Table of Contents
Advertisement
Quick Links
Advertisement
Table of Contents

Related Manuals for Digitus DS-23200


Summary of Contents for Digitus DS-23200
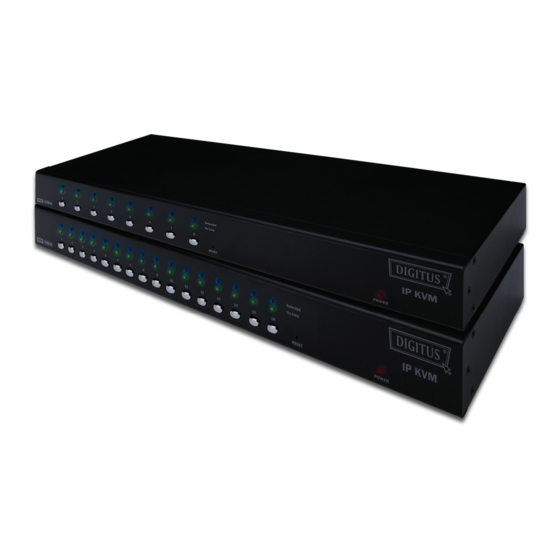
- Page 1 8-PORT / 16-PORT COMBO KVM SWITCH OVER IP User Manual...
-
Page 2: Table Of Contents
Index 1. INTRODUCTION ................................4 2. SPECIFICATIONS ................................. 6 3. SYSTEM REQUIREMENTS ............................7 4. INSTALLATION ................................7 4.1. F ................................7 RONT 4.2. R ................................8 4.3. Single stage installation ............................. 8 4.3.1. Precaution: ..............................8 4.3.2. Console connection: ..........................9 4.3.3. - Page 3 7.9. E OSD: <ESC> ............................... 27 8. SUN MICROSYSTEMS FUNCTION KEY EMULATION: .................... 27 9 CONFIGURATION ............................... 28 ....................28 ETWORK CONFIGURATION USING ETUP UTILITY ......................30 ONFIGURATION ETUP VIA ERIAL ONSOLE ..................... 31 EYBOARD OUSE IDEO CONFIGURATION 9.3.1 IP-KVM keyboard settings .......................... 31 9.3.2 Remote Mouse Settings ..........................
-
Page 4: Introduction
1. Introduction Thank you for purchasing one of our Combo KVM Switches Over IP (or IP-KVM for simplicity)! You now have a high quality, durable system to control 8 or 16 computers through PS/2 and/or USB connection from one console ( PS/2 & USB Mouse, PS/2 &... - Page 5 KVM Over IP Manage servers remotely around the world Remote KVM (keyboard, video, and mouse) access over IP or analogous telephone line (modem needed) Console your Keyboard / Mouse via PS/2 and/or USB at will Connect computers via PS/2 and/or USB at will Full control under all OS, in BIOS level, during boot, or at Blue Screens On-Screen-Display (OSD) &...
-
Page 6: Specifications
2. Specifications Specification Number Of Computer Controlled 8 or 16 Push Button and Hot-Key (PS2 and/or USB keyboard) Selection Method Or On-Screen-Display(OSD) Blue for PC Selection LEDs Green for PC ON-Line ready Compliant with USB Version USB1.0 / USB1.1 / USB2.0 Compliant with HID Version USB HID 1.11 Video... -
Page 7: System Requirements
System Requirements Hardware Local Host side : The following equipment must be equipped with each computer or server A VGA, SVGA or Multisync card Type A USB port or PS/2 6 pin mini-DIN for Keyboard and Mouse. Local console side: A VGA, SVGA, Multisync monitor capable of the highest resolution. -
Page 8: Rear View
4.2. Rear View 8-Port Figure 3: 8-port IP-KVM rear view 16-Port Figure 4: 16-port IP-KVM rear view Ethernet LED Indicators: IP-Ready ORANGE LED blinking per second when system is ready. Ethernet-Link: indicates that Ethernet connection established GREEN LED 4.3. -
Page 9: Console Connection
4.3.2. Console connection: Plug keyboard, mouse and monitor to the console ports on the real panel of IP-KVM Figure 5 Figure 5: Console connection 4.3.3. System connection: Please use Custom combo cable to connect your computers. Please refer to the figures and instruction shown below for System connection. Note: Please contact your dealer to purchase the custom combo 4-1 cables if you need. - Page 10 You can connect to computers via three methods shown below: IP-KVM A. Connect USB, PS/2 (keyboard/mouse) and VGA connectors to computers. We recommand users to connect computers in this way. Figure 7 Figure 7: USB & PS/2 (Keyboard & Mouse) and VGA connected B.
-
Page 11: Cascade Chaining
4.4. Cascade Chaining Combo 8-port & 16-port KVM switch support 3 level cascades; control up to 8/64/512 PCs ( for 8-port only ) and 16/256/4096 PCs ( for 16-port only ), from a single console; cascaded chaining units do not need special configuration. Cascaded configuration expands system ability and allows you to select computers connected to the Master or Slave. -
Page 12: Firmware Download Connector
G. After all KVM Switches are powerd by power adaptor, trun on the computers. Initial Plug-in Process: Please plug in the Master KVM Switch first before turning on any other devices like montior or computers. Hot plug and Hot Swap: Combo 8-port &... -
Page 13: Rack Mounting
4.6. Rack Mounting Figure 11: Rack mounting shows you how to attach mounting brackets to the KVM Switches unit Figure 11 for standard 19-inch rack cabinet. 1. Screw the mounting brackets into the sides of the unit. KVM-Switches ( See Figure 11) 2. -
Page 14: Leading Hot Key Select
6.2. Leading Hot Key Select The two-steps hot key sequence is used for quick function execution. The leading key is <Scroll Lock> by default. However, you can change the leading hot key if you want. By pressing <CTRL> twice, <New Hot Key>, then press <Enter>, you can change the leading hot key. -
Page 15: Arrow Key Channel Shift Function
6.3.2. Arrow Key Channel Shift Function Press <Scroll Lock> twice, and press <Left Arrow> or <Right Arrow> key to shift left/right one channel. Switch to left one channel <Scroll Lock> → <Scroll Lock> → <Left Arrow> Switch to right one channel <Scroll Lock>... -
Page 16: Buzzer Sound Disable / Enable
Note: You can also select active channel of cascade chain in OSD menu. Move the indicator bar to the chanel selected to switch by using <arrow key>, <Page Up> or <Page Down>, and then press <Enter> to switch to the target port. Please refer section 7.2.2 Channel select to cascade port. -
Page 17: Start Auto-Scan Function
6.6.1. Start auto-scan function <Scroll Lock> → <Scroll Lock> → <S> → <Enter>. The auto-scan banner will be shown on screen to indicate the scanning channel. Figure 14: Auto-scan hot key ─┬── ┬ ──┬────── Channel Name │ │ └─ Channel Number │... -
Page 18: Console Lock
6.7. Console Lock If the security mode is enabled in OSD mode (by pressing <F5> in OSD mode), you can lock console by pressing <Scroll Lock> twice, and then <H> and <Enter>. The KVM will be locked until an authorized user login. <Scroll Lock>... -
Page 19: Computer & Kvm Status
7.1.3. Computer & KVM status KVM buzzer stauts Buzzer sound on Buzzer sound off Logined user name The system has one administrator and 3 users for security management. The name of current logined is displayed here. ... -
Page 20: Function Control Menu
7.1.7. Function Control Menu Functions details will be described in later sections. List of control functions: F1: Set up: basic set up menu F2: Scan: autoscan function F3: Lock: setup lock/unlock, only available when F5 Security is enabled. F4: Rename: rename selected channel name. F5: Security: security function and user authority settings F6: Lock Port: PC port lock function (for administrator only) 7.2. -
Page 21: Setup In Osd:
7.3. Setup in OSD: <F1> Please use <Up> or <Down> arrow key to select the item you want to change, and use <Left> or <Right> arrow key to change the settings. Press <ESC> to exit and save the setup settings. Figure 19: OSD Setup 7.3.1. -
Page 22: Hot Key
Banner: Use four arrow keys to move the channel banner to the desired position. Press <ESC> to save the changed banner position. Figure 21: Banner Position Setup 7.3.5. Hot key Scroll Lock: <Scroll Lock> becomes the hot key. ... -
Page 23: Stop Auto-Scan
7.4.2. Stop auto-scan Press any key on keyboard to STOP the auto-scan function. The auto-scan banner will be disappeared when the scan stopped. 7.4.3. Auto-scan mode There are two auto-scan modes, please refer section 7.3.1 Setup in OSD – Scan Mode to set up the auto-scan mode. ... -
Page 24: Channel Rename:
7.6. Channel rename: <F4> Select the channel to rename by using up/down arrow key and press <F4> in OSD main menu. The channel rename window will be shown for setting up the channel name. Press <ENTER> to save the renamed channel name or <ESC> to cancel. -
Page 25: Security Mode
7.7.2. Security Mode To change the security mode setting, please move the highlight bar to Security Mode, and press <left arrow> or <right arrow> key to change it. The <F3> Console Lock and user authority functions can not be executed until the security mode is enabled. 7.7.3. -
Page 26: User Authority Setup
7.7.5. User Authority setup You can setup the authority which only support Layer 1 and Layer 2, and Layer 3 authority always enable for each user. Different user has different access right for each channel. To change the access authority of each channel for certain user, please move the highlight bar to the channel, and press <A>, <1>, <2>... -
Page 27: Channel Selection Of The Locked Port
7.8.2. Channel selection of the locked port If anyone selects the channel of the locked port either by panel push-button or hot key, the system will enter OSD mode waiting for administrator to unlock the port. 7.8.3. Unlock Port Only administrator login with correct password can unlock the port. After the administrator login, the red mark in STA column will disappear. -
Page 28: Configuration
9 Configuration 9.1 Network configuration using PSetup utility The Factory default settings for the IP-KVM unit are as below: DHCP: Disable Default IP address: 192.168.0.70 Default Net Mask: 255.255.255.0 If DHCP mode is enabled (IP auto configuration = DHCP), the IP-KVM will try to contact a DHCP server in the subnet to which it is physically connected. - Page 29 Set up a fixed IP a. Setup “IP auto configuration” as “None” ; setup IP address and Subnet mask b. Enter Super user login and password for Authentication (default : super/pass) c. Click Setup Device. If super login was authenticated, it’ll show “Successfully configured device”.
-
Page 30: Configuration Setup Via Serial Console
Authentication To adjust the authentication settings, enter your login as a super user, and change your password. Super user login Enter the login name of the super user. The initial value is “super”. All characters are in lower case. Super user password Enter the current password for the super user. -
Page 31: Keyboard, Mouse, And Video Configuration
IP auto-configuration With this option, you can specify whether the IP-KVM should get its network settings from a DHCP or BOOTP server. For DHCP, enter “dhcp”, and for BOOTP enter “bootp”. If you do not specify any of these, the IP auto-configuration is disabled and subsequently you will be asked for the following network settings. -
Page 32: Automatic Mouse Speed And Mouse Synchronization
Fixed mouse speed This mode just translates the mouse movements from the Remote Console in a way that one pixel move will result in n-pixel moves on the remote system. This parameter n is adjustable with the scaling. Please note that this works only when mouse acceleration is turned off on the remote system. -
Page 33: Single And Double Mouse Mode
While the IP-KVM works with accelerated mice and is able to synchronize the local with the remote mouse pointer, there are the following limitations, which may prevent this synchronization from working properly: Special Mouse Driver There are mouse drivers that influence the synchronization process and lead to desynchronized mouse pointers. -
Page 34: Video Modes
9.3.7 Video Modes The IP-KVM recognizes a limited number of common video modes. When running X11 on the host system, please do not use any custom mode lines with special video modes. If you do, the IP-KVM may not be able to detect them. -
Page 35: Log In/Out Ip-Kvm
Using the Internet Explorer, open the menu entry “?” and “Info” to read about the key length that is currently activated. The dialog box contains a link that leads you to information on how to upgrade your browser to a state of the art encryption scheme. - Page 36 When connecting to the IPK-KVM unit, the IPK-KVM system (web server, Telnet server or SSH server) will prompt user to enter the user name and password in order to access to the system. If this is the first time logging in, log in with the factory default username and password, you will be prompted to change the default password Warning Please make sure to change the super user password immediatelly...
-
Page 37: Log Out From The Ip-Kvm
The Buttons of the front end: Return to main page of IP-KVM access page Open the IP-KVM remote console Exit from the IP-KVM front end. Warning If there is no activity for 30 minutes, the IP-KVM will log out, automatically. A click on one of the links will bring you back to the login screen. -
Page 38: The Remote Console
10.3 The Remote Console The Remote Console is the redirected screen, keyboard and mouse of the remote host system that IP-KVM controls. The Remote Console window is a Java Applet that tries to establish its own TCP connection to the IP-KVM. The protocol that is running over this connection is neither HTTP nor HTTPS, but RFB (Remote Frame Buffer Protocol). -
Page 39: Control Bar Of Remote Console
Starting the Remote Console opens an additional window. It displays the screen content of your host system. The Remote Console will behave exactly in the same way as if you were sitting locally in front of the screen of your remote system. That means keyboard and mouse can be used in the usual way. - Page 40 Auto Adjust button If the video display is of bad quality or distorted in some way, press this button and wait a few seconds while the IP-KVM tries to detect the video mode of VGA port to the controlled host and adjust itself for the best possible video quality.
- Page 41 Notice: If your IP-KVM enable Double Mouse mode, in order to keep remote and local mouse pointers in sync, please take the following actions: 1. Disable the “Enhance pointer precision” and “Automatically move mouse pointer to the default button in a dialog box” in the mouse settings of host (target) computer OS.
- Page 42 Scaling • Allow you to scale down the Remote Console. You can still use both mouse and keyboard, however the scaling algorithm will not preserve all display details. When you designate 25%, 50%, or100% scaling, the size of Remote Console window is calculated according to the remote host video setting with scaling algorithm execution.
- Page 43 Intelligent Sync -- Use this option if the fast sync does not work or the mouse settings have been changed on the host system. Warning This method takes more time than the fast one and requires a correctly adjusted picture. Use the auto adjustment function to setup the picture.
- Page 44 The option Noise Filter defines how IP-KVM reacts to small changes in the video input signal. Turning on the noise filter can help reduce video flickering that is often caused by distortions, as well as lowering unnecessary bandwidth consumption. A large filter setting needs less network traffic and leads to a faster video display, but small changes in some display regions may not be recognized immediately.
- Page 45 Vertical Position Use the left and right buttons to move the picture in vertical direction while this option is selected. Reset this Mode Reset mode specific settings (Clock , Phase and Position) to the factory-made defaults. Reset all Modes Reset all settings to the factory-made defaults. Save changes Save changes permanently Undo Changes...
- Page 46 Mapping Used for choosing the specific language and country mapping of the Soft-Keyboard. Figure 40: Soft Keyboard Mapping • Local Keyboard Used to change the language mapping of your browser machine running the Remote Console Applet. Normally, the applet determines the correct value automatically. However, depending on your particular JVM and your browser settings this is not always possible.
- Page 47 • Encoding These options are used to adjust the encoding level in terms of compression and color depth. They are available only when "Transmission Encoding" is determined manually (select Manually in KVM Settings > User Console > Transmission Encoding of web page).
- Page 48 The option "Video Optimized" has its advantages if transferring high-quality motion pictures. In this case the video compression is disabled, completely and all video data is transferred via network as full-quality video snippets. Therefore, a high amount of bandwidth is required to ensure the quality of the video picture.
- Page 49 Figure 44: Lossy Compression Color Depth: Set the desired color depth. You may select between 8 or 16 bit for Video Optimized/compression level 0, or between 1 and 8 bit for compression level 1 to 9. The higher the color depth, the more video information has to be captured and to be transferred.
-
Page 50: Status Line Of Remote Console
10.3.3 Status Line of Remote Console Status line Shows both console and the connection state. The size of the remote screen is displayed. Figure below was taken from a Remote Console with a resolution of 800x600 pixels. The value in brackets describes the connection to the Remote Console. -
Page 51: Menu Option
11 Menu Option 11.1 Remote Control The Remote Console is the redirected screen, keyboard and mouse of the remote host system that IP-KVM controls. The Remote Console window is a Java Applet that tries to establish its own TCP connection to the IP-KVM. Starting the Remote Console opens a new window displays screen movement of host system, with its size automatically adjusted to optimum. -
Page 52: Telnet Console/Ssh Console
11.1.2 Telnet Console/SSH Console In general, the Telnet or SSH interface supports two operation modes: the command line mode and the terminal mode. The command line mode is used to control or display some parameters. In terminal mode the pass-through access to serial port is activated (if the serial settings were configured accordingly). - Page 53 To log in Telnet Console by one of the following way: 1. clicking Remote Control > telnet Console Figure 49: Telnet Console 2. or telnet command as required by the Telnet client, for instance in a UNIX shell: telnet 192.168.0.70 3.
- Page 54 Key in help to list all available commands. The following list shows the according command mode command syntax and their usage. help Displays the list of possible commands Clears the screen quit Exits the current session and disconnects from the client version Displays the release information terminal...
- Page 55 SSH Console The IP-KVM supports SSH security protocol. The SSHv2 will encryption the transferred data so as to keep the data communication secured. Basically, the SSH’s configuration interface is the same as Telnet console’s, except that SSH is data encrypted and secured. Please run the SSH-supported terminal emulation program (such as PuTTY).
-
Page 56: Remote Wakeup
11.1.3 Remote Wakeup The IP-KVM provides the remote power wakeup function, which can remotely wake up the sleeping computer. With this feature, the computers that are not in use for now can be shut down and remotely wake up the computer when want to use it, and thus save the power energy. - Page 57 2. Windows Settings: Enter the Properties of Local Area Connection. Make sure Wake on Magic packet is Enable. -57-...
- Page 58 Make sure the following two items are selected. Settings on IP-KVM: The control can be easily set up from the web page. 1. Click on Remote Control > Remote Wakeup to bring up the configuration page. 2. Click on More entries to add additional controlled target 3.
- Page 59 11.2 Virtual Media The IP-KVM provides a powerful capability called Virtual Media (or Virtual Disk). Using the USB port, the IP-KVM can present either a local floppy disk image or a redirected remote CD/DVD-ROM image to the target computer. This can allow system recovery in conditions as bad as having local disks down and no primary network connection.
-
Page 60: Drive Redirection
11.2.1 Drive Redirection The Drive Redirection is another possibility to use a virtual disc drive on the remote computer. With Drive Redirection you do not have to use an image file but may work with a drive from your local computer on the remote machine. -
Page 61: Virtual Drive
On the other hand, if the local operating system writes data to the redirected device the drive cache of the operating system of the remote host might contain older data. This may confuse the remote host’s operating system. We recommend to use the Drive Redirection with care, especially the write support. -
Page 62: Cd/Dvd Image
11.2.3 CD/DVD Image Use Image on Windows Share (via SAMBA) To include an image from a Windows share, select “CD/DVD Image” from the submenu. Figure 52: Virtual Media - CD-ROM Image Share host The server name or its IP address (the PC that shares out the image file). On Windows 95, 98 and Windows ME do not specify the IP address but the server name ("NetBIOS Name"). - Page 63 Notes: 1. The output image extension file name has to be ‘iso’, e.g. CD-Rom_vir.iso. 2. You may create an ISO image size up to 650Mb (for CD-ROM). This drive would be in read-only mode and would not allow you to write any information on this drive but copying only.
- Page 64 MS Windows Open the Explorer, navigate to the directory (or share) and press the right mouse button to open the context menu. Select Sharing to open the configuration dialog Figure 53: Explorer Context Menu -64-...
- Page 65 Figure 54 Share Configuration Dialog Adjust the settings for the selected directory. ■ Activate the selected directory as a share. Select Share this folder. ■ Choose an appropriate name for the share. You may also add a short description for this folder (input field Comment). ■...
- Page 66 3. Fill in the sharing information on Image on Windows Share, click on the Set button. 4. If the Image file set successfully. 5. Open the remote console and you can see the virtual CD as below picture. -66-...
-
Page 67: Floppy Disk
11.2.4 Floppy Disk Figure 55: Virtual Media - Floppy Disk The maximum image size is limited to 1.44MB. To use a larger image mount this image via Windows Share (or SAMBA) (see the Section called Use Image on Windows Share (via SAMBA) for details) Operation Procedures: 1. - Page 68 4. After you uploading the image file, you will see the information below. 5. Open the remote console and you will see a virtual Floppy drive is created on the host computer that connect to IP-KVM. You may create a floppy image size up to 1.44Mb. This drive would be in read-only mode and would not allow you to write any information on this drive but copying only.
-
Page 69: Creating An Image
11.2.5 Creating an Image 11.2.5.1 Creating a Floppy Image MS Windows You can use the tool “Raw Write for Windows”. You can get the RawWrite software from the website http://www.chrysocome.net/rawwrite. Figure 56: RawWrite for Windows selection dialog From the menu, select the tab “Read”. Enter (or choose) the name of the file in which you would like to save the floppy content. -
Page 70: Creating Acd/Dvd Iso Image
11.2.5.2 Creating a CD/DVD ISO Image MS Windows To create the image file, use your favorite CD imaging tool. Copy the whole contents of the disc into one single image file on your hard disk. For example, with “Nero” you choose “Copy and Backup”. Then, navigate to the “Copy Disc”... -
Page 71: Making A Drive Redirection
11.2.6 Making a Drive Redirection The operation procedures to make a drive redirection are as follows. 1. Run Remote Control > KVM Console. 2. Click on the “Floppy” icon You will see the Driver Redirection window as below Figure 58: Built-in Java Drive Redirection -71-... - Page 72 3. You can either redirect a local drive (only available under Windows) or redirect an ISO CD/DVD image. 3a. If click on Connect Drive Select the drive to be redirected and click OK. Select the drive you would like to redirect. All available devices (drive letters) are shown here.
- Page 73 3b. If click on Connect ISO Select the ISO image file and click Open 4. Finally the established Drive Redirection connection will be displayed Open My Computer. The virtual drive appears on the remote host PC window. -73-...
-
Page 74: User Management
The drive redirection software tries to lock the local drive before it is redirected. That means that it tries to prevent the local operating system from accessing the drive as long as it is redirected. This may also fail, especially if a file on the drive is currently open. In the case of a locking failure, you will be prompted if you want to establish the connection anyhow. -
Page 75: Change Password
11.3.1 Change Password Figure 59: Setting Password Change password of currently logged in user: Old Password: type in current password New Password: type in new password Confirm New Password: re-type new password for verification Click “Apply” to submit your changes. 11.3.2 Users and Groups There are three kinds of levels of user accounts: ■... -
Page 76: Kvm Settings
Existing users Select an existing user for modification. Once a user has been selected, click the lookup button to see the user information. New User name The new user name for the selected account. Password The password for the login name. It must be at least three characters long. Confirm password Confirmation of the password above. -
Page 77: User Console
User Console 11.4.1 The following settings are user specific. That means, the super user can customize these settings for every users separately. Changing the settings for one user does not affect the settings for the other users. Figure 60: User Console Setting -77-... - Page 78 User select box This selection box displays the user ID for which the values are shown and for which the changes will take effect. You may change the settings of other users if you have the required privileges. Transmission Encoding The Transmission Encoding setting allows changing the image-encoding algorithm that is used to transmit the video data to the Remote Console window.
- Page 79 Remote Console Type Specifies, which Remote Console Viewer to use. Default Java-VM Uses the default Java Virtual Machine of your Browser. This may be the Microsoft JVM for the Internet Explorer, or the Sun JVM if it is configured this way. Use of the Sun JVM may also be forced (see below). Sun Microsystems Java Browser Plugin Instructs the web browser of your administration system to use the JVM of Sun Microsystems.
-
Page 80: Keyboard/Mouse
Remote Console Button Keys Button Keys allow simulating keystrokes on the remote system that cannot be generated locally. The reason for this might be a missing key or the fact, that the local operating system of the Remote Console is unconditionally catching this keystroke already. - Page 81 PS/2 Keyboard Model Enables a certain keyboard layout. You can choose between “Generic 101-Key PC” for a standard keyboard layout, “Generic 104-Key PC” for a standard keyboard layout extended by three additional windows keys, “Generic 106-Key PC” for a Japanese keyboard, and “Apple Macintosh” for the Apple Macintosh.
-
Page 82: Video
11.4.3 Video Figure 62: Video Settings Miscellaneous Video Settings • Noise filter This option defines how the IP-KVM reacts to small changes in the video input signal. Turning on the noise filter can help reduce video flickering that is often caused by distortions, as well as lowering unnecessary bandwidth consumption. -
Page 83: Network
11.5 Device Settings 11.5.1 Network The Network Settings panel allows changing network related parameters. Each parameter will be explained below. Once applied the new network settings will immediately come into effect. Warning Changing the network settings of the IP-KVM might result in losing connection to it. - Page 84 Figure 63: Network Settings IP auto configuration With this option you can control if the IP-KVM should fetch its network settings from a DHCP or BOOTP server. For DHCP, select “dhcp” , and for BOOTP select “bootp” accordingly. If you choose “none” then IP auto configuration is disabled.
- Page 85 Subnet Mask The net mask of the local network. Gateway IP address In case the IP-KVM should be accessible from networks other than the local one, this IP address must be set to the local network router's IP address. Primary DNS Server IP Address IP address of the primary Domain Name Server in dot notation.
-
Page 86: Dynamic Dns
Disable Setup Protocol Enable this option to exclude the IP-KVM from the setup protocol. Setup protocol is a proprietary layer-2 MAC-based protocol to allow some configuration software to detect IP-KVM devices in the network, even without IP address, and then config network related settings to IP-KVM.. LAN Interface Settings The “Autodetect”... - Page 87 A freely available Dynamic DNS service (www.dyndns.org) can be used in the following scenario. Figure 65. Dynamic DNS Scenario The IP-KVM is reachable via the IP address of the DSL router, which is dynamically assigned by the provider. Since the administrator does not know the IP address assigned by the provider, the IP-KVM connects to a special dynamic DNS server in regular intervals and registers its IP address there.
-
Page 88: Security
DNS System Choose Dynamic for free DNS service. Custom for your own domain. Hostname This is the hostname of the IP-KVM that is provided by the Dynamic DNS Server. (use the whole name including the domain, e.g. testserver.dyndns.org , not just the actual hostname). Username You have registered this username during your manual registration with the Dynamic DNS Server. - Page 89 Force HTTPS If this option is enabled access to the web front-end is only possible using an HTTPS connection. The IP-KVM will not listen on the HTTP port for incoming connections. In case you want to create your own SSL certificate that is used to identify the IP-KVM refer to the Section called Certificate.
- Page 90 Figure 67: Chain Rules of IP Filtering Check the “Enable Group based System Access Control” to edit the rules. -90-...
- Page 91 Users can add a new IP filtering rule by setting the properties at adding line by Append or Insert. User can remove a rule by Remove or Delete. Figure 68: IP Filter Settings -91-...
-
Page 92: Certificate
11.5.4 Certificate Figure 69: Certificate Settings The IP-KVM uses the Secure Socket Layer (SSL) protocol for any encrypted network traffic between itself and a connected client. During the connection establishment the IP-KVM has to expose its identity to a client using a cryptographic certificate. - Page 93 The following steps are necessary to create and install a SSL certificate for the IP-KVM: • Create a SSL Certificate Signing Request using the panel shown in Figure. You need to fill out a number of fields that are explained below. Once this is done, click on the button “Create”...
- Page 94 After completing these three steps, the IP-KVM has its own certificate that is used for identifying the card to its clients. Warning If you destroy the CSR on the IP-KVM there is no way to get it back! In case you deleted it by mistake, you have to repeat the three steps as described above.
-
Page 95: Serial Port
Key length This is the length of the generated key in bits. 1024 Bits are supposed to be sufficient for most cases. Longer keys may result in slower response time of the IP-KVM during connection establishment. 11.5.5 Serial Port Figure 72: Serial Port The IP-KVM Serial Settings allows you to specify what device is connected to the serial port and how to use it. - Page 96 Logically, connecting to the IP-KVM using a telephone line means nothing else than building up a dedicated point-to-point connection from your console computer to the IP-KVM. In other words, the IP-KVM acts as an Internet Service Provider (ISP) to which you can dial in. The connection is established using the Point-to-Point Protocol (PPP).
-
Page 97: Date/Time
Passthrough access to serial port via Telnet Using this option, it is possible to connect an arbitrary device to the serial port and access it (assuming it provides terminal support) via Telnet. Select the appropriate options for the serial port and use the Telnet Console, or a standard Telnet client to connect to the IP-KVM. -
Page 98: Event Log
11.5.7 Event Log Figure 74: Event Log Important events like a login failure or a firmware update are logged to a selection of logging destinations. Each of those events belongs to an event group, which can be activated separately. The common way to log events is to use the internal log list of the IP-KVM. - Page 99 Since the IP-KVM's system memory is used to save all the information, the maximum number of possible log list entries is restricted to 1.000 events. Every entry that exceeds this limit overrides the oldest one, automatically. Warning If the reset button on the HTML frontend is used to restart the IP-KVM, all logging information is saved permanently and is available after the IP-KVM has been started.
- Page 100 Here is an example of all generated event and its event group. Device successfully started device Board Reset performed by user… device Firmware upload failed. device No firmware file uploaded. device Uploaded firmware file discarded. device Firmware validation failed. device Firmware file uploaded by user...
-
Page 101: Event Log
11.5.8 Event Log On this screen you can specify where the IP-KVM will look in order to authenticate the users. You can use "Local Authentication", this means you need to have created the user account on the IP-KVM and the user/group information residing on the IP-KVM for authentication. - Page 102 In order to configure the LDAP access, you can set the following options: User LDAP Server Here you enter the name or IP address of the LDAP server containing all the user entries. If you choose a name instead of an IP address you need to configure a DNS server in the network settings.
- Page 103 To access a remote device using the RADIUS protocol you have to login, first. You are asked to specify your user name and password, then. The RADIUS server reads your input data (Authentication) and the IP-KVM looks for your profile (Authorization). The profile defines (or limits) your actions and may differ depending on your specific situation.
-
Page 104: Usb
11.5.9 USB USB 2.0 is the default setting, if the operating system of the managed computer does not support USB 2.0, please force it to USB 1.1. 11.5.10 Config File With this function, the configuration settings can be saved (Backup) in a file (config.gz), or reloaded (Restore) from a previously saved configuration file 11.6 Maintenance... -
Page 105: Device Information
11.6.1 Device Information The Device Status page contains a table with information about the IP-KVM’s hardware and firmware. This information is useful if technical support is required. Figure 75: Device Information The Data file for support allows you to download the IP-KVM data file with specific support information. -
Page 106: Event Log
11.6.2 Event log The figure below displays the log list including the events that are logged by the IP-KVM Figure 77: Event Log List 11.6.3 Update Firmware Firmware can be easily upgraded via web page. This section describes the upgrade procedures. Figure 78: Update Firmware -106-... - Page 107 The IP-KVM is a complete standalone computer. The software it runs is called firmware. The firmware of the IP-KVM can be updated remotely in order to install new functionality or special features. A new firmware update is a binary file which will be sent to you by email or which you can download from the supplier web site.
- Page 108 2. If everything went well, you see the Update Firmware panel. The panel shows you the version number of the currently running firmware and the version number of the uploaded firmware. Pressing Update will store the new version and substitute the old one completely. 3.
-
Page 109: Unit Reset
11.6.4 Unit Reset This section allows you to reset specific parts of the device. This involves resetting keyboard/mouse, USB, video engine, or the IP-KVM device itself. In general, the IP-KVM requires a reset when implementing a firmware update. In the event of an abnormal operation, a number of subsystems may be reset without resetting the entire IP-KVM. - Page 110 The debugging mode window will display as below. 3. Key in “defaults” command and then Enter. The unit will automatically set to factory default settings and reboot the system. 4. The following window displays if reverting to factory default is complete. -110-...
-
Page 111: Faq
12. FAQ Does any software require on servers which connect to the IP-KVM? No, the IP-KVM is a 100% hardware solution. No extra software require on servers. What operating systems does IP-KVM support? The IP-KVM supports Windows, Unix, Unix-like Operating System (Sun Solaris, Linux) and Mac OS. -
Page 112: Troubleshooting
13. Troubleshooting KVM Part Symptom Possible Cause Recommended Solution Keyboard and/or Mouse Keyboard and/or Mouse need To unplug from console not working. to be reset port(s), and then replug it / them into console in. Failed connection to the Check the cable connected computer. - Page 113 3. Login to IP-KVM fails. Was the correct combination of user and password given? On delivery, the user “super” has the password “pass”. Moreover your browser must be configured to accept cookies. 4. When a PC connects to the host USB (mini connector) and runs the P Setup utility, an error message occurred: “Exception processing message ...”...
- Page 114 Local mouse & remote mouse are not in sync after doing mouse Intelligent Sync. Please don’t place mouse on upper-left corner of remote console window. Intelligent Sync (Options > Mouse handling) will re-calculate the coordinate of mouse from upper-left corner of remote console window. If still not in sync, please check whether the “Enhance pointer precision”...
- Page 115 10. In Windows Vista, when Remote Console is opened, the mouse won’t work in Remote Console window, and Drive Redirection won’t work either. You should run IE in Administrator mode; (a) right-click on IE shortcut, select "Run as administrator", or (b) right-click on IE shortcut, select properties, Shortcut-Advanced properties, select "Run as administrator".
- Page 116 16. The color of remote console displaying a pinkish tint. If you are experiencing the remote control screen displaying a pinkish tint with some graphic cards, please try adjusting the brightness of the remote console by following steps below. (a) Click Video Settings in Options menu of the remote console. (b) Adjust the Brightness setting until the pinkish tint is reduced or eliminated.
-
Page 117: Addendum
14. Addendum A. Key Codes Table below shows the key codes used to defines keystrokes or hotkeys for several functions. Please note that these key codes do not represent necessarily key characters that are used on international keyboards. They name a key on a standard 104 key PC keyboard with an US English language mapping. - Page 118 B. Video Modes Table below lists the video modes IP-KVM supports. Please don’t use other custom video settings besides of these. If done so, IP-KVM may not be able to detect them. Resolution Refresh Rates (x, y) (Hz) 640 x 350 70, 85 640 x 400 56, 85...
- Page 119 D. Bandwidth Consumption The preconfigured network speed selection simply results in a different Compression and Color Depth configuration in order to match the different bandwidth limitations of the network type (UMTS, ISDN, etc.) The following suggested network bandwidth planning table for IP-KVM installation is from the test results with 3D-Labyrinth screen saver at Resolution 800x600, the worst case consuming the highest network bandwidth.
- Page 120 E. Well-Known TCP/UDP Port Numbers Port numbers are divided into three ranges: Well Known Ports, Registered Ports, and Dynamic and/or Private Ports. Well Known Ports are those from 0 through 1023. Registered Ports are those from 1024 through 49151. Dynamic and/or Private Ports are those from 49152 through 65535. Well Known Ports are assigned by IANA, and on most systems, can only be used by system processes or by programs executed by privileged users.
- Page 121 F. Protocol Glossary BOOTP (Bootstrap Protocol) Similar to DHCP, but for smaller networks. Automatically assigns the IP address for a specific duration of time. CHAP (Challenge Handshake Authentication Protocol) A secure protocol for connecting to a system; it is more secure than the PAP. DHCP (Dynamic Host Configuration Protocol) Internet protocol for automating the configuration of computers that use TCP/IP.
-
Page 122: Firmware Upgrade Procedures
PPP (Point-to-Point Protocol) A protocol for creating and running IP and other network protocols over a serial link. RADIUS (Remote Authentication Dial-In User Service) An authentication and accounting protocol. Enables remote access servers to communicate with a central server to authenticate dial-in users and their access permissions. - Page 123 To update the firmware, please do the followings: 1. Disconnect all the KVM cable between KVM and computer. 2. Disconnect all the keyboard and mouse plugged on KVM. 3. Disconnect the VGA cable between KVM and monitor. 4. Apply 5V adapter to the KVM. Figure 80 Execute the firmware update utility “Prog182S.EXE”.
- Page 124 Figure 82 7. The utility will scan the KVM programmer automatically. Figure 83 8. Select target by enabling the check box, for example “USB Console”, and click the file browsing button to select the firmware file to update. Figure 84 9.
- Page 125 10. Click the “Program” button to start firmware programming. Figure 86 11. A status bar is shown under the panel to indicate the update progress. Figure 87 12. The firmware is updated successfully. Figure 88...
-
Page 126: Fcc Statement
Disclaimer Information in this document is subject to change without notice. The manufacturer does not make any representations or warranties (implied or otherwise) regarding the accuracy and completeness of this document and shall in no event be liable for any loss of profit or any other commercial damage, including but not limited to special, incidental, consequential, or other damages.
Need help?
Do you have a question about the DS-23200 and is the answer not in the manual?
Questions and answers