Table of Contents
Advertisement
Quick Links
Advertisement
Table of Contents

Related Manuals for Chauvet ColorAdo 2 Tour


Summary of Contents for Chauvet ColorAdo 2 Tour
- Page 1 User Manual...
- Page 2 Edition Notes Edition CHAUVET® released this edition of the COLORado™ 2 Tour User Manual Rev. 01e in December 2009. The COLORado™ 2 Tour User Manual Rev. 01e covers the Notes description, safety precautions, installation, programming, operation and maintenance of the COLORado™ 2 Tour fixture.
-
Page 3: Table Of Contents
Table of Contents Table of Contents 1. Before you Begin ......................1 What is included ..........................1 Unpacking Instructions ........................1 Text Conventions ..........................1 Icons ..............................1 Safety Notes ............................2 Expected LED Lifespan ........................2 2. Introduction ........................3 System Description .......................... - Page 4 Table of Contents COLORado™ 2 Tour Menu Map ...................... 14 DMX Values ............................15 TOUR ................................15 TOUR (Cont.) ..............................16 ARC1 ................................16 ARC1 + D ...............................16 ARC2 ................................16 ARC2 + D ...............................16 ARC2 + S ................................17 HSV ................................17 5. Technical Information ....................18 General Maintenance ........................
-
Page 5: Before You Begin
Before you Begin 1. Before you Begin What is · One COLORado™ 2 Tour · One power cable with Edison plug (US) included · One barn doors frame · Warranty Card · Quick Start Guide Unpacking Immediately upon receiving the fixture, carefully unpack the carton. Check the box or flight case contents to ensure that all parts are present and that they are in good Instructions condition. -
Page 6: Safety Notes
There are no user serviceable parts inside the COLORado™ 2 Tour. Any reference to servicing this unit you may find from now on in this User Manual will only apply to properly CHAUVET® certified technicians. Do not open the housing or attempt any repairs unless you are one of them. -
Page 7: Introduction
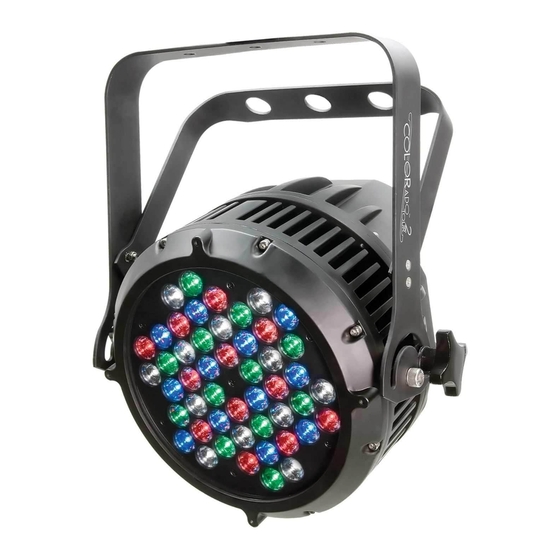
Introduction 2. Introduction System The COLORado™ 2 Tour is an RGBW wash light based on 48 LEDs. It consists of a single pod with a double bracket mounting yoke. The AC power comes directly into Description the fixture’s housing through a NEUTRIK® powerCON A socket. The power linking uses a NEUTRIK®... -
Page 8: Dmx Channel Summary
Introduction DMX Channel Summary DMX Channel Function TOUR Dimmer Green Blue White Color Macro + White Balance + HyperColor™ Strobe Programs Auto Speed Adjust Dimmer Speed ID Address DMX Channel Function ARC1 Green Blue DMX Channel Function AR1 + D Dimmer Green Blue... -
Page 9: Product Overview
Introduction Product Overview Safety cable passageway Power In Power Out DMX In DMX Out A: 0.3 in/8.5 mm B: 0.5 in/13 mm Control Panel December 11, 2009 COLORado™ 2 Tour User Manual Rev. 01e... -
Page 10: Setup
Green Fuse Replacement The COLORado™ 2 Tour fixture has no external fuse for the user to change. However, it does have an internal fuse that only an authorized CHAUVET® technician should change. DMX Linking If you are using the COLORado™ 2 Tour with a DMX controller, you can link them using a regular DMX serial connection. -
Page 11: Master/Slave Linking
Setup Master/Slave The Master/Slave mode allows one COLORado™ 2 Tour (the master) running a preconfigured program to control several other COLORado™ 2 Tour fixtures (the Linking slaves) without requiring a DMX controller. In this mode, all the slave fixtures will operate in unison with the master fixture. -
Page 12: Mounting
This fixture includes a mounting yoke to which you can attach one or two rigging clamps. You must supply your own “C” or “O” clamps and make sure that they are capable of supporting the weight of this fixture. CHAUVET® recommends using at least two mounting points per fixture. -
Page 13: Operation
Operation 4. Operation Control Panel Button Function Exits from the current menu or Description <MENU> function Enables the currently displayed menu or sets the currently <ENTER> selected value into the current function Navigates upwards through the <UP> menu list or increases the numeric value when in a function Navigates downwards through <DOWN>... -
Page 14: Dmx Control With Id Addressing
Operation Programming (Cont.) DMX Control With ID In this mode, the fixtures with the same DMX starting address will respond to the DMX Addressing controller based on the fixture’s individual ID address setting. If the user selects ID address “0”, all the fixtures with the same DMX address will respond in unison. Otherwise, each fixture will follow the control for its particular ID address. -
Page 15: Master/Slave
Operation Programming (Cont.) Master/Slave The Master/Slave mode allows a group of COLORado™ 2 Tour fixtures (the slaves) to execute simultaneously the same program, whether auto or custom, that another COLORado™ 2 Tour fixture (the master) is executing, and without a DMX controller. Master/Slave (Cont.) 1) Set the Master Unit: a) Set the running mode to DMX as explained in “DMX Control Without ID... -
Page 16: Control Panel Lock
Operation Programming (Cont.) Control Panel Lock This setting allows the user to activate or disable the control panel lock, which keeps non-authorized personnel from changing the fixture’s settings. 1) Press <MENU> repeatedly until KEY shows, and press <ENTER> to accept. 2) Use <UP>... -
Page 17: White Balance
Operation Programming (Cont.) White Balance This setting allows the user to select the white color shown by the COLORado™ 2 Tour when the DMX controller’s Red, Green and Blue faders are set to “255”. 1) Press <MENU> repeatedly until CAL2 shows, and press <ENTER> to accept. 2) Press <MENU>... -
Page 18: Colorado™ 2 Tour Menu Map
Operation COLORado™ 2 Tour Menu Map COLORado™ 2 Tour User Manual Rev. 01e -14- December 11, 2009... -
Page 19: Dmx Values
Operation DMX Values TOUR Channel Function Value Percent/Setting Master Dimmer 000 ó 255 0~100% 000 ó 255 0~100% (or Step Time when playing CUS. 01~10) 000 ó 255 Green 0~100% (or Fade Time when playing CUS. 01~10) 000 ó 255 Blue 0~100% 000 ó... -
Page 20: Tour (Cont.)
Operation DMX Values (Cont.) TOUR (Cont.) Channel Function Value Setting Value Setting Value Setting 000 ó 009 All IDs ID 23 ID 46 010 ó 019 ID 1 ID 24 ID 47 020 ó 029 ID 2 ID 25 ID 48 030 ó... -
Page 21: Arc2 + S
Operation ARC2 + S Channel Function Value Percent/Setting Master Dimmer 000 ó 255 0~100% 000 ó 255 0~100% 000 ó 255 Green 0~100% 000 ó 255 Blue 0~100% 000 ó 255 White 0~100% 000 ó 010 No function Strobe 011 ó 255 0~20 Hz Channel Function Value... -
Page 22: Technical Information
Even in the cleanest type of surroundings, the user should clean the external optics at least once every 30 days. CHAUVET® recommends cleaning the fixture’s external optics with a soft cloth using normal glass cleaning fluid. -
Page 23: Colorado™ 2 Tour Troubleshooting Guide
· Interference from AC wires · Keep DMX cables separated from power cables or black lights If you still experience technical problems after trying the above solutions, contact CHAUVET® Technical Support. December 11, 2009 -19- COLORado™ 2 Tour User Manual Rev. 01e... -
Page 24: Exploded View
Technical Information Exploded View Item Description Part Code Front cover P111-C2FRNT Rubber seal P111-C2SEAL Front tempered glass P150-C2GLSM Lens complete set P111-C2TLEN LED board P222-C2LEDP Heat sink P111-C2HTSK Bracket P111-C2BRKT Power connection board P170-C2TPCNB Display / Main board P170-C2DISP Display protection metal plate P111-C2CVR Safety chain plate P111-C2SCP... -
Page 25: Photometrics
Technical Information Photometrics December 11, 2009 -21- COLORado™ 2 Tour User Manual Rev. 01e... -
Page 26: Returns Procedure
The user must clearly label the package with a Return Merchandise Authorization Number (RMA #). CHAUVET® will refuse any product returned without an RMA #. DO NOT write the RMA # directly on the box. Instead, write it on a properly affixed label. -
Page 27: Technical Specifications
Technical Information Technical Specifications Weight & Dimensions Length ..........................10.8 in (276 mm) Width............................. 12 in (305 mm) Height ..........................9.0 in (230 mm) Weight............................ 20 lbs (9.1 kg) Power Auto-ranging ....................... 100~240 V, 50/60 Hz Fuse (internal) ..........................2 A, 250 V Power Consumption ........ -
Page 28: Appendix
Appendix 6. Appendix DMX Primer The DMX protocol (USITT DMX512-A) is a networking protocol that enables a universal DMX controller device to control the features of multiple DMX compatible fixtures, whether par cans, wash lights, moving heads, followspots, foggers, proprietary fixture controllers, etc. -
Page 29: Dmx Configuration
You must use DMX compliant data cables to link two or more DMX compatible fixtures. Cabling You may purchase CHAUVET® certified DMX cables directly from a dealer/distributor or construct your own cable. USITT recommends limiting the total length of the DMX cable (from the first fixture/controller to the last fixture) to 300~455 m (985~1,500 ft). -
Page 30: Dmx Cable Connectors
Appendix DMX Connectivity (Cont.) DMX Cable Each DMX cable must have a male, 3-pin XLR connector on one end and a female, 3- Connectors pin XLR connector on the other end. DMX Connector Configuration To DMX Input To DMX Output (Female) (Male) Common... -
Page 31: Master/Slave Linking
Appendix DMX Connectivity (Cont.) Controlle Other DMX Compatible First Third Second Fixtures Generic Cable Cable Cable DMX Data Connection Diagram DMX Fixture DMX Fixture Master/Slave The Master/Slave mode allows one fixture (the master) to run a preconfigured program to control several other fixtures of the same model (the slaves) without requiring a DMX Linking controller. - Page 32 Appendix ID Addressing ID Addressing is a sub-addressing method by which each fixture, apart from its starting address, can also have an “ID” address in the 1~66 range. This allows users to multiply the number of fixtures they can control with a single DMX controller. Many fixtures have at least one DMX personality or mode that enables ID addressing.
-
Page 33: Sizing The Circuit Breakers
(rating) to which they can connect a group of fixtures. Using the CHAUVET® fixtures come with a sticker that indicates the current they consume in a Spec Sticker circuit at the specified voltage. This greatly simplifies calculating the total current drawn. - Page 34 CHAUVET® 3000 N 29th Ct, Hollywood, FL 33020 U.S.A. (800) 762-1084 – (954) 929-1115 FAX (954) 929-5560 www.chauvetlighting.com COLORado™ 2 Tour User Manual Rev. 01e December 2009...
Need help?
Do you have a question about the ColorAdo 2 Tour and is the answer not in the manual?
Questions and answers