Table of Contents
Advertisement
Advertisement
Table of Contents

Related Manuals for Pandigital PhotoLink PANSCN01


Summary of Contents for Pandigital PhotoLink PANSCN01
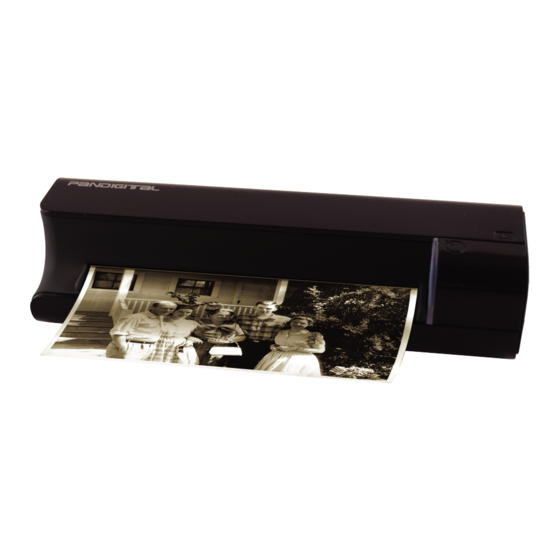
- Page 1 Scanner User Guide...
-
Page 2: Table Of Contents
Table of Contents Read This First ....................3 Important Safety Precautions ..............3 Copyright ..................... 5 Introduction ...................... 5 What’s In the Box ..................5 Parts of the scanner and their functions ............6 PhotoLink Scanner Indicators ............8 Operating the PhotoLink Scanner ............ 9 Preparation and Setup the PhotoLink Scanner ...... -
Page 3: Read This First
Read This First Please read the following important safety instructions carefully before using this scanner. Failure to observe these instructions may result in personal injuries or damages to this scanner. Important Safety Precautions Always follow these basic safety precautions when using your Scanner. - Page 4 Disclaimer Pandigital reserves the right to revise this publication and to make changes from time to time in the contents thereof without obligation to notify any person of such revision or changes.
-
Page 5: Copyright
Avoid scanning and re-distributing copyrighted originals and images or those of unknown sources. Doing so may violate your local copyright laws and related regulations. Pandigital cannot be made liable for the losses that may result from breaching the laws described above... -
Page 6: Parts Of The Scanner And Their Functions
Parts of the scanner and their functions Front view Name Function/ Description Indicates the operating status of the Status/ Card scanner and memory card. See Indicator “Indicators” on page 8. Press this button to turn the power on or off. Power Button Press and hold this button for 5 seconds to enter cleaning mode. - Page 7 Rear view Name Function/ Description Accepts the following types of memory SD/xD/MMC/ cards: SD, xD, MMC and MS. See MS card slot "Supported memory card types" on page 17 for details. The scanned original comes out from this Output slot slot.
-
Page 8: Photolink Scanner Indicators
Scanner Indicators Please see below for the lighting patterns of the indicators and the meanings they represent: Initializing system and memory card. Please wait until the scanner completes the initialization process before using it. The scanner is ready for use. The scanner power is off. -
Page 9: Operating The Photolink Scanner
Operating the PhotoLink Scanner Preparation and Setup the PhotoLink Scanner 1. Peel off the tape that secures the guide lever. Note: This step is only required when you use the scanner for the first time. 2. Connect the plug on the power adapter cable to the power socket on the scanner. -
Page 10: Powering Up The Photolink Scanner
Powering Up the PhotoLink Scanner 5. Press the Power button. The Power indicator blinks. Note: For more information on the indicators, see “indicators” on page 8. 6. Wait until the Power indicator stops blinking and then goes off. The Status/ card indicator will light up instead, indicating that the scanner is ready. - Page 11 2. The original photo will be fed into the slot and scanned automatically. The Power and Status/card indicators blink while scanning. Note: See "More information" on page 16 for how to insert photos and other types of originals. 3. When scanning is completed, the Power and Status/card indicators will keep blinking for a while, indicating that the scanner is processing the image and storing the file onto the memory...
-
Page 12: Scanning To A Pc Computer
4. To turn off the scanner after all originals are scanned, press and hold the Power button for 1 second. The power indicator will blink and then go off. Now it is OK to disconnect the power and remove the memory card from the scanner. Scanning to a PC Computer Connecting the Scanner to a PC Computer By connecting the scanner to a computer, you can access the... - Page 13 2. Plug the power adapter into a power outlet. Note: The type of power plug and socket illustrated may differ from that of your region. 3. Connect one end of the USB cable (with a Mini USB connector) to the Mini USB socket on the scanner.
- Page 14 8. The scanner will be recognized by the computer as a removable disk (Windows system). You will find a drive named “PDSCAN” in Windows Explorer (see below figure), within the drive there’s a folder called “Photo1”. Your scanned images are store there. Now, you are ready to view or edit the files on the memory card.
- Page 15 9. To safely disconnect the scanner from the computer: Windows Systems a. On Windows System Tray, click the hardware removal icon as indicated below. b. Click to select the Safely remove USB Mass Storage Device option that appears c. When the following message displays on- screen, you can safely remove your hard disk.
-
Page 16: More Information
More Information Suitable and Unsuitable Type of Original Photos This scanner is designed to obtain the best scanning results for the following types of originals (Photos): 3.5”x5” and 4”x6” photos Name cards Do not use the following types of originals for scanning. Otherwise the scanner will malfunction or cause the original to jam in the slot. -
Page 17: Cropping On Scanned Images
Cropping on scanned images In order for the scanner to determine the correctness of the scanned image data, some cropping on the scanned image may occur. Please refer to the illustration below. Supported memory card types... -
Page 18: File Naming And Storage Rules
File naming and storage rules If the memory card (volume name - PDSCAN) is used with the scanner for the first time, the scanner creates a folder named “PHOTO1” in the root directory to store the scanned image files. Each image file has a prefix “IMG_ = PD_”... -
Page 19: Cleaning The Roller
Cleaning the Roller 1. Follow the instructions above to clean the outer casing of the scanner first. 2. Connect the power supply to the scanner. 3. With scanner power off, press and hold the Power button for 5 seconds. The scanner will enter cleaning mode. -
Page 20: Cleaning The Image Sensor
Cleaning the Image Sensor 1. Follow the instructions on page 19 to clean the outer casing of the scanner first. 2. With the scanner power off and disconnected from the power supply, insert the sensor cleaning swab into one end of the output slot. -
Page 21: Calibrating The Scanner
Calibrating the Scanner If the scanned image looks fuzzy or there are strange stripes on it, then the scanner needs to be calibrated in order for the sensor to resume its original precision. To calibrate the scanner: 1. Follow the instructions on page 19 and 20 to clean the roller and image sensor, and then follow the instruction in “Preparation and setup Scanner on page 8 to... -
Page 22: Technical Specification
Technical Specification Specification PhotoLink “One Touch” Scanner Windows 2000 Pro, XP and Vista; Apple Operation System Macintosh OS 9, X (Leopard) Document Size (Max) Up to A6 / 4” x 6” Output image formats JPEG Image Up to 1800 x 1200 @ 4x6 photo scanned Resolution Optical 300 x 300 dpi (dot per inch) - Page 23 Q: The “scan to digital photo frame“ function does not work. A: This function only works with compatible digital photo frames. Visit www.pandigital.net for a list of compatible digital photo frame products.
-
Page 24: Limited Warranty
LABOR: For a period of ninety (90) days from the date of purchase, if this product is found to be defective, Pandigital will repair or replace the product, at its option, at no charge. After this ninety (90) day period, labor charges will be charged on a case by case basis. -
Page 25: Fcc Statement
This warranty gives you specific legal rights, and you may have other rights, which vary from state to state. All content included on the Pandigital website as well as Pandigital products, including preloaded demonstration images, digital media, digital cookbooks, text,...
Need help?
Do you have a question about the PhotoLink PANSCN01 and is the answer not in the manual?
Questions and answers