OWC Mercury Pro Optical Assembly Manual & User Manual
Hide thumbs
Also See for Mercury Pro Optical:
- User manual ,
- User manual & owners manual (24 pages) ,
- Assembly manual & user manual (12 pages)

Subscribe to Our Youtube Channel
Related Manuals for OWC Mercury Pro Optical


Summary of Contents for OWC Mercury Pro Optical
- Page 1 OWC Mercury Pro Optical ASSEMBLY MANUAL & USER GUIDE Copyright 2015 Other World Computing All Rights Reserved. Other World Computing’s Limited Warranty is not transferable and subject to limitations.
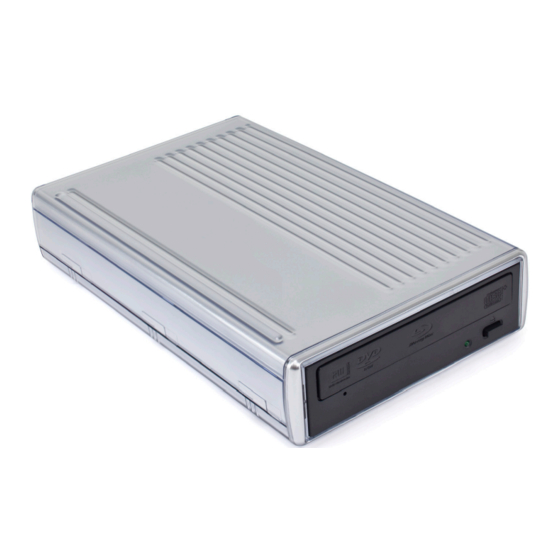
- Page 2 1.3 ABOUT THIS MANUAL 1.4 FRONT VIEW 1.4.1 Front Features 1.5 REAR VIEW 1.5.1 Connection 2. ASSEMBLY ......................... 3. APPENDIX ......................... 3.1 TROUBLESHOOTING 3.2 EJECTING DISCS 3.3 TECHNICAL SUPPORT HOURS AND CONTACT INFORMATION OWC MERCURY PRO OPTICAL TABLE OF CONTENTS...
- Page 3 Phillips screws for rear optical drive (4)* of enclosure (2)* OWC Mercury Pro Optical *If purchased as a preconfigured solution with optical drive included, all screws are already installed. • Depending on the kit purchased, some units may also include bundled software.
- Page 4 USB 2.0) 1.5.1 Connection Plug the power supply into the DC power port on the OWC Mercury Pro Optical and into a power outlet. Connect the interface cable of your choice (USB 3.0, FireWire 800, or FireWire 400) between the computer and the Mercury Pro, then turn on the Mercury Pro using the power on/off switch.
- Page 5 To open the OWC Mercury Pro Optical, first remove the top two Phillips screws at the rear of the enclosure, circled below in red. If you are assembling an OWC Mercury Pro Optical that was purchased as an empty enclosure kit, these two screws have already been removed.
- Page 6 Fasten the optical drive into the OWC Mercury Pro Optical enclosure using the four included Phillips screws. These four screws are shorter than the two screws for the rear of the enclosure.
- Page 7 Begin your troubleshooting by verifying that the power cable is connected to the OWC Mercury Pro Optical and to a power source. If the power cable is connected to a power strip, make sure that the power switch on the strip is turned on.
- Page 8 Other World Computing. Other World Computing and OWC are trademarks of New Concepts Development Corporation, registered in the U.S. Patent and Trademark Office and in Canada. The OWC logo and the Other World Computing logo are trademarks of New Concepts Development Corporation.
Need help?
Do you have a question about the Mercury Pro Optical and is the answer not in the manual?
Questions and answers