OWC mercury pro Assembly Manual & User Manual
Hide thumbs
Also See for mercury pro:
- User manual ,
- User manual & owners manual (24 pages) ,
- Assembly manual & user manual (12 pages)
Table of Contents
Advertisement
Quick Links
Advertisement
Table of Contents

Related Manuals for OWC mercury pro


Summary of Contents for OWC mercury pro
- Page 1 M E R C U R Y P R O Assembly Manual & User Guide...
-
Page 2: Table Of Contents
1.2 Package Contents 1.3 About This Manual 1.4 Front View 1.5 Rear View Device Setup ................ 2.1 Installation Steps 2.2 Quick Start Support Resources ............... 3.1 Troubleshooting 3.2 Ejecting Discs 3.3 Contacting Technical Support OWC Mercury Pro Table of Contents... -
Page 3: Minimum System Requirements
Functions and features may change depending on the firmware version. The latest product details and warranty information can be found on the product web page. OWC’s Limited Warranty is not transferable and subject to limitations. OWC Mercury Pro Introduction... -
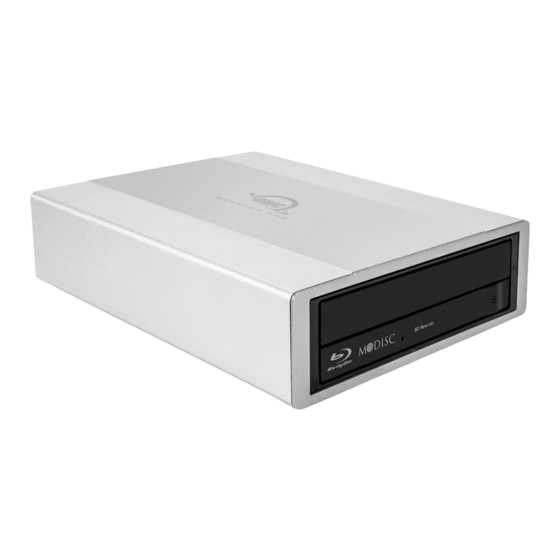
Page 4: Front View
2. DC Power — Connect to the included power supply here. ® 3. Kensington Security Slot — Connect a security tether here. 4. Power Switch — Use this switch to power the drive on or off. OWC Mercury Pro Introduction... -
Page 5: Installation Steps
2.1 Installation Steps These assembly instructions are written for users who purchased the OWC Mercury Pro as an empty enclosure. The instructions show how to install an optical drive. If you purchased the Mercury Pro with an optical drive already installed, opening the enclosure before the expiration of the original warranty will VOID the warranty. -
Page 6: Quick Start
2.2 Quick Start Plug the power supply into the DC power port on the OWC Mercury Pro and into a power outlet. Connect the included USB 3.1 Gen 1 cable to your computer and the Mercury Pro, then power on the Mercury Pro using the Power switch. Note: always unmount and eject the disc before powering off the optical drive. -
Page 7: Troubleshooting
Mercury Pro. If the Mercury Pro is still not working properly, try using a different USB 3.1 Gen 1 cable. You can also connect the Mercury Pro to a different computer to eliminate the possibility that the problem is with the computer and not the drive or the cable. - Page 8 OWC, its parent, partners, affiliates, officers, employees, and agents assume no liability resulting from errors or omissions in this document, or from the use of the information contained herein. OWC reserves the right to make changes or revisions in the product design or the product manual without reservation and without obligation to notify any person of such revisions and changes.
Need help?
Do you have a question about the mercury pro and is the answer not in the manual?
Questions and answers