OWC Mercury Rack Pro User Manual & Owners Manual
Hide thumbs
Also See for Mercury Rack Pro:
- User manual ,
- Assembly manual & user manual (12 pages) ,
- Owner's manual (2 pages)
Table of Contents
Advertisement
Quick Links
Advertisement
Table of Contents

Related Manuals for OWC Mercury Rack Pro


Summary of Contents for OWC Mercury Rack Pro
- Page 1 User Guide & Owners Manual...
-
Page 2: Table Of Contents
OWC Mercury Rack Pro Table of Contents 1 INTRODUCTION 1.1 SYSTEM REQUIREMENTS 1.1.1 Mac Requirements 1.1.2 PC Requirements 1.1.3 Supported Drives 1.2 PACKAGE CONTENTS 1.3 ABOUT THIS MANUAL 1.4 FRONT VIEW 1.4.1 Buttons 1.4.2 LED Drive Bay Indicators 1.5 REAR VIEW 1.5.1 Connections... -
Page 3: Introduction
OWC Mercury Rack Pro Chapter 1 - Introduction 1 INTRODUCTION 1.1 System Requirements 1.1.1 Mac Requirements • Minimum PowerPC G4 CPU, 128MB RAM • eSATA interface, Mac OS X 10.3 or later (OR) • FireWire interface, Mac OS X 10.2 or later (OR) •... -
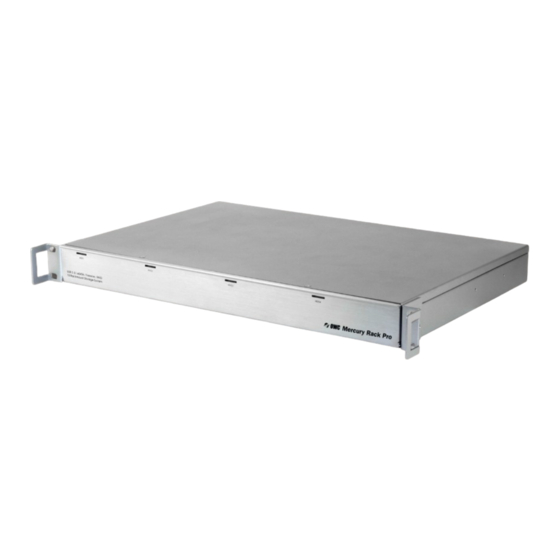
Page 4: Front View
If sold as a preconfigured solution, your OWC Mercury Rack Pro is preset as a RAID 5, using the “Mac OS Extended” format and is ready to use. If you want to change this... -
Page 5: Fan Alarm Mute Button
Chapter 1 - Introduction 1.5.2 Fan Alarm Mute Button In the event one of the fans within the OWC Mercury Rack Pro fails, an alarm will sound. The “Fan Alarm Mute” button located on the rear panel of the unit, will mute the alarm. -
Page 6: Raid Modes
Each drive will appear as a single volume. If you wish to use a mixed variety of capac- ity and model drives, this is the mode to use. To swap or replace drives, dismount all drives and power the OWC Mercury Rack Pro off. JBOD (SPAN) “Combine” Mode Switch setting: UP-DOWN-UP The drives show up as one large single volume. - Page 7 OWC Mercury Rack Pro Chapter 1 - Introduction RAID 1 “Drive Mirroring” Mode (2 drives installed only) Switch setting: UP-UP-DOWN The drives show up as one volume, but only 50% of the total capacity can be used. It is highly recommended to use identical drives for this RAID method. However, while you can utilize drives of different capacity, the RAID size will be based on the smallest ca- pacity total of the drives used in the RAID set.
-
Page 8: System Setup
To add additional drives at a later point, with the OWC Mercury Rack Pro turned OFF, adjust the switches on the back of the unit to the Clear RAID setting (down-down-down). Power the OWC Mercury Rack Pro ON while holding down the SET button right next to it. -
Page 9: Replacing Drives
NOTE: We recommend not turning the power off during the rebuild process but if it is interrupted, it will continue rebuilding the data as soon as the power is restored. The OWC Mercury Rack Pro does NOT need to be connected to a computer for the rebuild process to complete. -
Page 10: Connections To Computer
- into the drive and computer. (eSATA recommended for maximum performance) If sold as a preconfigured solution, your OWC Mercury Rack Pro is preset as a RAID 5, using the “Mac OS Extended” format and is ready to use. If you want to change this configuration, please follow the instructions in Chapter 3 to do so. -
Page 11: Converting To Desktop Unit
To remove the rack pulls, simply remove the 4 Phillips screws on the side of the rack and the rack pull will come off. Once you have removed the rack pulls, turn the OWC Mercury Rack Pro over and at- tach the 4 rubber feet using a Phillips screwdriver to the bottom of the enclosure. -
Page 12: Formatting
➀ Click on the “Initialize” button. ➁ Select the device with no volumes attached to it; in this picture, that would be the 4 TB OWC device. Click on the picture of the drive icon next to the text. - Page 13 ➃ You then need to choose how many partitions you wish your OWC Mercury Rack Pro to have. For ease of use we’re selecting one partition here but of course you could select more if you wish to have multiple volumes created.
- Page 14 Choose a name for the volume. You will need to repeat this step for each volume if you selected multiple partitions. Click Apply to finish. ➅ After a few moments, partitioning will complete and the OWC Mercury Rack Pro volume will mount on your desktop. You can quit Disk Utility, you’re all set!
- Page 15 OWC Mercury Rack Pro Chapter 3 - Formatting 3.2 Removing the GUID Partition Scheme Only for XP, 2000, ME and earlier. (XP 64-BIT, Vista & Windows 7 can continue to the next section) If you are not installing a brand-new drive into your enclosure, it may have a GUID drive partition already installed on it, especially if it was originally used with a Macintosh.
- Page 16 Instructions for other operating systems can be found at http://www.macsales.com/format IMPORTANT NOTE: This procedure will erase all data on your disk drives in the OWC Mercury Rack Pro. Back up any important data before proceeding! ➀ With the drive connected to the computer and powered on, right click on the “My Computer”...
- Page 17 OWC Mercury Rack Pro Chapter 3 - Formatting ➃ Your drive will appear similar to how Disk 1 does below. Notice that the space on the lower right reads as “Unallocated.” Right click in this space and choose “New Partition.”...
- Page 18 OWC Mercury Rack Pro Chapter 3 - Formatting ➇ If you like, you can specify the drive letter designation for your new drive. Otherwise, one will automatically be assigned. Click “Next. ” ➈ Before you can use the drive, it must be format- ted.
- Page 19 OWC Mercury Rack Pro Chapter 3 - Formatting ⑪ Once you have finished with the formatting wizard, you will see that your new drive (represented as “Disk E” in this case) will display a message of “Formatting. ” This should only take a...
- Page 20 OWC Mercury Rack Pro Chapter 3 - Formatting ⑬ At this point, you may close the Computer Management window. Your drive is ready to use and can be found in “My Computer. ” Using your new Storage Solution on both Macs and PCs? MacDrive takes the guesswork out of sharing files.
-
Page 21: Troubleshooting & Tips
Simply power the OWC Mercury Rack Pro off, and replace the drive. If you physically eject or remove the drive from the OWC Mercury Rack Pro without powering off, any mounted drives will disconnect from the computer and improperly dismount. -
Page 22: Appendix
Any data loss or corruption while using the OWC Mercury Rack Pro is the sole responsibility of the user, and under no circumstances will Other World Computing be held liable for compensation or the... -
Page 23: Customer Service
OWC Mercury Rack Pro Chapter 6 - Customer Service 6 CUSTOMER SERVICE 6.1 Before Contacting Customer Service •Read this manual and review Chapter 4: Troubleshooting & Tips. •Try to confirm the problem is with the drive. If you have a second computer, move the enclosure to that system and verify that the solution does not function with that machine. - Page 24 Copyrights: Copyright © 2009-12 Other World Computing, Inc. All rights reserved. No part of this publication may be reproduced, stored in a retrieval system, or transmitted in any form or by any means, electronic, mechanical, photocopying, recording or otherwise, without the prior written consent of Other World Computing.
Need help?
Do you have a question about the Mercury Rack Pro and is the answer not in the manual?
Questions and answers