Table of Contents
Advertisement
Quick Links
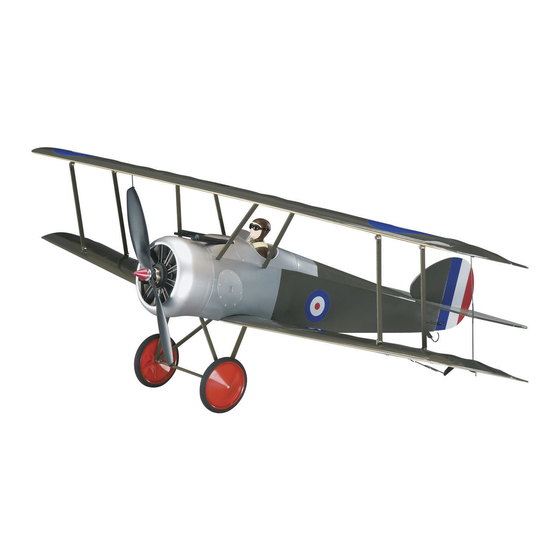
Wingspan: 35.5 in [900mm]
Wing Area: 389 in
2
[25.1dm
2
]
Weight: 21.1 – 26.3 oz [595 – 745g]
Wing Loading: 7.8 – 9.7 oz/ft
2
[24 – 30g/dm
Length: 25 in [630mm]
Radio:
4-channel, 4 micro servos
Motor:
RimFire
™
400 (28-30-950) brushless
ESC:
ElectriFly
™
SS-25
Battery: 11.1V (3S) 1250mAh – 1500mAh
®
Great Planes
Model Manufacturing Co. guarantees this kit to be
free from defects in both material and workmanship at the date
of purchase. This warranty does not cover any component parts
damaged by use or modifi cation. In no case shall Great Planes'
liability exceed the original cost of the purchased kit. Further,
Great Planes reserves the right to change or modify this warranty
without notice.
In that Great Planes has no control over the fi nal assembly or
material used for fi nal assembly, no liability shall be assumed nor
accepted for any damage resulting from the use by the user of
the fi nal user-assembled product. By the act of using the user-
assembled product, the user accepts all resulting liability.
If the buyer is not prepared to accept the liability associated
with the use of this product, the buyer is advised to return
this kit immediately in new and unused condition to the place
of purchase.
READ THROUGH THIS MANUAL BEFORE STARTING CONSTRUCTION. IT CONTAINS IMPORTANT
INSTRUCTIONS AND WARNINGS CONCERNING THE ASSEMBLY AND USE OF THIS MODEL.
Entire Contents © Copyright 2008
INSTRUCTION MANUAL
2
]
WARRANTY
To make a warranty claim send the defective part or item to Hobby
Services at the address below:
Hobby Services
3002 N. Apollo Dr., Suite 1
Champaign, IL 61822 USA
Include a letter stating your name, return shipping address, as
much contact information as possible (daytime telephone number,
fax number, e-mail address), a detailed description of the problem
and a photocopy of the purchase receipt. Upon receipt of the
package the problem will be evaluated as quickly as possible.
Champaign, Illinois
(217) 398-8970, Ext 5
airsupport@greatplanes.com
GPMA1144MNL V1.0
Advertisement
Table of Contents

Related Manuals for GREAT PLANES SopWith Camel


Summary of Contents for GREAT PLANES SopWith Camel
-
Page 1: Instruction Manual
Include a letter stating your name, return shipping address, as In that Great Planes has no control over the fi nal assembly or much contact information as possible (daytime telephone number, material used for fi nal assembly, no liability shall be assumed nor... -
Page 2: Table Of Contents
Open the “R/C AIRPLANES” pull down tab across the top of the page, then select “ARFs-ELECTRIC.” Scroll down INTRODUCTION ................. 2 the page and click on “EP Sopwith Camel ARF.” If there is AMA .................... 2 new technical information or changes, an “Important! TECH PRECAUTIONS ................ -
Page 3: Additional Items Required
Following is the list of additional hardware and accessories The EP Sopwith Camel ARF requires a four-channel radio required to fi nish the EP Sopwith Camel ARF. Order numbers with four micro servos and a mini receiver. The most basic are provided in parentheses. -
Page 4: Adhesives & Building Supplies
Mail parts orders and payments by personal check to: Here is a list of optional tools mentioned in the manual that will help you build the EP Sopwith Camel ARF. Hobby Services 3002 N. Apollo Drive, Suite 1 ❏... -
Page 5: Kit Inspection
If any parts are missing or are not of acceptable quality, or if you need assistance with assembly, contact Product Support. When reporting defective or missing parts, use the part names exactly as they are written in the Kit Contents list. Great Planes Product Support: 3002 N Apollo Drive, Suite 1 Champaign, IL 61822 Telephone: (217) 398-8970, ext. -
Page 6: Assembly
ASSEMBLY Tighten the Covering ❏ 2. Holding the horizontal stabilizer (stab) on the fuselage, view the model from the rear to see if it is parallel with the wing. ❏ 3. If necessary, use a small sanding block with medium- grit sandpaper to carefully sand the “high side”... - Page 7 ❏ ❏ 5. Stick another T-pin through the cockpit base at the 8. Insert a pin through the middle of the 1/4" x 1/2" centerline. Tie a loop in one end of an approximately 24" [6 x 13mm] CA hinge–the pin will keep the hinge centered. ®...
-
Page 8: Hook Up The Elevator & Rudder
or with your ESC and the motor battery, so you can operate Hook Up the Elevator & Rudder the servos with the transmitter. Center the trims on your transmitter and turn on the transmitter and receiver. Position the servo arm on each servo so the longer arms will be perpendicular to the servos. -
Page 9: Mount The Esc & Receiver
are using, center the plywood servo mounting plate on the rails and glue it into position. Then, place the servos on the mounting plate. ❏ 7. Fit the pushrods through the screw-lock pushrod connectors on the servo arms. If necessary, shorten the pushrods by cutting them. -
Page 10: Install The Replica Engine
❏ 2. Use a pin vise with a small drill or a hobby knife to drill the holes for the pushrod wires. The size of the drill isn’t critical–it just has to be approximately the same size or slightly larger than the pushrod wires so they will fi t into the holes. - Page 11 ❏ 8. While we’re working on the front of the fuselage, it will be easier to glue on the inspection panels now before the ❏ B. Turn it into position. wings are mounted. Add six or eight small drops of medium CA to the back of each panel, and then glue them into position on the sides of the fuselage where shown.
-
Page 12: Install The Battery Plate
❏ 10. While holding the windscreen in position, add a small ❏ drop of CA to one spot and apply a drop of CA accelerator 3. Apply the opposite side of Velcro to your battery–note with a T-pin or a small piece of wire. that the Velcro strip on the battery is only about 3/8"... -
Page 13: Mount The Aileron Servos
of wire with a “hook” on the end to “fi sh out” the battery wires. Otherwise, getting to the wires to disconnect the battery may be diffi cult when the wings and cabanes are in the way. Mount the Aileron Servos ❏... -
Page 14: Hook Up The Bottom Ailerons
❏ 9. Mount the other aileron servo to the other hatch the Hook Up the Bottom Ailerons same way. If you haven’t done so already, be sure to mount the servo arms to the servos with the screws. ❏ 1. Same as was done for the elevator and rudder horns and pushrods, fi... -
Page 15: Mount The Wings To The Fuselage
❏ 3. Test fi t the four aileron pushrods into the four fi berglass aileron pushrod tabs. Rotate the tabs around the pushrods to wear the paint off the pushrods and “break in” the holes. ❏ 6. Connect the aileron servo wire coming out the middle of the wing to the receiver with a battery. -
Page 16: Mount The Landing Gear
❏ 10. Use 2.6 x 8mm washer-head screws to mount the front and rear wing struts to the mounting tabs–the front struts are approximately 1/16" [1.6mm] shorter than the rear struts and it doesn’t matter which end is up. Use care not to overtighten the screws or they will strip out of the tabs. -
Page 17: Connect The Top & Bottom Ailerons
Connect the Top & Bottom Ailerons ❏ 1. Hold each top aileron centered to the wing with small pieces of masking tape. If you have mounted the propeller, remove it. Connect the motor battery to the ESC and turn on the transmitter. -
Page 18: Get The Model Ready To Fly
fi rst fl ights. If, after you have become accustomed to the way the EP Sopwith Camel ARF fl ies, you would like to change the throws to suit your taste, that is fi ne. However, too much control throw could make the model diffi... -
Page 19: Balance The Propeller & Mount The Spinner
❏ 1. If using a Great Planes C.G. Machine to balance your EP Sopwith Camel ARF, set the rulers to 2-7/8" [73mm]. If not using a C.G. Machine, use a fi ne-point felt-tip pen to draw short lines marking the balance point on the bottom of the top wing 2-7/8"... -
Page 20: Balance The Model Laterally
“nose heavy” and weight must be system. This will “condition” the batteries so that the next added to the tail. Carefully lay segments of Great Planes charge may be done using the fast-charger of your choice. -
Page 21: Ama Safety Code (Excerpts)
9) Under no circumstances may a pilot or other person AMA SAFETY CODE (excerpts) touch a powered model in fl ight; nor should any part of the model other than the landing gear, intentionally touch the ground, except while landing. Read and abide by the following excerpts from the Academy of Model Aeronautics Safety Code. -
Page 22: Flying
FLYING Takeoff The EP Sopwith Camel ARF is a great-fl ying model that fl ies The EP Sopwith Camel ARF will not take off from grass smoothly and predictably. The EP Sopwith Camel ARF does unless it is extremely short and smooth. But taking off from... - Page 23 (though it is never a bad idea!), but more importantly so you do not surprise yourself by impulsively ElectriFly S.E. 5a WWI Park Flyer EP ARF by Great Planes attempting a maneuver and suddenly fi nding that you’ve run On your next trip to the park or flying field, give chase to the out of time, altitude or airspeed.
- Page 24 BUILDING NOTES Kit Purchased Date: ___________________________ Date Construction Finished: _______________________ Where Purchased: ____________________________ Finished Weight: _______________________________ Date Construction Started: _____________________ Date of First Flight: ______________________________ FLIGHT LOG...
Need help?
Do you have a question about the SopWith Camel and is the answer not in the manual?
Questions and answers