Table of Contents
Advertisement
Quick Links
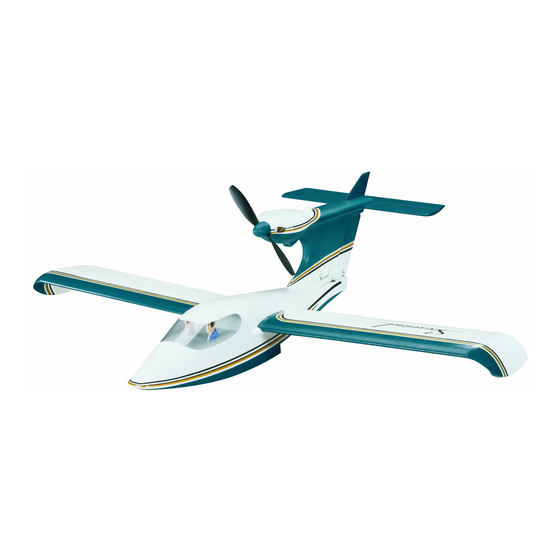
Wingspan: 39.5 in [1005mm]
Wing Area: 234 in
2
[15.1dm
2
]
Weight: 24 – 26 oz [680 – 735g]
Wing Loading: 14.8 – 16 oz/ft
Length: 33.5 in [845mm]
Radio:
4-channel, three servos
Electric Motor: 1.1 in [28mm] dia., 110 W, 25A ESC
Great Planes
®
Model Manufacturing Co. guarantees this kit to be free from defects in both material and workmanship at the date of purchase.
This warranty does not cover any component parts damaged by use or modifi cation. In no case shall Great Planes' liability exceed the
original cost of the purchased kit. Further, Great Planes reserves the right to change or modify this warranty without notice.
In that Great Planes has no control over the fi nal assembly or material used for fi nal assembly, no liability shall be assumed nor accepted
for any damage resulting from the use by the user of the fi nal user-assembled product. By the act of using the user-assembled product,
the user accepts all resulting liability.
If the buyer is not prepared to accept the liability associated with the use of this product, the buyer is advised to return this kit
immediately in new and unused condition to the place of purchase.
To make a warranty claim send the defective part or item to Hobby Services at the address below:
Include a letter stating your name, return shipping address, as much contact information as possible (daytime telephone number, fax
number, e-mail address), a detailed description of the problem and a photocopy of the purchase receipt. Upon receipt of the package
the problem will be evaluated as quickly as possible.
READ THROUGH THIS MANUAL BEFORE
STARTING CONSTRUCTION. IT CONTAINS
IMPORTANT INSTRUCTIONS AND WARNINGS
CONCERNING THE ASSEMBLY AND USE OF
THIS MODEL.
Entire Contents © Copyright 2007
INSTRUCTION MANUAL
2
[45 – 49g/dm
2
]
3002 N. Apollo Dr., Suite 1
Champaign, IL 61822 USA
WARRANTY
Hobby Services
Champaign, Illinois
(217) 398-8970, Ext 5
airsupport@greatplanes.com
GPMZ1169 for GPMA1169 V1.0
Advertisement
Table of Contents

Related Manuals for GREAT PLANES Seawind EP


Summary of Contents for GREAT PLANES Seawind EP
- Page 1 Further, Great Planes reserves the right to change or modify this warranty without notice. In that Great Planes has no control over the fi nal assembly or material used for fi nal assembly, no liability shall be assumed nor accepted for any damage resulting from the use by the user of the fi...
-
Page 2: Table Of Contents
INTRODUCTION & OTHERS..FOLLOW THESE IMPORTANT SAFETY PRECAUTIONS Thank you for purchasing the Great Planes EP Seawind ARF. Testing and developing the Seawind was lots of fun. 1. Your Seawind should not be considered a toy, but rather a Immediately we were surprised by how nimble and sporty sophisticated, working model that functions very much like a this model is. -
Page 3: Additional Items Required
Foam Safe CA+ Medium the air. Glue (GPMR6069) ❏ 4 oz. Great Planes Pro 6-minute epoxy (GPMR6042) 6. You must check the operation of the model before every ❏ CA accelerator (GPMR6035) fl ight to insure that all equipment is operating and that the model has remained structurally sound. -
Page 4: Optional Supplies & Tools
Mail parts orders and payments by personal check to: Optional Supplies & Tools Hobby Services 3002 N. Apollo Drive, Suite 1 ❏ Precision Magnetic Prop Balancer (TOPQ5700) Champaign, IL 61822 ❏ CA applicator tips (HCAR3780) ❏ CA debonder (GPMR6039) Be certain to specify the order number exactly as listed in the Replacement Parts List. -
Page 5: Kit Inspection
Product Support. When reporting defective or missing parts, use the part names exactly as they are written in the Kit Contents list. Great Planes Product Support: 3002 N Apollo Drive, Suite 1 Champaign, IL 61822 Telephone: (217) 398-8970, ext. -
Page 6: Assembly
ASSEMBLY Mount the Motor & Cowl ❏ 4. Connect the wires on the motor to the wires in the fuse. Mount the motor with the three 3mm x 6mm Phillips screws that came with this kit and a drop of threadlocker on the threads. ❏... -
Page 7: Mount The Horizontal Stabilizer & Fin
Mount the Horizontal Stabilizer & Fin ❏ 10. Fit one of the spinners all the way onto the propeller and collet assembly. Adjust the cowl so there will be an approximately 1/16" [1.5mm] gap between the spinner and ❏ 1. Temporarily mount the wing to the fuselage. With the the cowl. -
Page 8: Install The Servos & Radio
Install the Servos & Radio ❏ 1. Remove the elevator pushrod wire from the fuse. Disconnect the rudder pushrod from the rudder control horn and remove the rudder pushrod as well. ❏ 5. Square the stab with the centerline of the fuselage by taking accurate measurements from both tips to the seam between the two fuselage halves on the top of the motor pod behind the cowl. -
Page 9: Hook Up The Rudder & Elevator
to over tighten the screws, stripping out the holes–especially Hook Up the Rudder & Elevator if a larger drill was used. If this happens, remove the screw and build up the hole with more thin CA. ❏ 7. Install the nylon zip tie that came with this kit into the slots in the servo tray for mounting the ESC later. -
Page 10: Assemble The Wing
screw-lock pushrod connector to the arm and secure it with Assemble the Wing a small, black retainer. Thread one of the small machine- thread screws that came with this kit into the connector. Use this photo to hook up the elevator and rudder servos. ❏... -
Page 11: Get The Model Ready To Fly
❏ 4. Connect the aileron pushrods to the torque rod horns on the ailerons with the 90° connectors and to the screw-locks in the servo arm. Center the ailerons and tighten down the screws in the connectors with a drop of threadlocker on the threads. Make sure you have the servo arm screw in the servo. -
Page 12: Apply The Decals
All that needs to be done is assemble the stand, place the model on the stand and determine how much ballast will be required. If you have not already done so, use a Great Planes ™ AccuThrow... -
Page 13: Balance The Model Laterally
❏ 1. With the model ready to fl y and the battery installed, set the model in the water with the nose pointing into the wind. ❏ 2. It will probably fl oat with one tip in the water and one tip up out of the water. -
Page 14: Range Check
AMA SAFETY CODE (excerpts) Range Check Read and abide by the following excerpts from the Academy When you get to your fl ying site ground check the of Model Aeronautics Safety Code. For the complete Safety operational range of the radio before the fi rst fl ight of the Code refer to Model Aviation magazine, the AMA web site or day. -
Page 15: Check List
CHECK LIST FLYING The Seawind is a great-fl ying model that fl ies smoothly and Perform these basic checks to make sure the model is ready predictably. The Seawind does not, however, possess the self- to fl y. Where appropriate, refer to the instruction manual for recovery characteristics of a primary R/C trainer and should additional information required to complete the check. -
Page 16: Takeoff
Always be conservative so the motor won’t quit unexpectedly corrections. Like all airplanes, the objective is for smooth and you will have enough battery to land under power. takeoffs–but when taking off from water you should also avoid getting the model into a “skipping” mode. If the model does get into a situation where it begins to skip off the water, Takeoff you must either abort the takeoff by pulling back the throttle... -
Page 17: Optional Esc & Receiver Mounting Location
30° angle. Be alert ElectriFly ™ by Great Planes PBY Catalina EP Sport Scale ARF because until the model builds up speed it will initially pitch Thrilling water takeoffs and landings are just a few hours away downward. - Page 18 LiPo batteries, with automatic low-voltage cut-off for all. The SS25 features fully proportional forward and smooth throttle response with on/off brake. Connectors are installed and a 180-day warranty is included. GPMM1820 ElectriFly by Great Planes YAK 54 3D EP ARF ElectriFly by Great Planes RimFire ™ 28-30-950kV Winning performance is in the YAK’s genes –...
- Page 19 • Huge, 20C continuous discharge rate help packs stay cooler during sustained, high-amp current loads. • Assembled, shrink-wrapped and wired in series for balancing, with a standard balancing connector and high- effi ciency Deans plug. ™ ElectriFly PolyCharge4 For convenience with multiple LiPo packs, there’s the DC PolyCharge4.
- Page 20 BUILDING NOTES Kit Purchased Date: ___________________________ Date Construction Finished: _______________________ Where Purchased: ____________________________ Finished Weight: _______________________________ Date Construction Started: _____________________ Date of First Flight: ______________________________ FLIGHT LOG...
Need help?
Do you have a question about the Seawind EP and is the answer not in the manual?
Questions and answers
Great Planes Seawind EP Propeller size