Table of Contents
Advertisement
Great Planes Model Manufacturing Co. guarantees this kit to be free from defects in both material and workmanship
at the date of purchase. This warranty does not cover any component parts damaged by use or modification. In no case
shall Great Planes' liability exceed the original cost of the purchased kit. Further, Great Planes reserves the right
to change or modify this warranty without notice.
In that Great Planes has no control over the final assembly or material used for final assembly, no liability shall be
assumed nor accepted for any damage resulting from the use by the user of the final user-assembled product. By the act
of using the user-assembled product, the user accepts all resulting liability.
If the buyers are not prepared to accept the liability associated with the use of this product, they are advised
to return this kit immediately in new and unused condition to the place of purchase.
READ THROUGH THIS INSTRUCTION MANUAL
FIRST. IT CONTAINS IMPORTANT INSTRUCTIONS
AND WARNINGS CONCERNING THE ASSEMBLY
AND USE OF THIS MODEL.
SP40P03 V1.1
INSTRUCTION MANUAL
WARRANTY
TM
P.O. Box 788
Urbana, IL 61801
productsupport@greatplanes.com
(217) 398-8970
Entire Contents © Copyright 2000
Advertisement
Table of Contents

Related Manuals for GREAT PLANES SlowPoke Sport 40


Summary of Contents for GREAT PLANES SlowPoke Sport 40
-
Page 1: Instruction Manual
READ THROUGH THIS INSTRUCTION MANUAL FIRST. IT CONTAINS IMPORTANT INSTRUCTIONS AND WARNINGS CONCERNING THE ASSEMBLY AND USE OF THIS MODEL. P.O. Box 788 Urbana, IL 61801 (217) 398-8970 productsupport@greatplanes.com SP40P03 V1.1 Entire Contents © Copyright 2000... -
Page 2: Table Of Contents
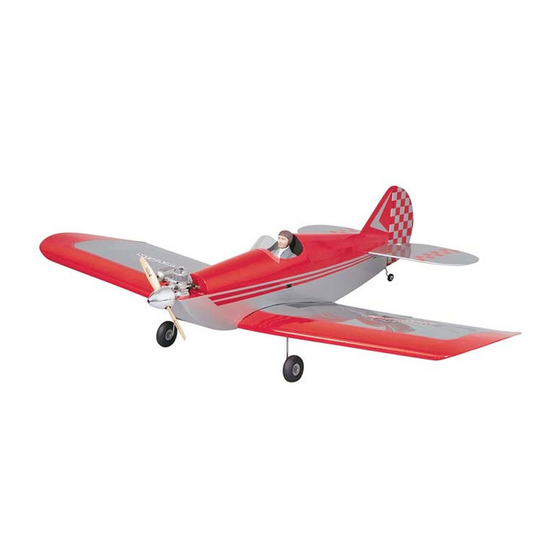
TABLE OF CONTENTS & OTHERS...FOLLOW THESE IMPORTANT SAFETY PRECAUTIONS PRECAUTIONS..............2 Your SlowPoke Sport 40 is not a toy, but rather a INTRODUCTION ...............3 sophisticated, working model that functions very much like an DECISIONS YOU MUST MAKE........3 actual airplane. Because of its realistic performance, the Engine selection.............3... -
Page 3: Introduction
❏ 2 oz. CA (Thin) (GPMR6003) Now, the SlowPoke Sport 40 builds upon this tradition but adds the dimension of larger size and ailerons for ❏ 2 oz. CA+(Medium) (GPMR6009) aerobatic enjoyment. -
Page 5: Two-View
Use this drawing or photocopy it and use the copy to design your trim scheme. -
Page 6: Common Abbreviations
Metric Conversions On our workbench, we have three 11” Great Planes 1" = 25.4mm (conversion factor) Easy-Touch™ Bar Sanders, equipped with #80, #150 and #220-grit sandpaper. This setup is all that is required 1/64" = .4mm 1" = 25.4mm for almost any sanding task. We also keep some 1/32"... -
Page 7: Build The Tail Surfaces
BUILD THE TAIL SURFACES Build the Fin & Rudder Work on a flat surface over the plan covered with wax paper or Great Planes Plan Protector. Refer to the plan and die-cut patterns on pages 4 and 5 to identify and position the parts. -
Page 8: Build The Stabilizer And Elevators
Build the Stabilizer & Elevators Work on a flat surface over the plan covered with wax paper or Great Planes Plan Protector. Refer to the plan and die-cut patterns on pages 4 and 5 to identify the parts. ❏ 4. From 1/4” x 1/2” x 30” balsa measure, cut and glue the stab leading edges in position. -
Page 9: Build The Wing
BUILD THE WING Build the Center Panel NOTE: The wing panels are built “right-side up” over the plan Work on a flat surface over the plan covered with wax paper ❏ ❏ 9. Using your marks as a guide, carefully drill a 1/8” or Great Planes Plan Protector. - Page 10 ❏ 3. Pin the 17-1/8” skin over your protected plan. Use the ❏ 9. Use the 1/2” x 2-1/2” x 9” balsa block to make a filler tic marks on the plan to draw the location of the ribs and between the W-1 and W-2 ribs at the aft edge of the panel spar on the surface of the balsa skin.
-
Page 11: Build The Outer Panels
thick CA, glue a doubler to both sides of only two ribs, making sure the auxiliary spar notches are aligned. Glue a doubler to the left side of one remaining rib and to the right side of the other rib, aligning them in the same manner. ❏... - Page 12 ❏ ❏ 8. Starting with the W-3 rib with two doublers (not the over the plan. Place a 1/4” x 1/4” x 24” auxiliary spar and a 1/8” x 1/4” x 24” rear spar in position as well. Without using root rib), glue all ribs (except the root rib) in position with any glue, position a W-3 rib (with the single doubler to the thin CA.
- Page 13 ❏ ❏ 15. Use thick CA to glue a sheet of 1/16” x 3” x 30” balsa to the top leading edge of the wing panel from the root end, extending over the tip. The sheet should fit against the rear edge of the top auxiliary spar.
- Page 14 ❏ ❏ 18. Glue the 3/32” die-cut balsa aileron ribs (W6) in ❏ ❏ 22. Using the plan for reference, measure, cut and glue position as shown on the plan. Try to avoid letting any parts leftover pieces of 1/4” x 1/4” x 1-1/2” balsa stick to the inside stick to the wing panel.
-
Page 15: Join The Wing Panels
❏ ❏ 24. Using 1/4” x 1/2” balsa left over from the tail, build ❏ ❏ 28. Mark a line 1/16” away from each side of the main a "covering pocket" around the servo. spars on the root rib. Carefully cut the root rib to allow the wing joiners to pass through. -
Page 16: Build The Fuselage
the parts together and pin the LE and TE in alignment. side and the stab saddle. Cut a short piece of leftover 1/8” Repeat this operation for the other wing tip. Weight the x 1/2” balsa stick to fit between the longerons at the rear of center section down flat on the board and recheck all joints. - Page 17 ❏ 11. Insert the F2/2A former into the notches in the fuse sides with the doubler facing the nose of the fuse. ❏ 7. Locate 1/8” die-cut ply formers F2 and F2A. Glue them together with thick CA. ❏ 12. Slide the 1/8” die-cut balsa stab base (SB) into position at the rear of the fuse.
- Page 18 ❏ 16. Remove the fuse bottom from the board and sand off any glue blobs or rough spots. ❏ 21. Glue each of the two halves of the 1/8” die-cut balsa cockpit floor (CF), F4A, F4B, and F5A together. ❏ 17. Position your engine in the engine mount with the front edge of the thrust washer 3/16”...
- Page 19 fit. Use a razor plane and sanding bar to do as much of the shaping as you can before gluing it in place. Once satisfied with the shape and fit, glue the turtle deck top to the top of the aft fuse formers and the tail post. ❏...
-
Page 20: Install The Tail Gear
❏ 30. Trim the front of the front deck sheeting flush with front edge of F1A. Trim the aft end of the sheeting flush with aft side of F3A. ❏ 3. Temporarily install the bearing and rudder. The rudder should fit flush with the fin and aft edge of the fuse. If not, check if the bearing is fully seated or that the groove in the rudder is deep enough. -
Page 21: Finishing
FINISHING Final Sanding ❏ 3. Using the sketch as a guide, measure and mark the location of the two wing bolt holes. While securely holding the wing in alignment with the reference marks you made in the previous step, drill #10 or 13/64” holes, perpendicular to the bottom of the wing, through the wing into the wing bolt plate. -
Page 22: Cover The Model
When covering areas that involve sharp junctions, like the Cover the Model tail section, cut narrow strips (3/8” to 1/2”) and apply them in the corners before covering the major surfaces. The The technique we will describe here is the how the model larger pieces of MonoKote will overlap and capture these pictured on the box was finished. -
Page 23: Final Hookups And Checks
fits this type of slot very well. Trial fit the hinge into the slot. FINAL HOOKUPS & CHECKS If the hinge does not slide in easily, work the knife blade back and forth in the slot a few times to provide more clearance (it is really the back edge of the blade that does the work here in widening the slot). -
Page 24: Install The Landing Gear
Install the Landing Gear HINGE LINE ❏ ❏ 1. Seat the landing gear in the groove on the bottom of the wing. Secure it with two nylon straps and four #2 x 3/8” sheet metal screws per strut. ❏ ❏ 1. Secure the main wheels to the landing gear with two 5/32"... -
Page 25: Control Surface Throws
4-CHANNEL RADIO SET-UP (STANDARD MODE 2) ELEVATOR MOVES UP 4-CHANNEL TRANSMITTER RIGHT AILERON MOVES UP LEFT AILERON MOVES DOWN 4-CHANNEL TRANSMITTER ❏ 8. Hookup the throttle using the 12” white nylon pushrod, 1” threaded stud and nylon clevis at the throttle and the 4” RUDDER MOVES RIGHT 4-CHANNEL TRANSMITTER... -
Page 26: Balance Your Model
Balance Your Model PREFLIGHT NOTE: This section is VERY important and must NOT be omitted! A model that is not properly balanced will be Charge the Batteries unstable and possibly unflyable. Follow the battery charging procedures in your radio instruction manual. -
Page 27: Engine Safety Precautions
The Great Planes SlowPoke Sport 40 is a great flying sport airplane that flies smoothly and predictably, yet is highly I will not fly my model aircraft higher than approximately maneuverable. -
Page 28: Balance The Propeller
Be sure to allow the tail to come up. Don’t hold the tail on the ground with too much up elevator, as the SlowPoke Sport 40 will become airborne prematurely and will possibly stall. When the plane has When it’s time to land, fly a normal landing pattern and...
Need help?
Do you have a question about the SlowPoke Sport 40 and is the answer not in the manual?
Questions and answers