Table of Contents
Advertisement
Quick Links
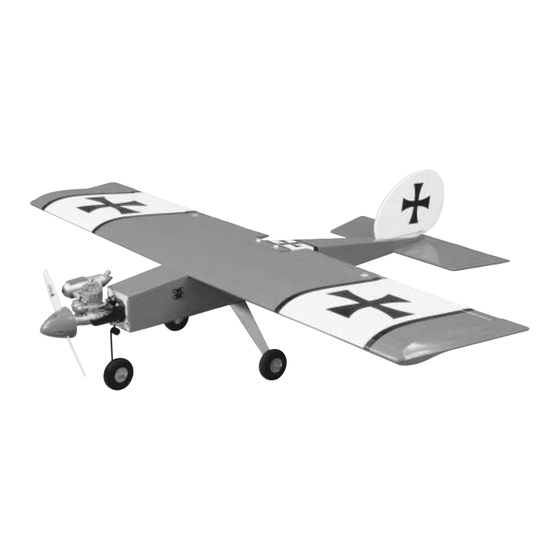
Big Stik .40:
Wingspan: 58.5 in. [1486mm]
Wing Area: 770 sq. in. [49.7 sq dm]
Weight: 5.25 lbs [2380g]
Wing Loading: 15.7 oz./sq. ft.[48 g/sq dm]
Length: 51.5 in. [1308mm]
Radio: 4-Channel with 5 servos
Engine: .40 – .51 2-stroke, .50 – .70 4-stroke
[6.5 – 8.5cc 2-stroke, 8.5 – 11.5cc 4-stroke]
Great Planes
®
Model Manufacturing Co. guarantees this kit to be free from defects in both material and workmanship at the date of
purchase. This warranty does not cover any component parts damaged by use or modification. In no case shall Great Planes' liability
exceed the original cost of the purchased kit. Further, Great Planes reserves the right to change or modify this warranty without notice.
In that Great Planes has no control over the final assembly or material used for final assembly, no liability shall be assumed nor
accepted for any damage resulting from the use by the user of the final user-assembled product. By the act of using the user-assembled
product, the user accepts all resulting liability.
If the buyer is not prepared to accept the liability associated with the use of this product, the buyer is advised to return this
kit immediately in new and unused condition to the place of purchase.
READ THROUGH THIS MANUAL BEFORE
STARTING CONSTRUCTION. IT CONTAINS
IMPORTANT WARNINGS AND INSTRUCTIONS
CONCERNING THE ASSEMBLY AND USE OF
THIS MODEL.
© Copyright 2001
INSTRUCTION MANUAL
WARRANTY
Big Stik .60:
Wingspan: 66.5 in. [1689mm]
Wing Area: 1000 sq. in. [64.5 sq dm]
Weight: 6.5 lbs [2948g]
Wing Loading: 14.97 oz./sq. ft.[46 g/sq dm]
Length: 59 in. [1499mm]
Radio: 4-Channel with 5 servos
Engine: .60 – .91 two-stroke, .91 – .1.20 four-stroke
[10 – 15cc 2-stroke, 15 – 20cc 4-stroke]
1610 Interstate Drive Champaign, IL 61822
(217) 398-8970, Ext 2
airsupport@greatplanes.com
GPMZ1250 for GPMA1220/1221 V1.0
Advertisement
Table of Contents

Related Manuals for GREAT PLANES Big Stir 40


Summary of Contents for GREAT PLANES Big Stir 40
-
Page 1: Instruction Manual
Further, Great Planes reserves the right to change or modify this warranty without notice. In that Great Planes has no control over the final assembly or material used for final assembly, no liability shall be assumed nor accepted for any damage resulting from the use by the user of the final user-assembled product. -
Page 2: Table Of Contents
INTRODUCTION reinforce the high stress points. The Great Planes Big Stik ARFs are aircraft that let you We, as the kit manufacturer, provide you with a top quality progress from your trainer into a model that is not only a... -
Page 3: Decisions You Must Make
™ Engine Mount Hole Locator (GPMR8130) Great Planes AccuThrow ™ Deflection Gauge (for The Great Planes Big Stik ARF .40 and .60 require a good measuring control throws, GPMR2405) four channel radio system like the Futaba ® 4VF. Both airplanes require a total of five servos each with a minimum of 44 oz-in of torque. -
Page 4: Ordering Replacement Parts
ORDERING REPLACEMENT PARTS To order replacement parts for the Great Planes Big Stik ARF .40 or .60, use the order numbers in the Replacement Parts List that follows. Replacement parts are available only as listed. Not all parts are available separately (an aileron cannot be purchased separately, but is only available with the wing kit). -
Page 5: Kit Contents
If any parts are missing or are not of acceptable quality, or if you need assistance with assembly, contact Great Planes Product Support. When reporting defective or missing parts, use the part names exactly as they are written in the Kit Contents list on this page. -
Page 6: Wing Assembly And Installation
T-pins and attach the aileron by applying 6 drops of thin CA WING ASSEMBLY & INSTALLATION to each side of each hinge. After the glue has cured, flex the aileron back and forth a few times to loosen up the hinges. Pull on the aileron to make sure that the aileron is firmly 1"... - Page 7 6. Taped to the inside of the root rib is a fine string. This is used to ease installation of the aileron servo lead. Untape the string from the root rib, pull the end through the hole you just cut and tape the string to the underside of the wing. 7.
-
Page 8: Install The Tail Components
place the horizontal stabilizer into position. Check the alignment as shown in the photo. Note: The plane is shown right side up in the photo. Yours should be inverted. 12. Turn the wing right side up. Position the MonoKote- covered wing bolt plate centered on the wing and flush with its trailing edge. - Page 9 How to cut covering from balsa. Use a soldering iron to cut the covering from the stab. The tip of the soldering iron doesn't have to be sharp, but a fine tip does work best. Allow the iron to heat fully. Use a straightedge to guide the soldering iron at a rate that will just 5.
-
Page 10: Tank Installation
Pressure Tap to Muffler Silicone Fuel Pipe Fuel Line Slide Into Firewall Fuel Clunk To Needle Valve Firewall Balsa Block 7. When you are satisfied with the fit, use 6-minute epoxy to glue the fin in position. Check the alignment of the fin to the stabilizer with a triangle, then secure it in position with 2. - Page 11 The engine on the engine mount. Adjust the width of the mount Great Planes Dead Center™ (GPMR8130) Engine Mount as needed for your engine. Tighten the bolts. Hole Locator works really well for this task.
-
Page 12: Mount The Landing Gear
5. Install the engine with four washers and four socket head screws of the size listed in the table. MOUNT THE LANDING GEAR 3. Locate the wire nose gear, plastic steering arm, two 5/32" [4mm] wheel collars and two 6-32 x 1/4" [6mm] socket head screws. -
Page 13: Radio Installation
clevises 20 turns onto the 36" pushrods. Place a silicone retainer over each of the clevises. Holding the clevis end, slide the two pushrods into the fuse through the openings you just trimmed. 5. Mount the two 5/32 axles with the two axle nuts to the main gear. - Page 14 Wrap the receiver and battery in 1/4" foam, then hold them in place by gluing small balsa sticks (not included) above them. We added a Great Planes Switch Mount and Charge Jack (GPMM1000, not included) for convenience and ease of use at the field, installed on the 7.
- Page 15 8. Make a 90-degree bend in the pushrod on your mark, 12. Connect the pushrod to the brass screw lock pushrod then insert it through the enlarged hole in the servo arm. Cut connector on the throttle servo. Trim the extra wire off behind off the excess wire 3/8"...
-
Page 16: Prop, Spinner And Fuel Line Installation
of the mounting holes. Drill 3/32" [2.4mm] mounting holes through the marks. Wick two to three drops of thin CA into the holes to harden the underlying balsa, then re-drill the holes. Attach the horns using #2 x 1/2" Screws and Nylon Nut Plates. -
Page 17: Set The Control Throws
Adjust if necessary. Set the Control Throws Balance the Model Use a Great Planes AccuThrow (or a ruler) to accurately More than any other factor, the C.G. (balance point) can measure and set the control throw of each control surface have the greatest effect on how a model flies and may as indicated in the chart that follows. -
Page 18: Balance The Model Laterally
AMA sanctioned flying events model installed (ready to fly) and an empty fuel tank, place the model right side up on a Great Planes CG Machine, or lift it right side up at the balance point you marked. -
Page 19: Balance The Propellers
We use a Top Flite Precision Magnetic Prop Balancer™ Keep these items away from the prop: loose clothing, shirt (TOPQ5700) in the workshop and keep a Great Planes sleeves, ties, scarfs, long hair or loose objects such as Fingertip Prop Balancer (GPMQ5000) in our flight box. -
Page 20: Radio Control
2. I will not fly my model aircraft higher than approximately 4. Extend your receiver antenna and make sure it has a 400 feet within 3 miles of an airport without notifying the strain relief inside the fuselage to keep tension off the solder airport operator. -
Page 21: Flying
Take it easy with the Big Stik ARF for the first few flights, FLYING gradually getting acquainted with it as you gain confidence. Adjust the trims to maintain straight and level flight. After The Big Stik ARF is a great-flying model that flies smoothly flying around for a while and while still at a safe altitude with and predictably. - Page 22 OTHER PLANES FROM GREAT PLANES SpaceWalker ARF GPMA1300 Based on Jesse Anglin’s ’86 tribute to ’30s homebuilts, the SpaceWalker takes only a few hours to assemble. It has a strong, wood frame; welded, steel landing gear; side plates; ABS wheel pants;...
- Page 23 OTHER ITEMS AVAILABLE FROM GREAT PLANES Great Planes ® Accu-Throw ™ Control Surface Deflection Meter GPMR2405 One leading cause of crashes is flying an airplane with its control throws set differently from those recommended in the instructions. The Great Planes AccuThrow ™...
- Page 24 BUILDING NOTES Kit Purchased Date: _______________________ Date Construction Finished: _________________ Where Purchased:_________________________ Finished Weight: __________________________ Date Construction Started: __________________ Date of First Flight: ________________________ FLIGHT LOG...
Need help?
Do you have a question about the Big Stir 40 and is the answer not in the manual?
Questions and answers