Advertisement
Advertisement
Table of Contents

Subscribe to Our Youtube Channel
Related Manuals for Bodyworx JX325


Summary of Contents for Bodyworx JX325
-
Page 2: Table Of Contents
INDEX 1. OVERVIEW DRAWING................2 2. IMPORTANT SAFETY INSTRUCTIONS ..........3 3. GROUNDING INSTRUCTIONS ..............4 4. PRE-ASSEMBLY CHECK LIST ..............5 5. ASSEMBLY STEPS ..................7 6. CAUTION ....................8 7. MAINTENANCE ..................9 8. COMPUTER OPERATION INSTRUCTIONS ............. -
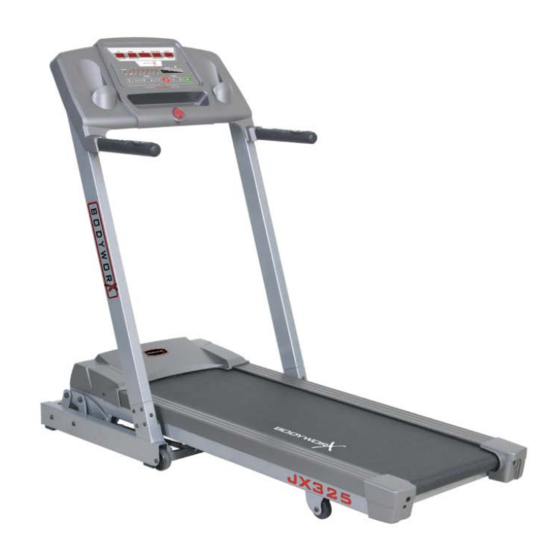
Page 3: Overview Drawing
1. OVERVIEW DRAWING Computer Console Safety Key / Clip Grip Pulse Sensor On-off Switch Frame Circuit Breaker Rear End Cape... -
Page 4: Important Safety Instructions
2. IMPORTANT SAFETY INSTRUCTIONS When using this product, basic precautions should always be followed, including the following: Please read the instruction carefully before starting to use this product. Danger – To reduce the risk of electric shock: Always unplug this product from the electrical outlet immediately after using and before cleaning. -
Page 5: Grounding Instructions
3. GROUNDING INSTRUCTIONS The products must be grounded first. If malfunction or breakdown occurs, grounding will provide a path of least resistance for electric current to reduce the risk of electric shock. The product is equipped with a cord having an equipment-grounding conductor and a grounding plug. -
Page 6: Pre-Assembly Check List
4. PRE-ASSEMBLY CHECK LIST ITEM Description Computer Console Frame Upright (L) Upright (R) - Page 7 ITEM Description Allen Bolt M8xP1.25x15 Allen Wrench Allen Wrench Safety Key/Clip SILICON Bottle Allen Bolt M8xP1.25x40...
-
Page 8: Assembly Steps
5. ASSEMBLY STEPS Two persons are required to finish the assembly steps. (Caution!! Please follow exactly the assembly steps below to avoid injury. ) 1. After pull out Control Wire with Guide Thread in right Upright (D), cap it into the wire clip and fix it inside hole of right Upright. -
Page 9: Caution
6. CAUTION: Note: The Cylinder is made of high pressure, so it must be extra careful not to impact with other objective to avoid deformation. Note: When the cylinder is hit, possibly will cause the damage and make the usage not smooth. This treadmill have the foldable mechanism for storage, when storage must stop all movement (include treadmill belt stop, take off the power cord). -
Page 10: Maintenance
7. MAINTENANCE When running belt is off the center, stop the treadmill immediately, use Allen Wrench to adjust the hex head screw. For example, the running belt is offset to the left it should adjust 1/4 circle clockwise; if the running belt is offset to the right, adjust 1/4 circle counterclockwise. -
Page 11: Computer Operation Instructions
8. B12OA25RS1-J8 COMPUTER OPERATION INSTRUCTIONS General Operation: 1. Turn on the treadmill. 2. Put the safely key in the recess of the console. The beeper will sound and all windows will display values, the initial values are 0, and not blinking, this present treadmill is under START/READY position, under this situation, user can hold the grip pulse sensor to detect heart rate value directly. -
Page 12: Computer Console
window display the heart rate values. ** PULSE value range:40~240 Beats/min **Check list below for different age and heart rate values: OVER MIDDLE (Age) 1.0km/hr, 3. Press to start treadmill, the treadmill will start with a speed of at this time press keys to increase/ decrease speed( also can press fast speed buttons to instantly choose the speed you need), press... - Page 13 B. MODE operation instruction (Under this mode total have MANUAL and 6 PROGRAM installed program): 1. MANUAL : Under this mode, you can set up the time, distance as your need, operation method are as below : 1.1. Press , when see the light of MANUAL LED light is linking, press , then into the MANUAL mode.
- Page 14 Program pre-se 32 min Time range : 5~99 min , Step is 1 min Regarding to the P1~P6 installed values, please refer to the last page List1~ List 6 C 、 Body fat: 1. Under START/READY condition, press , you can see the Body Fat LED light is blinking, present you are in to Body Fat function.
- Page 15 Annex 1 P1-L1 P1-L2 P1-L3 Annex 2...
- Page 16 P2-L1 M IN Annex 3...
- Page 17 Annex 4...
- Page 18 P4-L1 P4-L2 P4-L3 Annex 5...
- Page 19 P5-L1 P5-L2 P5-L3 Annex 6...
- Page 20 P6-L1 P6-L2 P6-L3...
Need help?
Do you have a question about the JX325 and is the answer not in the manual?
Questions and answers