Advertisement
Advertisement

Related Manuals for Bodyworx JX335


Summary of Contents for Bodyworx JX335
-
Page 2: Table Of Contents
INDEX 1. Overview Drawing...........錯誤! 尚未定義書籤。 2. Important Safety Instructions................3 3. Grounding Instructions .................4 4. Pre-Assembly Check List ........錯誤! 尚未定義書籤。 5. Assembly Steps.....................7 6. Caution......................8 7. Maintenance....................9 錯誤! 尚未定義書籤。 8. Computer Operation Instructions ........ -
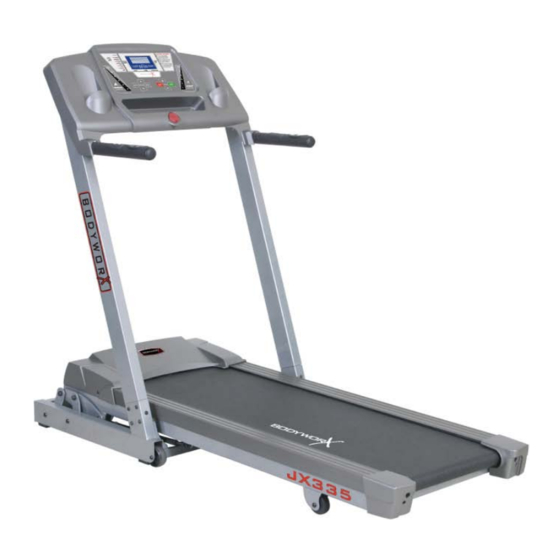
Page 3: Overview Drawing
1. Overview Drawing Computer Console Safety Key / Clip Grip Pulse Sensor On-off Switch Frame Circuit Breaker Rear End Cape... -
Page 4: Important Safety Instruction
2. IMPORTANT SAFETY INSTRUCTION When using this product, basic precautions should always be followed, including the following: Please read the instruction carefully before starting to use this product. Danger – To reduce the risk of electric shock: Always unplug this product from the electrical outlet immediately after using and before cleaning the treadmill. -
Page 5: Grounding Instructions
3. GROUNDING INSTRUCTION This product must be grounded. If the treadmill should be malfunction or breakdown, grounding provides a path of least resistance for electric current to reduce the risk of electric shock. This product contains a power cord with a grounding conductor and a grounding plug. The plug must be plugged into a correct outlet that is properly installed and grounded. -
Page 6: Pre-Assembly Check List
4.PRE-ASSEMBLY CHECK LIST ITEM Description Computer Console Frame Upright(L) Upright(R) - Page 7 ITEM Description Truss Hex ScrewM8xP1.25x15 Hex Wrench Hex Wrench Safety Key/Clip SILICON Bottle Truss Hex Screw M8xP1.25x40...
-
Page 8: Assembly Steps
5.Assembly Steps Two persons are required to finish the assembly steps. (Caution!! Please follow exactly the assemly steps below to aviod injury. ) 1. Pull the Control Cable out through with the Guide Thread in the Right Upright (D), then insert the Left and Right Uprights (C, D) into the Main Frame and tighten with Truss Hex Screw(a) according to the right drawing. -
Page 9: Caution
6.Caution Note: The Cylinder contains high pressure gas. Please avoid crash with other objects to avoid danger. Note: If the cylinder is hit, it might be damaged and cause the usage not smooth. The treadmill might fall while folding. This treadmill has the foldable mechanism for storage. Stop all movement (include treadmill stop the belt and take off the power cord) before storage, then fold the main frame as the direction shown in the picture. -
Page 10: Maintenance
7.Maintenance 1. If the belt tends to move off from the center, stop the treadmill. Take the Hex Wrench and adjust the Hex Screw in the Rear End Cap. For example, if the running belt is moving towards the left side, tighten the left Hex Screw about 1/4 turn (clockwise). -
Page 11: Computer Operation Instructions
8.COMPUTER OPERATION INSTRUCTIONS I. Start Display: If the SAFETY KEY is taken off, the matrix screen will display arrow down. If the SAFETY KEY is replaced, the matrix screen will display KGS (mile) for avoirdupois unit and the preset value is 70KG(150LBS), ranging 23~130KG (50~286LBS). - Page 12 Edit Mode: III. 1 Under Start/Ready status, press Mode. Press + — to select Program mode and Manu mode. 2 Program Mode:Press + — to edit Program(P1~P8) ,PROGRAM LED will blink. LCD will display P1~P8 to display. Press + — to edit. Press ENTER to edit TIME. Preset values:30min, Range: 20~99 min, STEP: 1 min。After user finishes editing,press ENTER or START to start.
- Page 13 Program Mode P1 Manu Time:Preset Value 0min;Range 20~99min,step 1 min。 P2 9 hole LEVEL:Setting Value 1,Range 1~10, step1,the distance is based on 3500. P3 hill climb LEVEL:Setting Value 1,Range 1~10,step 1。 Time:Preset Value 30min;Range 20~99min,step 1 min。 P4 hill run LEVEL:Setting Value 1,Range 1~10,step 1。...
- Page 14 *TIME RANGE:20~99 min,PRESET VALUE 30min,stepis1 **The following provides the chart of relationship between age and heart rate of the HRC function: SETTING SETTING SETTING SETTING VALUE VALUE VALUE VALUE Error Signal Display: E1:The treadmill can’t read the speed value. E6:In the range of ADC, incline motor doesn’t run. E7:Incline is too height or too low(exceed the range).
- Page 15 SWITCH SPEED AND INCLINE SPEED AND ELEVATION CHANGES 9 HOLE 10 11 12 13 14 15 16 17 18 19 20 21 22 23 24 25 26 27 28 29 30 INCLINE Level 1 0.0 1.0 1.0 1.0 1.0 1.0 1.0 2.0 1.0 1.0 1.0 1.0 2.0 1.0 1.0 1.0 1.0 2.0 1.0 1.0 1.0 1.0 1.0 1.0 1.0 0.0 English System(MPH) 1.0 1.5 2.0 2.0 2.0 2.0 2.0 2.0 2.0 2.0 2.0 2.0 2.0 2.0 2.0 2.0 2.0 2.0 2.0 2.0 2.0 2.0 2.0 2.0 1.5 1.0 Metric System(KPH) 1.6 2.4 3.2 3.2...
- Page 16 SWITCH SPEED AND INCLINE SPEED AND ELEVATION CHANGES HILL CLIMB 24 25 26 27 28 29 30 INCLINE Level 1 0.0 0.0 0.0 1.0 2.0 2.0 2.0 3.0 3.0 3.0 3.0 3.0 3.0 3.0 2.0 2.0 2.0 2.0 1.0 1.0 1.0 1.0 1.0 1.0 0.0 0.0 English System(MPH) 1.5 2.0 2.5 3.5 2.0 4.0 2.0 4.0 2.5 4.0 2.5 4.0 2.5 4.0 2.5 4.0 2.0 4.0 2.0 4.0 2.0 3.5 3.0 2.5 2.0 1.5 Metric System(KPH) 2.4 3.2 4.0 5.6...
- Page 17 SWITCH SPEED SPEED CHANGES ONLY INTERVAL 27 28 29 30 English System(MPH) 1.5 2.0 2.5 3.5 2.0 3.5 2.0 3.5 2.0 3.5 2.0 3.5 2.0 3.5 2.0 3.5 2.0 3.5 2.0 3.5 2.0 3.5 2.0 3.5 2.0 3.5 3.0 2.5 2.0 1.5 Level 1 Metric System(KPH) 2.4 3.2 4.0 5.6 3.2 5.6 3.2 5.6 3.2 5.6 3.2 5.6 3.2 5.6 3.2 5.6 3.2 5.6 3.2 5.6 3.2 5.6 3.2 5.6 3.2 5.6 4.8 4.0 3.2 2.4 English System(MPH) 1.5 2.0 2.5 4.0 2.5 4.0 2.5 4.0 2.5 4.0 2.5 4.0 2.5 4.0 2.5 4.0 2.5 4.0 2.5 4.0 2.5 4.0 2.5 4.0 2.5 4.0 3.5 2.5 2.0 1.5...
- Page 18 English System(MPH) 2.0 2.5 3.0 4.0 5.0 5.5 6.0 6.5 6.0 6.5 6.0 6.5 6.0 6.5 6.0 6.5 6.0 6.5 6.0 6.5 6.0 6.5 6.0 6.5 6.0 5.0 4.0 3.0 2.5 2.0 Level 6 Metric System(KPH) 3.2 4.0 4.8 6.4 8.0 8.8 9.6 10.4 9.6 10.4 9.6 10.4 9.6 10.4 9.6 10.4 9.6 10.4 9.6 10.4 9.6 10.4 9.6 10.4 9.6 8.0 6.4 4.8 4.0 3.2 English System(MPH) 2.5 3.0 3.5 4.5 5.5 6.0 6.5 7.0 6.5 7.0 6.5 7.0 6.5 7.0 6.5 7.0 6.5 7.0 6.5 7.0 6.5 7.0 6.5 7.0 6.0 5.0 4.5 3.5 3.0 2.5 Level 7 Metric System(KPH) 4.0 4.8 5.6 7.2 8.8 9.6 10.4 11.2 10.4 11.2 10.4 11.2 10.4 11.2 10.4 11.2 10.4 11.2 10.4 11.2 10.4 11.2 10.4 11.2 9.6 8.0 7.2 5.6 4.8 4.0...
Need help?
Do you have a question about the JX335 and is the answer not in the manual?
Questions and answers