
Related Manuals for Extraflame EcoLogica Idro


Summary of Contents for Extraflame EcoLogica Idro
- Page 1 PELLETS STOVES Use and maintenance manual ECOLOGICA IDRO ECOLOGICA I.C. MAXI I.C. MINI BABYFIAMMA PREZIOSA DIVINA BELLA BELLA LUX CONTESSA...
-
Page 2: Important
Congratulations! You are now the owner of an EXTRA FLAME stove ! The pellet stove EXTRA FLAME is an ideal heating solution. It springs from the most advanced technology and is manufactured to the highest standards with an up-to-date design, allowing you to enjoy the fantastic sensation which the heat of a flame can give, in complete safety at all times. -
Page 3: Table Of Contents
Temporary power failure ..................13 Electrical safety....................13 Fume exhaust safety ..................... 13 Safety for pellet overheating ................. 13 Safety plant pressure ( Ecologica Idro) …………………………….....……..…... 13 5.10 Safety water boiling (Ecologica Idro)……....…………………..……………. 13 ASSEMBLY & INSTALLATION INSTRUCTIONS .........….... 14 Assembly...................... -
Page 4: Precautions And Safety
ONLY FOR THE MODEL IDRO: quent proper operation of the product installed. Extraflame S.p.A. shall not be Before installation, we recommend that you responsible in the event of failure to thoroughly wash all the piping in the system to remove any residues which could affect the observe these precautions. -
Page 5: Technical Specifications
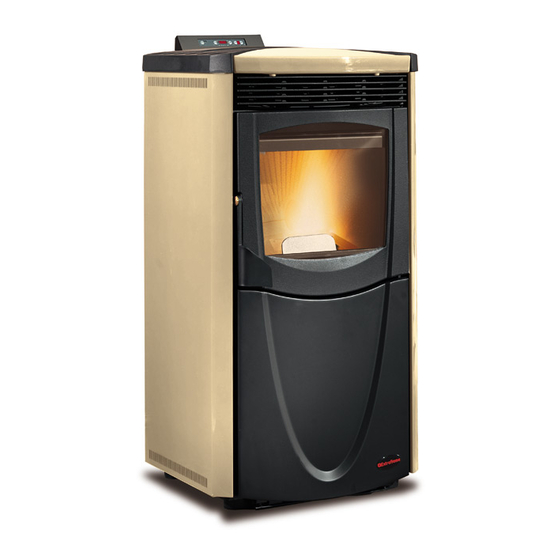
2 TECHNICAL SPECIFICATIONS EcoLogica Idro Ecologica Height 945 mm. 945 mm. Width 670 mm. 670 mm. Depth 670 mm. 670 mm. Weight 156 Kg. 150 Kg. Fume exhaust pipe diameter 80 mm. 80 mm. Max heating volume 220 m Total power... - Page 6 TECHNICAL SPECIFICATIONS I.C. Maxi I.C. Mini Height 606 mm. 550 mm. Width 640 mm. 700 mm. Depth 717 mm. 450 mm. Weight 130 Kg. 110 Kg. Fume exhaust pipe diameter 80 mm. 80 mm. Max heating volume 190 m 150 m Total power 2,5 - 9,4 kW/h 2,5 - 7,5 kW/h...
- Page 7 I.C. Maxi *** Minimum Height The detail “ adjustment pipe” is pre-drilled with 3 holes Ø 9 : 90-100-90. For other adjustments, drill according to needs. ø A: FUMES OUTLET PIPE ø B: AIR INTAKE PIPE...
- Page 8 TECHNICAL SPECIFICATIONS BabyFiamma Preziosa Height 858 mm. 884 mm. Width 440 mm. 477 mm. Depth 470 mm. 446 mm. Weight 100 Kg. 110 Kg. Fume exhaust pipe diameter 80 mm. 80 mm. Max heating volume 100 m 100 m Total power 1,7 - 5,1 kW/h 1,7 - 5,1 kW/h Water power...
- Page 9 TECHNICAL SPECIFICATIONS Divina Bella Divina Plus Height 1150 mm. 1041 mm. 1150 mm. Width 610 mm. 520 mm. 610 mm. Depth 576 mm. 513 mm. 576 mm. Weight 170 Kg. 130 Kg. 170 Kg. Fume exhaust pipe diameter 80 mm. 80 mm.
- Page 10 TECHNICAL SPECIFICATIONS Bella Lux Contessa Height 1041 mm. 1068 mm. Width 520 mm. 522 mm. Depth 513 mm. 500 mm. Weight 130 Kg. 150 Kg. Fume exhaust pipe diameter 80 mm. 80 mm. Max heating volume 150 m 180 m Total power 2,5 - 7,5 kW/h 2,5 - 9,4 kW/h...
-
Page 11: Air Required For Combustion
3 AIR REQUIRED FOR COMBUSTION Combustion always requires air (oxygen). Stoves therefore remove air from the room they are installed in and this must be replaced. Bad combustion can be caused by poor air circulation in the house and this is often the case in modern homes, which have sealed windows and doors. -
Page 12: What Are Pellets
4 WHAT ARE PELLETS ? The pellets are made by applying very high pressure to sawdust, that is pure timber waste (without paint), produced by sawmills, carpentry works and other activities associated with the working and transformation of timber. This type of fuel is completely environmentally friendly as no binders of any kind are used to keep it compact. -
Page 13: Safety Devices
In case of overheating inside the pellet hopper, this safety device stops the functioning of the stove, the resetting is manual and must be done by a qualified technician. ONLY FOR ECOLOGICA IDRO: 5.9 Plant pressure safety A mechanical pressure sensor stops automatically eventually overpressure of the plant. -
Page 14: Assembly And Installation Instructions
6 ASSEMBLY AND INSTALLATION INSTRUCTIONS 6.1 Assembly An authorised dealer should assemble the stove. The assembling of the ceramics in the stoves which have majolica tiles, must be done by a qualified technician. 6.2 Installation Paying attention to the dimes of perforation and taking into consideration a floor pro- tection plate, if fitted, measure and make... -
Page 15: Fume Exhaust
6.3 Fume exhaust conformity with DPR 412 and UNI 7129-2001, the allowed installations are: INTERIOR EXTERIOR WITH VERTICAL EXTERNAL OR INTERNAL FLUE • The Fig. 3 represents the best solution for Inspection discharging the fumes above the roof. intake Proceed as in previous chapter with the fig. -
Page 16: Electrical Connection
If the fume flue is installed in a fixed way , inspections should be provided for internal cleaning purposes (ashes), especially in the horizontal sections. NOTE: ALL SECTIONS OF THE FUME FLUE MUST BE EASY TO INSPECT AND TO REMOVE TO ALLOW THE INTERNAL CLEANING. -
Page 17: Installation I.c. Maxi And Mini
7 INSTALLATION I.C.MAXI and I.C. MINI Comfort insert is supplied with a sliding base in iron which allows it to be installed in a pre-existing fireplace. This sliding base allows you to slide out the insert easily for maintenance and cleaning at the end of the year. - Page 18 Finally, using the provided socket wrench, turn the screw anticlockwise as shown in figure 11. In order to see if the insert is correctly coupled with the base, connect the plug to the power socket: the display should switch on. N.B.
- Page 19 N.B. The hopper support can be fitted on both sides of the insert Comfort Maxi while for the Comfort Mini it can be fitted only on the right side. Adjust the height and angle of the hopper on the basis of the fireplace which has to be built. N.B.
- Page 20 circulation ducts It is necessary to create air intakes on the top of the fireplace for a correct operation. These can be made in the sides of the hood or in the front. It is important that following measurements are respected: Air intakes made in both sides of the fireplace Minimum...
- Page 21 Fig. 17 For a correct and safe operation of the insert Comfort, you have, during the construction of the fireplace, respect the measures (Fig.17) between insert and internal walls of the fireplace, above all the measure of 7,0 cm must be exact (in order to adapt the equipped frames), while the rest of the measures can be, in case, increased or decreased at manufacture’s discretion.
- Page 22 Fig. 18 Air inlet box Covering top for fumes exhaust box As far as the air inlet box is concerned, there is the possibility to connect the air inlet pipe above the sliding base (see pict.18) or under the sliding base (see pict.19) depending on the needs.
-
Page 23: Control Panel
2,5 KW/h till to max 7,5 KW/h Bella-Bella Lux: 2,5 KW/h till to max 9,4 KW/h Contessa: Ecologica Idro: 2,5 KW/h till to max 14,47 KW/h D1 Display for showing the different messages D2 Display for showing the set heating power... -
Page 24: Description Of Control Panel Alarms
Let the stove functioning for 2-3 days at the med. Power (on the display you read 3) for a good settlement of the components. ONLY FOR ECOLOGICA IDRO: We suggest to set the stove on power 5, the stove will drop down automatically to the lowest level, according to the water temperature. -
Page 25: Lighting
10 LIGHTING Check that the hopper is loaded, that the combustion chamber is clean, that the glass door is closed, that the power socket is connected and that the switch on the rear is in position 1. 2. Press button for the first 10 seconds, the display D1 will show the message 1 for... -
Page 26: Divina Plus Operation
Besides the feed rate , also the room temperature can be set directly from the control panel; this topic is dealt with in detail in chapter 12. The stove adjusts itself automatically as far as warm air ventilation is concerned. The timer-thermostat function allows the user to program the automatic starting and stopping of the stove. -
Page 27: Room Thermostat
To light the stove, press both buttons P3 and P5 at the same time for 3 seconds (fig. 21); the stove will automatically enter the starting stage and the display D1 will show all the information described in chapter 10, points 2 and 3. After the lighting phase, follows the starting phase allowing the stove to develop and to settle the flame. -
Page 28: Mechanical Thermostat (Optional)
12.2 Mechanical thermostat (optional) There is the possibility to put a thermostat in the room besides the installed stove: it is enough to connect a mechanical thermostat (like those for boilers) following the instructions of next point (we suggest to place the additional mechanical thermostat at a floor level of 1,50 m.) 12.2.1 Installation of the mechanical thermostat (optional) 1. - Page 29 AMBIENT TEMPERATURE REGULATOR CENTRIFUGAL CONTROL (DIVINA PLUS ONLY) FILLING WORM PANEL SCREW POWER REGULATOR BROWN HEATING ON-OFF TANGENTIAL FAN BUTTON BROWN OPTIONAL EXT. AMBIENT WHITE THERMOSTAT N.A. FILTER MOTOR HEATING WHITE HEAT POWER PROBE SUPPLY FUME EXTRACTION HOT AIR MOTOR MOTOR PELLETS RESISTANCE RESIST.
-
Page 30: User Parameters
AMBIENT TEMPERATURE REGULATOR CONTROL FILLING WORM PANEL SCREW HEATING POWER REGULATOR OPTIONAL : EXTERNAL ROOM THERMOSTAT TANGENTIAL FAN ON-OFF (THE CONNECTION MUST BE SET BUTTON PARALLEL TO THE “THERMIC PROBE” TERMINAL) WHITE FILTER MOTOR HEAT WHITE POWER PROBE SUPPLY FUME EXTRACTION HOT AIR MOTOR MOTOR PELLETS RESIST. -
Page 31: Chronothermostat
13 CHRONOTHERMOSTAT This function enables you to program 2 ignitions and 2 extinctions on all the days of the week. The ignition and extinction times will be included within a daytime, from 0 to 24, and cannot overlap on more days: Ignition 07:00 / Extinction 18:00 Ignition 22:00 / Extinction 05:00 WRONG... -
Page 32: Day/Night" Temperature Function
To stop the chronothermostat, press button 3, and while keeping it pressed, press button 5 on the Set the value on D1 on OFF (you acces OFF after Day7 or before Day1), then press 1 to display. confirm and exit. To see the current time, press button 1 for 1 second, if you press it longer than 1 second, the stove will be switched on/off. -
Page 33: Motor Parameters For Divina Plus Connection
1- LACK OF PELLET • The stove cannot develop a suitable flame, tending to burn very low also at high speeds. • At lowest speed, the stove tends to burn out/burns out, bringing the message “NO PELL” on the display. •... -
Page 34: Alarm Signalling
13.4 ALARM MESSAGES If operating faults occur, the stove provides a control system which informs the user on the display where the fault has occurred. The alarms are summarised in the following table: Message on the display D1 Type of problem Solution Replace the motor or check if there is... -
Page 35: Operation Of The Radiofrequency Remote Control For I.c. Mini
5. Using the push-button 4 or 5, select the wished coding (from 0 to 3) 6. Enable the stove to be coded 7. After the acoustic signal of 2 beeps, press the push-button 1 for 4 seconds until the display shows the text “extraflame”. Here below we provide the main characteristics: The visual interface is supplied as a display by LCD of 24 characters located on 4 lines plus 16 bars. - Page 36 3. THE DISPLAY The display LCD by 32 characters located on 4 lines by 8 characters each and 16 bars. The dis- playing of the display changes according to the status of the stove, or the menu displayed. In standby the display is the following: HOUR CALORIC 11:23...
- Page 37 USER’S MENU In this table we list all various menus available for the user: N° Menu Description Set temperature Menu to set the temperature Set clock Menu to set current hour and day Set chrono Menu to set programs of ignition/switching OFF Day/Night Menu for the day/night temperature function Set pellet...
- Page 38 We indicate here below the meaning of some parameters. Parameter 1: According to the type of application and use made by the user, such a parameter is used to set the current day of the week (weekly operation), or disable the weekly scheduling. Display D1 Meaning If the parameter 1 is set with the current day,...
- Page 39 DAY/NIGHT MENU The day-night temperature function allows to start and switch OFF in automatic way the equipment according to the two temperatures selected. After selecting the “DAY-NIGHT” menu press the menu button 2(2) to scroll the following submenus(see figure 1 pag. 5): Par.
- Page 40 Adjustment table Increase the percentage value of 5 points and test the stove with the new FUEL calibration. If the problem is reduced but not solved, increase of further 5 points. Repeat the operation up to the solution of the problem. In case it is LACK not solved, contact the office of technical assistance.
-
Page 41: Cleaning And Maintenance
15 CLEANING AND MAINTENANCE ATTENTION: All cleaning and maintenance operations must be carried out when the stove is completely cold. herewith described operations are very important to guarantee a correct functioning and a long life of your stove. The cleaning frequency of your stove depends from the quality of the pellett you are using, For this reason we recommend you to make use of tested pellett only. -
Page 42: Cleaning Ecologica,I.c.maxi, Ecologica Idro
4 Clean the heat exchanger chamber every fig. 23 week, if necessary. 5 On the Ecologica IDRO, the mobile firewall can be removed once a month ( see Fig.25). CLEANING PROCEDURE Open the glass door. - Page 43 d) If the interior is dirty, use the equipped tool to scrape the deposited ashes and then remove them by using a vacuum cleaner (Fig.26). Insert the mobile firewall again, fixing it with the two screws/bolts, taking care not to damage the ring.
-
Page 44: Cleaning Bella, Bella Lux, Divina, Contessa,Preziosa, Babyfiamma
15.2 CLEANING BELLA- BELLA LUX-DIVINA CONTESSA – PREZIOSA – BABYFIAMMA The maintenance operations guarantee a correct stove functioning in the time. Failure to respect these operations annuls all the warranties and could affect the safety of the stove. 1. BURN POT CLEANING burn pot must be cleaned every day. - Page 45 CLEANING THE HEAT EXCHANGER Cleaning the heat exchanger allows you to maintain a constant heat yield over time. This type of maintenance must be carried out at least once a day. To do this, simply use the special scrapers located in the upper part of the stove. •...
-
Page 46: Cleaning I.c.mini
15.3 CLEANING I.C. MINI 1. BURN POT CLEANING burn pot must be cleaned every day. To do so, use the special poker(see part.B Fig.38) to scrape off any incrustation which may have formed in the holes. Remove the deposited residues using a vacuum cleaner. Remove the burn pot from its seat and remove the ash deposits using a vacuum cleaner. -
Page 47: Problems, Causes And Solutions
16 PROBLEMS, REASONS, SOLUTIONS ATTENTION: All repairs must be carried out exclusively with the stove cold and without power (plug disconnected) by authorised personnel. PROBLEM REASON SOLUTION The pellets are not fed into 1. The pellet tank is empty 1. Fill the tank with pellet the combustion chamber. - Page 48 PROBLEM REASON SOLUTION The fire burns a weak orange 1. The air for the combustion is 1.a Check that all the holes in the flame. The pellets pile up in the not enough burn pot are open and clean burn pot and the door glass gets them if necessary.
-
Page 49: Guarantee
17 GUARANTEE All the stoves are guaranteed 24 months. warranty will be recognised on condition that the purchaser fills in the attached form completely and mails it within 8 days. The date of purchase must be validated by the possession of a fiscally valid receipt provided by the vendor. -
Page 50: Quality Control
18 QUALITY CONTROL Model Serial nr. Tests carried out: - Automatic lighting - Combustion air motor - Convection air motor - Aestetic aspect Packaging/Technical data label Operator’s signature: Dealer’s stamp Date of purchase: Cut out and send to the manufacturer within 8 days from purchase Surname Name Adress... -
Page 51: Appendix
19 APPENDIX CONTROL PANEL Previous versions REMOTE CONTROL SENSOR LED 1 REMOTE CONTROL SENSOR LED 1... - Page 52 PELLETS STOVES EXTRAFLAME S.p.A. Via dell’Artigianato, 10 36030 MONTECCHIO PRECALCINO Vicenza - ITALY Tel. 0445.864488 (3 linee r.a.) Fax 0445.865243 E-mail: info@extraflame.com internet: http://www.extraflame.com...
Need help?
Do you have a question about the EcoLogica Idro and is the answer not in the manual?
Questions and answers