
Related Manuals for 3Com Megahertz Series


Summary of Contents for 3Com Megahertz Series
- Page 1 3Com Megahertz ® ® 10/100 LAN+ 56K Modem ® Cardbus PC Card User Guide Published March 1999...
- Page 2 95052-8145 3Com Corporation reserves the right to revise this documentation and to make changes in content from time to time without obligation on the part of 3Com Corporation to provide notification of such revision or change. 3Com Corporation provides this documentation without warranty, term, or condition of any kind, either implied or expressed, including, but not limited to, the implied warranties, terms or conditions of merchantability, satisfactory quality, and fitness for a particular purpose.
-
Page 3: Table Of Contents
Inserting the LAN+Modem Card Connecting to a Network LAN Connector LEDs Connecting to a Telephone Line International Adapters Disconnecting the Cables Installing 3Com Software Utilities INDOWS Installing the Network Software Interface Installing the Modem Software Interface Modifying Audio Settings Confirming the Installation... - Page 4 Updating Windows 95 Drivers Updating LAN Drivers Updating Modem Drivers INDOWS Setup Using Softex Software Installing the Network Interface Installing the Modem Interface Setup Using System Soft Software Setup Using Point Enabler Installing the Network Interface Setup With No Networking Installed Setup With Networking Already Installed Installing the Modem Interface Uninstalling the Card...
- Page 5 World Wide Web Site 3Com Support Web Site 3Com Software Library 3Com KnowledgeBase Frequently Asked Questions 3Com FTP site for all FEM656B-Family files 3Com Bulletin Board Service 3Com Facts Automated Fax Service Support from Your Network Supplier Support from 3Com...
-
Page 7: Nstalling And
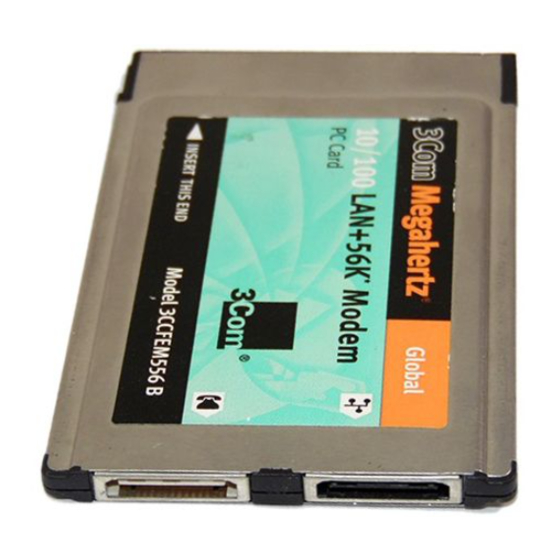
NSTALLING AND ONNECTING THE Identifying the The dual-function LAN+Modem card has a LAN port and modem port. The LAN+Modem Card connectors and card ports are color coded. Take care to connect each cable to the Ports correct card port. NOTE: When attaching connectors to the LAN+Modem card, insert them with the icon side up. -
Page 8: Connecting To A Network
1: I HAPTER NSTALLING AND ONNECTING THE Connecting to a Before connecting the LAN+Modem card to the network, be sure that you have Network the cable appropriate for a network connection at your site. 1 Attach the network connector at the end of the network cable to the LAN port (See “Identifying the LAN+Modem Card Ports”... -
Page 9: Lan Connector Leds
LAN Connector LEDs LAN Connector LEDs The LEDs on the network connector display the status of your network link. Description Steady Blinking Link integrity Good 10BASE-T connection No connection between card and hub. Faulty connection. between PC Card and hub (Off when 100 LNK LED is on.) Alternatively, speed set manually but... -
Page 10: International Adapters
1: I HAPTER NSTALLING AND ONNECTING THE International In some countries, the wall jack requires a telephone line adapter in order for it to Adapters accept the RJ-11 connector. Adapters for the United Kingdom, Germany, and France are included with the LAN+Modem card. International telephone line adapters for other countries are available from TeleAdapt. -
Page 11: Disconnecting The Cables
CAUTION: Do not pull or attempt to disconnect the cable without squeezing the release clips. Otherwise, you may damage the card and make it inoperable. Installing 3Com If you did not install the WorldPort country selection software when you installed Software Utilities this manual, do so now. - Page 12 1: I HAPTER NSTALLING AND ONNECTING THE This installs the English version of Acrobat Reader. You can obtain versions of Acrobat Reader in languages other than English from the Adobe Web site at www.adobe.com.
-
Page 13: Windows 98
3 Select Floppy Drives, insert the Windows 95/98 Installation disk, and click NEXT. 4 After finding the installation files on the floppy disk, the hardware wizard displays the card name, FEM656B - 3Com 10-100 LAN + 56K Modem CardBus PC Card-(Fast Ethernet). Click Next to copy the required files. -
Page 14: Modifying Audio Settings
INDOWS 4 After the hardware wizard finds the installation files on the floppy disk, it displays the card name, FEM656B - 3Com 10-100 LAN + 56K Modem CardBus PC Card-(Modem). Click Next. 5 Click Finish when the system displays “Installation complete.”... -
Page 15: Checking That The Modem Is Present
3 Double-click the System icon. The System Properties box details your system setup. 4 Click the Device Manager tab. A list of devices appears, arranged by type. 5 Double-click Modems. It should display the entry for the FEM656B - 3Com 10-100 LAN + 56K Modem CardBus PC Card-(Modem). - Page 16 INDOWS Type of Network Component Manufacturer Option to Select Microsoft Networking and NetWare Adapter 3Com FEM656B - 3Com 10-100 LAN + 56K Modem CardBus PC Card-(Fast Ethernet) Microsoft Networking (for Windows 95, Client Microsoft Microsoft Client for Windows NT, and Windows 98)
-
Page 17: Uninstalling The Card
You can also remove the WorldPort software and the on-line User Guide separately. 1 Open Control Panel/System/Device Manager. 2 Select FEM656B - 3Com 10-100 LAN + 56K Modem CardBus PC Card-(Fast Ethernet) and click Remove. 3 Select FEM656B - 3Com 10-100 LAN + 56K Modem CardBus PC Card-(Modem) and click Remove. -
Page 18: Troubleshooting
Clients and Protocols installed. System shows a valid COM-Port setting for Use the 3Com Modem Setting application in the control panel to change the the modem, but your application does not COM port assignment. The default is COM5. Change the COM port to a lower recognize it. -
Page 19: Windows 95 Version B (Osr 2)
B (OSR 2) INDOWS VERSION NOTE: If you are reinstalling the card, make sure you have completed the procedures for “Uninstalling the Card” on page 17. Determining Your The LAN+Modem card runs under Windows 95 version B. If you do not know Windows 95 Version which version of Windows 95 is installed on your computer, follow these steps: 1 In the Windows 95 Control Panel, double-click System to display the System... -
Page 20: Installing The Modem Software Interface
Windows 95/98 Installation disk in the floppy drive and click Next. 3 After the system finds the installation files on the floppy disk, it displays the card name, FEM656B - 3Com 10-100 LAN + 56K Modem CardBus PC Card-(Fast Ethernet), and prompts for the location of the driver files. -
Page 21: Confirming The Installation
3 Double-click System. The System Properties box details your system setup. 4 Click the Device Manager tab. A list of devices appears, arranged by type. 5 Double-click Modems. It should display the entry for the FEM656B - 3Com 10-100 LAN + 56K Modem CardBus PC Card-(Modem). - Page 22 Type of Network Component Manufacturer Option to Select Microsoft Networking and NetWare Adapter 3Com FEM656B - 3Com 10-100 LAN + 56K Modem CardBus PC Card-(Fast Ethernet) Microsoft Networking (for Windows 95, Client Microsoft Microsoft Client for...
-
Page 23: Uninstalling The Card
You can also remove the WorldPort software and the on-line User Guide separately. 1 Open Control Panel/System/Device Manager. 2 Select FEM656B - 3Com 10-100 LAN + 56K Modem CardBus PC Card-(Fast Ethernet) and click Remove. 3 Select FEM656B - 3Com 10-100 LAN + 56K Modem CardBus PC Card-(Modem) and click Remove. -
Page 24: Troubleshooting
System shows a valid COM-Port setting for Use the 3Com Modem Setting application in the control panel to change the the modem, but your application does not COM port assignment. The default is COM5. Use a lower number if you are recognize it. -
Page 25: Updating Windows 95 Drivers
1 From the Control Panel, open the System application. 2 Select the Device Manager tab. 3 Double-click Network Adapters. 4 Double-click FEM656B - 3Com 10-100 LAN + 56K Modem CardBus PC Card-(Fast Ethernet). 5 Open the Driver tab and click Update Driver. -
Page 27: Windows Nt
INDOWS NOTE: If you are reinstalling the card, make sure you have completed the procedures for “Uninstalling the Card” on page 25. For Windows NT 4.0 installation, you must have Service Pack 3 or later installed on your computer. After installation, reinstall the Service Pack software to update NT network files and eliminate error messages in the Event Viewer. -
Page 28: Installing The Modem Interface
8 Select Have Disk. Insert the Installation CD in the CD-ROM drive. 9 Specify the CD-ROM drive as the location of the modem files and click OK. 10 Select FEM656B - 3Com 10-100 LAN + 56K Modem CardBus PC Card-(Modem) and click Next. -
Page 29: Setup Using Point Enabler
5 Click Have Disk. Put the LAN+Modem card Windows NT Installation disk in the floppy drive and click OK. 6 When the Select Oem Option window opens, select FEM656B - 3Com 10-100 LAN + 56K Modem CardBus PC Card-(Fast Ethernet) and click OK. -
Page 30: Setup With Networking Already Installed
4 When the Select OEM Option window opens, select FEM656B - 3Com 10-100 LAN + 56K Modem CardBus PC Card-(Fast Ethernet) and click OK. 5 In the 3Com LAN card dialog box, accept the default settings and click Continue. The default settings work in most instances. However, you may specify network link settings, auto polarity, and IRQ and I/O values. -
Page 31: Uninstalling The Card
9 Specify the floppy drive as the location of the modem files and click OK. 10 Select FEM656B - 3Com 10-100 LAN + 56K Modem CardBus PC Card-(Modem) and click Next. 11 Select the COM port created in steps 1 through 4 above and click Next. -
Page 32: Troubleshooting
Troubleshooting Symptom Solution Basic Troubleshooting, applicable for all Inspect all cables and connections. problem situations. Check whether your card if fully inserted into the slot. Verify whether you have the latest BIOS for your system. If not, check the Web site for your computer, download the newest BIOS version and follow the upgrade instructions. - Page 33 Troubleshooting Failure after Suspend/Resume. This usually indicates a power-management problem. Since Windows NT 4.0 does not support power management, we recommend that you disable power management in the BIOS. Make sure you have the latest BIOS for your computer or upgrade your software from Microsoft. Card not functioning.
-
Page 35: Using The Modem
WorldPort Country Select software lets you select a country, then automatically configures the modem for that country. To change the modem configuration for another country: 1 Open the start menu and select Programs/3Com Utilities. 2 In the WorldPort Country Select Software, locate the country you are connecting from. -
Page 36: Software Settings
3Com BBS service, for example, type 18472626000 (“1”, followed by the area code, followed by the number). 6 In the Connect Using menu, be sure that you have selected the FEM656B - 3Com 10-100 LAN + 56K Modem CardBus PC Card-(Modem). If it does not appear, your modem is not installed correctly. -
Page 37: Calls From A Hotel Or Business Pbx
For information on cables and setup for cellular communication, refer to the Customer Support Web site at: http://www.support.3Com.com Setup for Cellular To set up your modem for cellular communications, disconnect the telephone Communications cable from the modem and follow the procedure below. -
Page 38: Additional Modem Features
5: U HAPTER SING THE ODEM 4 Connect the cable to the cellular phone, then use the AT dial command to dial the telephone number you wish to reach, for example, ATDP1234567. Advanced users may wish to view or print the file ATCOM656.TXT for a listing of AT commands, including the MNP-specific commands (listed separately at the end of the file). -
Page 39: At Commands
AT Commands Control Panel. It is available for Windows NT, but you will have to download it from the Microsoft WWW site. Microsoft Fax is configured to use an installed modem and set up as a printer-like device. Once installed, all you need to do to send a fax is select Microsoft Fax from the Printer Setup menu of your text-processing application, then print the file. -
Page 40: Modem Troubleshooting
5: U HAPTER SING THE ODEM Modem Troubleshooting Symptom Solution COM Port Conflict Indicates a conflict between two drivers claiming the same IRQs. Change one of the IRQs. Remember that the modem interface of the LAN+Modem card is a WinModem and uses COM5 or higher. Cannot hear modem or Make sure your computer's speaker is turned on (ATM1). - Page 41 When connecting to a remote access server running V.34 protocol to remote access server. (up to 33.6 Kbps) with devices such as 3Com AccessBuilder, configure your DUN settings to reflect the connection speed. We recommend 19200 or 38400 Kbps. Settings of 57600 or 115200 Kbps will cause a failure.
-
Page 43: Release Notes
ELEASE OTES Making Your Own To make your own installation disks from the Installation CD, format two diskettes Installation Diskettes and label them as follows: Disk 1: Windows 95/98 Installation Disk 2: Windows NT Installation To create a Windows 95/98 Installation diskette: 1 Put the Installation CD in the CD-ROM drive (for example, Drive D). -
Page 45: Contacting 3C Om Support
3Com KnowledgeBase http://knowlegebase.3com.com/ This link takes you to the knowledge base for 3Com products. The link to the LAN and LAN+Modem PC cards contains a list of known problems on specific laptop models and suggests ways to solve the problems. -
Page 46: 3Com Bulletin Board Service
A list of system hardware and software, including revision levels Diagnostic error messages Details about recent configuration changes, if applicable Support from 3Com If you are unable to obtain assistance from the 3Com online technical resources or from your network supplier, 3Com offers technical telephone support services. - Page 47 Support from 3Com If you contact 3Com for assistance, have the following information ready: Product model name, part number, and serial number A description of your computer system hardware and software, including revision levels Relevant diagnostic error messages Relevant details about recent configuration changes...
-
Page 48: Returning Products For Repair
1 800 NET 3Com (1 800 638 3266) Returning Products Before returning a product to 3Com for repair, first obtain a Return Materials for Repair Authorization (RMA) number. Products sent to 3Com without RMA numbers will be returned to the sender unopened, at the sender’s expense. - Page 49 0800 995014 Spain 900 983125 Sweden 020 795482 Switzerland 0800 55 3072 U.K. 0800 966197 Latin America 1 408 326 2927 1 408 326 3355 U.S.A. and 1 800 NET 3Com 1 408 326 7120 Canada (1 800 638 3266)
- Page 50 7: C HAPTER ONTACTING UPPORT...
-
Page 51: Warranty And Regulatory Compliance
January 1, 2000, and Customer notifies 3Com before the later of April 1, 2000, or ninety (90) days after purchase of the product from 3Com or its authorized reseller,... -
Page 52: Regulatory Compliance Information
This booklet is available from the U.S. Government Printing Office, Washington, D.C. 20402. Stock No. 004-000-00345-4. NOTE: In order to maintain compliance with the limits of a Class B digital device, 3Com requires that you use quality interface cables when connecting to this device. Changes or modifications not expressly approved by 3Com could void the user’s authority to operate this equipment. - Page 53 The telephone company may make changes in its facilities, equipment, operations or procedures that could affect the operation of this equipment. If this happens the telephone company will provide advance notice in order for you to make necessary modifications to maintain uninterrupted service. This equipment cannot be used on telephone company provided coin service.
- Page 54 This equipment shall not be set up to make automatic calls to the Telecom 111 Emergency Services. The grant of a Telepermit for a device in no way indicates Telecom acceptance of responsibility for the correct operation of that device under all operating conditions. In particular, higher speeds at which this modem is capable of operating depend on a specific network implementation which is only one of many ways of delivering high quality voice telephony to customers.
- Page 55 2 connecting to a telephone line 3 disconnecting the cables 5 inserting the card 1 redialing 32 installing 3Com documentation 5 regulatory compliance 46 installing 3Com utilities 5 Release Notes 37 removing the card (Windows 98) 11, 17...
- Page 56 NDEX...
Need help?
Do you have a question about the Megahertz Series and is the answer not in the manual?
Questions and answers