Chapters
Table of Contents

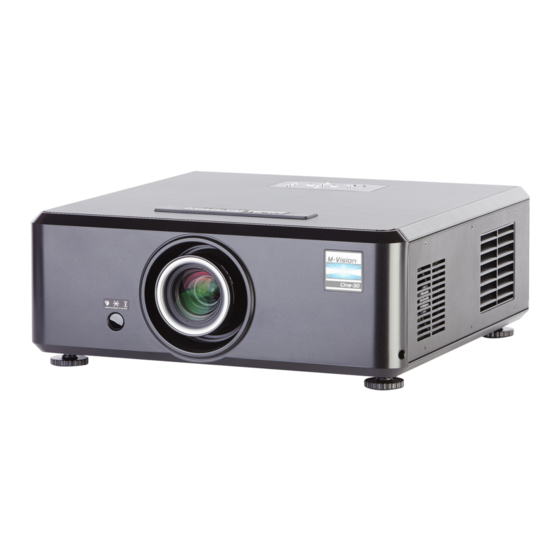
Related Manuals for Digital Projection M-Vision Cine 400 3D series


Summary of Contents for Digital Projection M-Vision Cine 400 3D series
- Page 1 USER GUIDES INSTALLATION AND QUICK START GUIDE CONNECTION GUIDE OPERATING GUIDE REMOTE COMMUNICATIONS GUIDE M-Vision Cine 400 3D series High Brightness Digital Video Projector 16:9 widescreen display Revision C, July 2014 112-853C...
- Page 2 This page is intentionally left blank.
- Page 3 INSTALLATION AND QUICK-START GUIDE M-Vision Cine 400 3D series High Brightness Digital Video Projector 16:9 widescreen display Revision C, July 2014 112-854C...
-
Page 4: Table Of Contents
Installation and Quick-Start Guide Digital Projection M-Vision Cine 400 3D series CONTENTS Important information ............Inst-01 Symbols used in this guide ................Inst-01 Special formatting .................... Inst-01 Product revision ....................Inst-01 What’s in the box? ..............Inst-02 Getting to know the projector ..........Inst-03 Front and rear views .................. -
Page 5: Important Information
If the described state of the equipment is named, the state appears in CAPITALS, e.g. STANDBY mode. Product revision Because we at Digital Projection continually strive to improve our products, we may change specifications and designs, and add new features without prior notice. Revision C, July 2014... -
Page 6: What's In The Box
WHAT’S IN THE BOX? Installation and Quick-Start Guide Digital Projection M-Vision Cine 400 3D series Notes What’s in the box? Make sure your box contains everything listed. If any pieces are missing, please contact your dealer. You should save the original box and packing materials in case you ever need to ship your projector. -
Page 7: Getting To Know The Projector
GETTING TO KNOW THE PROJECTOR Installation and Quick-Start Guide Digital Projection M-Vision Cine 400 3D series Notes Getting to know the projector Front and rear views Remote control The projector uses the standard MVision series infra-red remote Lens shift controls control. -
Page 8: Control Panel And Indicators
GETTING TO KNOW THE PROJECTOR Installation and Quick-Start Guide Digital Projection M-Vision Cine 400 3D series Notes Control panel and indicators Some of the functions on the remote control are duplicated on the projector control panel, as shown here. For full details of how to use the controls and the menu system, see the Operating Guide. -
Page 9: Error Codes (Red Light)
GETTING TO KNOW THE PROJECTOR Installation and Quick-Start Guide Digital Projection M-Vision Cine 400 3D series Notes Error codes (red light) If the projector detects an error, the red Issue indicator will flash as shown in the chart below. For full details of how to use the... -
Page 10: Positioning The Screen And Projector
POSITIONING THE SCREEN AND PROJECTOR Installation and Quick-Start Guide Digital Projection M-Vision Cine 400 3D series Notes Positioning the screen and projector Consider the following: All dimensions on the diagram on ● When installing the screen, ensure that it is in the best position for viewing by your audience. -
Page 11: Operating The Projector
OPERATING THE PROJECTOR Installation and Quick-Start Guide Digital Projection M-Vision Cine 400 3D series Notes Operating the projector Switching the projector on For full details of how to use the controls and the menu system, see Connect the power cable between the mains supply and the projector. The projector begins a self-test. -
Page 12: Adjusting The Lens
Shift Do NOT prise off the badge To reveal the adjustment access holes, slide the Digital Projection badge in the direction shown below, then gently lift it off by hand. using a tool. Use the 5mm Allen wrench to adjust the horizontal and vertical position of the image. -
Page 13: Selecting An Input Signal Or Test Pattern
OPERATING THE PROJECTOR Installation and Quick-Start Guide Digital Projection M-Vision Cine 400 3D series Notes Selecting an input signal or test pattern Input signal For full details of how to use the Connect an image source to the projector. The signal should be automatically detected by the projector, and should be displayed within controls and the menu system, two or three seconds. -
Page 14: Adjusting The Image
OPERATING THE PROJECTOR Installation and Quick-Start Guide Digital Projection M-Vision Cine 400 3D series Notes Adjusting the image Orientation For full details of how to use the controls and the menu system, To change the image orientation, access the System menu and then open the Rear Projection and Ceiling Mode settings. -
Page 15: Revision C, July 2014
CONNECTION GUIDE M-Vision Cine 400 3D series High Brightness Digital Video Projector 16:9 widescreen display Revision C, July 2014 112-855C... - Page 16 Connection Guide Digital Projection M-Vision Cine 400 3D series CONTENTS Important information ............Con-01 Trigger 1 and 2 outputs ..................Con-06 3D Sync ......................Con-06 Symbols used in this guide ................Con-01 Special formatting ....................Con-01 LAN IP configuration utility ...........Con-07 Product revision ....................Con-01 Wiring details ................Con-08 Signal inputs ................Con-02...
-
Page 17: Important Information
If the described state of the equipment is named, the state appears in CAPITALS, e.g. STANDBY mode. Product revision Because we at Digital Projection continually strive to improve our products, we may change specifications and designs, and add new features without prior notice. Revision C, July 2014... -
Page 18: Signal Inputs
SIGNAL INPUTS Connection Guide Digital Projection M-Vision Cine 400 3D series Notes Signal inputs Component 1 and 2 For a complete listing of pin configurations for all signal and RGsB control connectors, see Wiring Details later in this guide. In the Advanced Image menu, set Colorspace to Auto, or if necessary to RGB Video. -
Page 19: Supported Signal Input Modes
SUPPORTED SIGNAL INPUT MODES Connection Guide Digital Projection M-Vision Cine 400 3D series Supported signal input modes 3D Support Frame Rate Signal Resolution (Hz) 640 x 480 59.94 640 x 480 74.99 640 x 480 ... - Page 20 SUPPORTED SIGNAL INPUT MODES Connection Guide Digital Projection M-Vision Cine 400 3D series 3D Support Frame Rate Signal Resolution (Hz) 1440 x 900 1400 x 1050 1400 x 1050 1600 x 1200 ...
- Page 21 SUPPORTED SIGNAL INPUT MODES Connection Guide Digital Projection M-Vision Cine 400 3D series 3D Support Frame Rate Signal Resolution (Hz) 720p 23.98 720p 720p 29.97 720p 720p ...
-
Page 22: Control Connections
CONTROL CONNECTIONS Connection Guide Digital Projection M-Vision Cine 400 3D series Notes Control connections Service port For a complete listing of pin configurations for all signal and The service port is used to download firmware updates issued from time to control connectors, see Wiring time by Digital Projection. -
Page 23: Lan Ip Configuration Utility
LAN IP CONFIGURATION UTILITY Connection Guide Digital Projection M-Vision Cine 400 3D series Notes LAN IP configuration utility The default LAN IP address is LAN IP configuration can be carried out using a web browser: 192.168.0.100. Point your browser at the projector by typing the LAN IP address into the address bar, then press the key. -
Page 24: Wiring Details
WIRING DETAILS Connection Guide Digital Projection M-Vision Cine 400 3D series Notes Wiring details Signal inputs For full details of all input settings, see the Main menu section in the Component 1 Operating Guide. 3 x RCA Phono connector Component 1... -
Page 25: Hdmi Inputs
WIRING DETAILS Connection Guide Digital Projection M-Vision Cine 400 3D series HDMI inputs Notes 19 way type A connector TMDS Data 2+ For full details of all input settings, TMDS Data 2 Shield see the Main menu section in the Pin view of panel connector Operating Guide. -
Page 26: Control Connections
WIRING DETAILS Connection Guide Digital Projection M-Vision Cine 400 3D series Control connections Notes Wired remote control connection Ring Sleeve 3.5mm mini jack Plugging in the remote control cable disables the infrared. Power Only one remote connection Ring Signal should be used at any one time. -
Page 27: Lan Connection
WIRING DETAILS Connection Guide Digital Projection M-Vision Cine 400 3D series Notes LAN connection TCP Port number: 7000 Default IP address: 192.168.0.100 10BaseT Unshielded Twisted Pair cable Top view of cable connector (pin is underneath) 3D sync connection Pin 1... - Page 28 This page is intentionally left blank.
-
Page 29: Operating Guide
OPERATING GUIDE M-Vision Cine 400 3D series High Brightness Digital Video Projector 16:9 widescreen display Revision C, July 2014 112-856C... - Page 30 Operating Guide Digital Projection M-Vision Cine 400 3D series CONTENTS Important information ..............Op-01 Advanced Image menu ..................Op-11 Colorspace ....................Op-11 Symbols used in this guide ................Op-01 Gamma ..................... Op-11 Special formatting ....................Op-01 Color Temperature ..................Op-11 Product revision ....................Op-01 Color Gamut ....................Op-12 Brilliant Color®...
-
Page 31: Important Information
If the described state of the equipment is named, the state appears in CAPITALS, e.g. STANDBY mode. Product revision Because we at Digital Projection continually strive to improve our products, we may change specifications and designs, and add new features without prior notice. Revision C, July 2014... -
Page 32: Gamma
USING THE MENUS Operating Guide Digital Projection M-Vision Cine 400 3D series SOURCE Notes Using the menus POWER Opening the OSD POWER MENU Access the various menus using either the projector control panel or the SOURCE remote control. On either device,... -
Page 33: Inside A Menu
USING THE MENUS Operating Guide Digital Projection M-Vision Cine 400 3D series Notes MENU >> Sub-menu >> Inside a menu Highlighted Item <Value> When you open a menu, the page consists of the following elements: Menu Item <Value> ● Title bar at the top Unavailable Item <Value>... -
Page 34: Editing Projector Settings
USING THE MENUS Operating Guide Digital Projection M-Vision Cine 400 3D series Notes Editing projector settings If the highlighted menu item is a setting with a list of values to choose from, you can change the value in two different ways. -
Page 35: Main
A TOUR OF THE MENUS Operating Guide Digital Projection M-Vision Cine 400 3D series Notes A tour of the menus The projector settings are grouped into six menus as shown in the illustration. MAIN IMAGE ADVANCED IMAGE SYSTEM CONTROL SERVICE Main menu MAIN >>... - Page 36 A TOUR OF THE MENUS Operating Guide Digital Projection M-Vision Cine 400 3D series Main menu continued from previous page Notes Aspect Ratio This setting allows you to switch between 16:9, TheaterScope, 4:3, 4:3 Narrow and Native. Examples The Native image examples...
- Page 37 A TOUR OF THE MENUS Operating Guide Digital Projection M-Vision Cine 400 3D series Main menu continued from previous page Notes MAIN >> Presets >> Presets Recall Preset Preset A The current image settings can be saved a preset, which you can recall...
- Page 38 A TOUR OF THE MENUS Operating Guide Digital Projection M-Vision Cine 400 3D series Main menu continued from previous page Notes 3D Control Use this sub-menu to enable, disable and set up 3D input, as follows: For a list of supported 3D formats, see the Connection Guide.
- Page 39 A TOUR OF THE MENUS Operating Guide Digital Projection M-Vision Cine 400 3D series Main menu continued from previous page Notes MAIN >> Input Select Aspect Ratio <Value> HDMI 1 Presets HDMI 2 This setting controls the input source used by the projector. Choose from...
-
Page 40: Image Menu
A TOUR OF THE MENUS Operating Guide Digital Projection M-Vision Cine 400 3D series Notes IMAGE >> Image menu Brightness Highlight the setting you wish to edit, and then press ENTER SELECT , or Contrast LEFT RIGHT arrow button to open the slider. - Page 41 A TOUR OF THE MENUS Operating Guide Digital Projection M-Vision Cine 400 3D series Notes ADVANCED IMAGE >> Advanced Image menu Colorspace Auto Colorspace Gamma Film (2.2) Color Temperature Native In most cases, the Auto setting determines the correct colorspace to use. If...
- Page 42 A TOUR OF THE MENUS Operating Guide Digital Projection M-Vision Cine 400 3D series Advanced Image menu continued from previous page Notes ADVANCED IMAGE >> Color Gamut Colorspace Auto Gamma Film (2.2) In most cases, the Auto setting will determine the correct color gamut to...
- Page 43 A TOUR OF THE MENUS Operating Guide Digital Projection M-Vision Cine 400 3D series Advanced Image menu continued from previous page Notes ADVANCED IMAGE >> Fine Sync Fine Sync V Position H Position ● V Position and H Position Some of the settings within the Set the sliders as required.
- Page 44 Front and Rear define whether the projector is in front of the screen or behind it. ● Startup Splash Show or hide the Digital Projection logo at startup. ● Altitude High increases the fan speed to compensate for reduced air density at high altitude.
- Page 45 A TOUR OF THE MENUS Operating Guide Digital Projection M-Vision Cine 400 3D series Notes CONTROL >> Control menu Trigger 1 Screen Triggers ● Trigger 2 16:9 Choose from Screen, 16:9, TheaterScope, 4:3, 4:3 Narrow or RS232 Auto-Source to determine what will activate each trigger.
- Page 46 MENU MAP Operating Guide Digital Projection M-Vision Cine 400 3D series Notes Menu map Menu Sub-menus and settings The underlined text represents the factory default value for each MAIN setting. Aspect Ratio 16:9, TheaterScope, 4:3, 4:3 Narrow, Native Presets Recall A, B, C, D, Default...
- Page 47 MENU MAP Operating Guide Digital Projection M-Vision Cine 400 3D series Menu Sub-menus and settings Notes ADVANCED IMAGE The underlined text represents the factory default value for each Colorspace Auto, REC709, REC601, RGB PC, RGB Video setting. Gamma Film (2.2), Video, Punch (2.0), Graphics, CRT (2.5)
- Page 48 MENU MAP Operating Guide Digital Projection M-Vision Cine 400 3D series Menu Sub-menus and settings Notes SYSTEM The underlined text represents the factory default value for each OSD Settings setting. Menu Position Left-Upper, Right-Upper, Left-Bottom, Right-Bottom, Center Menu Transaprency 0%, 25%, 50%, 75%...
-
Page 49: Remote Communications Guide
REMOTE COMMUNICATIONS GUIDE M-Vision Cine 400 3D series High Brightness Digital Video Projector 16:9 widescreen display Revision C, July 2014 112-857C... - Page 50 Remote Communications Guide Digital Projection M-Vision Cine 400 3D series CONTENTS Important information ............Remote-01 Symbols used in this guide ...............Remote-01 Special formatting ..................Remote-01 Product revision ..................Remote-01 Introduction ...............Remote-02 The operation commands ..........Remote-03 Main menu ....................Remote-03 Image menu ....................Remote-04 Advanced Image menu ................Remote-04 System menu ....................Remote-05...
-
Page 51: Important Information
If the described state of the equipment is named, the state appears in CAPITALS, e.g. STANDBY mode. Product revision Because we at Digital Projection continually strive to improve our products, we may change specifications and designs, and add new features without prior notice. Revision C, July 2014... -
Page 52: Introduction
INTRODUCTION Remote Communications Guide Digital Projection M-Vision Cine 400 3D series Notes Introduction The projector can be controlled by using an external control system or a PC via an RS232 or LAN interface, using a terminal-emulation program, such as HyperTerminal. -
Page 53: The Operation Commands
THE OPERATION COMMANDS Remote Communications Guide Digital Projection M-Vision Cine 400 3D series The operation commands Notes <operation> <command> <values> Main menu aspect 0 = 16:9 1 = TheaterScope 2 = 4:3 3 = 4:3 Narrow 4 = Native recall.mem... -
Page 54: Image Menu
THE OPERATION COMMANDS Remote Communications Guide Digital Projection M-Vision Cine 400 3D series Notes <operation> <command> <values> s3d.24p.mode 0 = 96Hz Operations beginning with the 1 = 144Hz s3d. prefix are only available in input 0 = HDMI 1 3D mode. -
Page 55: System Menu
THE OPERATION COMMANDS Remote Communications Guide Digital Projection M-Vision Cine 400 3D series <operation> <command> <values> Notes color.gamut 0 = Auto 1 = REC709 2 = SMPTE C 3 = EBU 4 = Native stands for BrilliantColor®. 0 = Off... - Page 56 THE OPERATION COMMANDS Remote Communications Guide Digital Projection M-Vision Cine 400 3D series <operation> <command> <values> Notes osd.trans 0 = 0% 1 = 25% 2 = 50% 3 = 75% osd.timer 0 = Always On 1 = Display OSD for 10 sec.
-
Page 57: Control Menu
THE OPERATION COMMANDS Remote Communications Guide Digital Projection M-Vision Cine 400 3D series Notes <operation> <command> <values> Control menu trig1 0 = Screen trig1 When set to 0 (Screen), 1 = 16:9 trig2 will be present when 2 = TheaterScope... -
Page 58: Miscellaneous Commands
THE OPERATION COMMANDS Remote Communications Guide Digital Projection M-Vision Cine 400 3D series Notes <operation> <command> <values> total.hours <number> factory.reset (none) (none) pattern 0 = Off 1 = White 2 = Black 3 = Red 4 = Green 5 = Blue...
Need help?
Do you have a question about the M-Vision Cine 400 3D series and is the answer not in the manual?
Questions and answers