Table of Contents
Advertisement
Quick Links
Advertisement
Table of Contents

Related Manuals for Godex BZB-2U


Summary of Contents for Godex BZB-2U
-
Page 1: User Manual
User Manual BZB-2U Rev. A, 06.2011... -
Page 2: Table Of Contents
1-4. Contents of the BZB Package ............... 3 1-5. BZB Printer Parts .................. 3 2. SETTING UP THE BZB-2U PRINTER ........5 2-1. Connecting the Printer to a Power Outlet..........5 2-2. Connecting the Printer to a PC .............. 5 2-3. -
Page 3: About The Bzb Printer
1. About the BZB Printer 1-1. Introduction The BZB-2U label printer r will enable you to automate a lot of tasks currently handwritten saving time and giving a more professional image. It is the easiest way to produce high quality labels for a wide variety of applications, the printer works with direct thermal labels eliminating the need for costly ink, toner and ribbons. -
Page 4: Contents Of The Bzb Package
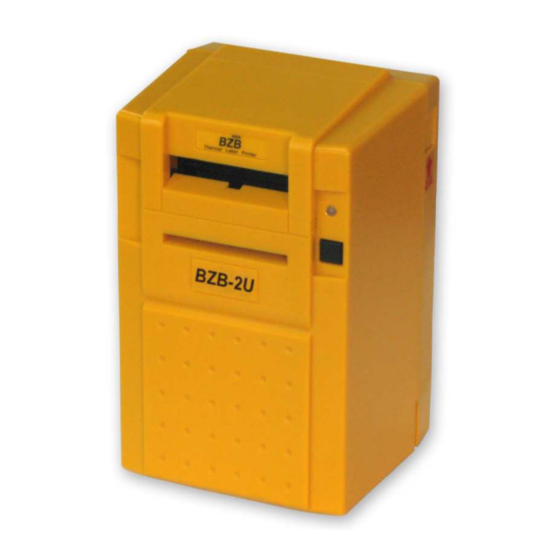
1-4. Contents of the BZB Package Fig. 1.4.1 Please check the contents of the packet as attached. 1-5. BZB Printer Parts Using the following diagram to familiarize yourself with the features and components of the BZB-2U printer (see figure 1.5.1). Fig. 1.5.1 Item Parts Description Front cover Protect the printer head of the unit. - Page 5 Item Parts Description Label guide Label guide Label spindle hole To locate the label roller in position Stands for big roll of label The big label roll holder stands USB port The printer port connector Power jack Connect the power cord to the unit Power switch Turn printer power on/off Print head release level To release label or adjust the label position.
-
Page 6: Setting Up The Bzb-2U Printer
2. Setting up the BZB-2U Printer 2-1. Connecting the Printer to a Power Outlet. Plug the power cord into a power outlet. Plug the AC adapter cable into the power jack at the rear of the BZB printer Turn the BZB printer on by pressing the power switch. -
Page 7: Testing The Bzb Printer
Loading large-size label roll Power on. Press the two lock switches (part 6) and lift up a little to open the rear cover. (See figure 2.3.1) Remove the label roll stands. Vertically place the two stands along the left and right sides of the rear cover. -
Page 8: Maintenance And Adjustments
3. Maintenance and Adjustments 3-1. How to remove the BZB top cover Face the front side of the printer. Place your thumbs on the top cover and the other fingers on the left and right sides of the printer. Gently press down the top cover with your thumbs, and pull it toward you to remove the top cover. -
Page 9: Label Gap Sensor Adjustment For The Bzb Printer
Fig. 3.3.1 3-4. Label gap sensor adjustment for the BZB printer Due to different quality labels available it may be necessary to make an adjustment to the label gap sensor for detecting the label gap Any adjustment must be made in well light room. Remove top cover. -
Page 10: Appendix A. Troubleshooting
Appendix A. Troubleshooting Problems Recommended Solution Power switch already turned on but the Check Power connector. LED does not light. Printing stops and LED goes red. Probably software setting or programming problem. Check to use the correct paper Probably label jam, remove the stuck label Printer is working but nothing is printed Check the label is facing up and the paper you on label. - Page 11 Label printing jumps to next label Check if the label height setting is the same as actual label height. Check the Label Transmit sensor, it may be covered with dust. Printing is not very clear Check the printer darkness setting. If any problems occur that are not described here, please contact your dealer.
-
Page 12: Appendix B. Bzb-2U Technical Specification
Appendix B. BZB-2U Technical Specification Printer Specifications: BZB-2U Model Print Method Direct Thermal Resolution 203 dpi (8 dots/mm) Print Speed Max. 2 ips (50.8 mm/s) Print Width 2.12” (54 mm) Controller 8-bit MCU, 64KB Flash, 32KB SRAM Fixed center alignment GAP label sensor Sensor Type Width: 1”... - Page 13 ℉ -20 to 50 ) ℃ Storage temperature : -4 to 122 ℉ ℃ Operation temperature : 40 to 104 (5 to 40 ) Environment Storage humidity : 10 to 90% non-condensing Operation humidity : 30 to 85% non-condensing * Specifications are subject to change without notice...
-
Page 14: Appendix C. Usb Port Specification
Appendix C. USB Port Specification Connector type : Type B Pin No. Function VBUS...
Need help?
Do you have a question about the BZB-2U and is the answer not in the manual?
Questions and answers