Table of Contents
Advertisement
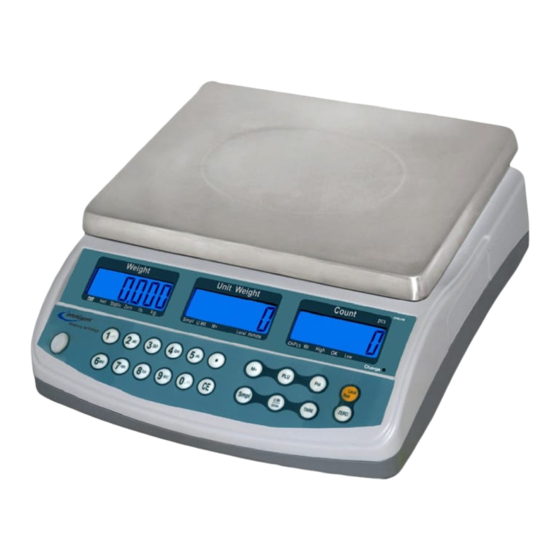
QHD series
Counting Scale
SERVICE MANUAL
©Intelligent Weighing Technology, Inc. 2012. All rights reserved worldwide.
The information contained herein is the property of Intelligent Weighing Technology. and
is supplied without liability for errors or omissions. No part may be reproduced or used
except as authorized by contract or other written permission. The copyright and the
foregoing restriction on reproduction and use extend to all media in which the
information may be embodied.
Advertisement
Table of Contents

Related Manuals for Intelligent Weighing Technology QHD+3


Summary of Contents for Intelligent Weighing Technology QHD+3
-
Page 1: Counting Scale
SERVICE MANUAL ©Intelligent Weighing Technology, Inc. 2012. All rights reserved worldwide. The information contained herein is the property of Intelligent Weighing Technology. and is supplied without liability for errors or omissions. No part may be reproduced or used except as authorized by contract or other written permission. The copyright and the foregoing restriction on reproduction and use extend to all media in which the information may be embodied. -
Page 2: Table Of Contents
CONTENTS 1. PRECAUTIONS…… ………………………………………………………………..4 2. INSTALLATION……...…………..…………………….…………………………..…5 3. N AME AND FUNCTIONS…………….……………………………… …………7 Key board………………………………...........7 D i s p l a y … … … … … … … … … … … … … … … … … … … … … … … … … … … 8 4. - Page 3 11. MAINTENANCE …………………………………………………………………27 Change Parts ………………………………………………………………..27 Replace main board…………………………………………………………2 7 Replace display board……………………………………………………..2 8 Re place load cell…………………………………………………………….2 8 Replace battery………………………………………………………………2 8 Checking Components ……………………………………………………2 9 Checking Load cell …………………………………………………………..2 9 Load cell connections……………………………………………………….2 9 ...
-
Page 4: Precautions
1. PRECAUTIONS Read this manual before operating or servicing this equipment. Follow these instructions carefully. Disconnect this equipment from the power source before cleaning of performing maintenance. Keep the manual for your future reference. Avoid extremes of temperature. Do not place in direct sunlight or near air conditioning vents. -
Page 5: Installation
2. INSTALLATION Unpacking Carefully take the balance out of its package, make it sure its not damaged and all accessories are included. Accessories, 1. Balance 2. Adaptor 3. Stainless steel pan 4. Product manual Keep the packaging material for your future use. SETTINGS Local Scale: ... - Page 6 The scale will be shown the model number in the “Weight” display and will be start self test. Remote Scale: The QHD+ Series can be connected to any size of load cell type weighing base through the Remote scale port on the left side of the scale case. Ensure you have the correct base for the scale as each is matched for calibration.
-
Page 7: Name And Functions
Setting a high resolution without providing a good input to the remote scale ADC will not give better accuracy and may make the scale difficult to meet performance specification. For best performance ensure a minimum of 0.1uV/d. 3. NAME AND FUNCTIONS Key Board Keys Press this key to... -
Page 8: Display
Display The arrow “▼” above the symbols Weight Display Low Battery Net Weight Display Stable Stable Display Zero Zeroing Display Lb / kg Current Weighing Mode Unit Weight Display Smpl No of samples is very low U.Wt Unit weight is below the minimum weight Data entered into the memory Local / Remote Active Scale in use... -
Page 9: Operation
4. OPERATION Initial Start-up Warm-up time of 15 minutes stabilizes the measured values after switching on. 1. Power ON/OFF Power switch is located below the right side of the scale. Switch on the scale by pressing on/off. The display is switched on and the self test is started. If you want to switch off press backward the key. -
Page 10: Accumulation
known. Ensure display is in zero. Enter the known tare weight by using numeric keys. Press to enter, weight will be stored as tare weight and displayed with minus sign and net indicator. Place the container on the platform, net weight will be displayed. The tare will be rounded up according to the readability of the balance. -
Page 11: Automatic Accumulation
Press during the display, delete all saved accumulation data. 0 00 - 0 - Automatic Accumulation Weighing values automatically accumulate total, when the goods is unloaded and with out key pressing. Set the parameter F1 off – print – au on ... -
Page 12: Enter A Known Weight
Enter the key to confirm. The scale determines the average parts weight. 1 .5 00 0 .15 As more items are added to the scale, the weight and the count will increase. If the scale is not stable, the calculation will not be completed. ... -
Page 13: Plu (Product Look
Use numeric key to enter desired and if necessary press to clear. Press key, the active low count limit will be shown lo cmt Use numeric key to enter desired and if necessary press to clear. Press key to return weighing mode. ... -
Page 14: Entering Description Manually
By pressing Continue to enter text until description is complete (max: 12 characters) P lu 27 abcdefg hijklmn Use key, number selection to left. Use key, number selection to right. Press and hold two seconds key, space to right. ... -
Page 15: Recalling Plu
Recalling PLU To recall the PLU values the user should first select either local or remote scale the tare value stored will be specific to the scale selected. Press display will be shown P lu Press numeric key 2 and 7 P lu ... -
Page 16: Parameters
5. PARAMETERS Enter into the Parameter Turn on the scale, press during that start up. Display will be shown F1 off Select the Menu Block Press key, it can choose menu block one by one. Enter the Selected Menu ... -
Page 17: Parameter Settings
Parameter Setting Menu Sub Menu Description Beep Beep off Beeper is turned off Beep On in Beeper is turned on, will be sounded with in the check weighing limits Fi off Beep On out Beeper will be sounded above the check weighing limits Lite Backlight will be turn on... -
Page 18: Rs-232 Out Put
6. RS- 232 OUT PUT The QHD Series of scales can be ordered with an option RS-232 output. Specifications: RS-232 output of weighing data ASCII code 4800 Baud 8 data bits No Parity Connector: 9 pin socket Pin 2 Output Pin 3 Input Pin 5 Signal Ground Sample of out put... - Page 19 The scale can be controlled with following commands. Basic Commands: PLUxx Select PLU from scale memory Tare current weight value T123.456 Numeric tare value Zero Print Store and print current results Recall memory values to scale display Clear memory U123.456 Store unit weight of 123.456 kg / lb S123 Enter sample size of parts 123 .
- Page 20 Send PLU text data to be stored with current TARE and U/W values. ie. “SPLU01,Parts” <CR> - 20 -...
-
Page 21: Calibration
7. CALIBRATION Turn on the scale and press during the self test. Pi n Use the numeric key to enter password Default password 0000 Pi n - - - - Press to confirm Display will be shown tech Local Select Local or Remote scale by pressing... -
Page 22: Technical Paameter
8. TECHNICAL PARAMETER Enter into the parameter by pressing F1 off during the self test tech Press until tech is displayed Pi n Press to confirm, display will be shown Enter the password. Default password is 0000 Pi n - - - - and press to confirm Tech... - Page 23 Technical Parameter Sub Menu Description Internal counts Capacity ( For Remote Scale Only ) desc Set remote scale decimal point 0.00 0.000 001000 Set remote scale capacity by using numeric keys I nc Set remote scale division Di v I nc Set division I nc I nc...
-
Page 24: Error Display
9. ERROR DISPLAY Error Message Description Solution ----- Maximum load exceeded Unload or reduce weight Incorrect date Enter the date by using format Err 1 “yy;mm:dd” Err 2 Incorrect time Enter the time by using format “hh:mm:ss” Err 4 Zero setting error Zero setting range exceeded due to switching on.(4%max) Make sure platform empty. -
Page 25: Trouble Shooting
10. TROUBLE SHOOTING No Display: Mains power is turned off or power supply not plugged proper. Power supply faulty. Internal Battery is not charged. Check On/OFF switch is turned on and faulty or not. Check the PCB power connecters and cable. Display is Blank after the self test / Err stuck: Unstable weight. - Page 26 Check battery and connect to charging. Check the load weight is seated properly. Check the load cell connections and connecters. Incorrect value: Calibration error. Calibrate again with exact calibration mass weights. Check the weight sample is lying proper and avoids touching the cover or surface.
-
Page 27: Maintenance
11. MAINTENANCE Disconnect the power before cleaning. Use a cloth with mild suds and light cleaning agents. Make sure that fluid is not able to get into the device. Use a clean and soft cloth for remove. This devise does not require any routine maintenance. It may be necessary to perform periodic checks of the calibration of the scale due to mechanical reasons. -
Page 28: Replace Display Board
2. Replace display board Remove the top cover Remove the seven screws from the display board and clean the glue. Disconnect the key board connecter and main PCB connecter from the display board. Remove the display board. ... -
Page 29: Checking Components
Take it out the battery from in side the housing. Remove the connecters from the battery terminals. Change the new battery. Connect the connecters to the battery terminals. Battery, place it proper to inside the housing. ... -
Page 30: Checking Voltages
Shield Points Resistance Red (+E) to Black (-E) 406 ohms ± 6 ohms Green (+S) to White (-S) 350 ohms ± 3 ohms If proper excitation voltage is reaching the load cell, check the output signal. If load cell has an unusual signal, replace that load cell. Checking Voltages ... -
Page 31: 2 . Circuit Diagram
12. CIRCUIT DIAGRAM - 31 -... - Page 32 - 32 -...
-
Page 33: 3 . Drawing
13. DRAWING - 33 -... -
Page 34: Parts List
Parts List No Parts Name Qty Material Spec 230mmx300mm 230mmx300mm Battery cover Battery Lead Acid 6V/4Ah Foam Rear Overlay Top Cover Name Plate Internal Allen Screw M6x16, 8.8 Washer (M6) 65Mn 200-300HV Spring Washer(M6) HRC42-50 Load cell upper bracket Aluminum Load cell Aluminum Alloy Star (+) Screw... -
Page 35: Specifications
14. SPECIFICATIONS DIMENSION Specification MODEL QHD+ 3 QHD+ 6 QHD+ 15 QHD+ 30 Maximum Capacity 3000 g 6000 g 15 kg 30 kg Readability 0.05 g 0.1 g 0.2 g 0.5 g Tare Range -3 kg -6 kg -10 kg -30 kg Repeatability(Std Dev) 0.05 g... -
Page 36: Specification For Remote Scale
Specification for Remote Scale Excitation voltage 5 VDC Signal range 0-20 mV(allows 3 mV/V LC with 5mv zero offset) Zero range 0-5 mV Sensitivity 0.02 µV/internal ADC count or better Internal ADC counts 500,000 maximum at 10 mV input Load 87 ohm minimum, 4 X 350 ohm load cells Connection 4 wire connection to load cells plus shield... - Page 37 Intelligent Weighing Technology has more than 50 years experience in the weighing industry, both in the USA and worldwide. With contacts in over 50 countries including the USA, we provide you with the weighing equipment you need. When you invest in weighing equipment from Intelligent Weighing Technology, you’re really buying peace of mind.
Need help?
Do you have a question about the QHD+3 and is the answer not in the manual?
Questions and answers