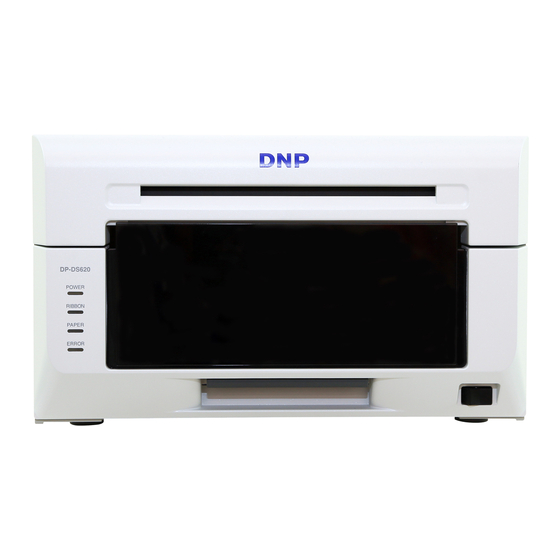
DNP DP-DS620 User Manual
Digital photo printer
Hide thumbs
Also See for DP-DS620:
- Driver users manual (40 pages) ,
- User manual (26 pages) ,
- Instruction manual (44 pages)
Table of Contents
Advertisement
Advertisement
Table of Contents

Related Manuals for DNP DP-DS620


Summary of Contents for DNP DP-DS620
- Page 1 Printer Driver User's Manual November 20, 2014 Ver. 1.0.0.0...
-
Page 2: Safety Precautions
User’s manual section related to safety, including usage and safety precautions, was created. ● Modifications For product safety, it is prohibited to modify the DP-DS620/DP-DS620 (A) printer, DP-DS620/DP-DS620 (A) printer driver, and CD contents. ● Copyright The copyrights, trademark rights, and other intellectual property rights related to documents and programs included with this product are the property of Dai Nippon Printing Co., Ltd. -
Page 3: Table Of Contents
Table of contents _________ Chapter 1 Installation __________________________________ 1 1.1 Prepare the printer and computer ______________________________________________________________ 1 1.2 Found New Hardware Wizard _________________________________________________________________ 1 1.3 Install using “Add a Printer” ___________________________________________________________________ 5 Chapter 2 Properties _________________________________ 10 2.1 Open the printer properties __________________________________________________________________ 10 2.2 Print settings functions ______________________________________________________________________ 11 2.2.1 Layout _______________________________________________________________________________ 11 2.2.2 Advanced options ______________________________________________________________________ 12... -
Page 4: Chapter 1 Installation
[DP-DS620/DP-DS620 (A) Printer Driver] User’s Manual (For Windows XP) Switch on the power of the DP-DS620 printer, and then use a USB cable to connect the printer and computer. *For the connection, see the user’s manual of the DP-DS620. If the Found New Hardware Wizard appears after connection, carry out the installation by following the procedure of “1.2 Found New Hardware Wizard”. - Page 5 [DP-DS620/DP-DS620 (A) Printer Driver] User’s Manual (For Windows XP) Select "Search for the best driver in these locations", and then make sure that "Include this location in the search:" check box is selected. Click "Browse", select the installation location, and then click "Next".
- Page 6 [DP-DS620/DP-DS620 (A) Printer Driver] User’s Manual (For Windows XP) The following screen appears when you install software. Click "Continue Anyway" to continue with the installation. Figure 1.4 Installing hardware If the Search removable media (floppy, CD-ROM...) check box shown in Figure 1.2 is selected, the following message may appear.
- Page 7 Click Finish to close the printer wizard. Figure 1.7 Completing the Found New Hardware Wizard Click "Start", and then click "Printers and Faxes", and then make sure that “DP-DS620” is present. Figure 1.8 Printers and Faxes After the installation of the printer driver is complete, always restart the computer.
-
Page 8: Install Using "Add A Printer
[DP-DS620/DP-DS620 (A) Printer Driver] User’s Manual (For Windows XP) “ ” “ ” Click "Start", and then click "Printers and Faxes". (Depending on the computer you are using, "Printers and Faxes" may not appear. If it does not appear, click the following items in order: Start, "Control Panel", "Printers and Other Hardware", and "Printers and Faxes". - Page 9 [DP-DS620/DP-DS620 (A) Printer Driver] User’s Manual (For Windows XP) The Local or Network Printer screen appears. Select "Local printer attached to this computer", clear "Automatically detect and install my Plug and Play printer" check box, and then click "Next". Figure 1.12 Local or Network Printer The Select a printer port screen appears.
- Page 10 [DP-DS620/DP-DS620 (A) Printer Driver] User’s Manual (For Windows XP) The Install Printer Software screen appears. Click "Have Disk...". Figure 1.14 Install Printer Software The Install From Disk screen appears. Click "Browse", and then select the installation location. I:¥DP-DS620_Driver¥XP Figure 1.15 Install From Disk Make sure that “DP-DS620”...
- Page 11 [DP-DS620/DP-DS620 (A) Printer Driver] User’s Manual (For Windows XP) The Name Your Printer screen appears. Configure the printer name. Furthermore, if the Do you want to use this printer as the default printer? screen appears, and if you want to set this printer as the default printer, select Yes, and then click "Next".
- Page 12 [DP-DS620/DP-DS620 (A) Printer Driver] User’s Manual (For Windows XP) The Completing the Add Printer Wizard screen appears. Click Finish. Figure 1.19 Completing the Add Printer Wizard The following message appears when installing software. Click "Continue Anyway" to continue with the installation.
-
Page 13: Chapter 2 Properties
[DP-DS620/DP-DS620 (A) Printer Driver] User’s Manual (For Windows XP) You can configure various printer settings from the Properties of the DP-DS620 driver. Make sure you understand the contents well before changing settings. Depending on the application you are using, you must perform this operation from the print settings of the application. -
Page 14: Print Settings Functions
[DP-DS620/DP-DS620 (A) Printer Driver] User’s Manual (For Windows XP) If you select the basic settings from the Properties screen, you can change various print settings. 2.2.1 Layout Figure 2.2.1 Layout tab Orientation Set the print orientation to "Portrait" or "Landscape". -
Page 15: Advanced Options
[DP-DS620/DP-DS620 (A) Printer Driver] User’s Manual (For Windows XP) 2.2.2 Advanced options If you select "Advanced..." on the Layout tab, you can configure various advanced options. Figure 2.2.2.2 Advanced options tab Figure 2.2.2.1 Advanced settings Paper Size Specify the paper size. Match the paper size with the size of the media set in the printer. - Page 16 [DP-DS620/DP-DS620 (A) Printer Driver] User’s Manual (For Windows XP) Advanced Printing Features Always set Enable. Do not use other settings. Border Synchronized with Border in the Option. Overcoat Finish Set the overcoat finish method for the surface of printed items from the following two types.
- Page 17 [DP-DS620/DP-DS620 (A) Printer Driver] User’s Manual (For Windows XP) <Multiple layout> When 5 x 7 or 6 x 8 media is used, you can use a two-picture layout. You can enable multiple layout settings by setting the paper size of the printer driver. The following section shows the image sizes.
- Page 18 5 x 7 size media, printing is similarly optimized to reduce consumption of the ribbon. The above operation applies only to the DP-DS620. When (6x4)xN is selected with the DP-DS620 (A), printing is performed the same as for (6x4)x2 without rewinding the ribbon. The same applies for (5x3.5)x2 even if (5x3.5)xN is selected.
- Page 19 [DP-DS620/DP-DS620 (A) Printer Driver] User’s Manual (For Windows XP) <Application usage example> Step 4. Set the paper size to the setting of the This usage example uses Windows Explorer. multi-page layout. Step 1. In Windows Explorer, select two or more pictures.
-
Page 20: Paper/Quality
[DP-DS620/DP-DS620 (A) Printer Driver] User’s Manual (For Windows XP) 2.2.3 Paper/Quality Figure 2.2.3 Paper/Quality tab Color Set Color. Do not use Black & White. 2.2.4 Option Figure 2.2.4.1 Option tab Figure 2.2.4.2 Sharpness setting Border Specify a border for printing. (Select the check box for a border.) Synchronized with Border Enable/Disable in the Advanced settings. - Page 21 [DP-DS620/DP-DS620 (A) Printer Driver] User’s Manual (For Windows XP) Sharpness Process sharpness using one of the 11 stages (Figure 2.2.4.2). If the setting is “0 (Default)”, sharpness is not processed. Moving to the minus (-) side blurs the image and moving to the plus (+) side sharpens the image.
-
Page 22: Color Adjustment
[DP-DS620/DP-DS620 (A) Printer Driver] User’s Manual (For Windows XP) 2.2.5 Color Adjustment If the Handheld by Driver Check box is selected in the 2.2.4 Option, the adjustment values of the Color Adjustment tab are applied to the image. Figure 2.2.5 Color Adjustment tab The following section shows the setting ranges on the Color Adjustment tab. -
Page 23: Printer Information
[DP-DS620/DP-DS620 (A) Printer Driver] User’s Manual (For Windows XP) 2.2.6 Printer Information View the printer information. Figure 2.2.6.2 Display when incorrect media is loaded Figure 2.2.6.1 Printer Info tab The following section shows the information displayed in the Printer Info tab. - Page 24 [DP-DS620/DP-DS620 (A) Printer Driver] User’s Manual (For Windows XP) Display item Display details Display icon Display characters Status/Response (Color) Offline The printer cannot be recognized. Connect the printer and computer, and then turn on the power. (Gray) Cooling head The head is being cooled.
-
Page 25: Default Values For Settings
[DP-DS620/DP-DS620 (A) Printer Driver] User’s Manual (For Windows XP) The following section shows the default values of the settings (at installation). If the settings have been changed, and the printer driver no longer operates normally, return to the default values shown below. -
Page 26: Color Management
[DP-DS620/DP-DS620 (A) Printer Driver] User’s Manual (For Windows XP) Use Color management to specify the color profile. The installer associates "DS620-R0" by default. Step 1. From the Printer Properties, select the Color management tab. File that the installer associates Figure 2.4 Color management tab... -
Page 27: Print Area
[DP-DS620/DP-DS620 (A) Printer Driver] User’s Manual (For Windows XP) The following section shows the image sizes and numbers of dots generated by the paper size setting of the driver. Image size Number of image dots (width x height) (width x height) -
Page 28: Orientation
[DP-DS620/DP-DS620 (A) Printer Driver] User’s Manual (For Windows XP) The following chart shows the relationship of images generated by an application and printed items (output direction) according to the orientation setting. Generated images are not the original image rotated by the application but are zoomed to fit within the sizes is shown in “2.5 Print Area". -
Page 29: Chapter 3 Update The Driver
Double click 2) From the Printers and Faxes screen, select the DP-DS620 printer. Click File, and then click Delete. When asked if you want to delete the printer “DP-DS 620”, select Yes to delete the printer. - Page 30 3) After the DP-DS620 printer has been deleted, similarly select File, and then Server Properties. The Print Server Properties dialog box appears. Select the Driver tab. If you select the DP-DS620 driver and then select "Remove", a confirmation screen appears. If you click "Yes", the driver is deleted.
- Page 31 [DP-DS620/DP-DS620 (A) Printer Driver] User’s Manual (For Windows XP) 2. Install an upgrade for the printer driver After deleting the printer and the printer driver, install the new printer driver. For the installation procedure, see “Chapter 1 Installation“. If the following figure appears during installation, check the Version section, select the most recent version, and then click Next.
-
Page 32: Chapter 4 Delete The Driver
[DP-DS620/DP-DS620 (A) Printer Driver] User’s Manual (For Windows XP) For the procedure to delete the printer driver, see Chapter 3, “1. Delete the driver”. Dai Nippon Printing Co., Ltd. - Page 33 [DP-DS620/DP-DS620 (A) Printer Driver] User’s Manual (For Windows XP) Dai Nippon Printing Co., Ltd.
Need help?
Do you have a question about the DP-DS620 and is the answer not in the manual?
Questions and answers