Table of Contents
Advertisement
Quick Links
Advertisement
Table of Contents

Related Manuals for DNP DP-ID600


Summary of Contents for DNP DP-ID600
- Page 2 ● Safety precautions Note that the contents of directions for use and safety precautions correspond to the safety standards as of the time this manual has been created. ● Remodeling For safety, do not remodel this product after purchase. ● Copyrights Copyrights, trademarks or any other intellectual property rights whatsoever that pertain to documents, programs or other items provided with this product, are ascribed to Dai Nippon...
- Page 3 English WARNING To reduce the risk of fire or electric shock, do not expose this apparatus to rain or moisture. To avoid electrical shock, do not open the cabinet. Refer servicing to qualified personnel only. This apparatus must be earthed. For pluggable equipment, the socket-outlet be installed near the equipment and shall be easily accessible.
- Page 4 For kundene i Norge Dette utstyret kan kobles til et IT-strømfordelingssystem.
- Page 5 dansk Hermed erklærer [Dai Nippon Printing Co., Ltd.], at radioudstyrstypen ‘[DS-RX1]’ er I overensstemmelse med direktiv 2014/53/EU. EU-overensstemmelseserklæringens fulde tekst kan findes på følgende internetadresse: http://www.dnpphoto.eu/en/support- and-downloads/declaration-conformity Nederlands Hierbij verklaar ik, [Dai Nippon Printing Co., Ltd.], dat het type radioapparatuur ‘[DS-RX1]’ conform is met Richtlijn 2014/53/EU.
-
Page 6: Introduction
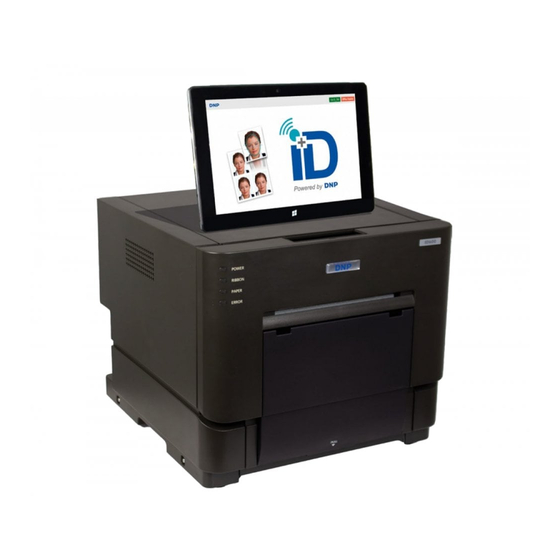
Introduction Thank you for purchasing this device. This document explains the handling and operation required to use this printer. Please read this document well before use. Be sure to read “For Safe Operation” (Pg 2-4), and operate the printer correctly. For Safe Operation ・... - Page 7 WARNING ・ Use only with the designated voltage and frequency. Improper connection could cause electric shock or fire. ・ Avoid overstressing outlets and using extension cords. The outlet could overheat and cause a fire. ・ Do not damage, destroy, bundle, or alter the power cord. Also, placing heavy objects on, pulling on, or bending the cord excessively can damage it, and could cause a fire.
- Page 8 CAUTION ・ Do not set the printer up in dusty or overly humid places. This could cause fire or electric shock, or damage the printer. ・ Do not set the printer up on an unstable surface. It could fall and cause injury to the user or others. ・...
-
Page 9: Cautions For Set-Up
Cautions for Set-up Prior to operation, read “For Safe Operation” carefully and observe the rules therein. ・ ・ Use care when moving the printer. Never try carrying the printer alone. Dropping it could cause injury or damage to other property. ・... -
Page 10: Table Of Contents
Table of Contents Introduction ........................4 For Safe Operation ......................4 Cautions for Set-up ......................7 Table of Contents ......................8 Setting Up the Printer Checking the Contents ....................9 Names of Components ......................10 Connecting ........................11 Paper, Ribbon ........................ 12 Setting the Media ...................... -
Page 11: Setting Up The Printer
Setting Up the Printer Checking the Contents Please check that the printer and all printer accessories are included in the package. Power Cord Paper Tray (Only for PC sizes) Scrap Box Printer Unit For Safe Operation Paper Holder (*) Start-up Guide (*) When using, remove the Protective pad Please keep the package box and packing material for transportation. -
Page 12: Names Of Components
Setting Up the Printer Names of Components [Front of Unit] Open Lever Print Feed Out Thermal print head Scrap Box Platen Roller [Back of Unit] USB port Ventilation [Side of Unit] CAUTION Power Switch Power Plug Socket Ventilation ・ Please be careful not to hurt yourself or damage anything on the edges of the printer. -
Page 13: Connecting
Setting Up the Printer Connecting 1. Make sure that both the printer and tablet power switches are set to the OFF position. 2. Plug the cord connector end into the printer Power Plug Socket. 3. Plug the cord into the wall outlet. 4. -
Page 14: Paper, Ribbon
Setting Up the Printer Paper, Ribbon Type PC (6x4) for ID Paper Width: 152mm Ribbon Width: 159mm CAUTION ・ Set the paper and ribbon without putting them directly on the work surface. Any dust or dirt could get inside the printer and adversely affect the print quality. ・... -
Page 15: Setting The Media
Setting Up the Printer Setting the Media 1. Release the Open Lever, and open the front cover. Open Lever 2. Set the paper to the paper holder. When setting it, make sure there are no gaps between the paper and the holder. Make sure the paper is not sticking out. - Page 16 Setting Up the Printer 4. Remove a paper fixed tape, and Insert the paper. Insert position 1 5. Fit the paper to the proper position for each size. PC size correspond to the line of PC. 6. Insert the paper under the black paper guide until the buzzer beeps (approx. to the dotted line). Make sure to insert the paper straight.
- Page 17 Setting Up the Printer 7. Set the take-up side core of the ribbon to the printer. Insert the protrusion of the core left side in the hole on the printer, then set the right side to the holder of the same color (yellow). 8.
- Page 18 Setting Up the Printer *In order to facilitate media color adjustment, media type recognition, and print quantity management, an IC chip is built into the ink ribbon. Media without an IC chip, which has not been evaluated and cleared, may not function properly. (If correct data cannot be read from the IC chip, an alarm will sound. In this case, in order to protect the printer, it will lower the concentration for printing.) *Please change the media as a set, because the IC chip for each ribbon has unique information.
-
Page 19: Setting The Scrap Box
Setting Up the Printer Setting the Scrap Box CAUTION ・ When the scrap box is removed, do not insert your fingers in the cutter at the top. They could be cut or severed. ・ As prints are cut, the scrap box fills with scrap paper. Be sure to empty it when you change the paper and ribbon. -
Page 20: Trouble-Shooting
Trouble-shooting Error Displays The flashing LED indicates the printer status LED display Status Solution Power Ribbon Paper Error ● Paper End Put in a new roll of paper ● Ribbon End Put in a new roll of ribbon ● Door is Open Set the paper properly and close the front cover (No paper) ●... -
Page 21: Solving Media Errors
Trouble-shooting Solving Media Errors 1. Release the Open Lever, and open the front cover. 2. Remove the ribbon. a. If the paper is jammed: 1. Pull out any paper remaining in the printer, and cut off any wrinkled or partially printed areas evenly with scissors. - Page 22 Trouble-shooting b. If the ribbon is cut: Remove any ribbon remaining in the printer. 2. Remove any incomplete prints. If the next image is printed over the previous image, the ribbon may stick, and it may cause the paper to jam. Reattach the ribbon with cellophane (or similar) tape.
- Page 23 Trouble-shooting c. If the printer is stopped in the middle of cutting: 1. Turn the power back ON. Jammed paper is cleared, and the cutter blade returned to its ready position. If the jammed paper cannot be freed, please contact a service representative. 2.
-
Page 24: Cleaning
Cleaning Platen Roller If there is an indent on the pictures at a regular interval, or if the back of the picture (white side) is dirty, clean the platen roller. There may be dust, grime, adhesives, etc. from the ribbon or paper on the platen roller. 1. -
Page 25: Repacking
Repacking Transporting the printer requires the reuse of the original packing materials. The printer must be packed in the same way it was at the time of purchase. If the original packaging materials are not used and the printer is not packed correctly, the printer may be broken during transport. -
Page 26: Specifications
Specifications Item Specific Power 100 to 240V AC, 50/60 Hz Input current 2.9 to 1.2 A 5 to 35 ℃ Operating temperature Operating humidity 35 to 80 % (no condensation) Approx. 322 × 281 × 351 mm (W×H×D) External Dimensions (excluding the maximum projecting parts) Mass Approx. - Page 27 Information on servicing the printer For information on use and repair service of the units, please contact your sales agent.
Need help?
Do you have a question about the DP-ID600 and is the answer not in the manual?
Questions and answers