
Subscribe to Our Youtube Channel
Related Manuals for DNP QW410-SET


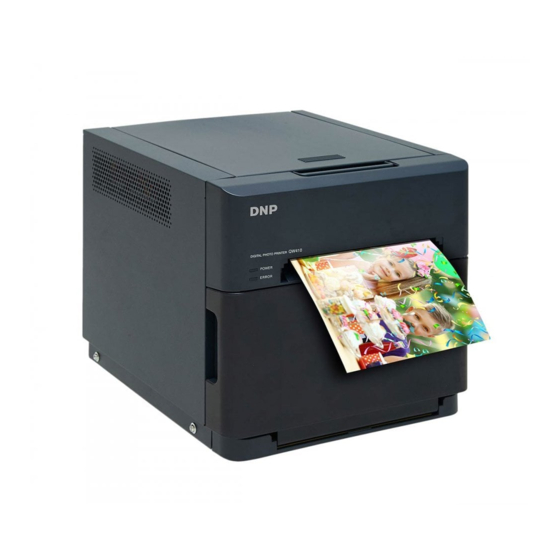
Summary of Contents for DNP QW410-SET
- Page 1 DIGITAL PHOTO PRINTER DP-QW410 User Guide Version 1.0.1 ©2019-2020 Dai Nippon Printing Co., Ltd. 2020012401...
- Page 2 WARNING To reduce the risk of fire or electric shock, do not expose this apparatus to rain or moisture. To avoid electrical shock, do not open the cabinet. Refer servicing to qualified personnel only. This apparatus must be grounded. For pluggable equipment, the socket-outlet be installed near the equipment and shall be easily accessible.
- Page 3 italiano Il fabbricante, [Dai Nippon Printing Co., Ltd.], dichiara che il tipo di apparecchiatura radio [DP- QW410] è conforme alla direttiva 2014/53/UE. Il testo completo della dichiarazione di conformità UE è disponibile al seguente indirizzo Internet: http://www.dnpphoto.eu/en/home български С настоящото [Dai Nippon Printing Co., Ltd.] декларира, че този тип радиосъоръжение [DP-QW410] е...
- Page 4 The identification, by name, address and telephone number, of a responsible party located within the United States. DNP Imagingcomm America Corporation 4524 Enterprise Drive NW Concord, NC 28027 United States Telephone (704) 784-8100 www.dnpimagingcomm.com...
- Page 5 Safety precautions Note that the contents of directions for use and safety precautions correspond to the safety standards as of the time this manual has been created. Remodeling For safety, do not remodel this product after purchase. Copyright Copyrights, trademarks or any other intellectual property rights whatsoever that pertain to documents, programs or other items provided with this product, are ascribed to Dai Nippon Printing Co., Ltd., or the respective other holders of rights.
-
Page 6: Table Of Contents
Table of Contents Introduction ..................... 7 For Safe Operation ..................7 Caution for installation ................. 10 Printer Installation ..................11 Checking the contents ................11 Name of components ................12 Connecting the power cord and a computer ..........13 Media (ribbon, paper) ................14 Setting the media (ribbon, paper) ............. -
Page 7: Introduction
Introduction Thank you for purchasing this product. This document explains how to handle and operate this product. Please read this document carefully before use. Be sure to read “For Safe Operation” (P.7-9), and operate the product correctly. For Safe Operation Be sure to read this document before using the product. - Page 8 For Safe Operation Warning • Use the product only with the designated voltage and frequency. Improper connection may cause electric shock or fire. • Avoid connecting too many devices to the outlet used for this product and using extension cords. The outlet may overheat and cause a fire. •...
- Page 9 For Safe Operation Caution • Do not install the product in dusty or humid places. This may cause fire or an electric shock, or damage the product. • Do not install the product on an unstable surface. It may fall and cause injury to the user or other people.
-
Page 10: Caution For Installation
Caution for installation • Before using the product, read “For Safe Operation” carefully and observe the instructions therein. • Do not use or store the product near a fire, humid places, in direct sunlight, near an air conditioner or heater, or any other location with unusually high or low temperature, strong humidity, or excessive dust. -
Page 11: Printer Installation
Printer Installation Checking the contents Check that the printer and all the following accessories are included in the package. Printer unit Paper tray for (4 x 6") Paper holder * Set in the printer. 4-inch spacer Explanation booklet Power cord * Set in the paper holder. -
Page 12: Name Of Components
Printer Installation Name of components Front of the unit 5.0 V DC, 2.0 A Top door Vent Opening lever Vent Paper output Vent Trash box LEDs Power inlet Caution • Be careful not to hurt yourself or damage anything on the edges of the printer. -
Page 13: Connecting The Power Cord And A Computer
Printer Installation Connecting the power cord and a computer Make sure that the ON/OFF switch of the printer unit is set to OFF. Make sure that the power switch of the computer is set to OFF. Plug the connector of the power cord (supplied) into the printer power inlet. Plug the power cord into an outlet. -
Page 14: Media (Ribbon, Paper)
Printer Installation Media (ribbon, paper) Prepare the media (paper, ribbon) with the following widths. Size Paper Ribbon 4-inch Width : 102 mm Width : 109 mm 4.5-inch Width : 114 mm Width : 121 mm Caution • Set the paper and ribbon without putting them directly on the work surface. If dust or dirt adheres to the media when setting it inside the printer unit, it may adversely affect the print quality. -
Page 15: Setting The Media (Ribbon, Paper)
Printer Installation Setting the media (ribbon, paper) Pull the opening lever toward you to open the printer unit’s top door. Remove the ribbon. Top door Ribbon Opening lever Caution • When the top door is opened, take care that a hand does not get caught in the Top door gap between the back of the top door and the printer (see the figure on the right). - Page 16 Printer Installation Install the ribbon to the printer unit. Align left side (1) of the ribbon shaft with the groove and then lower right side (2) of the ribbon shaft. New ribbon Align with the groove and then set in place Close the printer unit’s top door.
- Page 17 Printer Installation Remove the paper holder from the printer. Paper holder Caution • When removing the paper holders to change the paper roll etc., make sure to place them on the clean surface. Never place them directly on the table or work spaces. If dust or dirt adheres to the media when setting the paper holder inside the printer unit, it may adversely affect the print quality.
- Page 18 Printer Installation Caution • The paper holders with a new paper roll set on it weigh approximately 1 kg. Do not let them fall as they may cause physical injury or damage to the paper holders. Set the paper holder into the printer. Set the seal on the paper (→PULL) in the same direction as shown on the right.
- Page 19 Printer Installation Attach the printer unit’s trash box. Perform paper initialization. (Three blank sheets are output.) Paper initialization cuts off the outer edges of the paper that may be dirty. However, paper initialization will not be carried out if the printer unit's ON/OFF switch is set to ON after the paper is replaced.
-
Page 20: Paper Tray Installation
Printer Installation Paper tray installation You can use the paper tray when printing. Up to 20 sheets can be stored, however it is recommended to remove the sheets regularly. Insert the paper tray into the attachment parts on the sides of the printer unit’s paper output port. -
Page 21: Assembling The Paper Tray
Printer Installation Assembling the paper tray If trays (1) and (2) (refer to the illustration below) have come apart due to the paper tray falling or for any other reason, reassemble the paper tray according to the following procedure. Align the pegs on both sides with the hooks. -
Page 22: Disposing Of Paper Scrap
Printer Installation Disposing of paper scrap Paper scraps generated when the paper is cut are collected in the trash box. Be sure to empty the trash box when replacing the paper. Remove the printer unit’s trash box. After removing the trash box, paper scraps may be stuck to the printer unit. -
Page 23: Troubleshooting
Troubleshooting Error display The LEDs condition (lit, flashing, off) indicates the product status. POWER ERROR lit, flashing, off. LED display Status Condition Refer to The print heads are being cooled. POWER Head cool down This error is cleared automatically. ERROR There is Close the trash box and/or top POWER... -
Page 24: Solving Errors
Troubleshooting Solving errors Open the printer unit’s top door. Remove the ribbon from the printer unit. Perform the action corresponding to the error. “The printer is jammed with paper” (see this page), “The paper cannot be pulled out toward you (paper holder side)” (see P.26) “The ribbon is caught in the printer”... - Page 25 Troubleshooting Pull out the paper end toward you. When pulling out the paper, pull it out slowly. If a strong force is applied, the printer may be damaged. Caution • Use caution when reaching into the printer unit. If the jammed paper cannot be removed without using strong force, contact technical support for further instructions.
-
Page 26: The Paper Cannot Be Pulled Out Toward You (Paper Holder Side)
Troubleshooting The paper cannot be pulled out toward you (paper holder side) If the paper cannot be pulled out toward you (paper holder side), open the printer unit’s top door and then pull out the paper with the following procedure. First remove the paper holder in the forward direction and then cut off the part of the paper that is jammed. -
Page 27: Work Was Continued While The Printer Unit's On/Off Switch Is Off
Troubleshooting Reattach the ribbon with tape or similar material. Rotate the take-up roller until the part a t t a c h e d w i t h t a p e c a n n o t b e s e e n anymore. -
Page 28: Cleaning
Cleaning Platen roller If indentations or lines appear in regular intervals (approximately 38 mm) and in the same place on printouts, or if the back of the printout (white side) is dirty, clean the platen roller. There may be dust, dirt, adhesive, etc. from the ribbon or paper on the platen roller. Prepare a piece of gauze or other soft cloth moistened with ethyl alcohol. -
Page 29: Thermal Print Head
Cleaning Thermal print head If stains adhere to the thermal print head, unevenness or gaps may appear during printing. Prepare a piece of gauze or other soft cloth Thermal print head moistened with ethyl alcohol. Gently wipe the thermal head without touching it directly with your hands. -
Page 30: Repacking
Repacking Transporting the printer requires the reuse of the original packing materials. The printer must be packed in the same way it was at the time of purchase. If the original packaging materials are not used and the printer is not packed correctly, the printer may be broken during transport. -
Page 31: Specifications
Specifications Model DP-QW410 Print method Thermal dye sublimation transfer Width direction 11.8 dot/mm (300dpi) Resolution Paper feed direction 11.8 dot/mm (300dpi) 102 mm × 102 mm (4 × 4") 102 mm × 152 mm (4 × 6") Print size 114 mm × 114 mm (4.5 × 4.5") 114 mm ×...
Need help?
Do you have a question about the QW410-SET and is the answer not in the manual?
Questions and answers