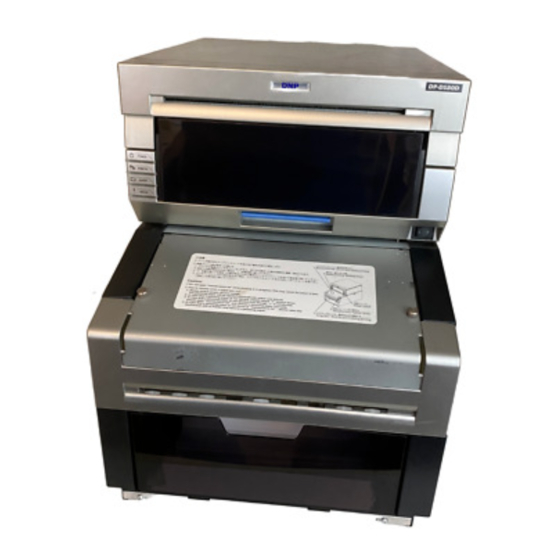
DNP DP-DS80D Instruction Manual
Digital photo printer
Hide thumbs
Also See for DP-DS80D:
- User manual (30 pages) ,
- Instruction manual (36 pages) ,
- Startup manual (34 pages)

Related Manuals for DNP DP-DS80D


Summary of Contents for DNP DP-DS80D
- Page 1 DIGITAL PHOTO PRINTER DP-DS80D Printer Driver Instruction Manual For Windows 7,8 Janualy 5, 2015 Ver.1.01...
- Page 2 User ’s Manual has been created. ●Remodeling For product safety, do not remodel the DP-DS80D printers or the contents of the DP-DS80D printer drivers and the CD. ●Copyright Copyrights, trademarks or any other intellectual property rights whatsoever that pertain to documents, programs or other items provided with this product, are ascribed to Dai Nippon Printing Co., Ltd., or the respective other...
-
Page 3: Table Of Contents
Contents Chapter 1 Install ______________________________________ 1 1.1 Printer and Host computer Preparation ________________________________________ 2 1.2 Installing the Driver Package ________________________________________________ 2 1.3 Installing the Printer Driver _________________________________________________ 5 1.4 Installing a Driver for an Unspecified Device ____________________________________ 9 Chapter 2 Properties __________________________________ 12 2.1 Opening Printer Properties _________________________________________________ 12 2.2 Explanation of Print Setting Functions ________________________________________ 14 2.2.1 Layout _____________________________________________________________________________________ 14... -
Page 4: Chapter 1 Install
[DP-DS80D Printer Driver] Instruction Manual for Windows 7,8 Installation Flow Installation is done in the following 3 steps. Details of each step are shown in a subsequent page. → ”1.1 Printer and Host computer Preparation” STEP 1 Prepare the printer and computer Do not connect the USB cable at this step. -
Page 5: Installing The Driver Package
[DP-DS80D Printer Driver] Instruction Manual for Windows 7,8 Check that the power for the DP-DS80D printer is OFF. Have a USB cable ready. But do not connect the printer to the computer with the USB cable at this point. In order to install the driver, login with administrator right. The following explanations are given on the assumption of use with administrator rights. - Page 6 [DP-DS80D Printer Driver] Instruction Manual for Windows 7,8 In the selected folder, double click on the file “DriverInstall.CMD”. (Depending on your operating environment, the .CMD extension may not be shown.) The best Driver Package Installer for your operating system (32 or 64 bit) will automatically be selected.
- Page 7 [DP-DS80D Printer Driver] Instruction Manual for Windows 7,8 If the Windows Security confirmation window appears, click on “Install this driver software anyway”. Fig 1.5 Windows Security confirmation In Windows 8, click on “Install”. DP-DS80D Fig 1.5.ii Windows Security confirmation (Windows 8) This starts the Driver Package installation.
-
Page 8: Installing The Printer Driver
[DP-DS80D Printer Driver] Instruction Manual for Windows 7,8 Connect the printer to the computer with the USB cable, and turn the printer power ON. The printer will be recognized, and the driver installation should begin. * Please refer to the manual for the DP-DS80 printer for connection if needed. - Page 9 [DP-DS80D Printer Driver] Instruction Manual for Windows 7,8 When the confirmation window appears, click on “Yes”. Fig 1.10 Skip getting the driver software from Windows Update From a beginning of installation after a while, the message “Your device is ready to use” will appear above the task bar, and the printer driver installation will be complete.
- Page 10 Check that the DP-DS80D is shown in the Devices and Printers window. Note: In Windows 8, DP-DS80D icon does not appear if the printer is offline (if the printer with the power on is not connected). Now, installation of the DP-DS80D printer driver is complete.
- Page 11 [DP-DS80D Printer Driver] Instruction Manual for Windows 7,8 If the DP-DS80D printer driver installation was unsuccessful, the message “Device driver software was not successfully installed” will appear above the task bar. Fig 1.15 Driver Not Installed message By clicking on this message, the “Driver Software Installation” window will be opened, and the message “Device driver software was not successfully installed”...
-
Page 12: Installing A Driver For An Unspecified Device
[DP-DS80D Printer Driver] Instruction Manual for Windows 7,8 Before installing the driver package, connect the printer (with power ON) to the computer, to create an ”Unspecified” device in the “Devices and Printers” window. Using this method, the printer driver can be installed as follows. - Page 13 [DP-DS80D Printer Driver] Instruction Manual for Windows 7,8 When the “Install a driver for this device” window appears, click on “Apply this fix”. It will automatically search for the driver and installation is started. Fig 1.18 Applying the Fix When the driver has been installed, “Troubleshooting has completed” will appear. Click on “Close the troubleshooter” to end the troubleshooting.
- Page 14 Check that the DP-DS80D is displayed in the “Devices and Printers” window. Note: In Windows 8, DP-DS80D icon does not appear if the printer is offline (if the printer with the power on is not connected). Now, the DP-DS80D Printer Driver installation is complete.
-
Page 15: Chapter 2 Properties
[DP-DS80D Printer Driver] Instruction Manual for Windows 7,8 Various printer settings can be made using the DP-DS80D Driver properties. Before operation, be sure to have a good understanding of the contents. Login by administrator authority is required for operation. Depending on application of the use, operation from print setting of the application is necessary. - Page 16 3. Right-click on the DP-DS80D icon, and from the pull-down menu select Printer properties ⇒ open the Properties window Note: In Windows 8, DP-DS80D icon does not appear if the printer is offline (if the printer with the power on is not connected).
-
Page 17: Explanation Of Print Setting Functions
[DP-DS80D Printer Driver] Instruction Manual for Windows 7,8 From the Properties window, by selecting Preferences you can make various print settings. 2.2.1 Layout Output image depending on print direction Ex.) For (8x5), (8x6) Print paper exit slot Print paper exit slot... - Page 18 [DP-DS80D Printer Driver] Instruction Manual for Windows 7,8 Page Order When printing multiple images in the application, you can set the order. Ex.) Print order No.3 No.2 No.1 In order Reverse order Pages per Sheet In most situations, set “1”.
-
Page 19: Advanced Options
You can designate the paper size. Please match the paper size to the media size with which the printer is equipped With the DP-DS80D, the paper sizes that can be designated with the roll paper / cut paper (tray) selection in “2.2.3 Paper/Quality” differ as shown in the table below. - Page 20 [DP-DS80D Printer Driver] Instruction Manual for Windows 7,8 Copy Count You can designate the number of times an image will be printed. Print Quality You can designate the print quality. Please match the print quality to the printer settings. Print Quality...
- Page 21 [DP-DS80D Printer Driver] Instruction Manual for Windows 7,8 According to the contents of a printer error, the power supply of a printer needs to be re-switched on for error recovery. In this case, it is not dependent on a setup of Print Re-try, and printing data in a printer buffer is cleared.
-
Page 22: Paper/Quality
[DP-DS80D Printer Driver] Instruction Manual for Windows 7,8 2.2.3 Paper/Quality Fig 2.2.3 Paper/Quality tab Paper Source Either Roll paper or Cut paper (tray) can be selected. Duplex printing can only be done when Cut paper (tray) is selected. If a paper size valid for only either Roll paper or Cut paper (tray) is selected in the paper size setting in “2.2.2 Advanced Options”, then the Paper Supply Method setting will be disabled. -
Page 23: Color Adjustment
[DP-DS80D Printer Driver] Instruction Manual for Windows 7,8 2.2.5 Color Adjustment If you check Handled by Driver in 2.2.4 Option, the respective color adjustment values in the Color Adjustment tab are reflected in the image. Fig 2.2.5 Color Adjustment tab... -
Page 24: Printer Information
[DP-DS80D Printer Driver] Instruction Manual for Windows 7,8 2.2.6 Printer Information When the Printer Information tab is opened, the printer status can be checked. Fig 2.2.6 Printer Information tab Display Contents Media Type This displays the type of ribbon that is set in the printer. -
Page 25: Default Values For Various Settings
[DP-DS80D Printer Driver] Instruction Manual for Windows 7,8 Default values for each option (at the time of installation) are shown below. If the printer driver does not work correctly after changing the options, please return the options to the default settings. -
Page 26: Image Size
2448 x 3636 2448 x 7272 ※1 Roll paper only With the DP-DS80D printer, the paper size (output size) can be designated as less than 8 inches, but the media used will be the inch width media. ※2 Cut paper only The image dot counts for (8x10.5) and (8x10.75) are the same.The image that is output differsasshown... -
Page 27: Print Orientation
[DP-DS80D Printer Driver] Instruction Manual for Windows 7,8 The relationship between application-created image and printed image(output orientation) by the driver settings(Layout orientation) is as followed table. These are limited by that original image is not rotated by the apprication and enlarged or scale downed within the image size that is selected from 2.5 Image Size table. - Page 28 [DP-DS80D Printer Driver] Instruction Manual for Windows 7 ◆The relationship between application-created image and printed image when performing duplex printing as affected by the driver settings( Binding direction) Original Image Driver Settings Paper Size (8x4)、(8x5) <including multi-layout> Paper Size (8x10)、(8x10.5)、(8x10.75)、(8x12)
-
Page 29: Print Method
[DP-DS80D Printer Driver] Instruction Manual for Windows 7,8 2.7.1 Multi-layout When the is using 8x12, 8x10 size media, 2 or 3 image layout is possible. DP-DS80D With the printer driver paper setting, multi-image layout is made possible, and the image sizes are as follows. - Page 30 [DP-DS80D Printer Driver] Instruction Manual for Windows 7,8 Layout for 1 sheet with 2 different-size images Cut as sheet is fed out (Roll Paper only)⇒ (8x6)_(8x4) etc. (When cut paper use, the image of 2 different- size on 1 sheet can not be assigned).
-
Page 31: Example Of Multi-Layout Application Use
[DP-DS80D Printer Driver] Instruction Manual for Windows 7,8 2.7.2 Example of Multi-layout application use This is an example using Windows Explorer Step 1. Select 2 or more images⇒Click “Print”. Step 5. Click on “Advanced”. Step 2. Check “Fit picture to frame” and click “Options”. -
Page 32: Duplex Printing
[DP-DS80D Printer Driver] Instruction Manual for Windows 7,8 2.7.3 Duplex Printing Duplex printing is possible on the DP-DS80D when cut paper is selected. Duplex printing can be performed under the following conditions. 1. Select “Cut paper (tray)” in the Paper Supply Method on the “2.2.3 Paper/Quality” tab. - Page 33 [DP-DS80D Printer Driver] Instruction Manual for Windows 7,8 Cautions for using Multi-layout in Duplex Printing When using multi-layout in duplex printing, the images will be laid out as follows. If there is a remainder in transmitted images, the driver will insert empty data images into the layout. The printer will output the empty data as white images.
- Page 34 [DP-DS80D Printer Driver] Instruction Manual for Windows 7,8 In cases as above wherethere is a remainder from 1 or 2 prints, if you don’t want to output blank imagesfromthe printer, then you can use the application to change the multi-layout media size as shown below, and send the image data as a separate job.
-
Page 35: Chapter 3 Updating The Driver
Note: In Windows 8, DP-DS80D icon does not appear if the printer is offline (if the printer with the power on is not connected). If you can not connect to the printer with the power on, remove the device in the procedure on the next page. - Page 36 [DP-DS80D Printer Driver] Instruction Manual for Windows 7,8 In Windows 8, DP-DS80D icon does not appear if the printer is offline (if the printer with the power on is not connected). If you can not connect to the printer with the power on, remove the device in the following procedure.
- Page 37 (3) When “Are you sure you want to remove this device?” appears, click on “Yes”. Fig 3.3 Remove device confirmation window (4) After the DP-DS80D printer has been removed, select another printer (for example: Fax), and click on “Print server properties” in the menu bar.
- Page 38 [DP-DS80D Printer Driver] Instruction Manual for Windows 7,8 (5) When the Print Server Properties window appears, click on the Drivers tab. From the list of installed printer drivers, select “DP-DS80D”, and click the “Remove” button. Fig 3.5 Print Server Properties window (6) When the Remove Driver and Package window appears, select “Remove driver only”, and click on the”OK”...
- Page 39 (7) When the Print Server Properties confirmation window appears, click on the “Yes” button. Fig 3.7 Print Server Properties confirmation window (8) Using the Print Server Properties window, confirm that “DP-DS80D” has been removed, and click on the “Close” button. After removing the printer driver, uninstall the driver package.
- Page 40 Fig 3.9 Control Panel (2) When the “Uninstall or change a program” window appears, double-click on “Windows Driver Package – Dai Nippon Printing DP-DS80D (mm/dd/yyyy x.x.x.x)” (mm/dd/yyyy = the date, x.x.x.x = the version). Fig 3.10 Uninstall a program Dai Nippon Printing Co.,Ltd.
- Page 41 [DP-DS80D Printer Driver] Instruction Manual for Windows 7,8 (3) When the “Uninstall Driver Package” window appears, click on “Yes”. The Uninstall will be completed. After finished with uninstalling the driver package, reboot the computer. Fig 3.11 Uninstall confirmation window 3. Installing the printer-driver upgrade After removing the printer and printer-driver, install the new printer-driver.
-
Page 42: Chapter 4 Driver Removal
[DP-DS80D Printer Driver] Instruction Manual for Windows 7,8 For steps to remove the printer driver, refer to Chapter 3 “1. Driver Removal” and “2. Uninstalling a Driver Package”. Dai Nippon Printing Co.,Ltd. - Page 43 [DP-DS80D Printer Driver] Instruction Manual for Windows 7,8 Dai Nippon Printing Co.,Ltd.
Need help?
Do you have a question about the DP-DS80D and is the answer not in the manual?
Questions and answers