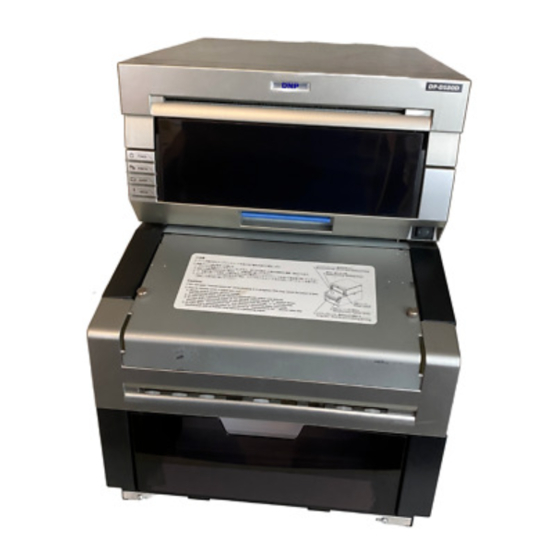
DNP DP-DS80D User Manual
Digital photo printer
Hide thumbs
Also See for DP-DS80D:
- Instruction manual (43 pages) ,
- Instruction manual (36 pages) ,
- Startup manual (34 pages)
Table of Contents
Advertisement
Advertisement
Table of Contents

Related Manuals for DNP DP-DS80D


Summary of Contents for DNP DP-DS80D
- Page 2 ■ Safety precautions Note that the contents of directions for use and safety precautions correspond to the safety standards as of the time this manual has been created. ■ Remodeling For safety, do not remodel this product after purchase. ■ Copyright Copyrights, trademarks or any other intellectual property rights whatsoever that pertain to documents, programs or other items provided with this product, are ascribed to Dai Nippon Printing Co., Ltd., or the respective other holders of rights.
- Page 3 This is a Class A product. In a domestic environment, this product may cause radio interference in which case the user may be required to take adequate measures. Dai Nippon Printing Co.,Ltd. hereby declares that this DP-DS80D is in compliance with the essential requirements and other relevant provisions of Directive 1999/5/EC.
- Page 4 Alulírott, Dai Nippon Printing Co.,Ltd. nyilatkozom, hogy a(z) DP-DS80D megfelel a vonatkozó alapvető követelményeknek és az 1999/5/EC irányelv egyéb előírásainak. italiano Con la presente Dai Nippon Printing Co.,Ltd. dichiara che questo DP-DS80D è conforme ai requisiti essenziali ed alle altre disposizioni pertinenti stabilite dalla direttiva 1999/5/CE. norsk Dai Nippon Printing Co.,Ltd.
-
Page 5: Introduction
Introduction Thank you for purchasing this product. This document explains how to handle and operate this product. Please read this document carefully before use. Be sure to read “For Safe Operation” (P.4-6), and operate the product correctly. For Safe Operation Be sure to read this document before using the product. - Page 6 For Safe Operation Warning ・Use the product only with the designated voltage and frequency. Improper connection may cause electric shock or fire. ・Avoid connecting too many devices to the outlet used for this product and using extension cords. The outlet may overheat and cause a fire. ・Do not damage, cut, bundle, or alter the power cord.
- Page 7 For Safe Operation Caution ・Do not install the product in dusty or humid places. This may cause fire or an electric shock, or damage the product. ・Do not install the product on an unstable surface. It may fall and cause injury to the user or other people.
-
Page 8: Caution For Installation
Caution for installation ・Before using the product, read “For Safe Operation” carefully and observe the instructions therein. ・Use care when moving the product. Never try to carry the product alone. Dropping it may cause injury or property damage. ・Do not use or store the product near a fire, humid places, in direct sunlight, near an air conditioner or heater, or any other location with unusually high or low temperature, strong humidity, or excessive dust. - Page 9 ■ Japanese users Model No. Rating Mark of conformity Plug KP-300 125 V 12 A Cord VCTF 1.25 mm Connector KS-16A 125 V 12 A Model No. Rating Mark of conformity Plug LP-53 125 V 12 A Cord VCTF 1.25 mm Connector LS-13J 125 V 12 A...
-
Page 10: Regulatory Compliance Statements
Regulatory compliance statements For the Customers in USA FCC part 15 This equipment has been tested and found to comply with the limits for a Class A digital device, pursuant to Part 15 of the FCC Rules. These limits are designed to provide reasonable protection against harmful interference when the equipment is operated in a commercial environment. -
Page 11: Table Of Contents
Table of Contents Introduction ....................................4 For Safe Operation ................................4 Caution for installation ............................... 7 s ..........................9 Table of Contents ................................. 10 Duplex Printing (option) ..............................11 Printer Installation ................................12 Checking the contents ................................12 Name of components ................................13 Connecting the power cord and a computer ......................... -
Page 12: Duplex Printing (Option)
For more information about duplex printing, refer to the Operating Instructions supplied with the optional Turning Unit. Contents ■ (1) Overview (2) Preparation (3) Operation (4) Cleaning and Clearing Paper Jams DP-DS80D Optional Turning Unit This manual gives information only for single side printing. -
Page 13: Printer Installation
Printer Installation Checking the contents Check that the printer and all the following accessories are included in the package. Printer unit Power cord Ribbon cassette *Set in the printer. Remove the wrapping before using them. Paper holder Paper cassette CD-ROM *Set in the printer. -
Page 14: Name Of Components
Printer Installation Name of components ■ Front of the unit Paper output LEDs Make sure to attach the blind plate when you do not use an optional Turning Unit. Knurled screw Use to fix the blind plate. Scrap box Blind plate Attach to the bottom of the unit. -
Page 15: Connecting The Power Cord And A Computer
Printer Installation Connecting the power cord and a computer Make sure that the power switch of the printer unit and the computer are turned off. Plug the connector of the power cord supplied into the printer power inlet. Plug the power cord into the wall outlet. Connect the printer to the computer with a USB cable. -
Page 16: Paper And Ribbon
Printer Installation Paper and ribbon Prepare the media (paper, ribbon) with the following widths. Paper 203 mm in width Ribbon Ribbon (Ribbon cassette) Ribbon cassette 210 mm in width Caution ・Set the paper and ribbon without putting them directly on the work surface. If dust or dirt adheres to the media when setting it inside the printer unit, it may adversely affect the print quality. -
Page 17: Setting The Media (Paper, Ribbon)
Printer Installation Setting the media (paper, ribbon) Release the opening lever, and pull out the mechanism unit. Opening lever Lift the paper lever and raise the front cover. Paper lever Front cover Remove the scrap box. Scrap box Hold the center and lift it up straight. - Page 18 Printer Installation Remove the paper cassette (including the attached paper holders). Remove the paper holders from the paper cassette. Remove the old paper roll from the paper holders and set the new paper roll. Set the roll so that there is no gap between the paper and the holder.
- Page 19 Printer Installation Set the paper holders into the paper cassette. Set the paper roll with the “PULL” sticker in the same orientation as show below. Set it firmly all the way in. Remove the “PULL” sticker attached to the roll, and rotate the roll in the direction of the arrow to feed the paper.
- Page 20 Printer Installation Rotate the paper in the direction of the arrow to advance the leading edge until the buzzer beeps. Hold the paper holder to prevent it from turning when rotating the paper. When paper is correctly inserted the paper LED turns off. Set the scrap box and close the front cover.
- Page 21 Printer Installation Remove the old ribbon from the ribbon cassette and set the new ribbon. Rotate the roller in Take-up side the direction of the (white roller) arrow to take up the slack. Supply side (black roller) Install the ribbon cassette to the printer unit. Install the cassette here.
-
Page 22: Disposing Of Paper Scrap
Printer Installation Disposing of paper scrap Paper scraps generated when the paper is cut are collected in the scrap box. Be sure to empty the scrap box when replacing the paper. Release the opening lever, and pull out the mechanism unit. Lift the paper lever and raise the front cover. -
Page 23: Troubleshooting
Troubleshooting Error display The LEDs condition (lit, flashing, off) indicates the product status. lit, flashing, off. LED display Status Condition Refer to POWER RIBBON Paper end Set a new roll of paper. P.16 PAPER ERROR POWER RIBBON Ribbon end Set a new ribbon. P.16 PAPER ERROR... -
Page 24: Solving Errors
Troubleshooting Solving errors Release the opening lever, and pull out the mechanism unit. Remove the ribbon cassette front the printer unit. Perform the action corresponding to the error. see this page), see P. “The printer is jammed with paper” ( “The ribbon is caught in the printer”... -
Page 25: Cutting The Paper
Troubleshooting Remove the paper cassette (including the attached paper holders) (see P.17). Cut off any damaged parts of paper that could not be cut in step and the leading edge evenly with a pair of scissors. If wrinkles or partially printed areas remain, it may cause the printer to jam again. ■Cutting the paper Always cut the paper evenly. - Page 26 Troubleshooting The ribbon is caught in the printer Cut the ribbon. Remove all the ribbon remained in the printer unit. Remove the ribbon carefully. Any pieces of ribbon left inside the mechanism may affect the print quality. If necessary, clean the platen roller (see “Platen roller”...
- Page 27 Troubleshooting The printer stopped with the paper partially cut Restart the printer. Then release the paper and return the cutter blade to its standby position. ・If you cannot release the paper, contact a service representative. Remove the partially printed part of paper from the printer. Next, refer to “The printer is jammed with paper”...
-
Page 28: Cleaning
Cleaning Platen roller If indents appear at the same places on the printout at a regular interval (approximately every 50 mm), or if the back of the printout (white side) is dirty, clean the platen roller. There may be dust, dirt, adhesive, etc. from the ribbon or paper on the platen roller. Prepare a piece of gauze or other soft cloth moistened with ethyl alcohol. -
Page 29: Specifications
Specifications Print method Thermal dye sublimation transfer Standard 11.8 x 11.8 dot/mm (300 x 300 dpi) Resolution 11.8 x 23.6 dot/mm (300 x 600 dpi) High quality 203 mm x 102 mm 203 mm x 127 mm 203 mm x 152 mm Print size (When using roll paper) 203 mm x 203 mm...
Need help?
Do you have a question about the DP-DS80D and is the answer not in the manual?
Questions and answers