Adam CPWplus 35 Instruction Manual

Adam CPWplus 35 Instruction Manual

Cpwplus range of platform scales

Advertisement

Adam Equipment
CPWplus RANGE OF SCALES
(P.N. 9009, Rev. B, May 2008)
© Adam Equipment Company 2008

Advertisement

Table of Contents
loading
Need help?

Need help?

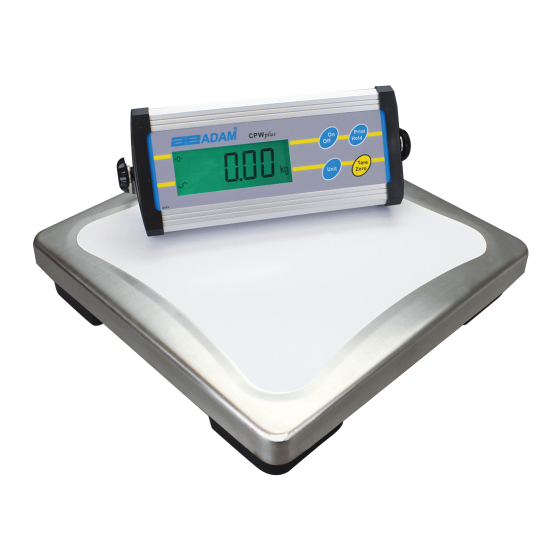
Do you have a question about the CPWplus 35 and is the answer not in the manual?

Questions and answers

Troy
March 6, 2025

installed new screen computer board. Getting continuous beep with error. Is there an initialization step or something?

1 comments:
Mr. Anderson
March 6, 2025

The continuous beeping error on the Adam CPWplus 35 scale occurs when the weight on the pan exceeds the scale’s capacity. To resolve this issue, follow these steps:

1. Remove Excess Weight – Ensure that the pan is not overloaded by removing any excess weight.
2. Restart the Scale – Turn off the scale and switch it back on to reset the system.
3. Calibration Check – If the error persists, verify that the calibration process has been performed correctly. Incorrect calibration can trigger error messages.
4. Repeat the Procedure – If the issue continues, repeat the steps that led to the error, such as turning the scale on or recalibrating.
5. Contact Support – If the error message remains after these steps, contact the supplier for further assistance.

These steps should help resolve the continuous beeping error and restore the scale to normal operation.

This answer is automatically generated

Subscribe to Our Youtube Channel

Summary of Contents for Adam CPWplus 35

  • Page 1 Adam Equipment CPWplus RANGE OF SCALES (P.N. 9009, Rev. B, May 2008) © Adam Equipment Company 2008...
  • Page 2 © Adam Equipment Company 2008...
  • Page 3: Table Of Contents

    STABILIZATION RANGE ..............23 13.2.4 STABILIZATION TRACKING .............. 24 13.3 FACTORY PARAMETERS................. 24 14.0 ERROR MESSAGES..................25 15.0 REPLACEMENT PARTS AND ACCESSORIES........... 25 16.0 SERVICE INFORMATION ................26 17.0 WARRANTY INFORMATION ............... 27 18.0 APPENDIX....................28 © Adam Equipment Company 2008...
  • Page 4 © Adam Equipment Company 2008...
  • Page 5: Introduction

    Power Supply module. CPWplus 300 x 300mm base operates with 6 x AA size batteries CPWplus M 500 x 500mm base with internal rechargeable batteries CPWplus L 900 x 600mm base with internal rechargeable batteries © Adam Equipment Company 2008...
  • Page 6: Specifications

    Hold symbols Keypad Mechanical switches under overlay Scale housing Indicator: Aluminium Platform: Mild steel base and stainless steel pan Applications Weighing, Dynamic / Animal weighing, Display Hold © Adam Equipment Company 2008...
  • Page 7: Installation

    CPWplus Indicator with bracket and 2 screws The Platform Stainless Steel Pan Power supply Module An Instruction manual CPWplus L CPWplus Indicator with bracket and 2 screws The Platform Stainless Steel Pan Power supply Module An Instruction manual © Adam Equipment Company 2008...
  • Page 8: Locating

    Avoid air movement such as from fans or opening doors. Do not place the scale near open windows or air-conditioning vents. • Keep the scales clean. Do not stack material on the scales when they are not in use. © Adam Equipment Company 2008...
  • Page 9: Setting Up

    Power input and RS-232 ports). Remove them from the base and use them to attach the bracket to the base. 3. Mount it on the wall- Use two suitable screws (not supplied) to fix the bracket to the wall. © Adam Equipment Company 2008...
  • Page 10: Setting Up The Cpwplus M & Cpwplus L Series

    NOTE: To re-charge the internal battery, connect the power supply module to the rear of the indicator and apply power. © Adam Equipment Company 2008...
  • Page 11: Keypad

    , lb, oz or lb-oz Active weighing unit Battery is weak When weighing in pounds:ounces Net weight is being displayed Display is held as per the Hold parameter setting Hold (See section 9.8 & 9.9) © Adam Equipment Company 2008...
  • Page 12: Battery

    13.1.2. 9.0 AUTO POWER OFF The auto power off can be set by the user to disable the feature or to a pre-set time interval. See setting of the parameter in section 13.1.1. © Adam Equipment Company 2008...
  • Page 13: Operations

    See the next section on taring the scale. • The scale has an automatic zero tracking function to account for shifting of the zero point due to the environment change or accumulation of dust on the platform. © Adam Equipment Company 2008...
  • Page 14: Taring

    [Tare/Zero] key was pressed last. Note: If the capacity of the scale is 6000g and a container weighing 2450g is used and tared, the scale can then be used to weigh the material of up to 3550g. © Adam Equipment Company 2008...
  • Page 15: Selecting The Unit

    ASNG/W + 0.00 xx A is communication address set by the user, S stands for stable, N for no error G/W for ASNG/W + 0.51 xx gross weight, xx for the chosen unit ASNG/W + 2.99 xx <cr><lf> © Adam Equipment Company 2008...
  • Page 16 N <cr> <lf> G <cr> <lf> Sends the gross weight to the RS-232 interface. T <cr> <lf> Sends the tare weight to the RS-232 interface. Output format: + 2.00 kg <cr><lf> + 1.00 kg <cr><lf> © Adam Equipment Company 2008...
  • Page 17: Calibration

    Note: If the selected mass is less than 10% of the capacity of the scale, an error message “CALEr” will be displayed and the scale will return to zero. Repeat the process correctly. © Adam Equipment Company 2008...
  • Page 18: Parameter Setting

    • To scroll through the user parameters, press the [Unit] key (which will advance to the next parameter). • To return to normal weighing, turn the scale off and back to on again or press the [Print/Hold] key. © Adam Equipment Company 2008...
  • Page 19: Auto Power Off

    When the weight is removed it will stay on for 10 seconds after the scale returns to zero. • Press the [Unit] key to confirm the selection and move to the next parameter. © Adam Equipment Company 2008...
  • Page 20: Enabling Of Units

    The numbers relate to alphabets for example 1=A, 2=B to 25=Y • Use the [Tare/Zero] key to scroll through the options. • Press the [Unit] key to confirm the selection and move to the next parameter. © Adam Equipment Company 2008...
  • Page 21: Selection Of Baud Rate

    8 bits no parity 7 bits even parity 7 bits odd parity • Use the [Tare/Zero] key to scroll through the options. • Press the [Unit] key to confirm the selection and move to the next parameter. © Adam Equipment Company 2008...
  • Page 22: Selection Of Transmission Mode

    Use the [Tare/Zero] key to scroll through the options. • If selection of “Hod 2” or “Hod 3” is made then it will lead to SETTING OF HOLD TIME LIMIT (see section 13.1.9). The display will show “Hold” above the weight during operation. © Adam Equipment Company 2008...
  • Page 23: Setting Of Hold Time Limit

    45 (3 x 15) seconds Holds the display for 60 (4 x 15) seconds • Press the [Unit] key to confirm the selection and move back to the first parameter or press [Print/Hold] to exit the parameter setting. © Adam Equipment Company 2008...
  • Page 24: Technical Parameters

    • To scroll through the technical parameters, press the [Unit] key (which will advance to the next parameter). • To return to normal weighing, turn the scale off and back to on again or press the [Print/Hold] key. © Adam Equipment Company 2008...
  • Page 25: Filter

    13.2.3 STABILIZATION RANGE This parameter is for setting the range of the stability indicator. This is used to determine when the scale will print automatically as well as indicate that the weight is stable. © Adam Equipment Company 2008...
  • Page 26: Stabilization Tracking

    Factory Parameter section. This section contains critical calibration reference information and is protected by a Pin Code which can only be accessed by a qualified technician. To exit, the user must switch off the scale when the display shows “Pi”. © Adam Equipment Company 2008...
  • Page 27: Error Messages

    15.0 REPLACEMENT PARTS AND ACCESSORIES If you need to order any accessories and spare parts, contact your dealer or Adam Equipment. A partial list of such items is as follows- Accessories Part Number...
  • Page 28: Service Information

    Include any recent history of the unit. For example: -Has it been working since it’s delivered -Has it been in contact with water -Damaged from a fire -Electrical Storms in the area -Dropped on the floor, etc. © Adam Equipment Company 2008...
  • Page 29: Warranty Information

    During the warranty period, should any repairs be necessary, the purchaser must inform its supplier or Adam Equipment Company. The company or its authorised Technician reserves the right to repair or replace the components at any of its workshops depending on the severity of the problems.
  • Page 30: Appendix

    18.0 APPENDIX © Adam Equipment Company 2008...
  • Page 31 Shielded interconnect cables must be employed with this equipment to insure compliance with the pertinent RF emission limits governing this device. Changes or modifications not expressly approved by Adam Equipment could void the user's authority to operate the equipment. WEEE COMPLIANCE...
  • Page 32 For a complete listing of all Adam products visit our website at www.adamequipment.com © Copyright by Adam Equipment Co. Ltd. All rights reserved. No part of this publication may be reprinted or translated in any form or by any means without the prior permission of Adam Equipment.

Table of Contents

Save PDF