Advertisement
Table of Contents
M
onitored GPRS Cellular alarm system
Video Alarm Technologies HELPLINE: 1300 46 44 55
Australasian Hotline +61 (0) 7 5
info@videofied.com.au
Security System
Made by RSI VIDEO TECHNOLOGIES
Videofied
Installation
Manual
XT GPRS -
XT700i GPRS for Australia/New Zealand
XT600i GPRS for USA/Canada,
200 i GPRS for Europe and rest of the world.
®
- Model XT GPRS
Advertisement
Table of Contents

Related Manuals for Videofied XT GPRS


Summary of Contents for Videofied XT GPRS
- Page 1 ® Videofied - Model XT GPRS Security System Made by RSI VIDEO TECHNOLOGIES Installation Manual onitored GPRS Cellular alarm system XT GPRS - XT700i GPRS for Australia/New Zealand XT600i GPRS for USA/Canada, 200 i GPRS for Europe and rest of the world.
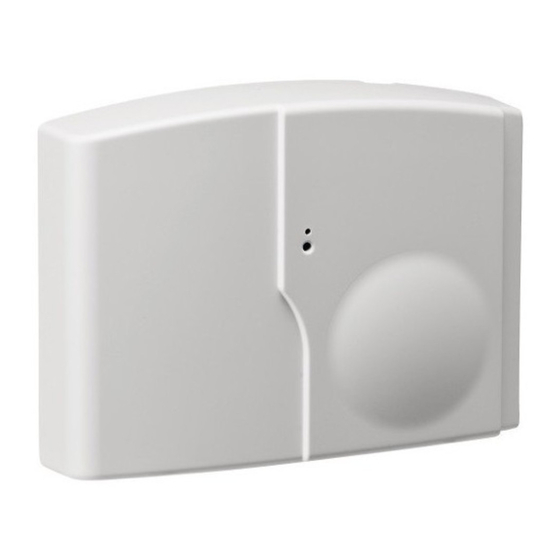
- Page 2 SETUP MANUAL XT710 GPRS PANEL *THIS SYSTEM REQUIRES A CMA 01 FOR PROGRAMMING* XT Installation Open the Control Panel Unscrew the 2 screws holding the panel together Video Alarm Technologies info@videofied.com.au www.videofied.com.au...
- Page 3 2009/06/15 Ed1.0 User manual for XT710GPRS *The SIM card must not be inserted or removed while the panel is powered* Install the SIM card Put the SIM card on the plastic (Take care to respect the right direction) Slide it into the connector. *How to Mount the Control Panel Fix the back casing on the wall with 3 screws (...
- Page 4 2009/06/15 Ed1.0 User manual for XT710GPRS XT Programming Reset the XT Panel : Press and hold programming button ( for 10sec until the Indicator LED blinks twice Press and instantly release the programming button ( The indicator LED will blink once. The panel is now in ‘Learn Mode’...
- Page 5 2009/06/15 Ed1.0 User manual for XT710GPRS RADIO RANGE The Radio Range test must be run during the learn in TEST ? process in order to ensure proper pairing with the control panel. This test is the strength of communication between the device and the control panel.
-
Page 6: Periodic Test
2009/06/15 Ed1.0 User manual for XT710GPRS DATE (Month) : Use the to set the Month 10/11/ DATE (Day) : 09/06/01 DATE (Day) : Use the to set the Day 09/06/03 TIME (HOUR) : 00:00 TIME (HOUR) : Use the to set the Hour 10:00 DATE (Minutes) : 10:00... -
Page 7: Exit Delay
Go to Page 7 if you will Standalone: Will make the XT a solo system controlled by arming and disarming using Videofied peripheral devices. be choosing this option (ie Wireless Keypad, Remote Control or Badge Reader) Other values are available:... -
Page 8: Transmission Delay
Mode Fast : Used to instant arm all devices while sacrificing battery life. ENTRY DELAY VALUE:(0-255) (000): There is no Videofied Exit Delay with the ‘From the Host’ option. Videofied will only control the Entry Delay. Enter the value for your Entry Delay up to 255 seconds and YES. press... -
Page 9: Domain Name
2009/06/15 Ed1.0 User manual for XT710GPRS DETAILED APN INFORMATION page 10 GPRS PARAMETERS ? Your APN code (Access Point Name) is given to you by your APN CODE SIM card Provider. Press YES to enter into the parameter and use the Keypad to complete the code. Press YES to confirm your entry and the arrow to move to the next... -
Page 10: Gprs Error Codes
5 minutes. Once the level or error has YES = END posted press YES to continue in programming. *For explanation of GPRS errors see page 9 GPRS LEVEL Videofied will require a 3/5 or better for reliable transmission of Video alarms RECORDING DEVICES PRESS PROGRAM Each device has a unique programming button. -
Page 11: Apn Technical Note
See a list of APN’s that relate to common Australian/New Zealand Sim card service providers. The GPRS Parameters – Settings of Videofied require the APN to be entered in lower case. If the SIM card service is being used on the Public Network, then the USERNAME and PASSWORD fields are to be left blank. -
Page 12: Programmable Inputs
XT700i GPRS control panels are wireless battery operated alarm systems designed for residential, small business security applications and both indoor and outdoor commercial applications. Through the use of the MotionViewer and Videofied products, the XT700i GPRS panel offers video verification in case of intrusion. - Page 13 DISABLED : CAMERA NAME MAPPING disabled. CAMERA NAME : Camera choice generating video-clip. PROGRAMMABLE Programmable Input 2 configuration menu INPUT 2 PROGRAMMABLE Programmable Input 3 configuration menu INPUT 2 www.videofied.com...
-
Page 14: Panic Button
2. Use : programmable inputs Example 1 : PROGRAMMABLE INPUT 1 is a Panic Button. Keypad screen Notes PROGRAMMABLE INPUTS PROGRAMMABLE INPUT 1 It is necessary to enable the transmission of the programmable input in TRANSMISSION : ENABLED order to transmit the event linked to the panic button. The choice of ALARM in ALARM MODE will allow you to transmit the ALARM MODE : ALARM Panic Button event when the panic button is activated. - Page 15 Programmable input’s name, for example : MAGNETIC CONTACT. MAGNETIC CONTACT Siren mode when existing magnetic contact is triggered. The SIREN mode in SIREN MODE will allow you to activate the videofied siren in case SIREN MODE : SIREN of detection on the existing system.
- Page 16 Programmable input’s name, for example : INFRARED BEAM. INFRARED BEAM Siren mode when infrared beam is triggered. The SIREN mode in SIREN MODE will allow you to activate the videofied siren in case of detection the SIREN MODE : SIREN infrared beam.
-
Page 17: Access Level
RSI Video Technologies XT series control panels can trig- ger up to 2 relays hard wired to external devices you would like activated based on an event in the Videofied control panel. *YOU CAN ONLY USE THE OUTPUTS WITH ALKALINE +... - Page 18 PROGRAMMABLE INPUT 2 - LOW DEVICE BATT- PROGRAMMABLE INPUT 3 - AC POWER MISS. - ARMING INPUT 1 - PANEL RESET - ARMING INPUT 2 - OUTPUT NAME: OUTPUT NAME Allows you to name the programmable output for identification. www.videofied.com Page - 2...
- Page 19 When using the ioutputs the panel must Ref+ be powered by 4 Alkaline D-cell batteries PWR AC2/DC- PWR AC1/DC+ and a 12v DC power supply. The powere supply must be hooked up to these termi- nals. www.videofied.com Page - 3...
- Page 20 XTender Mode XT200/XT600/XT700 Auteurs : Frédéric LANCELIN Diffusion : RSI Video Technologies Date : 23/12/2010 : XTx00 Application Note_EN.doc Version : 1.0 – FR Suivi des versions : Date Version Auteur Modifications 23/12/2010 F. LANCELIN Creation 23/12/2010 F. LANCELIN More Specs 1.
- Page 21 3. Wiring In order to arm the XT, you must apply a latching +12V to Arming Input 1 or 2. Arming Input 1 will arm Area 1 and 2. Arming Input 2 will arm Area 3 and 4. 4. XTender Mode Menus The XTender mode is available through the following menus : CONFIGURATION GENERAL PARAMETERS...
- Page 22 This mode will allow the panel to be armed and and disarming. This mode will set the panel so when it sees disarmed by Videofied peripherals or by a schedule. 12v on the arming inputs it will arm, when that voltage is taken away the system will disarm.
-
Page 23: Wiring Diagram
XT610 ARM/DISARM FROM XT610 Wiring Diagram Host XT610 Slave XT610 Relay Power Supply... - Page 24 XT610 ARM/DISARM FROM XT610 Q: What model ratchet/toggle relay do you recommend? A: During our testing we used an Altronix RBR1224 Q: How do you know when the ‘SLAVE’ system is armed? A: The keypad for the slave system will change the display to PART LVL # where # is the current user level the system is in when it arms Q: How long can the wire run between panels be? A: The wire length is different depending on the guage of wire.
-
Page 25: Tech Support
It can be armed only through its Arming Inputs. 5. Tech Support Questions can be directed to www.videofied.com under the technical support tab or directly to support@videofied.com. RSI Video Technologies Parc d’activités des Forges, 56 rue J. Giraudoux 67200 Strasbourg FRANCE page 3/4... - Page 26 Access Level. You must change your Access Level DISARMED LVL: 3 to 4. RIGHT ARROW to ACCESS LEVEL and press YES, RIGHT ARROW to ACCESS LVL: 4 and press YES. When prompted ACCESS LEVEL with BADGE OR CODE enter your installer code + YES. www.videofied.com...
- Page 27 Press YES if every- thing looks correct. The display will now show all schedules that have been entered 02:00 OPEN in cronological order. You can use the ARROW KEYS to cycle 12345 -- through them. www.videofied.com...
-
Page 28: Additional Configuration Options
ARROW KEYS to change it to DISABLED and press YES. 5. When using Frontel TMTiV2.6.6.6. you must add the line Managelocsched=1 to the Frontel.ini located in the Frontel2/Bin folder in your in- stallation. Once this has been added you must restart Frontel. www.videofied.com... - Page 29 Even though Videofied uses the data side of the network a SIM card will have a phone number associated with it. When the Ringtone feature is activated and the modem is always on the Videofied control panel will be looking for a call on the GPRS modem.
-
Page 30: Gprs Parameters
PRODUCT APPLICATION NOTE: PANIC W/ VIDEO Using the RIGHT ARROW go to CONFIGURATION and press YES, CONFIGURATION when prompted with BADGE OR CODE, enter your installer code + YES. With the display showing GENERAL PARAMETERS press the YES GPRS PARAMETERS key. - Page 31 XT Control Panel. This plug must not get loose or you will lose reception. When plugging in the connector you must be careful to press straight down in order to make a proper connection. www.videofied.com Page 1 of 3...
- Page 32 Remove a single tab from the cover of the XT control panel in order to not pinch the cable. Carefully place the cover on the control panel making sure that the cable is not going to be pinched anywhere. www.videofied.com Page 2 of 3...
- Page 33 9. Press and hold the ESC/NO button for 5 seconds to bring you back to the main screen Parts List: CA-3N010- 10’ 240 Series N-Male to N-Male Coax - L-Com Technologies HGV-906U - 6dBi Omni Directional 900MHz Antenna CA-MMNFBCN19 - 19” N-Female to MMCX Mini Coax - L-Com Technologies www.videofied.com Page 3 of 3...
- Page 34 NOTE: The GPRS Yagi Antenna Kit is only available for the V6000(P) GPRS and XT series control panels...
- Page 35 GPRS YAGI ANTENNA APPLICATION NOTE P r o d u c t A P P l i c A t i o n n o t e Manufactured by RSI Video Technologies May 2011 Remove the tab on the cover for the panel in order to allow the coax through without being pinched.
- Page 36 4 (Area 1 predefined from factory for entry/exit delay. Areas 2, 3, & 4 programmable.) www.videofied.com www.videofied.com © 2010 RSI Video Technologies Videofied® is a Registered Trademark of RSI Video Technologies. MotionViewer is a Registered Trademark of RSI Video Technologies. S View ®...
-
Page 37: Troubleshooting
Good communication between the MotionViewers and the Control Panel is key to getting successful video to the monitoring station. During mounting of any device on your Videofied system you must run the Radio Range/Device Locating test to ensure that the mounting location is with-in range of the Control Panel. - Page 38 2012/1/9 Ed 1.1 Setup and Programming manual for XTIP series Monitoring Station is not getting any signals: Communication between the Control Panel and the Monitoring Station is either over the Ethernet Connection or GPRS side of the GSM cellular network. ...
- Page 39 2012/1/9 Ed 1.1 Setup and Programming manual for XTIP series Panel is staying CONNECTED WITH MONITOR STATION While the Control Panel is attempting or is connected with the Monitoring Station you will see this message when you attempt to move around on the keypad. If the system is not successful in connecting with the station it will retry the connection multiple times, locking you out of programming until it is done trying.
- Page 40 2012/1/9 Ed 1.1 Setup and Programming manual for XTIP series XT -SERIES „AFTER INITIAL PROGRAMMING‟ FLOW CHART P a g e...
- Page 41 CONFIGURATION Menu Configuration : XT7 GPRS GENERAL ALARM MODES RESPONDING PARTY AREAS AND CONFIGURATION PARAMETERS PROGRAMMABLE LIST DEVICES MONITORING STATION MONITORING SITE DEVICES FULLY ARMED PARAMETERS IDENTIFICATION GPRS PARAMETERS VIDEOMAIL ALARM ADRESS MONITORING ? ADD A NEW PHONE NUMBER ZONE : NNNN DISABLED/ENABLED DEVICE STATE : EEEE...
- Page 42 XTIP710 - CONFIGURATION MENU Configuration General Alarm Modes Responding Party Areas and Configuration Parameters Programmable List Devices Monitor Station Monitoring Site Identification Fully Armed Devices Parameters Not Supported in North American Monitoring? Market Add A New Phone Number Enabled Areas: 1234 Device State: AAAA Account Number...
Need help?
Do you have a question about the XT GPRS and is the answer not in the manual?
Questions and answers