
Related Manuals for Videofied XTO Series


Summary of Contents for Videofied XTO Series
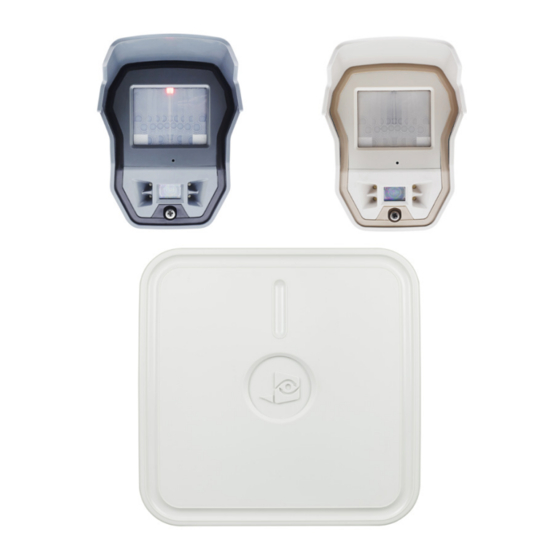
- Page 1 / XTO-IP ALARM PANEL SERIES INSTALLATION MANUAL DOC. - REF. 230-XTO-IP MODIF. DATE : SEPTEMBER FIRMWARE VERSION : XLP.04.04.00.XXX AND LATER...
-
Page 2: Introduction
Technology ® The XTO-iP alarm panel, like all Videofied devices, uses the S2View patented technology. Which is an interactive wireless and AES encrypted technology ensuring signal integrity and optimal security. The reliability of the signal is guaranteed thanks to the two-way radio frequency transmissions with all the peripherals ®... -
Page 3: Table Of Contents
SUMMARY INSTALLATION MANUAL Introduc tion......................2 Summar y........................3 1. Panel setup.........................4 1.1 SIM card installation..........................4 1.2 Panel bracket mounting........................4 1.4 Powering and initialization........................5 1.5 Pairing the keypad..........................6 1.6 Cover locking............................6 2. XTENDER Mode................................3. Panel programming........................... ETHERNET parameters configuration............................12 XTENDER mode configuration...............................14 4. -
Page 4: Panel Setup
1. PANEL SETUP INSTALLATION MANUAL 1.1 SIM card installation Before removing the front cover from its box, Put the SIM card on the plastic base (Take care to respect the right direction). DO NOT insert or remove the SIM card while the panel is powered. -
Page 5: Powering And Initialization
1. PANEL SETUP INSTALLATION MANUAL 1.3 Powering and initialization • The panel is powered either with 4 LSH20 Lithium batteries or mains powered with 4 alkaline backup batteries. • Always replace all 4 batteries at once. Mixing new and used batteries can severely damage the panel (risk of explosion). •... -
Page 6: Pairing The Keypad
Insert all LS14500 Lithium batteries into the keypad. • Do not mount the keypad. It will display one of the following screens: RSI (c) 2013 <=========XX=========> videofied.com ESC NO • Press on both keys at the same time and release. The indicator LED on the keypad will blink rapidly. -
Page 7: Xtender Mode
2. XTENDER MODE INSTALLATION MANUAL The panel can be used as standard standalone alarm system but it can also be connected to an existing alarm system capable of latching a 9-12Vcc* voltage used for its arming/disarming. 2.1 Standalone Mode In this functioning mode, the XTO-iP panel works as a standard hybrid alarm system with 25 wireless peripherals... -
Page 8: Panel Programming
3. XTO-IP PANEL PROGRAMMING INSTALLATION MANUAL Keypad Display Actions and comments KEYPAD 1 RECORDED OK or YES The system can also be programmed in : french, italian, german, dutch, spanish, swedish, portuguese, danish, < - LANGUAGE : - > czech and polish. ENGLISH (UK) The language can be changed at any time once the panel for language selection... - Page 9 3. XTO-IP PANEL PROGRAMMING INSTALLATION MANUAL Keypad display Actions and comments You may name the installer code using the Alphanumeric CODE NAME : Keypad. If using automatic setting (called installer default list), enter the name of the list. OK or YES Warning : If the wrong installers list name is used it cannot be set later, the system must be defaulted.
- Page 10 3. XTO-IP PANEL PROGRAMMING INSTALLATION MANUAL Keypad display Actions and comments PERIODIC TEST Test Periodicity: 1 hour, 12 hours, 24 hours, 48 hours, 7 days or no tests. PERIODIC TEST : We suggest a 24 hours periodic test call. 24 HOURS To select periodicity OK or YES TEST (hour) :...
- Page 11 Do not interrupt the test or remove the SIM 2G3G4G LEVEL ? card during the test. IMPORTANT : Videofied will require a 3/5 grade or better for reliable transmission of Video alarms. XTO-IP Alarm panel...
-
Page 12: Ethernet Parameters Configuration
3. XTO-IP PANEL PROGRAMMING INSTALLATION MANUAL ETHERNET parameters configuration PARAMETERS ? OK or YES DHCP : DHCP : PANEL IP OK or YES ENABLED DISABLED If the router forces a static IP By setting the DHCP as ENABLED, IP MASK address for the panel, there will a new IP address will be assigned then be a need to define DHCP... - Page 13 OK or YES disarming using Videofied peripheral devices(keyfobs, keypads, badge,readers). From the host : Will make the XTO-iP panel a piggyback/xtender system that will only arm and ARMING PROFILE : ARMING PROFILE : disarm off the latching of 9-12V on the arming...
-
Page 14: Xtender Mode Configuration
3. XTO-IP PANEL PROGRAMMING INSTALLATION MANUAL XTENDER mode configuration ARMING PROFILE : FROM THE HOST OK or YES MODE SLOW : The panel will arm each device one at ARMING MODE a time saving battery life. We recommend this mode. MODE FAST : The panel will arm all devices at the same time. - Page 15 3. XTO-IP PANEL PROGRAMMING INSTALLATION MANUAL Each device has a unique programming button or a RECORDING specific manipulation. Please refer to the Installation DEVICES Sheet for the device you would like to program. Please check the radio level of each device on its final location.
-
Page 16: Xto-Ip Features Guide
4. FEATURES GUIDE INSTALLATION MANUAL 4.1 Get to Access level 4 Tue 29/10 11:23 ACCESS LEVEL ACCESS LEVEL OK or YES LEVEL : 1 DISARMED LVL:1 To unlock and get access to the installer level 4, you need to successively enter TWO codes (in any order) : ACCESS LEVEL LEVEL : 4... -
Page 17: Arming And Siren Mode Configuration
CONFIGURATION (LVL 4) -> AREAS AND DEVICES -> DEVICES -> DEVICES CONFIGURATION -> DEVICE TYPE When in the ‘Arm From Host’ mode, the Videofied system will only arm and disarm when 9-12v is supplied and sustained. When both arming inputs are supplied voltage at the same time the Videofied Keypad display will show ‘SYSTEM ARMED. -
Page 18: Manage Badges And Access Codes
4. FEATURES GUIDE INSTALLATION MANUAL 4.4 Manage badges and access codes Access Level Access Level Definition & Rights LVL 1 Standby Level LVL 2 Restricted USER level, where it is only possible to arm/disarm the system. USER level, where it is possible to arm/disarm the system, check the event log, test the devices. LVL 3 Modifications of the settings are not possible at this level. - Page 19 4. FEATURES GUIDE INSTALLATION MANUAL Enter a new end user Badge/Code Delete an end user Badge/Code ENTER A BADGES ACCESS CODES BADGE/CODE Press twice on the right OK or YES arrow ENTER A DELETING BADGE/CODE BADGES/CODES OK or YES OK or YES BADGE OR CODE Badges/codes list Enter a 4-6 digit user code and...
-
Page 20: Delete The Keypad Or Any Other Device
4. FEATURES GUIDE INSTALLATION MANUAL 4.5 Delete the keypad or any other device ACCESS LEVEL CONFIGURATION OK or YES GENERAL AREAS AND PARAMETERS DEVICES OK or YES DEVICES OK or YES ADD A NEW DEVICE DEVICE CONFIGURATION OK or YES Devices list to select the device and press... -
Page 21: Read The Event Log
The XTO-iP control panel has 3 programmable inputs and 2 programmable outputs. Please note that we advise to connect the panels to a power supply when using programmable inputs. These functions allow the linking of Videofied ® security systems to auxiliary equipment such as panic buttons, pepper spray, smoke generator, hard-wired door contact, light curtain, etc. -
Page 22: Golden Rules
LCD screen goes dark after 30 seconds of inactivity, press an Registration of up to 25 devices (including the keypad). arrow or numeric key to light it up. Use only batteries provided by Videofied (siren : Alkaline Respect indoor infrared devices installation height (2m10 to 2m30). batteries). -
Page 23: Transmitted Events List
5. TRANSMITTED EVENTS LIST INSTALLATION MANUAL The XTO-iP panel can be configured to enable or disable the transmission of events like alarms or defaults. The installer can modify the default sending settings for those events, although it will end the EN50131 standard compliance. These are the default transmitted events : The following events are not sent by default : DEVICE (intrusions) -
Page 24: G3G4G Error Codes
6. 2G3G4G ERROR CODES INSTALLATION MANUAL IMPORTANT: The PIN of the SIM card has to be deactivated or 00000. The following is a list of error codes that can appear after the 2G3G4G test. In case of 2G3G4G (GPRS) errors during initial programming, we strongly 2G3G4G suggest to continue with the installation and perform the 2G3G4G (GPRS) LEVEL :... -
Page 25: Technical Specification And Security Notes
7. TECHNICAL SPECIFICATIONS AND SECURITY NOTES INSTALLATION MANUAL FCC Regulatory Information for USA and CANADA FCC Part 15.21 Changes or modifications made to this equipment not expressly approved by RSI Video Technologies may void the FCC authorization to operate this equipment. FCC Part 15.105 Class B This equipment has been tested and found to comply with the limits for a Class B digital device, pursuant to Part 15 of the FCC Rules. - Page 26 7. TECHNICAL SPECIFICATIONS AND SECURITY NOTES INSTALLATION MANUAL ELECTRICAL DATA TRANSMISSION Power requirements (option 1) Communicator 2G & LAN Ethernet (XTO-iP 210) Power supply Type B 9-12 V / 1.2 A Communicator type 3G & LAN Ethernet (XTO-iP 730 830) Low voltage limit 5.15 V 4G (XTO640)
- Page 27 For more information about recycling of this product, please contact your local municipality, your waste disposal service or the company that installed the product. The EC declaration of conformity of this product is available by flashing this QR code. www.videofied.com...
Need help?
Do you have a question about the XTO Series and is the answer not in the manual?
Questions and answers