
Related Manuals for MUTOH DT-Series


Summary of Contents for MUTOH DT-Series
-
Page 1: Operation Instructions
Mutoh’s Digital Transfer Printer DT-Series Printers Operation Instructions MUTOH EUROPE N.V. AP-75171, Rev : 1.1, 25/06/2004... - Page 2 Mutoh’s DT-Series Printers – Operation Instructions AP-75171, Rev. 1.1, 25/06/04...
-
Page 3: Copyright Notice
This document may not be reproduced by any means, in whole or in part, without written permission of the copyright owner. This document is furnished to support the Mutoh’s DT-Series Printers. In consideration of the furnishing of the information contained in this document, the party to whom it is given, assumes its custody and control... - Page 4 Mutoh’s DT-Series Printers – Operation Instructions AP-75171, Rev. 1.1, 25/06/04...
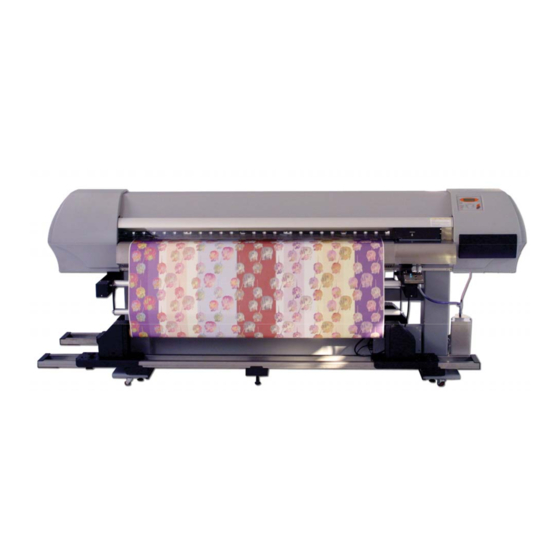
- Page 5 One application possibility in the field of digital textile printing is heat transfer apparel. Mutoh’s DT-Series Printers are offered in two different models, i.e. 65” (1653 mm) media width and 90” (2280 mm) media width.
- Page 6 Mutoh’s DT-Series Printers – Operation Instructions AP-75171, Rev. 1.1, 25/06/04...
-
Page 7: Table Of Contents
Mutoh’s DT-Series Printers – Operation Instructions TABLE OF CONTENTS 1. Safety Instructions..........................9 1.1. Introduction..........................9 1.2. Warnings, Cautions and Notes....................9 1.3. Important safety instructions.....................9 1.4. Warning labels ........................12 1.4.1. Handling the warning labels ....................12 1.4.2. Warning and operation procedure labels on front side............13 1.4.3. - Page 8 Mutoh’s DT-Series Printers – Operation Instructions 3.7.1. Loading roll media ......................53 3.7.2. Setting media type......................57 3.8. Media retainers (media holder) ....................59 3.9. Using the ETT system......................62 3.10. Pressure rollers disabler tool ....................65 3.11. Controlling the heater elements ....................68 4. Daily Maintenance .........................71 4.1.
-
Page 9: Safety Instructions
Mutoh’s DT-Series Printers – Operation Instructions 1. SAFETY INSTRUCTIONS 1.1. INTRODUCTION This chapter explains the meaning of safety terms for personnel who operate this equipment, important safety instructions and the positions of the warning labels. Important : • Be sure to follow all instructions and warnings on this manual when using the equipment. - Page 10 Stop using your printer if a liquid is spilled into it. This may cause electrical shock or fire. Turn the printer off as soon as possible, unplug the power cord, contact your local MUTOH dealer. Be sure to use the attached cable. Otherwise, electrical shock or fire may occur.
- Page 11 Mutoh’s DT-Series Printers – Operation Instructions When cutting the roll media, be careful of the following. Incorrect handling can result in injury to the hands and fingers from the razor blade. When holding the media, do not place fingers over the media cut groove.
-
Page 12: Warning Labels
When cleaning labels, use a cloth with water or neutral detergent. Do not use a solvent or gasoline. • If a warning label is damaged, lost or cannot be recognized, replace the label. When replacing warning labels, contact your local MUTOH dealer. AP-75171, Rev. 1.1, 25/06/04... -
Page 13: Warning And Operation Procedure Labels On Front Side
Mutoh’s DT-Series Printers – Operation Instructions 1.4.2. Warning and operation procedure labels on front side. Type AP-75171, Rev. 1.1, 25/06/04... -
Page 14: Warning Labels On Rear Side
Mutoh’s DT-Series Printers – Operation Instructions 1.4.3. Warning labels on rear side. Type CAUTION THIS UNIT HAS TWO POWER SUPPLY CORDS, WHEN WiNDING UNIT IS PROVIDED. TO REDUCE THE RISK OF ELECTRICAL SHOCK, DISCONNECT ALL POWER SUPPLY CORDS BEFORE SERVICING. -
Page 15: Warning Labels Involving The Special Shipping Liquid
Mutoh’s DT-Series Printers – Operation Instructions 1.4.4. Warning labels involving the special shipping liquid. Description BEFORE powering on printer, REMOVE clamp from waste tubes: On right bottom side of machine! Remove dummy cassettes before powering on the printer. BEFORE powering on printer;... -
Page 16: Perfect Media Handling
Therefore, the DT-series printer has been specially developed to avoid the media cockling to occur and to minimize the print heads to touch the media when minimal media cockling occurs. - Page 17 We recommend you to set the pre-heater temperature at 50°C. This to be sure that transfer paper is already expanded a little before reaching the pressure rollers. 1.5.1.4. Extra fans The DT-series printer is equipped with extra fans to keep the transfer paper flat on the print platform. Caution : •...
-
Page 18: Measurements To Minimize Head Touching Cockling Media
Mutoh’s DT-Series Printers – Operation Instructions 1.5.1.6. Media Retainers (holders) The media cockling causes the transfer paper edges to curl. Media retainers keep the media edges pushed down. Caution : • When using roll media, we recommend you to always use the media retainers. - Page 19 Mutoh’s DT-Series Printers – Operation Instructions 1.5.2.2. Head Height The DT-series printer can be set at the following head heights : 1.2 mm (LOW), 2.2 mm (MIDDLE) and 4 mm (HIGH). Caution : • We recommend you to use the lowest possible head height. This to obtain the best printing quality.
- Page 20 Mutoh’s DT-Series Printers – Operation Instructions AP-75171, Rev. 1.1, 25/06/04...
-
Page 21: Installation Procedures
Mutoh’s DT-Series Printers – Operation Instructions 2. INSTALLATION PROCEDURES 2.1. INSTALLATION ENVIRONMENT REQUIREMENTS Install the unit on a proper location referring to the following. Important : • Do not place the printer on a location under the following conditions. Doing so may cause the product to fall, become damaged, or cause injury. - Page 22 Places where direct sunlight or excessive lighting are expected. Places where air conditioners blow directly. • MUTOH recommends that the printer should be installed where air conditioning can be adjusted easily. Install the product on a flat surface that fulfills the following conditions.
-
Page 23: Unpacking
Mutoh’s DT-Series Printers – Operation Instructions 2.2. UNPACKING The unpacking procedure is described below. The product is sent to the user in 3 boxes, 1 for the main unit, a second for the stand and one for the unwinder / winder 100 system. -
Page 24: Unpacking Stand Packaging Box + Kit
Mutoh’s DT-Series Printers – Operation Instructions Step 4 : Remove the outer boards and take out the accessory box and the packaging box of the waste fluid tank. 1. Outer board 2. Accessory box 3. Packaging box of the waste fluid tank 2.2.2. -
Page 25: Unpacking Unwinder / Winder 100 Box
Mutoh’s DT-Series Printers – Operation Instructions 2.2.3. Unpacking unwinder / winder 100 box Notes : For further information about the unwinder / winder 100, please refer to the user’s guide “Handling roll media”. AP-75171, Rev. 1.1, 25/06/04... -
Page 26: Verification Of Packaged Items
After unpacking the packaging box, inspect if the unit is not damaged and that all necessary parts are present. Notes : • If any part is missing or broken, contact either of the following: The shop where you bought your MUTOH printer. Your local MUTOH dealer. 2.3.1. Packaging box of the main unit Main unit 1 set... -
Page 27: Accessories Box
Mutoh’s DT-Series Printers – Operation Instructions 2.3.2. Accessories box Power cable User's Guide Tube clamp Quick Start Manual Foot switch Installation sheets Hexagon socket head cap screw (M6 x 30) Hexagon socket head cap screw (M6 x 16) Assembly tool (Hexagon wrench:... -
Page 28: Stand Packaging Box + Kit
1 set Foot 3.2.3.1. KIT The DT-series printer has some unique items delivered with the printer. These items are all special measurements to prevent media cockling and / or head strikes. → 10 x Pressure roller disabler tool → 1 x Extra tensioning Tool (3 pieces) →... -
Page 29: Part Names And Functions
Mutoh’s DT-Series Printers – Operation Instructions 2.4. PART NAMES AND FUNCTIONS Part names and functions are explained below. 2.4.1. Front Name Function Operation panel This panel is used to set operational conditions, the status of the printer, and other functions. -
Page 30: Back
Mutoh’s DT-Series Printers – Operation Instructions 2.4.2. Back Name Function AC inlet This is the inlet interface to which the power plug is connected. Interface connector This is the connector to which the interface cable is connected. Foot switch connector This is the connector to which the foot switch cable is attached. -
Page 31: Position And Function Of The Heating Elements
Mutoh’s DT-Series Printers – Operation Instructions 2.4.3. Position and function of the heating elements Heater element Temperature Function → The pre heater expands the transfer paper before it hits Pre-heater (Heater A) 20 – 50°C the pinch rollers. → The dryer helps to make the media touch-dry before it Dryer (Heater D) 20 –... -
Page 32: Assembling The Unit
Mutoh’s DT-Series Printers – Operation Instructions 2.5. ASSEMBLING THE UNIT The assembly of this product is described below. Caution : When assembling this product, always work with at least 4 people or more. 2.5.1. Assembling the stand Assemble the stand according to the following procedure. -
Page 33: Installing The Stand
Mutoh’s DT-Series Printers – Operation Instructions 2.5.2. Installing the stand Install the stand to the main unit according to the following procedure. Step 1 : Place the stand with its feet on the floor. Step 2 : Lift up the main unit with at least four persons by holding it by the handles. -
Page 34: Fixing The Printer Body Onto The Stand
Mutoh’s DT-Series Printers – Operation Instructions 2.5.3. Fixing the printer body onto the stand After installation of the unit onto the stand, please check if there is no gap between the printer body and the stand. When you notice that there is a gap between the printer body and the stand, please follow the instructions mentioned below to minimize this gap. -
Page 35: Removal Of Protective Packaging Material
Mutoh’s DT-Series Printers – Operation Instructions 2.5.4. Removal of protective packaging material Protective packaging material is attached on following locations of this product. Remove all protective packaging material according to the following procedure. Step 1 : Remove tape from all parts of the product. - Page 36 Mutoh’s DT-Series Printers – Operation Instructions B ) : Remove the two wing bolts. C ) : Remove the head unit fixture material. 1. Wing bolt 2. Head unit fixture material D ) : Close the front cover. 1. Front cover Step 4 : Remove the bag with media retainers taped onto the print platform.
-
Page 37: Installing The Printer
Mutoh’s DT-Series Printers – Operation Instructions 2.5.5. Installing the printer To install the product, follow the steps below. Step 1 : Move the product to where it will be installed. Step 2 : Lock the casters. Step 3 : Rotate the four adjusters in the direction shown in the figure to make the printer stable. -
Page 38: Installing Unwinder / Winder 100 And Waste Bottle
Mutoh’s DT-Series Printers – Operation Instructions 2.6. INSTALLING UNWINDER / WINDER 100 AND WASTE BOTTLE To install accessories, such as the unwinder / winder 100 and waste fluid bottle, please refer to the User’s Guide “Handling roll media”. Caution : •... -
Page 39: Preparing For A Job
Do not wire the cable near equipment that generates heat. Notes : • If the power cable is damaged, contact one of the following : The shop where you bought your MUTOH printer. Your local MUTOH dealer. AP-75171, Rev. 1.1, 25/06/04... - Page 40 Mutoh’s DT-Series Printers – Operation Instructions To connect the power cable, follow the steps below. Step 1 : Plug the power cable to the AC inlet on the back of the printer. 1. AC inlet 2. Power cable Step 2 : Plug the cable correctly to the outlet.
- Page 41 Mutoh’s DT-Series Printers – Operation Instructions Notes : • If you cannot use earth terminals or find any of them, contact the shop where you bought your printer. • Do not unplug the power cable when the printer is on. If the power cable has been unplugged, leave the printer for at least 1 minute before plugging the cable in again.
-
Page 42: Connecting The Foot Switch
Mutoh’s DT-Series Printers – Operation Instructions 3.3. CONNECTING THE FOOT SWITCH The connection procedure for the foot switch is described below. If the pressure roller needs to be raised or lowered, it is possible to control this motion from the foot switch, instead of doing so at the operation panel. - Page 43 Mutoh’s DT-Series Printers – Operation Instructions Step 3 : Place the foot switch on the floor under the stand. 1. Foot switch AP-75171, Rev. 1.1, 25/06/04...
-
Page 44: Connecting The Printer To Your Pc
The memory requirements may vary depending on the type of applications you are using and the complexity of the document you want to print. • MUTOH recommends you to use a hard disk and bulk memory as large as possible. 3.4.2. Selecting cables... -
Page 45: Connecting The Network Interface
Mutoh’s DT-Series Printers – Operation Instructions 1. Centronics interface connector 2. Interface cable Step 3 : Plug the other end of the cable into the computer's port. Notes : • Refer to your computer's manual for the procedure to connect to your computer. - Page 46 Mutoh’s DT-Series Printers – Operation Instructions 1. Network interface connector 2. Interface cable Step 3 : Connect the other end of the Ethernet cable to the network. Notes : • Refer to "Network interface board operation manual" to use the network interface board.
-
Page 47: Turning The Power On/Off
Mutoh’s DT-Series Printers – Operation Instructions 3.5. TURNING THE POWER ON/OFF The method to turn the power ON or OFF is described below. Caution : Before powering ON the unit for the first time, make sure to: Remove the dummy cassettes... -
Page 48: Turning The Power Off
Mutoh’s DT-Series Printers – Operation Instructions 3.5.2. Turning the power OFF Turn the power of the unit OFF according to the following procedure. Step 1 : Verify the following regarding the operational condition of the unit. There is no printing operation being performed. - Page 49 Mutoh’s DT-Series Printers – Operation Instructions Step 4 : The product will perform the power OFF operation. Following message is displayed on the operation panel. Power OFF Please Wait All lamps and the LCD of the operation panel will turn OFF.
-
Page 50: Installing Ink Cassettes
Mutoh’s DT-Series Printers – Operation Instructions 3.6. INSTALLING INK CASSETTES The installation of ink cassettes for the first time into the unit is explained below. Caution : • Before powering ON the unit, make sure the waste bottle is installed, the clamps of the waste tubing are removed and the dummy cassettes are removed. - Page 51 Mutoh’s DT-Series Printers – Operation Instructions Step 3 : Power ON the unit. Caution : The unit is shipped with a water based shipping liquid. If there is any doubt about compatibility with your ink, perform a cleaning cycle before loading ink (step 4 to step 6).
- Page 52 Mutoh’s DT-Series Printers – Operation Instructions Step 7 : Insert ink cassettes in the requested configuration. • The ink cassette must be put in a specific slot according to the type and colour used. • Insert the cassette with the arrow mark face-up and pointing to the rear of the printer.
-
Page 53: Media Handling
Mutoh’s DT-Series Printers – Operation Instructions 3.7. MEDIA HANDLING Media handling, attaching media and setting media type are explained below. Environmental Recommended Temperature: 19°C – 26°C working environment Humidity: 30% to 60%, without condensation Notes : Please note that some inks require a humidity of more than 50%, other inks can be used at 30% humidity. - Page 54 Mutoh’s DT-Series Printers – Operation Instructions Caution : • It is very important to set the correct media thickness. Please find below a short resume of installation of roll media. Notes : • Please also refer to the section “Unwinder / winder 100” of the user’s guide “Handling roll media”.
- Page 55 Mutoh’s DT-Series Printers – Operation Instructions Step 8 : Load media through the rear tensioning system as described below. 1 = Unwinder System 2 = Rear Tension System 3 = Insertion slot Step 9 : Load the media through the printer’s pressure rollers.
- Page 56 Mutoh’s DT-Series Printers – Operation Instructions Step 11 : Set the unwinder (REAR) unit to AUTOMATIC until the media reaches the empty core and the rear tensioning system is turned against the unit. Step 12 : Set the unwinder (REAR) unit to MANUAL.
-
Page 57: Setting Media Type
Mutoh’s DT-Series Printers – Operation Instructions Notes : With a small intervention it is possible to reverse your winding direction. Mount a cable between the control box and the front motorized unit cable. 3.7.2. Setting media type The procedure for setting media type is explained below. - Page 58 Mutoh’s DT-Series Printers – Operation Instructions Parameters Description Setup items Media type Roll media Alternates the roll media type. • Roll media : Set when loading roll media. Sheet media • Sheet media : Set when loading sheet media. Lever Down/Up...
-
Page 59: Media Retainers (Media Holder)
Mutoh’s DT-Series Printers – Operation Instructions 3.8. MEDIA RETAINERS (MEDIA HOLDER) The media cockling causes the transfer paper edges to curl. Media retainers keep the media edges pushed down on the print platform. Caution : • When using roll media, we recommend you to always use the media retainers. - Page 60 Mutoh’s DT-Series Printers – Operation Instructions Step 3 : Attach the media holder (left, right) to both sides of the roll media. First attach the rear side of the media retainer to the rear of the print platform. Step 4 : Push the front side of the media retainer down to set it.
- Page 61 Mutoh’s DT-Series Printers – Operation Instructions To remove the media retainers, please follow the instructions below. Step 1 : Carefully pull the lid towards you and unlock the media retainer from behind the print platform. NOT OK AP-75171, Rev. 1.1, 25/06/04...
-
Page 62: Using The Ett System
Mutoh’s DT-Series Printers – Operation Instructions 3.9. USING THE ETT SYSTEM The ETT Extra Tension Tool pulls the media in line with the print platform. The tension on the sides is always bigger than in the middle. As a result possible curls are straightened. - Page 63 Mutoh’s DT-Series Printers – Operation Instructions When using media larger than 51”, install all three ETT’s. When using media smaller than 51”, install only the Left and Right-ETT’s. Place all ETT’s on the ETT-holding-bar. AP-75171, Rev. 1.1, 25/06/04...
- Page 64 Mutoh’s DT-Series Printers – Operation Instructions Secure all ETT’s to the ETT-holding-bar with the secure knob. Step 3 : Bring the ETT-holding-bar backward with all ETT’s attached : Handle is placed vertically. Step 4 : Install the roll media. (Please refer to loading roll media.) Step 5 : Bring the ETT-holding-bar with the previously installed ETT’s forward.
-
Page 65: Pressure Rollers Disabler Tool
Mutoh’s DT-Series Printers – Operation Instructions 3.10. PRESSURE ROLLERS DISABLER TOOL The pressure roller disabler tool allows a pressure roller to be lifted while printing, thus providing the necessary space for media to expand. Caution : • When using roll media, we recommend you to use two pressure rollers disabler tools on both outer sides of the media, as well as two on 1/3 and two on 2/3 of the media. - Page 66 Mutoh’s DT-Series Printers – Operation Instructions Step 2 : Pull the pressure roller (you want to disable) down with your left index finger. Step 3 : Place the pressure roller disabler tool in the space created when pulling the pressure roller down.
- Page 67 Mutoh’s DT-Series Printers – Operation Instructions The pressure roller disabler tool is now positioned as follows : AP-75171, Rev. 1.1, 25/06/04...
-
Page 68: Controlling The Heater Elements
Mutoh’s DT-Series Printers – Operation Instructions 3.11. CONTROLLING THE HEATER ELEMENTS If you want to change or check the heater elements, follow the steps below. Step 1 : Press the [F1] key on the operation panel. The printer works as follows. - Page 69 Mutoh’s DT-Series Printers – Operation Instructions Caution : • We recommend you to set the pre-heater temperature at 50°C. This to be sure that transfer paper is already expanded a little before reaching the pressure rollers. 3.11.2. Change the dryer temperature To change the temperature of the dryers, press the [F3] key on the operation panel.
- Page 70 Mutoh’s DT-Series Printers – Operation Instructions AP-75171, Rev. 1.1, 25/06/04...
-
Page 71: Daily Maintenance
Mutoh’s DT-Series Printers – Operation Instructions 4. DAILY MAINTENANCE 4.1. REPLACING INK CASSETTES Read the following for information on when and how to replace ink cassettes. (1) Replacement time Replace ink cassettes under the following conditions. a. The ink remaining in the ink cassette is low. - Page 72 Mutoh’s DT-Series Printers – Operation Instructions Step 1 : If the printer is turned on, make sure of the following • Printing or other operations are not performed. • Make sure that the display on the operation panel shows the normal state.
- Page 73 Mutoh’s DT-Series Printers – Operation Instructions Step 4 : Take the new ink cassette from its package. Notes : Unpack the ink cassette just before installing it into the ink cassette slot. If you leave the cassette unpacked for a long time, the printer may not be able to print correctly.
-
Page 74: Replacing The Cutting Blade
Mutoh’s DT-Series Printers – Operation Instructions 4.2. REPLACING THE CUTTING BLADE Read following information on when and how to replace the cutting blade. (1) Replacement time Replace the cutting blade under the following conditions. a. Media cannot be cut cleanly The message "media Cut Error"... - Page 75 Mutoh’s DT-Series Printers – Operation Instructions * CutterChg. * Changed cutter? → ENTER Step 4 : Open the front cover. 1. Front cover Notes : • Replace the cutting blade as quickly as possible. If you leave the carriage at the cutting blade replacement position, the head may be clogged with ink.
- Page 76 Mutoh’s DT-Series Printers – Operation Instructions Step 6 : Take out the cutting blade. Caution : • Do not touch the edge of the cutting blade to avoid injury. • Do not drop the cutting blade or apply it on hard material. Doing so may damage or break the cutting blade.
- Page 77 Mutoh’s DT-Series Printers – Operation Instructions Step 8 : While slightly pressing the cutting blade holder tab, return the cutting blade lever to its original position. Notes : • Do not push the cutting blade holder tab strongly or release it suddenly. Doing so may cause the spring incorporated in the cutting blade holder to fly off.
- Page 78 Mutoh’s DT-Series Printers – Operation Instructions Step 10 : Press the [ENTER] key on the operation panel. The carriage returns to its original position and returns to menu 6/7. * SetupMenu * F1 → CutterChg. WiperClean ← F2 F3 → TankChg.
-
Page 79: Replacing The Waste Liquid Tank
Mutoh’s DT-Series Printers – Operation Instructions 4.3. REPLACING THE WASTE LIQUID TANK Read following information on when and how to replace the waste liquid tank. (1) Replacement Time Replace the waste liquid tank under the following conditions. a. When the waste liquid tank is nearly full. - Page 80 Mutoh’s DT-Series Printers – Operation Instructions Step 4 : Remove the waste liquid tank from the tank tray of the stand. Notes : • Put the used waste liquid tank in a plastic bag and follow the local regulations when disposing.
-
Page 81: Cleaning
• Stop using your printer if a liquid is spilled into it. This may cause electrical shock or fire. Power the printer OFF as soon as possible, unplug the power cord and then contact your local MUTOH dealer. Caution: •... -
Page 82: Cleaning The Inside Of The Printer
Mutoh’s DT-Series Printers – Operation Instructions 4.4.2. Cleaning the inside of the printer (1) Cleaning frequency Clean once a month. (2) Cleaning procedure The following are instructions for cleaning the inside of the printer. Follow the steps below. Step 1 : Open the front cover. -
Page 83: Head Cleaning
Mutoh’s DT-Series Printers – Operation Instructions 4.4.3. Head cleaning If printouts become faint or partially missed, perform head cleaning to clean the surface of the head and the nozzles. Follow the steps below to perform head cleaning. Step 1 : Refer to "Testprinting"... - Page 84 Mutoh’s DT-Series Printers – Operation Instructions Step 6 : Press the [ENTER] key on the operation panel to start the head cleaning. Notes : • If the [Cancel] key has been pressed instead of the [ENTER] key after changing the parameters, the printer returns to the normal status without performing a head cleaning.
-
Page 85: Cleaning The Cleaning Wiper
Mutoh’s DT-Series Printers – Operation Instructions 4.4.4. Cleaning the cleaning wiper Following are instructions for cleaning the cleaning wiper. Follow the steps below to clean the cleaning wiper. Step 1 : If the printer is turned on, make sure of the following Printing or other operations are not performed. - Page 86 Mutoh’s DT-Series Printers – Operation Instructions 1. Front cover Caution : • Do not touch the cleaning wiper or the head cap unit while cleaning the cleaning wiper. Doing so may result in poor head cleaning because of oil on your hands.
-
Page 87: Understanding The Operation Panel & Printer Controls
Mutoh’s DT-Series Printers – Operation Instructions 5. UNDERSTANDING THE OPERATION PANEL & PRINTER CONTROLS 5.1. OPERATION PANEL The operation panel is used to set operational conditions, display the status of the printer, and set other functions. The names and functions of the operation keys and status lamps are explained below. - Page 88 Mutoh’s DT-Series Printers – Operation Instructions [ENTER] key Displays the print mode currently set. Determines the new parameter value and changes the LCD monitor display to the next menu. Sets the parameter value and changes the LCD monitor display to the next menu.
-
Page 89: Printer Status
Mutoh’s DT-Series Printers – Operation Instructions 5.2. PRINTER STATUS The status of the printer is explained below. 5.2.1. Normal Indicates that the printer can draw print data when media is loaded. You can also make settings concerning printing using the operation panel. -
Page 90: Changing The Printer Status
Mutoh’s DT-Series Printers – Operation Instructions 5.2.3. Changing the printer status To change the printer status, follow the steps below. (1) Changing the status from normal to the setting menu display Press either [MENU ] or [MENU ] on the operation panel when the printer is in normal status. -
Page 91: Details Of The Setup Items
Mutoh’s DT-Series Printers – Operation Instructions 5.2.4. Details of the setup items This section describes each setup menu of the printer. * SetupMenu * F1 → Ink Status OriginSet ← F2 F3 → TestPrint MediaSet ← F4 (1/7) * SetupMenu * F1 →... - Page 92 Mutoh’s DT-Series Printers – Operation Instructions Parameter Description Setup item Displays information on the Ink status ink cartridge installed in the ink cartridge slot. Makes setting on the print Origin setting head position at the start of printing. Performs test printing.
- Page 93 Mutoh’s DT-Series Printers – Operation Instructions Makes various print mode Print mode settings. setting Print Mode 1 Sets when 4 colours of ink Colour Mode cartridges of 4 colours are loaded for the 87-inch specification printer. 360x360 dpi Makes settings for print...
- Page 94 Mutoh’s DT-Series Printers – Operation Instructions Makes various layout function Layout setting settings. MAX-MIN / Makes settings for how to Direct Command layout printing data. Joint ON / OFF Makes settings for joint printing. Data / Standard Makes settings for media...
- Page 95 Mutoh’s DT-Series Printers – Operation Instructions Makes various settings for the File management processing method of the printing setting data from a computer to the installed hard disk in the printer. WriteMode Makes settings for the processing method of printing data.
- Page 96 Mutoh’s DT-Series Printers – Operation Instructions AP-75171, Rev. 1.1, 25/06/04...
Need help?
Do you have a question about the DT-Series and is the answer not in the manual?
Questions and answers