Honeywell MAXPRO NVR XE Operator's Manual
Hide thumbs
Also See for MAXPRO NVR XE:
- Quick install manual (2 pages) ,
- Hardware installation and configuration manual (360 pages) ,
- Installation and configuration manual (358 pages)
Table of Contents
Advertisement
Quick Links
Advertisement
Table of Contents

Related Manuals for Honeywell MAXPRO NVR XE


Summary of Contents for Honeywell MAXPRO NVR XE
- Page 1 ® MAXPRO Operator’s Guide Issue 1 Document 800-09356V1 – Rev A– 10/11...
- Page 2 This page is intentionally left blank...
- Page 3 Revisions Issue Date Description July 13, 2011 New document October 13, 2011 Added the following: • Changed the CONFIGURATION screen on p .13 • Changed the storage capacity of MAXPRO NVR SE on p.9 • Added the PAL version of MAXPRO NVR SE system diagram...
- Page 4 This page is intentionally left blank...
-
Page 5: Table Of Contents
MAXPRO NVR XE System Diagram ........ - Page 6 M A X P R O N V R Table of Contents Deleting the cameras ............42 Configuring the advanced discovery settings .
- Page 7 M A X P R O N V R Table of Contents Panning, tilting, and zooming ........... 61 Zooming the video display .
- Page 8 M A X P R O N V R Table of Contents This page is intentionally left blank...
-
Page 9: About Maxpro Nvr
• Comes bundled with the software, hardware and licenses. • Connects up to 16 IP cameras in MAXPRO NVR XE (Xpress Edition) and 32 IP cameras in MAXPRO NVR SE (Standard Edition), including support for IP High- definition cameras. •... -
Page 10: Features Of The Software Bundled In The Maxpro Nvr Single-Box Solution
NVR S I N G L E B O X S O L U T IO N The software bundled in both MAXPRO NVR XE (Xpress Edition) and MAXPRO NVR SE (Standard Edition) offer the following features: • Allows local or remote operations including live and recorded video monitoring, configuration and system management in a single interface. -
Page 11: Maxpro Nvr System Diagrams
A B O U T M A X P R O ® N V R Introducing MAXPRO® NVR MAXPRO NVR S Y S T E M D IA G R A M S MAXPRO NVR SE S (PAL V YSTEM IAGRAM ERSION The following figure illustrates the PAL version of MAXPRO NVR SE (Standard Edition system... - Page 12 A B O U T M A X P R O ® N V R Introducing MAXPRO® NVR MAXPRO NVR Operator’s Guide ...
-
Page 13: Maxpro Nvr Xe System Diagram
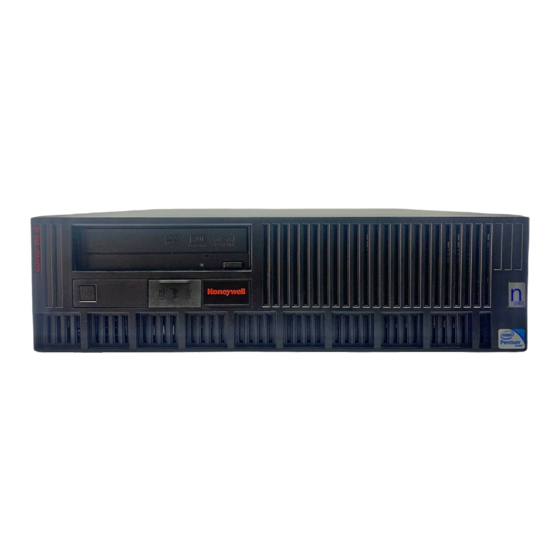
A B O U T M A X P R O ® N V R Introducing MAXPRO® NVR MAXPRO NVR XE S YSTEM IAGRAM The following figure illustrates the MAXPRO NVR XE (Xpress Edition) system diagram. MAXPRO NVR Operator’s Guide... - Page 14 A B O U T M A X P R O ® N V R Introducing MAXPRO® NVR This page is intentionally left blank MAXPRO NVR Operator’s Guide ...
-
Page 15: Maxpro Nvr Wizard
MAXPRO NVR W IZARD ........MAXPRO NVR Wizard is an easy three-step procedure to live video. This wizard automatically starts each time you power-on the MAXPRO NVR system. - Page 16 M A X P R O N V R W I Z A R D Field Description Start Recording Start recording as soon as soon as the camera is added. 24/7 background recording is enabled for all the cameras. Auto IP Assigns a valid address to cameras with Automatic Private IP Assignment Addressing (APIPA).
- Page 17 M A X P R O N V R W I Z A R D Step 2 - The CAMERA DISCOVERY page displays. • All the settings that you have saved on the CONFIGURATION page are listed, along with the discovered cameras. As each connected camera is discovered (notice the message that displays on the lower right of your monitor) it is added to the list.
- Page 18 M A X P R O N V R W I Z A R D Note: The ADD button on the CAMERA DISCOVERY page displays only if you have selected “NO” corresponding to Auto Add Discovered Camera in the CONFIGURATION page. Use the ADD button to add discovered cameras of your choice to the MAXPRO NVR software.
-
Page 19: Licensing Information
MAXPRO NVR comes pre-licensed or included with all camera licenses as this varies with MAXPRO NVR SE (Standard Edition) or MAXPRO NVR XE (Xpress Edition). You can view the version and license information of MAXPRO NVR from the User menu. - Page 20 L I C E N S I N G I N F O R M A T I O N Viewing The Version and License Information of MAXPRO NVR This page is intentionally left blank MAXPRO NVR Operator’s Guide ...
-
Page 21: Logging On And Familiarization
To log on to MAXPRO NVR Double-click on the desktop. The Log On dialog box appears. Click Start -> Programs -> Honeywell -> MAXPRO NVR. The LogOn dialog box appears. Click the Language option, and then select the required language from the drop-down list. -
Page 22: Saving A Server Address In A Profile
L O G G I N G O N A N D F A M I L I A R I Z A T I O N Logging On Using Profiles Note: Set profiles if you have multiple MAXPRO NVR units and use the drop-down to choose which unit you would like to connect to. -
Page 23: Deleting A Profile
L O G G I N G O N A N D F A M I L I A R I Z A T I O N Familiarizing with the MAXPRO NVR user interface Click OK. The profile is modified. E L E TI N G A P R O F IL E To delete a profile In the client workstation, double-click... -
Page 24: Viewer Tab
L O G G I N G O N A N D F A M I L I A R I Z A T I O N Familiarizing with the MAXPRO NVR user interface IE WE R T A B The following figure illustrates the Viewer tab. - Page 25 L O G G I N G O N A N D F A M I L I A R I Z A T I O N Familiarizing with the MAXPRO NVR user interface The following components are displayed on the screen. Component Description Devices/Site window...
- Page 26 L O G G I N G O N A N D F A M I L I A R I Z A T I O N Familiarizing with the MAXPRO NVR user interface Component Description Image/Clip window Click to display a floating window that lists the images and clips in a tree structure.
- Page 27 L O G G I N G O N A N D F A M I L I A R I Z A T I O N Familiarizing with the MAXPRO NVR user interface Component Description Views window A floating window that lists the salvo views. The View window consists of My Salvo views and Shared Salvo views.
-
Page 28: Configurator Tab
L O G G I N G O N A N D F A M I L I A R I Z A T I O N Familiarizing with the MAXPRO NVR user interface O NF IG U R A T O R TA B The following figure illustrates the Configurator tab. -
Page 29: Search Tab
L O G G I N G O N A N D F A M I L I A R I Z A T I O N Familiarizing with the MAXPRO NVR user interface E A R C H TA B The following figure illustrates the Search tab. -
Page 30: Report Tab
L O G G I N G O N A N D F A M I L I A R I Z A T I O N Setting preferences E P O R T T A B The following figure illustrates the Report tab. Report tab Event History Report... -
Page 31: Pausing The Video Rendering
L O G G I N G O N A N D F A M I L I A R I Z A T I O N Setting preferences Select the Renderer Option for video rendering. Select the Mange CPU Load (Throttle Frame Rate) check box if you want to throttle the frame rate if the CPU usage reaches 90 per cent. -
Page 32: Setting The Alarm Threshold Value
L O G G I N G O N A N D F A M I L I A R I Z A T I O N Setting preferences To define the video display for each preview panel Click the Preferences option in the User menu. The Preferences dialog box displays. By default, the General Settings tab is selected. -
Page 33: Configuring The Diagnostic Settings
L O G G I N G O N A N D F A M I L I A R I Z A T I O N Setting preferences Click the Timeline Settings tab. Under Timeline Jump Control Configuration, set the time for the intervals. Under Snapshot Duration Settings, select the Daywise or Hourwise option button as applicable. - Page 34 L O G G I N G O N A N D F A M I L I A R I Z A T I O N Setting preferences This page is intentionally left blank MAXPRO NVR Operator’s Guide ...
-
Page 35: Configuring Maxpro Nvr
MAXPRO NVR ONFIGURING ........Configuring MAXPRO NVR involves the following tasks: •... - Page 36 C O N F I G U R I N G M A X P R O N V R Note: The information in the Device Address and the Device Name field is mandatory. EVENT RECORDI NG SETTINGS The event recording settings enable configuring of the times associated to video motion detection and user based recording.
-
Page 37: Configuring The Disk Management Settings
C O N F I G U R I N G M A X P R O N V R To remove holidays and exceptions • Under List of Holidays, select the check box for the holiday you want to remove, and then click Remove Holiday. - Page 38 C O N F I G U R I N G M A X P R O N V R You can also view a graphical illustration of the drive statistics with legends for each of the above fields. • In the Recording recycle at box, type a value.
-
Page 39: Configuring The Cameras
C O N F I G U R I N G M A X P R O N V R Note: To remove a drive, select the check box corresponding to the drive, and then click Delete. O NF IG U R IN G T H E C A M E R A S Cameras are sources for a video input in MAXPRO NVR. - Page 40 C O N F I G U R I N G M A X P R O N V R Note: By default, ACUIX cameras are PTZ enabled. • Continuous Recording - All cameras added are defaulted to “24/7” recording. You can choose a different option from the drop-down list.
-
Page 41: Updating The Cameras
C O N F I G U R I N G M A X P R O N V R Note: For live streaming, 30 FPS is the default frame rate in NTSC format and 25 FPS is the default frame rate in PAL format. •... -
Page 42: Deleting The Cameras
C O N F I G U R I N G M A X P R O N V R To update a camera Click the Configurator tab. The System page displays by default. Click the Camera tab to navigate to the Camera page. The list of cameras configured are displayed. -
Page 43: Creating A Schedule
C O N F I G U R I N G M A X P R O N V R REATING A SC HEDULE You can create schedules for the camera to record video at recurring intervals. To create a schedule Click the Configurator tab. -
Page 44: Configuring The Input And Output For A Camera
C O N F I G U R I N G M A X P R O N V R O NF IG U R IN G T H E IN P U T A ND O U T P U T F OR A C A M E R A Almost all the IP cameras have one or more input and output slots that can be configured. -
Page 45: Updating A Sequence
C O N F I G U R I N G M A X P R O N V R Note: The Sequence Name is limited to a maximum of 18 alphanumeric characters. • The Dwell Time (Sec) appears by default. You can type a new Dwell Time(Sec) for the camera to display video before advancing to the next camera. -
Page 46: Deleting A Sequence
C O N F I G U R I N G M A X P R O N V R ELETING A SEQUENCE To delete a sequence Click the Configurator tab. The System page displays by default. Click the Sequence tab to navigate to the Sequence page. Select the check box corresponding to the sequence you want to delete. -
Page 47: Updating A User
C O N F I G U R I N G M A X P R O N V R Click the Camera Association tab to associate cameras to the user. • To associate one camera at a time, under Available List, select a camera and then click >. -
Page 48: Deleting A User
C O N F I G U R I N G M A X P R O N V R ELETING A USER You can remove a user from MAXPRO NVR. When you delete a user, all the associations made to the user are also removed. -
Page 49: Monitoring A Site
ONITORING A ........A L V O A Y O U T S A N D ANE LS . -
Page 50: Salvo View
M O N I T O R I N G A S I T E Salvo View SURROUNDING CAMERAS The Surrounding Cameras feature allows you to associate a group of cameras to each camera. This feature is particularly useful when you want to view video from a group of cameras at the same time. -
Page 51: Surrounding Cameras
M O N I T O R I N G A S I T E Surrounding Cameras The context menu options on the salvo bar include Send Message, Create Salvo View, and FullScreen. URRO UN DING AM ERA S ............You can associate a camera to a group of cameras using the Surrounding Cameras feature. -
Page 52: Context Menu Options
M O N I T O R I N G A S I T E Live Video ONTEXT MENU OPTIONS When you right-click on a panel displaying live video, a context menu appears. The following table lists the commands in the context menu. Command Click to... -
Page 53: Video Recording And Viewing
M O N I T O R I N G A S I T E Video Recording and Viewing I D E O E CO R DI N G A N D IEWING ............IDE O R E C O R D I N G In the Configurator tab, you can configure the settings to record video for the cameras connected to MAXPRO NVR. -
Page 54: Timeline
M O N I T O R I N G A S I T E Timeline IM ELINE ............L A Y I N G R E C OR D E D V I D E O U S I N G T H E T IM E L I NE Timeline enables you to play recorded video from a particular date and time. -
Page 55: Viewing Thumbnails
M O N I T O R I N G A S I T E Timeline Color Indicates... recording is available for the corresponding date and time. recording is not available for the corresponding date and time. I EWI NG THUMBNAILS To view the thumbnail frames •... -
Page 56: Context Menu Options
M O N I T O R I N G A S I T E Timeline Click the drop-down arrow on the while video is playing and select a time interval. Click the to jump backward or click the to jump forward. The video jumps to the selected time interval. •... -
Page 57: Playing Recorded Video Using Mark In And Mark Out Points In The Timeline
M O N I T O R I N G A S I T E Timeline Command Click to... Save Image As save the frame displayed in the panel in different image formats such as JPG, PNG, and GIF. Saving images on page 62. -
Page 58: Playing Video From The Loop
M O N I T O R I N G A S I T E Timeline LAYI NG VIDEO FROM THE LOOP To play video from the loop To select the loop, click anywhere between the mark in and mark out points. Note: A tool tip appears when you hover the mouse over a loop. -
Page 59: Browsing From One Bookmark To The Other
M O N I T O R I N G A S I T E Video Control Note: To edit the comments, right-click the bookmark and click Edit Comments in the context menu. Modify the comments in the dialog box and click OK. ROWSING FROM ONE BOOKMARK TO THE OTHER Using this feature, you can skip those portions in the timeline that are not bookmarked. - Page 60 M O N I T O R I N G A S I T E Video Control Icon Click to... zoom out of the video. flip the video display. Alternatively, you can click this icon in the toolbar on the top of the salvo layout.
-
Page 61: Panning, Tilting, And Zooming
M O N I T O R I N G A S I T E Video Control Icon Click to... store a preset camera position. To store a preset, select a preset number from the drop-down list and then click the icon. -
Page 62: Images And Clips
The images are saved in the ImagesAndClips folder at the location in the hard drive in which MAXPRO® NVR files are installed. For example, X:\Program Files\Honeywell\TrinityFramework\ImagesAndClips. Here, X: is the hard drive. - Page 63 M O N I T O R I N G A S I T E Images and Clips To create a clip Click the Viewer tab. Specify the loop for which you want to create a clip. Click in the Timeline window. A dialog box appears with the name of the cameras from which video is displayed in the salvo layout.
-
Page 64: Naming Convention For Clips
M O N I T O R I N G A S I T E Images and Clips AMING CONVENTION FOR CLIPS The following table explains the automatic naming convention for a clip using an example. Clip Name Description 080109 The first two digits indicate the year, the next two digits indicate the month, and the last two digits indicate the date of clip creation. -
Page 65: Viewing Options For Images
M O N I T O R I N G A S I T E Alarms I EWI NG OPTIONS FOR IMAGES Option Description Image Size On the toolbar, you can select the image size in the box. The image sizes available are Small, Medium, and Large. -
Page 66: Acknowledging Alarms
M O N I T O R I N G A S I T E Alarms alarms in a table in the Alarm window. For each unacknowledged alarm, the following details are listed: Column Indicates... Description name of the event that triggered the alarm. For example, camera motion detected. -
Page 67: Context Menu Options
M O N I T O R I N G A S I T E Alarms ONTEXT MENU OPTIONS When you right-click on the list of unacknowledged alarms in the first table, a context menu appears. The following table lists the commands in the context menu: Command Click to.. -
Page 68: Context Menu Options
M O N I T O R I N G A S I T E Alarms If you have selected multiple alarms, then all the alarms are cleared. To clear all the acknowledged alarms • Click Clear All. All the acknowledged alarms are cleared and removed from the list of acknowledged alarms. - Page 69 M O N I T O R I N G A S I T E Alarms Command Click to..Receive Both Alarms and Events to list both alarms and events in the Alarm window. MAXPRO NVR Operator’s Guide...
- Page 70 M O N I T O R I N G A S I T E Alarms This page is intentionally left blank MAXPRO NVR Operator’s Guide ...
-
Page 71: Searching For Recorded Video In Maxpro Nvr
MAXPRO EARCHING ECORDED IDEO ........You can search for video recorded from cameras connected to MAXPRO NVR. You can filter the search for recorded video based on search conditions like video recorded today, yesterday, and others. - Page 72 S E A R C H I N G F O R R E C O R D E D V I D E O I N M A X P R O N V R PLAYING VIDEO AF TER SEARCHING Drag and drop the search result from the Results window on the salvo layout.
-
Page 73: Generating Reports
ENERATING EPORTS ........VERVIEW ............You can generate the following two types of reports: Event History report and Operator Log report. -
Page 74: Generating The Operator Log Report
G E N E R A T I N G R E P O R T S Generating The Operator Log Report In the Device Types box, select the check box next to the type of device for which you want to generate the event history report. -
Page 75: Viewing, Printing, And Saving The Report
G E N E R A T I N G R E P O R T S Viewing, Printing, And Saving The Report In the Operators box, select the check box next to the operators for which you want to generate the operator log report. - Page 76 G E N E R A T I N G R E P O R T S Viewing, Printing, And Saving The Report Icon Click to... close the current view. MAXPRO NVR Operator’s Guide ...
-
Page 77: Index
I N D E X NDEX ........About MAXPRO®... - Page 78 I N D E X Live video 51 Logging Off 23 Logging on 21 Logging On To MAXPRO NVR 21 MAXPRO NVR server addresses 21 MAXPRO™ VMS platform 9 Modifying A Profile 22 Network Video Recorder (NVR) 9 On Screen Display (OSD) s 30 Operator log report 74 Playing a sequence 52 PTZ 61...
- Page 79 This page is intentionally left blank...
- Page 80 Document 800-09356V1 – Rev A – 10/11 © 2011 Honeywell International Inc. All rights reserved. No part of this publication may be reproduced by any means without written permission from Honeywell. The information in this publication is believed to be accurate in all respects. However, Honeywell cannot assume responsibility for any consequences resulting from the use thereof.
Need help?
Do you have a question about the MAXPRO NVR XE and is the answer not in the manual?
Questions and answers