Table of Contents
Advertisement
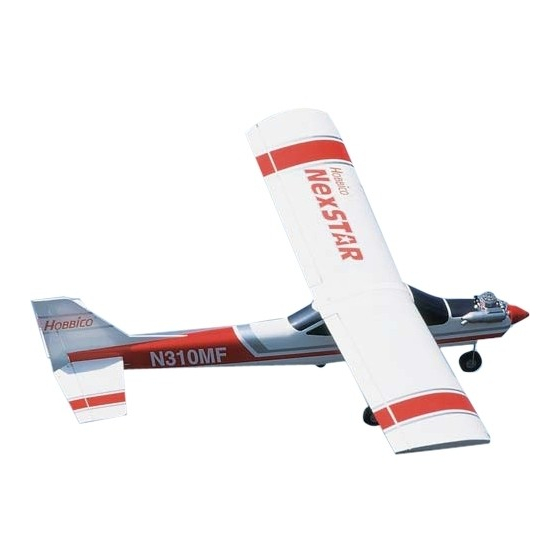
ALMOST-READY-TO-FLY RADIO CONTROLLED MODEL AIRPLANE
Hobbico
®
guarantees this kit to be free from defects in both
material and workmanship at the date of purchase. This warranty
does not cover any component parts damaged by use or
modification. In no case shall Hobbico's liability exceed the
original cost of the purchased kit. Further, Hobbico reserves
the right to change or modify this warranty without notice.
In that Hobbico has no control over the final assembly or material
used for final assembly, no liability shall be assumed nor accepted
for any damage resulting from the use by the user of the final
user-assembled product. By the act of using the user-assembled
product, the user accepts all resulting liability.
READ THROUGH THIS INSTRUCTION MANUAL
FIRST. IT CONTAINS IMPORTANT INSTRUCTIONS
AND WARNINGS CONCERNING THE ASSEMBLY
AND USE OF THIS MODEL.
Entire Contents © Copyright 2004
INSTRUCTION MANUAL
Wingspan: 68-3/4 in [1745mm] Length: 56 in [1420mm]
Wing Area: 722 sq in [46.6 dm
Weight: 6.25–6.75 lb [2835–3060 g]
Wing Loading: 21 oz/ft
Engine: .46–.50 cu in [7.5–8.2cc] two-stroke
WARRANTY
If the buyer is not prepared to accept the liability associated
with the use of this product, the buyer is advised to return
this kit immediately in new and unused condition to the place
of purchase.
To make a warranty claim, send
the defective part or item to
Hobby Services at this address.
Include a letter stating your name, return shipping address, as
much contact information as possible (daytime telephone number,
fax number, e-mail address), a detailed description of the problem
and a photocopy of the purchase receipt. Upon receipt of the
package the problem will be evaluated as quickly as possible.
2
]
[63 g/dm
2
2
.52–.56 cu in [8.5–9.2cc] four-stroke
Hobby Services
3002 N. Apollo Dr. Suite 1
Champaign IL 61822
Champaign, Illinois
(217) 398-8970
E-mail: airsupport@hobbico.com
HCAZ3005 for HCAA2025 V1.0
] Radio: 4-5 channel
USA
Advertisement
Table of Contents

Related Manuals for Hobbico NexStar ARF


Summary of Contents for Hobbico NexStar ARF
-
Page 1: Instruction Manual
Champaign IL 61822 Hobby Services at this address. In that Hobbico has no control over the final assembly or material used for final assembly, no liability shall be assumed nor accepted Include a letter stating your name, return shipping address, as... -
Page 2: Table Of Contents
There are over 2,500 Fueling the Nexstar ARF..... . 25 AMA chartered clubs across the country. Contact the AMA FLYING . -
Page 3: Important Safety Precautions
The recommended engine size range for the Hobbico NexSTAR ARF is .46 to .50 two-stroke or .52 to .56 four-stroke. If an engine in the upper end of the size range is used, remember that this is a model that is intended to fly at scale- like speeds, so throttle management should be practiced. -
Page 4: Additional Items Required
Here is a list of optional tools mentioned in the manual that In addition to the items listed in the “Decisions You Must will help you build the Hobbico NexSTAR ARF. Make” section, the following is a list of hardware and ❏... -
Page 5: Kit Inspection
KIT INSPECTION Before starting to build, take an inventory of this kit to make sure it is complete, and inspect the parts to make sure they are of acceptable quality. If any parts are missing or are not of acceptable quality, or if you need assistance with assembly, contact Product Support. -
Page 6: Ordering Replacement Parts
Replacement Parts List that follows. The fastest, most economical service can be provided by your hobby dealer or mail-order company. To locate a hobby dealer, visit the Hobbico web site at www.hobbico.com. Choose “Where to Buy” at the bottom of the menu on the left side of the page. - Page 7 The tail bolts slide into blocks in the fuselage under the The Hobbico NexSTAR ARF uses a three-line fuel line stabilizer. As the tail bolts are tightened, both the fin and system to simplify fueling and de-fueling.
- Page 8 The SpeedBrakes Training Flaps were designed to allow your The CenterCore wing rib is a nylon part that comes NexSTAR ARF to fly slower, reduce top speed and shorten preinstalled onto one of the wing halves. It performs several the landing approach. Thanks to these flaps, your NexSTAR functions: it aligns the two wing halves;...
-
Page 9: Assembly
ASSEMBLY Assemble the Wing For this section you will need: 1 Left wing 2 Nylon horns 1 Right wing 4 #4 x 3/4" [19mm] 2 Airfoil extensions Wood screws 2 SpeedBrakes training 6 #4 x 5/16" [8mm] flaps Wood screws 1 CenterCore wing rib 1 Standard servo ❏... - Page 10 CenterCore wing rib until it stops. ❏ 10. Cut a servo arm as shown above and use a Hobbico Servo Horn Drill (or a #48 or 5/64" [2mm] drill bit) to enlarge the servo arm holes. Install the arm on the servo. Install a clevis and a clevis retainer on the threaded end of the ❏...
-
Page 11: Install The Engine
Install the Engine For this section you will need: Engine 4 4mm x 30mm Fuel tank IsoSmooth engine Metal engine mount mount screws 4 4mm x 20mm Engine 4 4mm Nuts mount machine 8 4mm Washers screws 4 4mm Lock washers ❏... - Page 12 the engine with the IsoSmooth nylon bracket on the engine mount. Use Great Planes Thread Locking Compound on the screws to prevent them from coming loose with vibration. ❏ 5. Install a clevis and a clevis retainer on the threaded end of the 17-1/2"...
-
Page 13: Alternate Engine Installation
Propeller (HCAA3744) Keep away from the propeller while the engine is running. The engine size used on the NexSTAR ARF is powerful enough to cause damage if anything (including you) gets in ❏... -
Page 14: Landing Gear Installation
Landing Gear Installation For this section you will need: Nose gear wire 2 4mm Washers Aluminum main gear 1 Steering arm (2 parts) 5 4mm Wheel collars 3 Wheels 1 Steering pushrod 2 Landing gear axles Phillips screwdriver 1 Nylon nose gear Metal file ❏... - Page 15 Note: Should you ever need to remove the landing gear from the fuselage, insert a screwdriver into the hole under the fuselage farther from the leg you want to remove. Apply light pressure to the tab inside the hole and pull the landing gear leg out.
-
Page 16: Install The Tail Surfaces
Install the Tail Surfaces For this section you will need: Stabilizer 2 Nylon clevises 2 Silicone clevis 2 Control horns retainers 4 #2 x 1/2 [12mm] 2 2mm Steel pushrods Screws 2 Nylon tail bolts Phillips screwdriver ❏ Note: It is recommended that you apply the fuselage, stab 3. -
Page 17: Radio Installation
❏ 5. Connect both the elevator and rudder pushrod clevises to their control horns. Use the second hole from the outer tip of the control horn for both of them. This will allow you to obtain the recommended throws. Slide the silicone clevis keeper over the clevis. - Page 18 ❏ 2. Wrap the receiver and the battery with foam and then install them on the radio tray. Use the hook and loop material supplied to secure them in place. ❏ 3. Install a 6" [150mm] extension on the receiver’s aileron channel.
- Page 19 Enlarge the servo arm holes where ❏ the pushrods will be connected with a Hobbico Servo Horn 11. Remove the aileron servo arm and connect the Drill (or a #48 or 5/64" [2mm] drill bit.) Slide pushrods into aileron servo to the receiver aileron servo extension.
-
Page 20: Get The Model Ready To Fly
GET THE MODEL READY TO FLY Now the plane is assembled, but there are a few things that must be done before it will be ready to fly. You must carefully perform all of the following Setup procedures. If possible, have your flight instructor assist you. -
Page 21: Check The Control Throws
Adjust the Throttle The throttle is to be set up so that when the throttle stick is all the way down, and the throttle trim lever is all the way up, the carburetor will be nearly, but not fully closed and the engine will idle at a low RPM. -
Page 22: Balance The Model
Those mark the forward and aft CG limit for the I.D. tag found in the back of the manual and use spray adhesive NexSTAR ARF. The forward CG limit is 3-3/16" [81mm]. The or tape to stick it in the model. -
Page 23: Ama Safety Code
AMA SAFETY CODE (excerpts) ENGINE SAFETY PRECAUTIONS Read and abide by the following excerpts from the Academy Failure to follow these safety precautions may result of Model Aeronautics Safety Code. For the complete Safety in severe injury to yourself and others. Code refer to Model Aviation magazine, the AMA web site or the Code that came with your AMA license. -
Page 24: Check List
Check List FINAL PREPARATIONS ❏ 1. Fuel proof all areas exposed to fuel or exhaust residue such as the wing saddle area, etc. If you haven't already done so, refer to the Futaba instruction manual for the radio control system and charge ❏... -
Page 25: Flight Preparation
IMPORTANT: Your radio control system transmits a signal on a certain frequency. Be certain you know what The NexSTAR ARF comes with a three-line fuel line system. To the frequency is. This is expressed as a two-digit number fuel the airplane, remove the fuel line plug from the filling line (42, 56, etc.), and can be found on the container the... -
Page 26: Flying
If there is an R/C site within six miles of where you react. The Hobbico NexSTAR ARF should fly well at half or are flying, and if you are operating your model on the slightly less than half throttle. -
Page 27: Maintenance Tips
Flaps. Remove the six screws that hold them in place. The flight there will be a fair amount of exhaust oil residue NexSTAR ARF was optimized to fly with the flaps on, so if sprayed on your fuselage. Do not be concerned with this. - Page 28 Use the strings pre-installed inside the wings to pull the Follow your radio manufacturer's instructions to setup the servo leads. Install the aileron servos into the trays. flaperon mixing in your Hobbico NexSTAR ARF.
- Page 29 Dual Aileron Servos & Flaps The Hobbico NexSTAR Select can also be equipped with dual aileron servos and flaps. To set up the airplane this way, you need to follow the above instructions for the dual servo installation and then install the flaps as indicated below.
-
Page 30: Nexstar Select Arf Faqs
Q.What should I do if the fin rods and fin bolts won't align? NEXSTAR SELECT ARF FAQ A. Lay your fin over the fin sketch on page 31 of this manual and make sure that the fin rods align properly with the drawing.
Need help?
Do you have a question about the NexStar ARF and is the answer not in the manual?
Questions and answers