Table of Contents
Advertisement
Quick Links
Advertisement
Table of Contents

Related Manuals for Parmco Tilta T1-6-1


Summary of Contents for Parmco Tilta T1-6-1
- Page 1 Operating Instructions TILTA MODELS: T1-6-1 T1-6HT T1-9HT As part of Parmco Appliances Ltd commitment to improving and updating product ranges, we reserve the right to alter, change and update technical specifications and appearance attributes of all Parmco Appliances. E&OE...
- Page 2 Please take special note of all detailed technical information and installation instructions. We hope you enjoy your new appliance. If you would like to find out more about this product or any other products in Parmco’s extensive range visit us on the web at www.parmco.co.nz. Regards,...
-
Page 3: Table Of Contents
INDEX Content Page Important Safety Information Installation 6-10 Operation Use and care 11-12 Electrical Connection Warranty... -
Page 4: Important Safety Information
IMPORTANT SAFETY INFORMATION For best performance and to extend the life of your appliance we recommend that you read the instructions in this owners manual thoroughly before using your new appliance. It will provide you with all the information you need to ensure its safe installation, proper use and maintenance. -
Page 5: Safety Information
Safety Information • This appliance is designed for non-commercial, household use only and must not be altered in any way. • This appliance can only be used safely when it is correctly connected to an efficient earthing system in compliance with New Zealand Electrical Standards requirements. -
Page 6: Installation
Installation The above dimensions are shown for both the 600mm and 900mm version of the Tilta hood. Installation of kitchen ventilation over electrical and gas cooktops must be undertaken in full accordance and reference to the relevant NZ building standards. •... -
Page 7: Wall Fixing
• Regulations concerning the discharge of air must be adhered to. Please refer to the relevant NZ standards. • These hoods can be recirculated using carbon filters available from Parmco Appliances. WALL FIXING • Drill two holes into the wall using the dimensions set out in (fig1) above. - Page 8 • A packer may be required depending on the depth of cabinetry being used and the depth of the fascia panel being applied to the Tilta unit. • Additional holes can be drilled through the rear of the unit to fix the unit to the packer if required.
- Page 9 FIXING THE INTEGRATED PANEL The Tilta units are designed so panels of various type and thickness’ can be used to integrate the unit into the cabinetry. • First remove the aluminium mesh filter from the front of the unit • Locate the two fixing lugs on either side of the curved sliders (see Fig 5) below.
- Page 10 FIXING FASCIA PANEL TO DOOR ASSEMBLY Mount the desired panel to the door using suitable self tapping screws as per the dimensions in (Fig6) below Remount the door assembly into the unit and ensure the locking lugs are correctly positioned and orientated.
-
Page 11: Operation
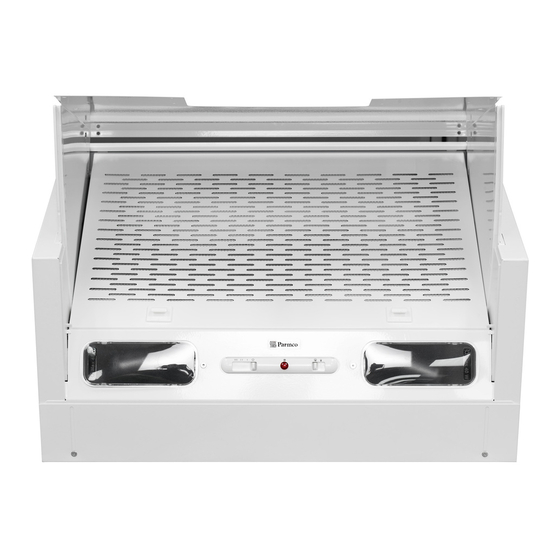
Operating Instructions The Tilta units can have the fan speed and lighting preset so that it automatically operates when the front cover is extended out. The unit can also be operated manually once the front cover is extended out. The Tilta units will not operate when closed. Three speed power switch Suction warning light Lighting switch. - Page 12 Vapours and odours in the cooking air are exhausted through the aluminium grease filter then the carbon filter (when fitted). The efficiency of this appliance depends on the condition and cleanliness of these filters. Aluminium Grease Filters These filters should be washed every 10-15 days depending on the type of cooking being undertaken.
-
Page 13: Electrical Connection
Electrical Connection Make sure that the supply voltage ratings are compatible with those stated on the appliance data label. This appliance comes fitted with a AS/NZS rated 3 pin plug and can be connected to a suitable socket that supply voltage ratings compatible with those stated on the appliance data label. -
Page 14: Warranty
If proof of date of purchase is not supplied, except at the sole 30km of a recognised Service Agent. discretion of Parmco Sales. Proof of purchase can be for the • This warranty is offered as an extra benefit, and does not...
Need help?
Do you have a question about the Tilta T1-6-1 and is the answer not in the manual?
Questions and answers