Table of Contents
Advertisement
Advertisement
Table of Contents

Related Manuals for Parmco T7-6S-1


Summary of Contents for Parmco T7-6S-1
- Page 1 Installation and Operating Instructions Models: T7-6S-1 T7-9S-1 As part of Parmco Appliances commitment to improving and updating product ranges, we reserve the right to alter, change and update technical specifications and appearance attributes of all Parmco Appliances. E&OE 727626032012...
-
Page 2: Table Of Contents
INDEX 1. User guide 1.1 Control Panel ....................1 1.2 Safety ......................1 1.3 Cleaning ......................1 2. Maintenance 2.1 Warnings ......................2 2.2 Anti-grease filters ..................2 2.3 Carbon filters ....................2 2.4 Lighting ......................3 3. Installation instructions 3.1 General ...................... -
Page 3: User Guide
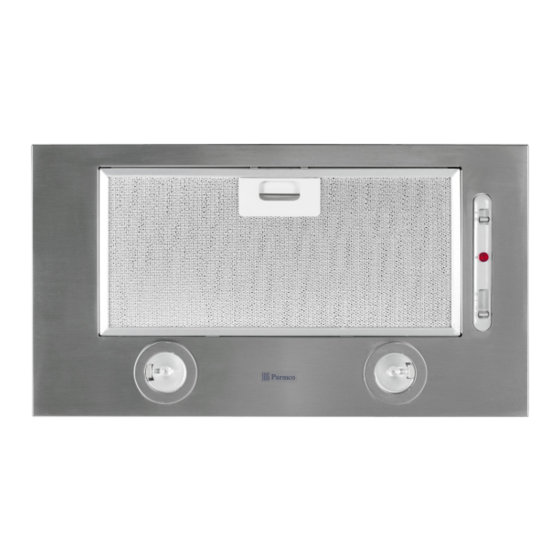
1. User Guide 1.1 Control Panel A -3 way aspiring switch B - Intake warning light C - Light switch 1.2 Safety - Do not use open fire under the rangehood. - Constantly check oil overheating while using the deep fryer in order to prevent it from catching fire. - Before carrying out cleaning operation, disconnect the a ppliance by unplugging it or by switching off the main switch. -
Page 4: Maintenance
2. Maintenance 2.1 Warning Unplug the appliance or switch off the circuit breaker before carrying out any maintenance operations. 2.2 Metallic anti-grease filter • The filter must be washed at least once a month with hot water and non-caustic detergent. • It can also be washed in the dishwasher using non-caustic detergent. -
Page 5: Lighting
2.4 Lights To change the two lamps: • Unscrew the lateral screw. • Remove the ceiling light making it slide towards the right or left. • Unscrew the lamp or lamps and replace with a new one (Fig. 3A). Fig. 3A Halogen lighting • Rotate the light unit anti-clock wise. -
Page 6: Installation Instructions
3. Installation instructions 3.1 General information This hood has been constructed for built-in arrangements. It can be used on the ASPIRATING types (external exhaust), or on the FILTERING types (internal use). Installation must be carried out by a qualified personel, in compliance with all the current regulations and in particular with the ones concerning air exhaust. -
Page 7: Installation
3.4 Installation A - How to position the hood casing (filtering type) • Mount the 120/150 reduction fitting whenever the air discharge tube is 120. The diameter of the air outlet pipe must not be less than 120mm. • Assemble the activated carbon filters (optional). • Fix the hood to the unit using the eight screws supplied (M 4x10 steel - M 4,2x30 wood) together with the 4 screws for attachment to the panel. - Page 8 - How to connect the electrical main • Check to see that the main voltage complies with the one required by the hood, which is indicated on the tag that is applied on the internal side of the appliance. • Assemble a suitable plug on the wire or insert a proper power two-pole switch if it is to be directly connected to the main with a 3mm minimum opening between the contacts of the main and the appliance.
-
Page 9: Technical Specifications
4. Construction and technical specifications 4.1 Construction characteristics • Stainless steel sheet body Sp. 6/10. • Steel bearing body painted with black, white. 4.2 General Characteristics • Electrical system according to the international regulations. • 3 operating speeds. • Activated carbon filter with high depurating qualities (filtering types) (sold aside). • Cooking counter lighting system. -
Page 10: Warranty
09 573 5678 f: 09 573 5699 e: sales@parmco.co.nz w: www.parmco.co.nz Parmco Appliances extended 5 year warranty The Warranty: The Warranty is not valid: • If the product is not installed and operated in accordance with the operating • Subject to the terms and conditions contained within this instructions. warranty, if the product is not of Acceptable Quality (as • If the product is not installed to comply with the electrical, gas, plumbing defined in the Consumer Guarantees Act) within 5 years of and other Regulations and Codes of Practice in New Zealand. the date of original purchase, then Parmco Sales undertakes • If the product is operated on voltages or frequencies outside the normal range for domestic appliances in New Zealand. to repair or, at it’s sole discretion, replace the product.
Need help?
Do you have a question about the T7-6S-1 and is the answer not in the manual?
Questions and answers
How do I change the lights
To change the lights on a Parmco T7-6S-1:
1. Slide the ceiling light cover to the right or left.
2. Unscrew and remove the old lamp(s) (see Fig. 3A).
3. For halogen lighting:
- Rotate the light unit counterclockwise.
- Remove the light unit (see Fig. 3B).
- Replace the lamp with one of the same amp rating. Using a higher amp lamp may damage the electrical system.
This answer is automatically generated