Table of Contents
Advertisement
Quick Links
Models:
T7-6S-3
T7-9S-3
For your convenience, we recommend to attach the serial number label HERE.
As part of Parmco Appliances commitment to improving and updating product ranges,
we reserve the right to alter, change and update technical specifications and appearance
attributes of all Parmco Appliances products. E&OE.
Installation
and Operating
Instructions
727626032013
Advertisement
Table of Contents

Subscribe to Our Youtube Channel
Related Manuals for Parmco T7-6S-3


Summary of Contents for Parmco T7-6S-3
- Page 1 T7-9S-3 For your convenience, we recommend to attach the serial number label HERE. As part of Parmco Appliances commitment to improving and updating product ranges, we reserve the right to alter, change and update technical specifications and appearance attributes of all Parmco Appliances products. E&OE.
- Page 2 Parmco Appliances before any installation is carried out. We hope you enjoy your new appliance. If you would like to find out more about this product or any other products in Parmco’s extensive range, visit us on the web at www.parmco.co.nz. Regards,...
- Page 3 (V) and the frequency (Hz) indicated on the rangehood are exactly the same as the voltage (V) and the frequency (Hz) in your home. Parmco will not bear any responsibility for any damages caused by inappropriate installation and usage. Functions and Features ...
- Page 4 1. The rangehood should be placed at a distance of 65cm above an electric cooktop or 75cm above a gas cooktop. 2. Cut a hole in the cupboard of 490x265mm for model T7-6S-3 and 715x265mm for model T7-9S-3. Make sure there is a minimum 35mm gap between the cutout edge and the cupboard edge.
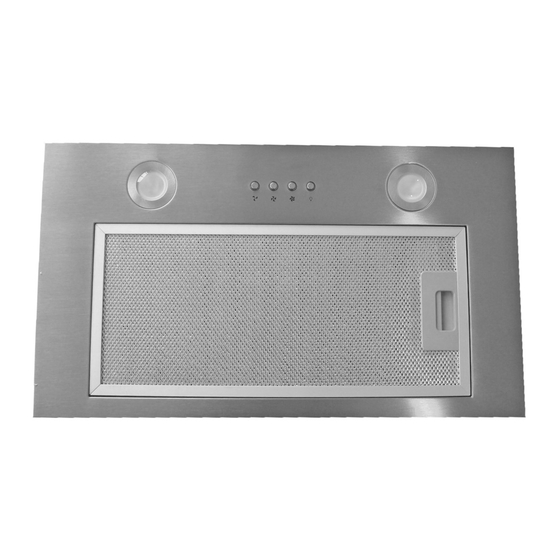
- Page 5 How to use the Control Panel 1. Turn on the power and the buzzer will buzz five times, indicating the appliance is turned on. 2. Press the "Low" button to run the motor at low speed. Press it again and the motor will stop.
- Page 6 If there is damage to the plug or plug wire, contact a qualified electrician or professional to replace with the specific flexible wire. Technical Reference Model T7-6S-3; T7-9S-3 Rated voltage 220-240V 50Hz Lighting power 3W x 2 Motor power...
-
Page 7: Troubleshooting Tips
Do not exhaust the air from the rangehood through the same flue as the cooktop or other kitchen appliances. Troubleshooting Tips If any problem occurs, please remove the plug from the socket and contact Parmco service department at 09 573 5678. Problem... - Page 8 09 573 5678 f: 09 573 5699 e: sales@parmco.co.nz w: www.parmco.co.nz Parmco Appliances extended 5 year warranty The Warranty: The Warranty is not valid: • If the product is not installed and operated in accordance with the operating • Subject to the terms and conditions contained within this instructions. warranty, if the product is not of Acceptable Quality (as • If the product is not installed to comply with the electrical, gas, plumbing defined in the Consumer Guarantees Act) within 5 years of and other Regulations and Codes of Practice in New Zealand. the date of original purchase, then Parmco Sales undertakes • If the product is operated on voltages or frequencies outside the normal range for domestic appliances in New Zealand. to repair or, at it’s sole discretion, replace the product.
Need help?
Do you have a question about the T7-6S-3 and is the answer not in the manual?
Questions and answers