Advertisement
Quick Links
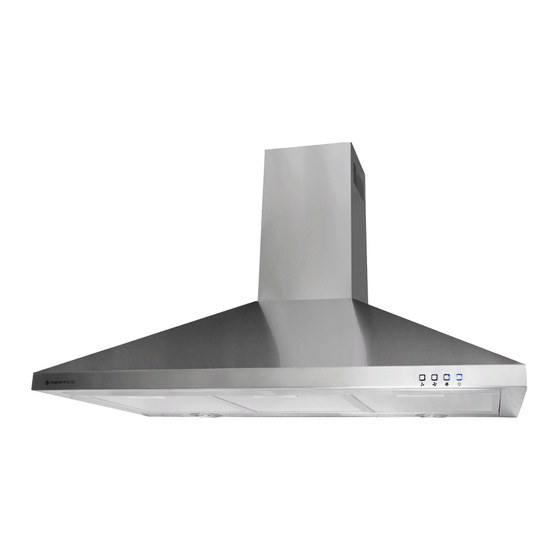
Models:
RBOX-6S-1000
RBOX-9S-1000
RCAN-6S-1000
RCAN-6S-500
RCAN-6W-1000
RCAN-6W-500
RCAN-9S-1000
RCAN-9S-500
RCAN-9W-1000
RCAN-9W-500
RLCD-9G-1000
RLOW-9S-1000
T4-11GLA
T4-11GLA-6
T4-12LOW
As part of Parmco Appliances commitment to improving and updating product ranges,
we reserve the right to alter, change and update technical specifications and appearance
attributes of all Parmco Appliances products. E&OE.
Installation
and Operating
Instructions
Advertisement

Related Manuals for Parmco RBOX-6S-1000


Summary of Contents for Parmco RBOX-6S-1000
- Page 1 RCAN-9S-500 RCAN-9W-1000 RCAN-9W-500 RLCD-9G-1000 RLOW-9S-1000 T4-11GLA T4-11GLA-6 T4-12LOW As part of Parmco Appliances commitment to improving and updating product ranges, we reserve the right to alter, change and update technical specifications and appearance attributes of all Parmco Appliances products. E&OE.
-
Page 2: Rbox-6S
Dear Valued Customer, Thank you and congratulations on purchasing your new Parmco appliance. All Parmco products are made to the highest quality and design standards. We are sure you will enjoy your new appliance. As a note, please read through these instructions carefully. These will assist you in gaining a complete understanding of the functions and features o ered by your appliance. -
Page 3: Table Of Contents
INDEX Content Page Important Safety Information Safety Information Features Installation Use and Care Maintenance Warranty... -
Page 4: Important Safety Information
Please check that the brackets and screws are not discarded with the packaging. This canopy must be installed by a qualified professional. Parmco is not liable for any damages or injuries caused as a result of not following the installation instructions in this manual. -
Page 5: Safety Information
SAFETY INFORMATION This appliance is designed for non-commercial, household use only and must not be altered in any way. This appliance can only be used safely when it is correctly connected to an efficient earthing system in compliance with New Zealand Electrical Standards requirements. ... -
Page 6: Installation
INSTALLATION Models without Glass: Step 1: The canopy should be placed at a minimum distance of 65cm above the cooking surface when placed above an electric hob and a minimum of 75cm above the cooking surface when placed above a gas cooktop. (Refer Pic 1). Step 2: To install, drill 3 holes of Ø8mm along a level line at the desired height. - Page 7 Models with Glass: Step 1: The canopy should be placed at a minimum distance of 65cm above the cooking surface when placed above an electric hob and a minimum of 75cm above the cooking surface when placed above a gas cooktop. (Refer Pic 1). Step 2: To install, drill 3 holes of Ø8mm along a level line at the desired height.
- Page 8 Installation of kitchen ventilation over electrical and gas cooktops must be undertaken in full accordance and reference to the relevant New Zealand building standards. Before installation, please ensure the area is clean to avoid remaining bits of broken wood and dust being sucked into the unit. The exhaust air must not be discharged into an operating smoke or exhaust flue, or into a shaft used for ventilating rooms in which a fireplace is located.
-
Page 9: Use And Care
USE AND CARE For models with Electronic Buttons 1. Turn on the power; the buzzer will sound five times. The sound signifies that the appliance is powered. 2. Push button “low”, the light comes on, the buzzer will sound once and the motor runs at low speed. - Page 10 For models with LCD Touch Controls 1. Turn on the power. The backlight will light up, displaying the time. The backlight will turn off automatically if there is no activity within 30 seconds. 2. Press “light” once to turn on the light. The “light” icon will display on the LCD screen. Press the “light”...
-
Page 11: Maintenance
5. When the motor is on, press “timer” and the canopy will operate for 10 minutes before automatically turning off. MAINTENANCE Cleaning of the Mesh Grease Filter The filter mesh is made of high-density aluminium and stainless steel. Please do not use corrosive detergents on it. - Page 12 Replacing the Lights RBOX range Twist the lamp cap and gently pull out the bulb. Replace the bulb, holding it with the package wrapping or tissue paper, as holding it directly with your fingers will cause the fuse to blow. RCAN 1000s, T4 ranges, RLCD, RLOW Lever out the lamp cap at its indentation points with a blunt object and gently pull out the bulb.
-
Page 13: Warranty
Please retain this Warranty card together with receipt or other proof of purchase date when seeking service during the warranty period • Normal or scheduled maintenance including blocked filters or ducting. • Consumable items such as light bulbs. • Any damage to hobs caused by spills when cooking. • Any breakage or damage of glass items. Please contact Parmco at 09 573 5678 if your • Any damage caused by non recommended product used for cleaning, appliance needs servicing under warranty. Please maintaining, lubricating or similar. have your model number and proof of purchase ready. • Any aspect relating to the installation of the product, or damage caused Warranty repairs must be authorized by Parmco. during installation including blocked access for repair. • Any third party (including reseller) or consequential loss or damage (direct or indirect) however arising. Subject to updates without prior notice, please visit www.parmco.co.nz for E & O.E. 727626022015 the latest version.
Need help?
Do you have a question about the RBOX-6S-1000 and is the answer not in the manual?
Questions and answers