Table of Contents
Advertisement
Quick Links
Advertisement
Table of Contents

Related Manuals for Techni-Lux SE-SNOW1


Summary of Contents for Techni-Lux SE-SNOW1
- Page 1 Information specifically for: SE-SNOW1...
-
Page 2: Table Of Contents
Table of Contents IMPORTANT INFORMATION................UNPACKING......................SAFETY INSTRUCTIONS..................INTRODUCTION....................FEATURES......................SPECIFICATIONS....................PRODUCT VIEW....................SETUP........................Mounting......................Power......................DMX BACKGROUND..................Adapter 5-to-3pin....................OPERATING INSTRUCTIONS................DMX Control..................... Wire Remote Control..................Master Slave..................... REPLACING FUSE.................... -
Page 3: Important Information
SE-SNOW1... -
Page 4: Unpacking
UNPACKING Immediately upon receipt, carefully unpack and inspect the unit to verify that all parts are present and have been received in good condition. If any parts appear damaged from shipping or the shipping carton shows signs of mishandling, retain all packing material for inspection and notify the shipper immediately. -
Page 5: Introduction
▪ Keep this device dry. ▪ For inside use only. Not designed for outside use. ▪ Always unplug your SE-SNOW1 before filling its tank. ▪ Turn off or unplug when not in use. ▪ Never aim output directly at a person(s) or animal. -
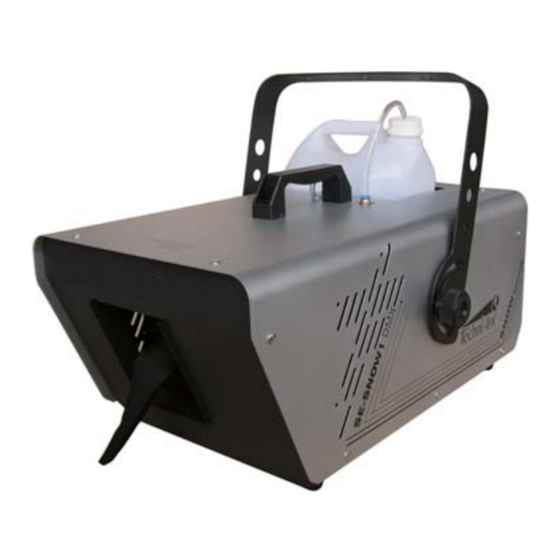
Page 6: Product View
2. Set the snow machine on a flat dry surface. Locate the included bracket from the package and install it using the supplied hard ware to the side casing. 3. Remove the fluid tank cap and fill the tank with TECHNI-LUX branded snow fluid only and then tighten the cap. -
Page 7: Dmx Background
switched circuit. This unit cannot be run on a rheostat or dimmer circuit even if used solely for a 0% to 100% switching. Before applying power to a unit, check that the fixture’s input voltage matches the power source voltage. Consult a qualified electrician if there are any concerns about proper connection to power. -
Page 8: Adapter 5-To-3Pin
OPERATING INSTRUCTION Always be sure to maintain an adequate supply of Techni-Lux brand Snow fluid in the fluid tank. Running the snow machine dry will cause pump failure. Only Techni-Lux snow fluid is recommended! DMX Control The snow machine functions on two DMX channels for snow output and blower speed. To operate in DMX mode, you need to set the machine in DMX mode and address it. -
Page 9: Wire Remote Control
Wired Remote Control 1. Set DIP Switch 9 & 10 to ON position. 2. Plug in Wired Remote and switch on the machine. 3. Red LED indicator on the Remote is lit up. 4. The following functions are available: a. Press the yellow TIMER button and yellow LED is lit up. Use INTERVAL knob to adjust interval from 0- 60 minutes and VOLUME knob for various snow output. - Page 10 10900 Palmbay Drive • Orlando, FL 32824 U.S.A. Voice: 407-857-8770 Fax: 407-857-8771 www.techni-lux.com...
Need help?
Do you have a question about the SE-SNOW1 and is the answer not in the manual?
Questions and answers