Table of Contents
Advertisement
Quick Links
Information specifically for:
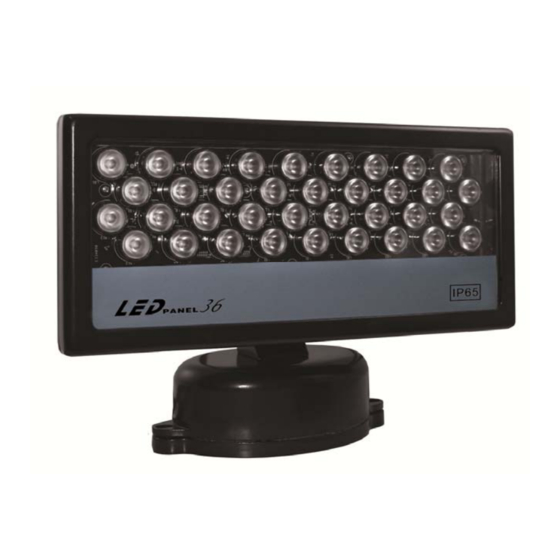
DL-LEDPANEL36C/B – Black with RGB LEDS
DL-LEDPANEL36C/W – White with RGB LEDS
DL-LEDPANEL36W/B – Black with White/Amber LEDS
DL-LEDPANEL36W/W – White with White/Amber LEDS
DL-LEDPANEL36UV/B – Black with UV LEDS
V2.0
This manual contains important information.
Please read before operating fixture.
Advertisement
Table of Contents

Subscribe to Our Youtube Channel
Related Manuals for Techni-Lux DL-LEDPANEL36C/B


Summary of Contents for Techni-Lux DL-LEDPANEL36C/B
- Page 1 Information specifically for: DL-LEDPANEL36C/B – Black with RGB LEDS DL-LEDPANEL36C/W – White with RGB LEDS DL-LEDPANEL36W/B – Black with White/Amber LEDS DL-LEDPANEL36W/W – White with White/Amber LEDS DL-LEDPANEL36UV/B – Black with UV LEDS V2.0 This manual contains important information. Please read before operating fixture.
- Page 2 It is the owner’s responsibility to provide invoices for proof of purchase, purchase date and dealer or distributor. If purchase date can not be provided, warranty period will start at manufacture date. It is the sole discretion of Techni-Lux to repair or replace parts or equipment.
-
Page 3: Table Of Contents
Table of Contents Specifications ..........................4 Unpacking ........................... 5 Purpose of Manual ........................5 Power ............................5 Mounting ............................. 6 Optional Mounting Bracket ......................6 Basic Reference .......................... 6 Basic Setup Wiring Diagrams ....................7 Operation Modes (LED Segment Display) ................8 Display Panel Navigation ...................... -
Page 4: Specifications
Specifications Fixture Overview RGB color mixing, White/Amber variable white or UV Blacklight Rugged Heavy Duty Aluminum Housing Operating modes: DMX, or Standalone Master/Slave 3 Pin DMX connectors Segmented LED display menu for settings Integrated power supply in base ... -
Page 5: Unpacking
Unpacking Immediately upon receipt, carefully unpack and inspect the fixture to verify that all parts are present and have been received in good condition. If any parts appear damaged from shipping or the shipping carton shows signs of mishandling, notify the shipper immediately. Retain carton and all packing material for inspection. -
Page 6: Mounting
used solely for a 0% to 100% switching. Before applying power to a fixture, check that the fixture’s input voltage matches the power source voltage. Consult a qualified electrician if there are any concerns about proper connection to power. Mounting Always consult a qualified professional when rigging. -
Page 7: Basic Setup Wiring Diagrams
Basic Setup Wiring Diagrams There are two basic ways to use the fixture. One is in standalone, which does not require the use of any data lines to be connected nor any controller, each fixture would operate independently based solely on the menu setting. The second method, is to use the units in Master/Slave “self control”... -
Page 8: Operation Modes (Led Segment Display)
Operation Modes (LED Segment Display) The following refers to the different modes that are available on this fixture via the LED Segment Control Panel display. All functions are selectable from the display menu located at the back of the fixture using the two push buttons, A and B. “A” is on the left, “B” is on the right. Description of Display and Button Functions Display Panel Navigation Use the control panel located on the rear of the fixture to access its settings. -
Page 9: Setting P(X,Y) Standalone Program
Setting P(x,y) Standalone Program 1) When there is no DMX signal present the fixture will run the selected Standalone Program. 2) Pressing the “A” button 4 times advances to the P(x,y) Standalone Program display. P(x,y) signifies: Program x, Option y. Reference the P(x,y) chart for details. 3) Press button “B”... -
Page 10: Dmx-512 Control
DMX-512 Control Fixtures require a "Start Address" from 1 to 512, setting the first DMX channel containing data for the fixture (see DMX Background). Before addressing fixtures, consult the manual of the system’s DMX controller to select a desirable addressing scheme. Valid Start Addresses range from 1 to 512. -
Page 11: Dmx Start Address
5 Pin XLR (Socket) Pin 1: GND(Sheild) XLR (Plug) Pin 2: Signal(-) Pin 1: GND(Sheild) Pin 3: Signal(+) Pin 2: Signal(-) Pin 4: N/C Pin 3: Signal(+) Pin 5: N/C 5 Pin XLR (Plug) XLR (S ocket Pin 1: GND(Sheild) Pin 1: GND(Sheild) Pin 2: Signal(-) Pin 2: Signal(-) -
Page 12: Channel Values And Functions - 3 Channel Mode
UV model: Channel Function UV set 1 (0-255) UV set 2 (0-255) UV set 3 (0-255) Channel Values and Functions – 3 Channel Mode RGB Models: CH 1 : Red Sets relative intensity of Red. CH 1 – Red DMX Value Function No Output 1-255... -
Page 13: Ch 1 : White
White/Amber LED Models: CH 1 : White Sets relative intensity of White CH 1 – White LEDS in set 1. DMX Value Function No Output 1-255 Intensity - Off to Full On CH 2 : White Sets relative intensity of White CH 2 –... -
Page 14: Maintenance
Maintenance Make sure fixture is cool and disconnected from power mains before any service. Weekly operating hours and environmental conditions will establish how often the fixtures need cleaning. Fixtures should be cleaned and inspected at least once a month to maintain optimum performance. -
Page 15: Troubleshooting
Troubleshooting Symptom Possible Cause / Solution No Power Check for power on mains Check main fuse and fuse holder Erratic / No response to DMX Check data cables: connection and proper wiring Check Display settings Check Start Address Incorrectly responds to DMX Check Start Address (Diagnostic technique for DMX issues: Set Check for overlapping addresses... - Page 16 10900 Palmbay Drive • Orlando, FL 32824 U.S.A. www.techni-lux.com...
Need help?
Do you have a question about the DL-LEDPANEL36C/B and is the answer not in the manual?
Questions and answers