Table of Contents
Advertisement
Advertisement
Table of Contents

Subscribe to Our Youtube Channel
Related Manuals for Orbit T977


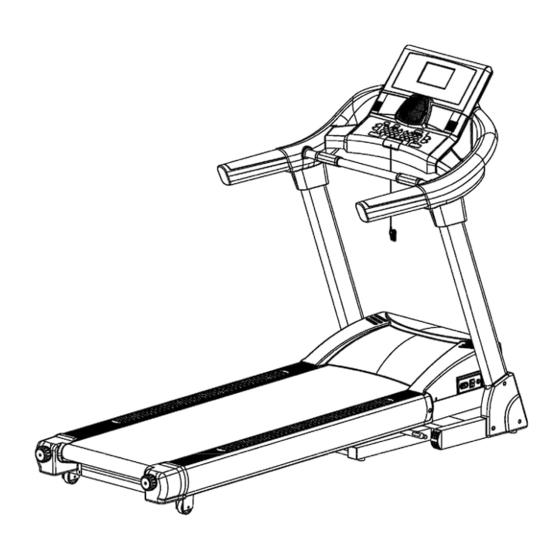
Summary of Contents for Orbit T977
-
Page 2: Important Safety Precautions
IMPORTANT SAFETY PRECAUTIONS 1. Plug the power cord of the treadmill directly into a dedicated grounded circuit. This product must be grounded well. If it breaks down, grounding provides a path of least resistance for electric current to reduce the risk of electric shock. - Page 3 IMPORTANT SAFETY PRECAUTIONS 10. When the treadmill is not used, the power cord should be unplugged and the safety pull pin should be removed. 11. Before starting any exercise program, consult with your physician or health professional. He or she can help to establish the exercise frequency, intensity (target heart zone) and time appropriate to your particular age and physical condition.
-
Page 4: Assembly Instructions
ASSEMBLY INSTRUCTIONS Caution: Read the assembly instruction carefully, and follow the steps of the instruction while assembling. When you open the carton, you will find the below spare parts: ASSEMBLY SPARE PARTS LIST: DESC. SPEC QTY NO. DESC. SPEC MAIN FRAME SAFETY KEY LEFT HANDLE BOTTOM CONSOLE SET... -
Page 5: Assembly Steps
ASSEMBLY STEPS Notice: Do not turn power on before assembly is done. Step 1: 1.Put the Main Frame(#A)on the flat ground. Step 2: 1. Use 6# Allen Wrench, fasten the Left Upright (#80) and the Right Upright (#81) with the Main Frame (#A) by the Bolt (#110) and the Washer (#54). - Page 6 Step 4: Use 6# Allen Wrench, Fasten the Console Set (B) with the Left & Right Upright (#80 & #81) by the Bolt (#110, M10*25) and the Lock Washer (#54). 2. Connection Way: Connect the Upper Wire (#113) of the Console Set (B) with the Middle Wire (#114) of the Right Upright (#81) carefully.
-
Page 7: Moving Instructions
Use Allen Wrench with Screw Driver, Fasten the Right Protection Cover (#99) onto the Base Main Frame by the Screw (#111, ST4.2*16). MOVING INSTRUCTIONS After assembling the Treadmill, please follow the instructions below to move the Treadmill: 1, Hold the position F, the cross bar of the treadmill, pull up the main frame as shown by the arrow. -
Page 8: Technical Parameter
TECHNICAL PARAMETER 2160*880*1525MM AS ORDER REQUEST BUILT UP SIZE (mm) POWER MAX.OUTPUT NON-FOLDABLE AS ORDER REQUEST FOLDABLE SIZE (mm) POWER 1520*520 MM AS ORDER REQUEST RUNNING BOARD (mm) IMPUT CURRENT 132 KG 0-20% NET WEIGHT OF THE UNIT INCLINE LEVELS 135 KG 1.0-22 KM/h MAX. -
Page 9: Window Display
OPERATION GUIDE WINDOW DISPLAY: 1. “TIME”: Display the running exercise time. Counting from 0:00 to 99:59, when it reaches 99:59, the speed of the treadmill will be slowly decreased until the treadmill stops completely and displays END. The unit will become STANDBY state after 5 seconds. Counting from the target data down to 0:00, when it reaches 0:00, the speed of the treadmill will also be slowly decreased and the treadmill displays END. -
Page 10: Button Function
5. “CAL. / “FAT”” window: Display the runner’s calories consuming data and Fat testing result. When display the runner’s calories, counting from 0 to 999, when it is over 999, the display will be reset to be 0 and the counting will start again from 0 to 999. Counting from the target data down to 0. When it reaches 0, the speed of the treadmill will also be slowly decreased and finally “END”... -
Page 11: Manual Mode
FAN button: Press this button to operate or stop the fan. 10. When the treadmill is under standby mode, press both SPEED+ and INCLINE+ for about 3 seconds. You will hear the buzzer make a sound “BI”, then the change between Kilometer and Mile will be finished, and the LED light will be shown accordingly. -
Page 12: Preset Programs
5, When setting is finished, press “START” button to start up, the treadmill will run after 3 seconds, press “INCLINE+”,”INCLINE-”, “SPEED+”, “SPEED-” to adjust the speed and the incline; press the STOP, the treadmill will stop. PRESET PROGRAMS: This treadmill has 18 preset programs. Under the standby status, press “PROGRAM” button, the window of “SPEED”... - Page 13 FORM 1: TIME INTERVAL (KM) TIME SETTING TIME/10 =OPERATION TIME OF EACH SECTION MODE SPEED INCLINE SPEED INCLINE SPEED INCLINE SPEED INCLINE SPEED INCLINE SPEED INCLINE SPEED INCLINE SPEED INCLINE SPEED INCLINE SPEED INCLINE SPEED INCLINE SPEED INCLINE SPEED INCLINE SPEED INCLINE SPEED...
- Page 14 FORM 2: TIME INTERVAL (MILE) TIME SETTING TIME/10 =OPERATION TIME OF EACH SECTION MODE SPEED INCLINE SPEED INCLINE SPEED INCLINE SPEED INCLINE SPEED INCLINE SPEED INCLINE SPEED INCLINE SPEED INCLINE SPEED INCLINE SPEED INCLINE SPEED INCLINE SPEED INCLINE SPEED INCLINE SPEED INCLINE SPEED...
- Page 15 USER’S PROGRAM: U1, U2, U3: Besides the 18 preset programs, you can also set up another 3 user’s programs for user’s programs as your need: U1, U2, U3. 1, User’s programs setting: Press the button “PROGRAM” until it shows the user’s program(U1-U3), then press the “MODE” to enter into the setting.
- Page 16 The above chart is for reference only. And HRC 1 is recommended for moderate exercisers and HRC 2 & HRC 3 is for weight loss users. Please consult your physician if you have high blood pressure, high cholesterol, heart problem, asthma or other physical conditions HRC PROGRAM OPERATION INSTRUCTION (OPTION): 1.
- Page 17 3. After finishing “Age” setting, presses “MODE” again and the system will advise a target heart rate and display on the window. You can adjust the heart rate you want by pressing “INCLINE+”, “INCLINE –“, “SPEED+”, “SPEED –” and the range is 86 – 179. 4.
- Page 18 BODY TESTER: At the beginning state, press “ PROGRAM” continually to enter into the body FAT tester, press “ MODE “ enter F-1、F-2、F-3、F-4、F-5 ( F-1 SEX, F-2 AGE, F-3 HEIGHT, F-4 WEIGHT, F-5 FAT TESTER ), Press “SPEED+”、“SPEED -” to set F-1 ---- F-4 ( refer to the following chart), after that, press “ MODE” to set F-5, then grasp the hand pulse, the window will display your body quality index after 3 seconds.
-
Page 19: Exercise Instructions
CAUTION: 1. We recommend that you maintain a slow speed in the beginning of exercise and hold on the handrails until you become comfortable and familiar with the treadmill. 2. Attach the magnet end of the safety lock to the console and also attach the clip of the safety pulling rope to your clothing. - Page 20 2. The Exercise Phase This is the stage where you put the effort in. After regular use, the muscles in your legs will become stronger. It is very important to maintain a steady tempo throughout. The rate of work should be sufficient to raise your heart beat into the target zone shown on the graph below.
-
Page 21: Maintenance Instructions
MAINTENANCE INSTRUCTIONS WALKING BELT CENTERING AND TENSION ADJUSTMENT DO NOT OVERTIGHTEN the walking belt. This may reduce motor performance and excessive roller wear. TO CENTER WALKING BELT: ● Place treadmill on a level surface ● Run treadmill at approximately 3.5 mph ●... -
Page 22: Walking Belt And Deck Lubrication
WALKING BELT AND DECK LUBRICATION This treadmill is equipped with a pre-lubricated, low maintenance deck system. The belt/ deck friction may play a major role in the function and life of your treadmill, thus requiring periodic lubrication. We recommend a periodic inspection of the deck. We recommend lubrication of the deck according to the following timetable: Light user (less than 3 hours/ week) annually... -
Page 23: Exploded Diagram
EXPLODED DIAGRAM:... -
Page 24: Parts List
PARTS LIST: DESCRIPTION SPEC. Q’TY DESCRIPTION SPEC. Q’TY Main Frame Bolt M5*12 Incline Frame Bolt M10*45 Enhance Tube Speaker Seal Ring Front Roller Mp3 Connection Wire Rear Roller Base Main Frame 6# Allen Wrench Turnable Sleeve 5# Allen Wrench Incline Turnable Sleeve Allen Wrench With Screw S=13, 14, 15 ARC End Cap... - Page 25 Bolt M10*45 Tap Cushion Pad Spring Washer Hand Pulse Flat Washer Fan Set Bolt M8*65 Sticker Bolt M8*75(Option) Safety Key Spring Ball Bolt M8*50 Bolt M10*25 Bolt M12*60 Screw ST4.2*16 M10*80 Flat Washer Bolt M6*25 Computer Up Wire Bolt M4*8 Computer Middle Wire Bolt M5*8...
-
Page 26: Troubleshooting Guide
TROUBLE SHOOTING GUIDE TROUBLE CODE PROBABLE CAUSE SOLUTION WAY EXPLANATION Frequency Frequency Converter IC Converter system Change the Frequency Converter. is damaged. problem Friction between the running belt The current of motor is over 10A. and running board is too big, Over-current &...
Need help?
Do you have a question about the T977 and is the answer not in the manual?
Questions and answers