Table of Contents
Advertisement
Advertisement
Table of Contents

Related Manuals for Orbit ST 35D


Summary of Contents for Orbit ST 35D
- Page 1 ST 35D ST 35D ST 35D 110kgs...
-
Page 2: Table Of Contents
CONTENT CONTENT -------------------------------------------------------------------------------------------------------------------------------- IMPORTANT SAFETY PRECAUTIONS ------------------------------------------------------------------------------------2 ASSEMBLY INSTRUCTIONS -------------------------------------------------------------------------------------------------3-5 FOLDING & UNFOLDING INSTRUCTIONS ------------------------------------------------------------------------------6 GROUNDING METHODS ----------------------------------------------------------------------------------------------------------7 OPERATION GUIDE -------------------------------------------------------------------------------------------------------------8-13 GETTING STARTED GUIDE ----------------------------------------------------------------------------------------------------14 SAFETY EXERCISES --------------------------------------------------------------------------------------------------------------15 WARM-UP EXERCISES -----------------------------------------------------------------------------------------------------------16 MAINTENANCE INSTRUCTIONS --------------------------------------------------------------------------------------------17 BELT ADJUSTMENT ----------------------------------------------------------------------------------------------------------------18 EXPLODED DRAWING -------------------------------------------------------------------------------------------------------------19 PARTS LIST -------------------------------------------------------------------------------------------------------------------------21-22 ERROR CODE AND SIGNIFICANCE--------------------------------------------------------------------------... -
Page 3: Important Safety Precautions
IMPORTANT SAFETY PRECAUTIONS WARNING: Before starting any exercise program, consult your physician or health professional, especially for person who is above 35 years old or had some health problems before. Neither manufacturer nor distributor should be held responsible for any injuries or discomfort by the user due to above reasons. Don't plug in power until you finish assembling the treadmill. - Page 5 Line up holes and threads in between co puter bracket and upright posts, screw in bolt M8*15 (D3) and with washer (D31) manually, take care to avoid cross-threading, do not tighten bolts. Line up holes in between upright posts and main frame, screw in bolt M10*55 (D5) and with washer (D31) manually, take care to avoid cross-threading, do not tighten up bolts.
- Page 6 Step 3: Put on safety key (C26) and MP3 line(C33), attach left/right side cover(B27/28) using bolt ST4.2*25(D33) ATTENTION: Check that all nuts and bolts are tightened. Before you use this treadmill, please read the below instructions carefully.
-
Page 7: Folding & Unfolding Instructions
Folding instruction Lift up the machine and apply force to push up until you hear "click" from the latch which indicate that locking mechanism is engaged. Unfolding instruction Use foot to press the latch lightly until the cylinder disengages and treadmill deck starts folding down. Hold onto the deck to support the fold down until you are in safe space to the drop. -
Page 8: Grounding Methods
Grounding methods This treadmill must be grounded properly. It is equipped with a cord connecting to an equipment-grounding conductor and a grounding plug. The 3 pin plug must be plugged into an appropriate power outlet that complies with industrial codes and local requirements in relate to grounding. -
Page 9: Operation Guide
Operation Guide WINDOW DISPLAY 1.1. 1.2. START Treadmill starts at 0.8kph after 5 seconds countdown 1.3 PROGRAM 1 manual mode,15 pre-set programs, 1 body fat program, 3 countdown functions , 3 users and HRC programs 1.4. SAFETY LOCK FUNCTION Window shows"---" when safety key is taken away from the lock and treadmill will stop quickly with "didi" beeping alarm. - Page 10 1.5.3 “MODE” BUTTON When treadmill is switched on, press this button to choose countdown modes:‖H-1‖,‖H-2‖,‖H-3‖; H-1‖ is the time countdown mode, ―H-2‖ is the distance countdown mode, ―H-3‖ is the calorie countdown mode; press ―SPEED+/-‖ or ―INCLINE+/-―button to adjust the set values to desired values. After that, press ―START‖ button to start the treadmill.
- Page 11 1.6.7 ALL WINDOW DISPLAY DATA RANGE TIME:0:00 – 99.59(MIN) DISTANCE: 0.00 – 99.9(KM) CALORIES: 0.0 – 999 (kcal) SPEED:0.8-18.0(km/h) PULSE: 50 – 200 (BPM) INCLINE:0 – 15 level 1.7 PULSE FUNCTION When the treadmill is running, hold on hand pulse pads for about 5 seconds, it will then display your pulse reading.
- Page 12 1.9 Manual mode operation 1.9.1 Press start key, time counts down 5 seconds, then treadmill will start to work with initial speed 1km/h 1.9.2 Press speed +/- to adjust speed 1.9.3 Press incline+/- to adjust incline 1.9.4 Press stop, you can stop treadmill at anytime 1.9.5 Press quick speed key, you can quickly adjust speed to what you want 1.9.6 Press quick incline key, you can quickly adjust incline to what you want 1.10 3 COUNTDOWN FUNCTION PARAMETER DATA...
- Page 13 The ideal FAT should be between 20-25, if under 19, it means too thin. If between 25 and 29, it means overweight, if over 30, it means obese. (The Index is a loose definition and should only be treated as reference, not for medical purpose) Sex 01 Male 02 Female Age 10------99 Height 100----200 cm...
- Page 14 If『THR+15≥HR>THR+5』, then SPEED and INCLINE adjust itself to make your pulse close to the default pulse automatically in every 15 secs, SPEED automatically decrease by 0.4K and INCLINE automatically decrease by1 level until the data reached the min.. If『HR>THR+15』, then each 15secs SPEED and INCLINE adjust itself to make your pulse close to the default pulse automatically in every 15 secs, SPEED automatically decreased by 0.8KM and INCLINE automatically decrease by 2 level until the data reached the min.
-
Page 15: Getting Started Guide
Getting started guide PREPARE f you are over 35 years old, or have health problems, or this is your first time to do fitness exercise, please consult doctor or professional before use this machine. If you’re unsure of intensity and exercise time, please consult professional for advice. -
Page 16: Safety Exercises
SAFETY EXERCISE Please consult professional staff before exercise, which can help recommend or draft exercise programs according to your age and health condition. When running, if you feel chest tightness or chest pain, irregular heartbeat, short of breathe, dizziness or anything uncomfortable, please stop exercise immediately! Seek medical advice if symptoms persist long after stop exercise. -
Page 17: Warm-Up Exercises
Warm-up Exercise It is better to do some stretch exercise before running, this would help reduce chance of injury as well. Use 5-10 mins to warm-up. Follow below method and diagram to do stretch exercise for five repeats, and each foot for 10 seconds or more every repeat. -
Page 18: Maintenance Instructions
Maintenance Instruction WARNING: Please make sure pull out treadmill's power plug from power supply before cleaning or maintenance, fail to do so may result in electric shock. CLEANING:Regular cleaning of the unit will greatly prolong the treadmill's life. Keep treadmill clean by dusting regularly. Be sure to clean the exposed part of the deck on either side of the walking belt and also the side rails. -
Page 19: Belt Adjustment
Belt Adjustment Place treadmill on a level surface. Make treadmill run at approximately 6-8 km/h, observe the running belt deviate condition. f the belt is drifting to right, unplug safety lock and power switch, and turn the right adjusting bolt 1/4 turn clockwise, re-start treadmill and make it run at above speed, observe the running belt deviate condition for 1-2 minutes. -
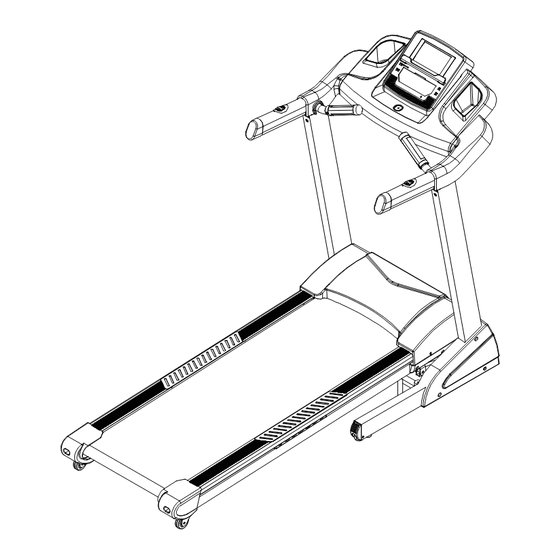
Page 20: Exploded Drawing
Exploded drawing... -
Page 21: Parts List
Parts list A Welding parts Description Description Main frame Handrail bracket Base frame Incline bracket Left upright Incline bushing Right upright B Plastic parts Description Description Computer upper cover End cap Computer left cover Protect wire plug Computer right cover Inner plug Running board cushion Computer bottom cover... - Page 22 C Electric and drive parts Description Description DC motor Single line Motor bracket Controller Incline motor Upper console wire Running board Lower console wire Cylinder Left quick button Motor belt Right quick button Rear roller Handle pulse Front roller Speed sensor Running belt Safety key Power switch...
- Page 23 Cross washer bolt M5X20 Nylon nut M8 Cross washer bolt M5X15 Spring washer M5 Round hex bolt M8X100 Spring washer M8 Hex round head bolt M10X20 Flat washer M10 Hex round head bolt M8X20 Flat washer M8 Cross self-tapping bolt Hex round head bolt M8X55 ST4.2X25 Hex round head bolt M8X60...
-
Page 24: Error Code And Significance
Error code and trouble shooting Error Code Fault Symptoms and Trouble shooting Communication abnormal: Can’t start machine; E1 display on computer with 3 beeps. communication between lower Check wire connection between lower controller and computer, controller and computer failed including connectors, pins and wires. Change wire to test. No Speed signal : E2 display on computer with 3 beeps, no display in other windows. - Page 25 Check incline motor sensor wire and AC wire are plugged into lower control board correctly; match +/- with colored wires; test continuity in connection wires; replace wire and/or incline motor to test; finally, do the calibrate testing according to below steps. E6 display on computer with 3 beeps, no display in other windows.
Need help?
Do you have a question about the ST 35D and is the answer not in the manual?
Questions and answers