Advertisement
Table of Contents
Advertisement
Table of Contents

Subscribe to Our Youtube Channel
Related Manuals for Orbit T944


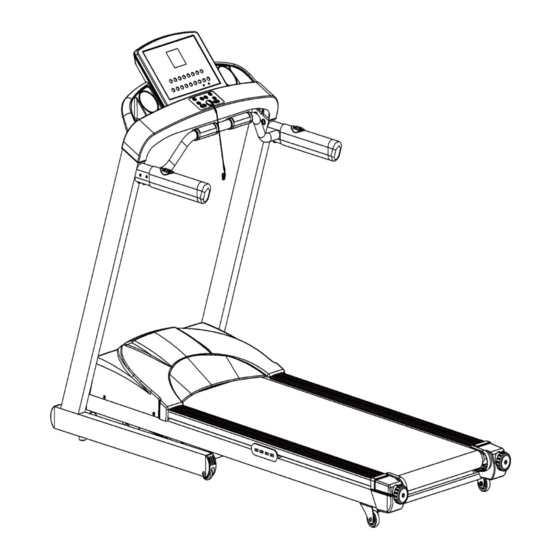
Summary of Contents for Orbit T944
-
Page 2: Table Of Contents
Content Manual and Reference -----------------------------------------------------------------------2 Assembly Instructions-----------------------------------------------------------------------3-5 Folding Instructions ----------------------------------------------------------------------------6 Technical Parameter --- ----------------------------------------------------------------------7 Grounding methods ---------------------------------------------------------------------------7 Operation Instructions---------------------------------------------------------------------8-12 Exercise Instruction --------------------------------------------------------------------------13 Maintenance Instruction---------------------------------------------------------------------14 Running belts centering ---------------------------------------------------------------------15 Exploded Drawing ----------------------------------------------------------------------------16 Parts list ------------------------------------------------------------------------------------17-18... -
Page 3: Manual And Reference
MANUAL AND REFERENCE WARNING Read all instructions carefully before using this product. Retain this owner’s manual for future reference: ----When using this treadmill, keep the safety pull pin rope attached to your clothes. ----When you are running, keep your hands swinging natural, look forward, Never look down at your feet. -
Page 4: Assembly Instructions
ASSEMBLY INSTRUCTIONS When you open the carton, you will find the below spare parts: Spare parts list: Description Specification Qty Description Specification Main Frame Sheet metal screw M6*16 Left upright tube Lock washer Right upright tube Allen Wrench 5 mm Handle bar tube Allen Wrench 6 mm... - Page 5 Notice: Do not turn on before assembly is done. ASSEMBLY STEP 1: Open the carton, get out the above spare parts , put the MAIN FRAME on the ground. ASSEMBLY STEP 2: Use the 6# allen wrench, drill through the bolt (67) to Lock washer(88), then lock the Left upright (3) onto MAIN FRAME (1) ASSEMBLY STEP 3:...
- Page 6 ASSEMBLY STEP 4: Pull through the computer middle wire of Handle bar tube(10) from the left and right Upright(3,4). Then insert the handle bar tube into left and right upright; 2、Fix the handle bar tube(10) and left/right upright with screw driver and M6*16 sheet metal screw(83) ASSEMBLY STEP 5: 1.Connect...
-
Page 7: Folding Instructions
FOLDING INSTRUCTION Folding up the walking deck Hold the handle bar with one hand and with the other hand hold support (A), then PUSH in an up direction until the deck is locked securely into the adjusting bracket as the upper-left picture shows. -
Page 8: Technical Parameter
TECHNICAL PARAMETER (mm) 2060*835*1425 1.0-18KM/h BUILT UP SIZE SPEED RANGE (mm) 1060*835*1885 130KG MAX WEIGHT FOLDABLE IZE RUNNING BELT SIZE 2900*500*T2.8 (mm) 109.8KG NET WEIGHT 0-15 INCLINE LEVELS SPEED, TIME, DISTANCE, CALORIES, INCLINE, PULSE 5 LCD DISPLAY GROUNDING METHODS This treadmill can be seriously damaged by sudden voltage changes in your home’s electrical power. -
Page 9: Operation Guide
OPERATION GUIDE WINDOW DISPLAY: 1、”TIME”window: Turn data per 5 seconds, and relevant direction light will be on. It shows the exercise time .it will show from 0: 00 to 99: 59, the treadmill will speed down slowly until it totally stop and the windows will show the “End”. -
Page 10: Manual Mode
1、“PROGRAM” Button:When the treadmill is not running, press the program button to choose one of the programs: 9 preset programs, 3 user programs and 2 heart rate programs. “Manual quick start” you must press the start button, the treadmill count dowm from 3 to 1 and start at 1.0 kph.;... - Page 11 1、If you do not make any setting and press START button directly, the treadmill will start to move at 1.0km/h after the count down, the other windows will start to count from positive direction from windows default, press “INCLINE+”,”INCLINE-”, “SPEED+”, “SPEED-” change the incline and speed. 2、set up the Time, press “MODE”...
- Page 12 INCLINE SPEED INCLINE SPEED INCLINE SPEED INCLINE SPEED INCLINE SPEED INCLINE User programs Besides the 9 preset programs, we do have 3 user’s programs U1、 U2、 U3.You can use these to make you and your family an individual program. To start press the program until it shows the user program(U1,U2,U3) choose one and the “TIME” will flash showing the pre-set time of 15min .
- Page 13 speed and incline,but the system will adjust the speed and incline to make your pulse close to the default pulse automaticlly.; It has a warm-up status of one minute after beginning your exercise program, the system will not adjust the speed and incline automatically, you can only adjust it manually; one minute later, system will automaticlly add speed with 0.5km/h rate according to your pulse.
- Page 14 3. To end your workout safely, press the PAUSE button or pull out the safety pulling rope, then the treadmill will stop immediately. 4. Please feel free to contact the Orbit service department if the treadmill has any problem. please...
-
Page 15: Exercise Instruction
EXERCISE INSTRUCTIONS Most people are anxious to get started, we sugget that you get checked out by your family physician before entering into any strenuous exercise program especially if you have been inactive for some time. No matter what your level of fitness we still suggest you start your exercise program on your new treadmill slowly. - Page 16 We recommend lubrication of the deck according to the following timetable: Light user (less than 3 using hours/ week) once a year Medium user (3-5 using hours/ week) every six months Heavy user (more than 5 using hours/ week) every three months We suggest you purchasing the lubricant from our local distributors or contact with our company directly.
-
Page 17: Running Belts Centering
Running belts centering Put the treadmill on a flat ground and have the treadmill run at 6-8 km/hour to check if it drifts If it drifts to the right side, turn adjusting knob(36) right side circle clockwisely, check if it drifts. Repeat the steps above until it centers, see picture A. -
Page 18: Exploded Drawing
EXPLODED DRAWING... -
Page 19: Parts List
SPARTS LIST Description Specification Description Specification Left /right side MAIN FRAME TUB PLUG tube60*30*2.0 Left/right BASE FRAME connect TUB PLUG tube80*40*2.0 LEFT UPRIGHT 100*40*2.0 FOAM RIGHT UPRIGHT 100*40*2.0 SIDE RAIL COMPUTER BRACKET NON-SLIP PAD INCLINE SUPPORT FRAME MOTOR BOTTOM COVER REAR INCLINE FRAME SLIDING BLOCK SLIDING BLOCK... - Page 20 BOLT M8*65 PC BOARD M8*55 BOLT QUICK KEYS BOARD PROGRAM BUTTON BOARD SAFETY KEY HOODLE COMPUTTER UP WIRE COMPUTER MIDDLE BOLT M4*6 WIRE COMPUTER BOTTOM BOLT M5*12 WIRE M3*12 BOLT HOCK PANEL BOLT M5*8 MAGNETIC CORE M6*16 BOLT MAGNETIC RING ST4.2*32 SCREW SINGLE LINE1...
Need help?
Do you have a question about the T944 and is the answer not in the manual?
Questions and answers