
Related Manuals for Belling IHK80


Summary of Contents for Belling IHK80
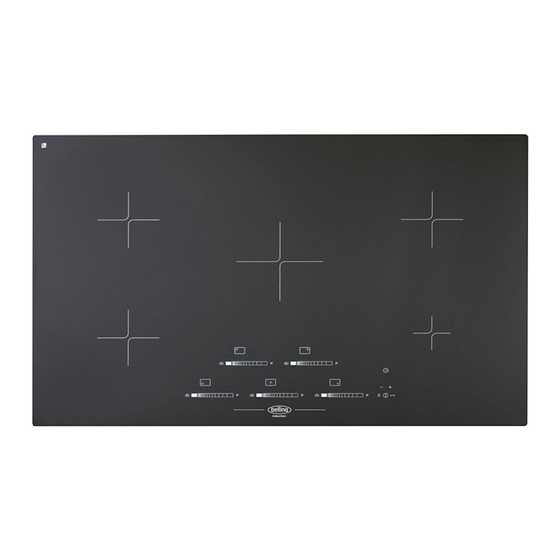
- Page 1 Users Guide & Installation Handbook Belling IHK80/90 UK AU Part No 083364500 Date 14/07/2014...
- Page 2 BELLING GUARANTEE REGISTRATION DEPARTMENT Please ensure that you have available (UK/IE) your appliance model number and serial...
-
Page 3: Important Notice
CONTENTS & INTRODUCTION BEFORE USING THE HOB Make sure that you have removed all packaging, wrappings, stickers and films from the hob surface. It is recommended that you clean and wash the hob surface before using for the first time. Apply a thin coat of ceramic hob cleaner to the hob to help maintain and protect it. - Page 4 SAFETY appliance. Cleaning and BEFORE USING THE PRODUCT Make sure that you have removed all user maintenance shall packaging and wrapping. Some of the not be made by children items inside this appliance may have additional wrapping. without supervision. GENERAL WARNING! - WARNING! - The Unattended cooking on...
- Page 5 SAFETY during use, as this will correctly fitted. seriously affect the WARNING! - There is safety and performance, a risk of electric shock, particularly in relation so always make sure to surface temperatures you have turned off becoming hot and gas and unplugged your operated parts not appliance before...
- Page 6 SAFETY NEVER try to extinguish do not rely upon the a fire with water, but automatic pan detection switch off the appliance system as your means and then cover flame of switching “off” the e.g. with a lid or a damp appliance. cloth. This induction hob Danger of fire: do not complies with the store items on the applicable EMC and EMF...
- Page 7 SAFETY only. It must not be used If you use a griddle plate for other purposes, for ensure it is completely example room heating. cool before attempting to lift it from the hob as Induction Hob residual heat may cause burns, Always use oven Parts of the appliance gloves to protect your...
- Page 8 SAFETY Keep electrical leads oil can be dangerous and may result in a fire. NEVER try to extinguish a fire with from trailing over or water, but switch off the appliance and then cover flame e.g. with a lid or a fire going near the hob. blanket. The appliance must WARNING - If a pan catches fire: •...
- Page 9 SAFETY Old Appliances The Symbol on the product or on its packaging indicates that this product may not be treated as household waste. Instead it should be taken to the appli- cable collection point for the recycling of electrical and electronic equipment. You will by ensuring the appliance is cor- rectly disposed of help prevent potential negative consequences for the environ-...
-
Page 10: Using The Hob
USING THE HOB USING THE HOTPLATE The functions of the hob comply with • Commercial simmering aids should the applicable standards on electro- not be used as they create excessive magnetic interference temperatures that can damage the Your induction cooking hob thus com- surface and may cause a hazard. - Page 11 USING THE HOB Feature Symbol Description Induction Power is the most energy efficient means of Eco power cooking food, provides fast heat up and boiling times Slide your finger along the graphic or simply touch the Slide Control graphic at the power level you require. Digital display Secret till “lit” hob display No. of power Precise and repeatable control settings levels Three preset temperature controls set at 42 C, 70...
- Page 12 USING THE HOB About the induction hob Using the Touch Controls The induction hob provides the most en- To select a cook zone or the timer, simply ergy efficient hob technology available. touch the graphic slider, using the flat of your finger, not the tip, The controls The induction system provides superior respond to touch, so you don’t need to heat up and cool down times for pans - apply any pressure.
- Page 13 USING THE HOB Induction controls Note The Power Boost function will only Power Boost operate for a limited time and is also This feature, temporarily boost the power under thermal control. This means the to a cook zone by 60%. power boost will deactivate automati- cally if the product is hot, to protect the The power boost is a function that can...
- Page 14 USING THE HOB Note: Special Function Key All other keys only need to be pressed for Touch once for Function 1 0.3 seconds to be activated/deactivated. C - Ideal for melting or sauces Note: Touch twice for Function 2 “H” will appear on any cook zone display C - Ideal for keeping warm that is still hot to touch.
-
Page 15: Minute Minder
USING THE HOB display is switched off again. Using the To operate: timer selection key again (as long as no 1) Turn on the hob, using the on/off key. value was set) the next active cooking zone can be selected. 2) Select the timer by pressing the + and - keys together (do not activate any cook Setting a timer value... - Page 16 USING THE HOB Pause key To Operate 1) Press the pause key. Warning! Don’t leave pans on the hob when you’re Note:- not around - take them off the heat if you All cook zones functions will pause (no have to leave the kitchen (even if you power) and will be displayed for each cook think it will only be for a moment, while zone.
- Page 17 USING THE HOB Child Lock Approximate Glass This feature is to help prevent accidental Intelligent hob Surface switching on of the hob, especially by safety system Temperature young children. To activate: Reduces Power Boost Press the key lock button and pause setting to Power Level 9 button together, and then release them.
- Page 18 USING THE HOB Very fast Fast Medium Slow Simmering, Keeping frying re-heating warm Preparation Soup Thin soup Thick soup Fish Court-Bouillon Deep fried Sauces Thick, flour based Buttery, containing eggs Vegetables Spinach Pulses ...
- Page 19 USING THE HOB Troubleshooting with the Induction Hob Code Problem Possible Cause Solution Hob is not work- Child lock is activated Deactivate child lock in display Power boost not The appliance is hot, power Allow the appli- working boost is deactivated when ance to cool the appliance is hot to protect the electronics and...
- Page 20 CLEANING ELECTRIC HOB • Scratches or dark stains on the ce- ramic glass that cannot be removed Ceramic glass hobs do not affect the function of the appliance. • The ceramic hob top can be cleaned using a clean, damp cloth or kitchen Safety when Cleaning paper.
-
Page 21: General Information
INSTALLATION ABOVE AN OVEN INSTALLATION General information • We recommend that you install this Worktop appliance in a work top which is a Installation should only be carried out by minimum 38mm deep. a qualified installer or engineer. 25mm • The hob can be fitted into a work top Oven less than 38mm deep, but the 20mm Please keep to the following points most- gap between hob base and appliance carefully;... - Page 22 INSTALLATION Clearances and dimensions – re- Cutout Required - 80 quirements Width 735mm Depth 455mm No shelf or overhang of combus- tible material should be closer than Clearance Required 650mm above the hob. Side Wall 50mm There must be a minimum clearance Rear Wall 50mm of 50mm between the edges of the...
- Page 23 INSTALLATION Protecting the cut-out; The types of chipboard used for work surfaces swell relatively quickly in contact Recessed Method (selected models) with humidity. Recess the work top to the appropriate Apply a special varnish or adhesive to depth (Approx 5mm) and shape to fit the the cut edge to protect it from steam or hob (add 1mm to overall glass size.
- Page 24 INSTALLATION Fixing Brackets Installation advice - cabinetry Dealing with sides, cross-rails and back-panels in cabinetry Depending on the cabinets, the worktop thickness and the hob positioning, it is possible for the hob base and/or the clamp brackets to interfere with parts of the cabinet.
- Page 25 INSTALLATION Connect to the electricity supply Wire Colour Connect to: (For Fixed Wiring only) Live Brown Terminal 2 Warning: This appliance must be earthed. Neutral Blue Terminal 4 Earth Yellow/ The hob must be installed by a competent green electrician, using a suitable double pole control unit, with 3mm minimum contact separation at all poles.
- Page 26 CUSTOMER CARE (UK/IE CUSTOMERS ONLY) CUSTOMER CARE WEB SHOP range of Bake ware and Cookware essen- tials including Roasting Pans, Cake Tins Having purchased a superior cooker, hob and Non-Stick Cooking Liners. or hood from us, you’ll naturally want to keep it looking great.
-
Page 27: Technical Data
TECHNICAL DATA Technical Data - 80 & 90 MAX Total Power Rating @ 220 - 240V ~ 50Hz (kW) = 7.4kW Individual Cook Zone Power Ratings 80 & 90 80 & 90 Cook Zone Normal Power Power Boost Rating kW Rating kW LH Front LH Rear... -
Page 28: Important Note
Always check the instruction book before contacting us to make sure you have not missed anything. Destination Contact Address Contact Details UK/IE Glen Dimplx Home Appliances Ph: 0844 815 3746 Web: www.belling.co.uk Stoney Lane Prescot Webshop: www.gdhaonline.co.uk Merseyside L35 2XW Glen Dimplex Australia PTY LTD Ph: 1300 556 816...
Need help?
Do you have a question about the IHK80 and is the answer not in the manual?
Questions and answers