Table of Contents
Advertisement
Quick Links
Advertisement
Table of Contents

Related Manuals for Belling IHT603


Summary of Contents for Belling IHT603
- Page 1 Belling IHT603 Date: 22/02/22...
- Page 2 NZ - New Zealand DE - Germany NL - Netherlands AU - Australia ES - Spain To contact Belling about your appliance, please call: Customer Care Helpline Warranty Registration 0800 952 1068 0344 815 3746 *Please call our Customer Care team for extended...
- Page 3 INTRODUCTION This user guide book is designed to help you through each step of owning your new product. Please read it carefully before you start using your appliance, as we have endeavored to answer as many questions as possible, and provide you with as much support as we can. General information, spares and service information is available from our website.
- Page 4 SAFETY WARNING appliance to avoid the possibility of electric shock and call for a service engineer’s visit. • During use the appliance becomes hot. Care should be taken to avoid touching heating elements. • Children less than 8 years of age shall be kept away unless continuously supervised.
- Page 5 the appliance. The use of inappropriate hob guards can cause accidents. • This induction hob complies with the applicable EMC and EMF standards. Therefore it should not interfere with other electronic implant should clarify with their doctor or the producer of the implant, whether there implant is adequate and fail-safe.
- Page 6 Contact your local gas supplier immediately. Report No.: GZES190802265932 Information for domestic electric hobs Symbol Value Unit Model identification — BEL IHT603 BLK Type of hob Built-in induction hob — Number of cooking zones and/or 4 zones — areas Heating technology (induction...
-
Page 7: Control Panel
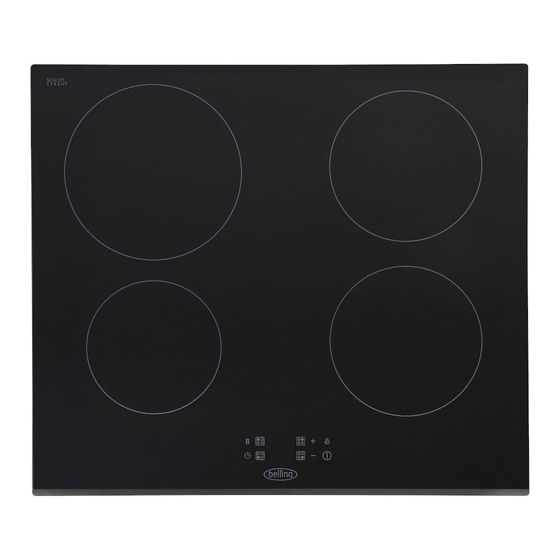
USING YOUR APPLIANCE Getting to know your product Note: Control Panel 1. Max. 1300/1500W zone 4. Max. 1800/2000W zone 2. Max. 2300/2600W zone 5. Glass plate 3. Max. 1800/2000W zone 6. Control panel Hob functions Heating zone selection controls Boost Keylock control Timer control Power timer regulating key... -
Page 8: Touch Controls
Before using the Hob • Read this guide, taking special note of the ‘Safety Warnings’ section. Touch controls pressure. The touch control keys take approximately 1 second to respond to your touch. Always ensure the touch control area is clean, dry and free from any objects (e.g. utensils, tea towels and Choosing the right Cookware •... -
Page 9: Start Cooking
least as large as the circle printed on the glass. Using a pan which is slightly wider than the glass zone. Start cooking After switching the hob on, the buzzer will beep once. All the indicator lights light up for a second to indicate that the induction hob is now in standby mode. -
Page 10: If The Display Flashes
4. Select a heat setting by touching the “-” or “+” control. • If you don’t select a heat setting within about 1 minute, would then need to start again from step 1. • You can modify the heat setting at any time during cooking. -
Page 11: Using The Boost Function
Using the Boost function To activate 1. First select the relevant heating zone by touching the relevant heating zone selection key. 2. Touch the power boost control key. The zone indicator display shows ‘P’ and the zone works on maximum power. To cancel 1. -
Page 12: Timer Control
Locking and unlocking the Controls • You can lock the controls to prevent unintended use (for example children accidentally turning the cooking zones on). To lock key. The timer display will show “Lo“. 1. Touch and hold the keylock control To unlock Note: Make sure the hob is turned on. -
Page 13: Setting The Timer To Turn One Or More Cooking Zones Off
4. Touch the “-” and “+” control keys together to cancel the timer. “00” will show in the minute display. 5. Once the timer has been set it will count down immediately. The display will show the remaining time and the timer If you need to change the minute minder duration time, please repeat steps 2-3 above. -
Page 14: Residual Heat Warning
4. Touch the “-” and “+” control keys together to cancel the timer. “00” will show in the minute display. 5. Once the timer has been set it will count down immediately. The display will show the remaining time and the timer indicator will NOTE: power level indicator, to show that the zone is currently being controlled by the timer. - Page 15 Controlling more than one zone with the timer If you wish to control more than one zone with the timer, please repeat steps 2-5 above. When you set the time for several cooking zones simultaneously, decimal dots of the relevant automatically.
-
Page 16: Heat Settings
Heat Settings The settings below are guidelines only. The exact setting will depend on several factors, including settings that best suit you. Heat Setting Suitability • Delicate warming for small amounts of food. • Melting chocolate, butter, and foods that burn quickly 1 - 2 •... -
Page 17: Care And Cleaning
Care and cleaning What ? How ? Important ! Everyday soiling on glass 1. Switch the power to the cooktop • When the power to the left by food or non-sugary 2. Apply a cooktop cleaner while there will be no ‘hot surface’ spillovers on the glass) the glass is still warm (but not indication but the cooking... -
Page 18: Troubleshooting
Troubleshooting Problem Possible causes What to do The induction hob cannot be No power. Make sure the induction hob is turned on. connected to the power supply and that it is switched on. Check whether there is a power outage in your home or area. If you’ve checked everything and the problem persists, call a The touch controls are... - Page 19 Troubleshooting The induction hob is equipped with a self diagnostic function. With this test the technician is able to check the function of several components without disassembling or dismounting the hob from the working surface. Troubleshooting 1) Failure code occuring during customer use & solution; Failure code Problem Solution...
- Page 20 Failure Problem Solution A Solution B No power supplied. Check that appliance is switched on at the fused spur cooker point on the wall. Request a service visit. Check the connection. Engineer to check the The LED does not connection between the come on when unit is powerboard and display plugged in.
-
Page 21: Cleaning Your Appliance
CLEANING YOUR APPLIANCE Do’s Note: Note: Please take extra care when cleaning over the symbols on the control panel, as this can lead to them fading. • Warm, soapy water • Clean, wring out cloth • Wipe with damp cloth •... -
Page 22: Installation
Installation Preparing the worktop cut out Make a cut-out in the worktop according to the dimensions shown in the table. For the purpose of installation and use, a minimum of 5cm space shall be preserved around the hole. Be sure the thickness of the work surface is at least 30mm. Please ensure the worktop is made of heat-resistant material to prevent deformations caused by heat from the appliance. - Page 23 WARNING: Ensuring Adequate Ventilation Make sure the induction cooker hob is well ventilated and that air inlet and outlet are not blocked. In order to avoid accidental touch with the overheating bottom of the hob, or getting unexpectable distance of 50mm from the bottom of the hob. Follow the requirements below. Min.
-
Page 24: Before Installation
Before installation • The work surface is square and level, and no structural members interfere with space requirements. • The work surface is made of a heat-resistant material and insulated material. • If the hob is installed above an oven, the oven has a built-in cooling fan. •... -
Page 25: Connecting The Hob To The Mains Power Supply
Cautions professionals at your service. Please never conduct the operation by yourself. 2. The hob will not be installed directly above a dishwasher, fridge, freezer, washing machine or clothes dryer, as the humidity may damage the hob electronics. 3. The induction hotplate shall be installed such that better heat radiation can be ensured to enhance its reliability. -
Page 26: Connect To The Electricity Supply
• If the cable is damaged or to be replaced, the operation must be carried out by the service agent with dedicated tools to avoid any accidents. • If the appliance is being connected directly to the mains electricity supply, an omnipolar circuit-breaker must be installed with a minimum opening of 3mm between contacts. -
Page 27: Customer Care
Customer Care Please keep this handbook in a safe place as the information inside may model number and serial number in the spaces provided below as they will assist us should you need to call. 0344 815 3746 When you dial this number, you will hear a recorded message and be given several options. - Page 28 TECHNICAL DATA Hob Details Cooking hob Cooking Zones 4 Zones Supply Voltage 220-240V~ 50Hz or 60Hz Installed Electric Power 7200W Product Size D x W x H (mm) 590 X 520 X 62 Building-in Dimensions A x B (mm) 560 X 490 Weight and Dimensions are approximate.
Need help?
Do you have a question about the IHT603 and is the answer not in the manual?
Questions and answers