Table of Contents
Advertisement
Quick Links
Advertisement
Table of Contents

Related Manuals for Belling IHF64T


Summary of Contents for Belling IHF64T
- Page 1 USER GUIDE A commitment to: Belling IHF64T Part Number: 083532000 Date: 04/01/16...
- Page 2 NZ - New Zealand DE - Germany NL - Netherlands AU - Australia ES - Spain To contact Belling about your appliance, please call: Warranty Registration Customer Care Helpline 0344 815 3746 0800 952 1068 in case of diffculty within the UK...
- Page 3 INTRODUCTION Thank you for buying this British-built appliance from us. This user guide book is designed to help you through each step of owning your new product. Please read it carefully before you start using your appliance, as we have endeavored to answer as many questions as possible, and provide you with as much support as we can.
- Page 4 SAFETY WARNING • If the hob surface is cracked, broken or shattered, switch off the appliance to avoid the possibility of electric shock and call for a service engineer’s visit. • The appliance and its accessible parts become hot during use. Care should be taken to avoid touching heating elements.
- Page 5 • Fire Safety Advice If you do have a fire in the kitchen, don’t take any risks - get everyone out of your home and call the Fire Brigade. If you have an electrical fire in the kitchen: • Pull the plug out, or switch off the power at the fuse box - this may be enough to stop the fire imme- diately •...
-
Page 6: Using Your Appliance
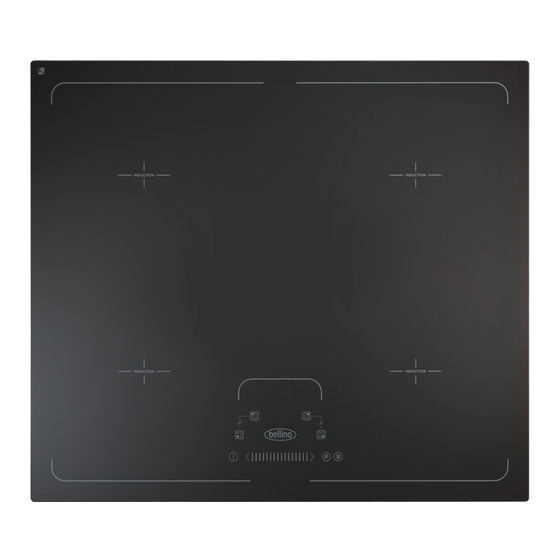
USING YOUR APPLIANCE Getting to know your product Note: Your appliance layout may differ depending on the model. Control Panel Hob functions Display screen Cook zones Cook zones symbols symbols Pause Key On/Off key Slide Control Power Boost... -
Page 7: Switching The Appliance On/Off
Caution: Always ensure that induction pans remain within the marked cooking area when hot. Do not allow hob pans to rest on the user control panel at the front of the hob glass, as this will cause the controls to overheat and the appliance to temporarily shut down. Switching the appliance On/Off To turn On/Off Cleared... -
Page 8: Pause Key
Low temperature setting/Keep warm Choose cook zone 0 U 1 Select “U” This function can be used when the cook zone(s) are in the bridge function. Pause key To turn on/off Note: All cook zones functions will pause (no power) and will be displayed for each cook zone. -
Page 9: Auto Heat-Up
Recall Note: All cook zones functions will automatically resume to the previous settings. Auto heat up Choose cook zone(s) 5 6 7 “A” and cooking level 9 will flash alternately 5 6 7 Initially, while the cook zone is at the highest setting, “A” will flash alternately with your selected lower setting. -
Page 10: Power Boost
Power boost Choose cook zone The power boost function can temporarily boost the power to a cook zone by a massive 60%. This func- tion is not available in bridge mode. Note: The Power Boost function will only operate for a limited time and is also under thermal control this means the power boost will deactivate automatically if the product is hot this is to protect the inter- nal electronic components of the hob or to prevent the cookware from overheating. - Page 11 Timer auto switch off Ensure power level is already set before selecting timer. Choose cook zone 10 minute Single unit units 5 6 7 When the time is up, timer display will flash, beep and the cook zone will automatically switch off. Touch any control to stop the beeping.
-
Page 12: Suitable Pans
Pans and cookware for induction hobs • If a pan creates a large air gap over the middle of the cooking zone, the accuracy of the temperature sensing can be affected. • Always ensure that pan bases are dry before using them on the hob. •... -
Page 13: Child Lock
Child lock When you now switch on the hob “L” will appear in all the cook zone displays. The child lock feature will be permanently activated. To operate the hob with child lock activated When you now switch on the hob “0” will be displayed in all cook zone displays, the hob can now be used normally. -
Page 14: Residual Heat Indicators
De-activate child lock Residual heat indicators > 60°C < 55°C Note: The cook zone itself does not heat up, but the ceramic glass does get hot because of the hot pan conducting heat back onto the hob glass. -
Page 15: Auto Standby
Auto Stand by The Hob will automatically switch off if left (with pan) on for an extended period of time. Power Rating Max Operating Time (h) Power Boost 10 mins Hob Status Code Error code Description / Fault Action Cannot operate hob. “L” is dis- Child lock has been activated, played on user control de-activate child lock... -
Page 16: Cleaning Your Appliance
CLEANING YOUR APPLIANCE Do’s Note: Always switch off your appliance and allow it to cool down before you clean any part of it. Note: Please take extra care when cleaning over the symbols on the control panel, as this can lead to them fading. - Page 17 Please keep this handbook for future reference, or for anyone else who may use the appliance.
- Page 18 Please keep this handbook for future reference, or for anyone else who may use the appliance.
- Page 19 Please keep this handbook for future reference, or for anyone else who may use the appliance.
-
Page 20: Technical Data
TECHNICAL DATA Hob Details Max total power rating @ 220-240V ~ 50Hz 7.4kW Cook Zone Max Power Rating (kW) Boost Rating (kW) Left Hand Front 1.85 Left Hand Rear 1.85 Right Hand Rear 1.85 Right Hand Front 1.85...
Need help?
Do you have a question about the IHF64T and is the answer not in the manual?
Questions and answers