Table of Contents
Advertisement
Advertisement
Table of Contents

Related Manuals for ESAB CaddyTig HF


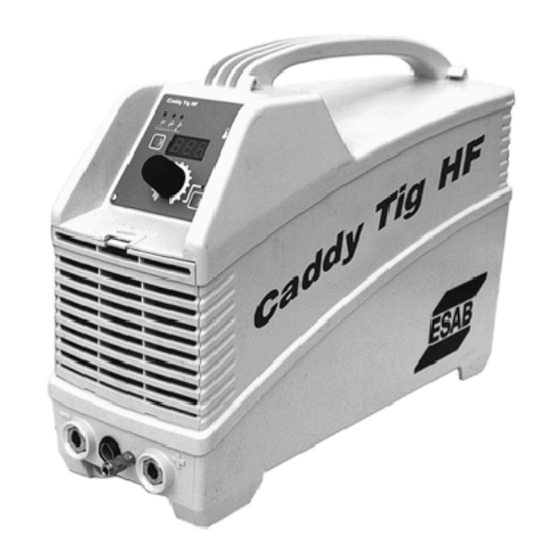
Summary of Contents for ESAB CaddyTig HF
- Page 1 CaddyTig HF Service manual 0700 xxx xxx 020726...
-
Page 2: Table Of Contents
Edition: 07/02 Rev.: 1.0 How to contact Service Department: All rights reserved. Copyright Esab Welding Equipment AB. No part of this manual may be translated, reproduced or adapted by any means (including photocopying, filming and microfil- ming) without the written permission of Esab Welding Equipment AB. -
Page 3: Purpose Of The Manual
Refrain from making any changes or performing any mainte- nance work not contemplated herein. Should the problem persist even after following the instructions described herein, contact Esab Welding Equipment Service Department or send the machine to Esab for relevant work. Purpose of the manual... -
Page 4: Warnings, Precautions, General Information On Executing Repairs
2) WARNINGS, PRECAUTIONS, GENERAL - Moving parts: INFORMATION ON EXECUTING REPAIRS WARNING!: Keep your hands well away from the fan when the machine is connected to the power Imminent danger of serious bodily harm and dan- supply. Make sure that the power plug is removed gerous behaviours that may lead to serious bodily and that the fan is idle before replacing it. -
Page 5: Diagnostics And Repair Instruments And Tools
3) DIAGNOSTICS AND REPAIR INSTRUMENTS 3.3) Conventions AND TOOLS We have adopted a convention whereby, when you are asked 3.1) Instruments for basic diagnostics to take a measurement between two points, such as a the tip of the arrow always indicates where to apply the multi- You will need: meter's red probe (a), whilst the black probe is applied to the other end (b). -
Page 6: Technical Data
4) TECHNICAL DATA Caddy TIG HF Performance MMA: at 25% duty cycle 150 A/26 V at 60% duty cycle 115 A/24.6 V at 100% duty cycle 100 A/24 V Performance TIG: at 30% duty cycle 150 A/16 V at 60% duty cycle 125 A/15 V at 100% duty cycle 110 A/14.4 V... -
Page 7: Description Of Machine's Operation (Block Diagram)
5) DESCRIPTION OF MACHINE'S OPERATION (BLOCK DIAGRAM) (fig. 1) a) Master switch b) Varistor c) Emi input filter d) Input rectifier e) DC link capacitor f) Zero Voltage Switching Phase Shifted Full Bridge Inverter g) Primary current transformer h) High frequency power transformer i) Output rectifier j) Voltage doubler k) Shunt... -
Page 9: Description Of Diagnostic Indications
7) DESCRIPTION OF DIAGNOSTIC INDICATIONS (fig. 3) The actual status of the equipment is reported to the operator via the LEDs and display of the front panel. See the "Owner's manual" for meanings and use of the various controls as this section deals with diagnostic signals only. Power Supply LED (GREEN) Indicates machine on/off status. -
Page 10: Set-Up Parameters
8) SET-UP PARAMETERS 8.1) Setting up the unit Front panel settings are complemented by others that can be edited in the Setup, which is accessed as follows (also see fig. 3 in sect. 7): - Switch the equipment on. - Wait until "150" and then software release (e.g. "u01") is displayed - Keep the "PARAMETERS"... - Page 11 8.2) TIG welding modes Parameter n° 8 sets the trigger mode accordingly to what follows: Two stroke TIG welding (2T) 1) 1 press of the trigger - the gas flows for the pre-gas time - the voltage is activated on the electrode - the HF strikes the arc - the current goes from the initial current to the welding current in the slope-up time...
-
Page 12: Description Of Boards, Replacing Instruction, Current Calibration
9) DESCRIPTION OF BOARDS, REPLACING INSTRUCTION, CURRENT CALIBRATION The following sections illustrate regular work conditions of boards making up the power source, and furnish standard values for the electrical measurements that can be taken at the main points of said boards. All measurements indicated can be taken with a digital multimeter. - Page 13 9.1) Input filter board AP03 (fig. 4) Filter pc-board AP03 contains a varistor ZN1 guarding against supply overvoltage, an EMC filter circuitry and the DC link elec- trolytic capacitors. The filter basically consists in a network of capacitors and a shared inductor. This circuit has the dual purpose of limiting the machine's radiofrequency emissions to levels prescribed by regulations, and making the power source immune from similar problems caused by any electronic device connected to the same power supply.
- Page 14 Description of boards, replacing instruction, current calibration Unless otherwise specified, all measurements sholud be taken with the boards in their slots and connected accordingly...
- Page 15 Description of boards, replacing instruction, current calibration Unless otherwise specified, all measurements sholud be taken with the boards in their slots and connected accordingly...
- Page 16 Description of boards, replacing instruction, current calibration Unless otherwise specified, all measurements sholud be taken with the boards in their slots and connected accordingly...
- Page 17 9.2.2) Replacing instructions for AP01 (fig. 6) WARNING! - Components sensitive to electrostatic discharges! - Torque wrench settings: POWER MODULE FASTENING TO HEAT SINK = MAX 2.2 Nx m / 19 lb x in POWER MODULE FASTENING TO PC-BOARD = MAX 0.2 Nx m / 1.7 lb x in - Always replace thermal interface with a new one! In order to replace AP01 pc-board see following instructions: 1.
- Page 18 9.2.3) Calibration procedure In case of incorrect calibration performing and confirming, the machine will deliver a totally wrong current during welding and damages could occur to the welding unit itself! Grid load or striking a TIG arc is required to perform calibration! Measurement of actual output current is required, too! Once that AP01 or the shunt should have been replaced (see previous section 9.2.2 ), we may need to calibrate the current delivered by the unit.
- Page 19 9.2.4) Replacing instructions for secondary rectifier (fig. 7) WARNING! - Components sensitive to electrostatic discharges! - Torque wrench settings: POWER MODULE FASTENING TO HEAT SINK = MAX 2.2 N x m / 19 lb x in POWER MODULE FASTENING TO PC-BOARD = MAX 0.2 N x m / 1.7 lb x in DIODE MODULE FASTENING TO HEAT-SINK = MAX 1.5 N x m / 13 lb x in...
- Page 20 AP02 (fig. 8) (UPPER VIEW) Description of boards, replacing instruction, current calibration Unless otherwise specified, all measurements sholud be taken with the boards in their slots and connected accordingly...
- Page 21 9.3) TIG pc-board AP02 This pc-board perform TIG functions (i.e. gas flow, HF striking, torch trigger interface) as well as output voltage doubling to maxi- mize dinamic arc control and assure excellent ark striking in all welding conditions (TIG & MMA). A separate auxiliary power supply is also located in this board: it allows voltage insulation between logic circuitry (i.e.
- Page 22 9.4) Front panel pc-board AP04 (fig. 9) The front panel performs the interface between the machine and the operator. It's a simple passive pc-board, with no logic circuitry. To understand the use of the front panel commands, see the User's Manual. WARNING: To prevent damages due to HF disturbances, front panel is connected to machine's metal frame i.e.
- Page 23 WHITE PAGE...
-
Page 24: Available Spare Parts
10) AVAILABLE SPARE PARTS (fig. 10) Available spare parts... - Page 25 Item Ordering no. Denomination Q.ty Notes 0700 159 001 LOWER COVER 0700 159 002 UPPER COVER 0700 159 005 HF TRANSFORMER 0700 159 004 MAIN TRANSFORMER 0212 602 208 0193 307 104 CABLE BUSH 0193 317 001 MAIN SWITCH 0700 159 003 KNOB 0700 159 006 TIG PC-BOARD...
- Page 26 ESAB subsidiaries and representative offices Europe NORWAY Asia/Pacific Representative offices AS ESAB AUSTRIA AUSTRALIA BULGARIA Larvik ESAB Ges.m.b.H ESAB Australia Pty Ltd ESAB Representative Office Tel: +47 33 12 10 00 Vienna- -Liesing Ermington Sofia Fax: +47 33 11 52 03...
Need help?
Do you have a question about the CaddyTig HF and is the answer not in the manual?
Questions and answers