Table of Contents
Advertisement
Quick Links
Gemini 4:4:4 User Manual
Current Firmware: Version 1.5.146
This is a Virtual Manual. As new firmware and features are released this manual
will be updated. Please check back regularly or bookmark this link for reference.
Last Updated: 13-Feb-2013
ht t p : / / w w w . c o n v e r ge nt - de s i g n. c o m/P o rt al s / 0 / G e mi ni 4 44 / D oc s / G e mi n i 4 4 4U s e r M a n u al _ v 1_ 5 _1 4 6 _0 2 13 1 3 2. pd f
Advertisement
Table of Contents

Subscribe to Our Youtube Channel
Related Manuals for Gemini 4:4:4


Summary of Contents for Gemini 4:4:4
- Page 1 Gemini 4:4:4 User Manual Current Firmware: Version 1.5.146 This is a Virtual Manual. As new firmware and features are released this manual will be updated. Please check back regularly or bookmark this link for reference. Last Updated: 13-Feb-2013 ht t p : / / w w w . c o n v e r ge nt - de s i g n. c o m/P o rt al s / 0 / G e mi ni 4 44 / D oc s / G e mi n i 4 4 4U s e r M a n u al _ v 1_ 5 _1 4 6 _0 2 13 1 3 2. pd f...
-
Page 2: Table Of Contents
021313 Contents READ ME FIRST! ......................... 4 OVERVIEW ......................... 5 PACKAGE CONTENTS ..........................5 FEATURES ..............................6 GEMINI 4:4:4 ANATOMY ........................9 MENU STRUCTURE ..........................10 GEMINI ............................. 11 SETUP ............................12 RECORD ........................... 13 INPUTS ............................13 OUTPUT ............................. 14 Enable/Disable Options ........................ - Page 3 Gemini 4:4:4 User Manual 021313 RECORDING ........................25 Recording Time / Media ........................25 Frame rates of 48p and above require two SSD’s (256 GB or 512 GB)............25 Recording Instructions ......................... 26 DPX ................................26 WAV ................................27 ARI ................................
- Page 4 Gemini 4:4:4 User Manual 021313 RELEASE NOTES ............................64 Firmware Version 1.4.100 16-November-2012 ..................64 Previous Firmware Releases ....................... 73 Firmware Version 1.3.105 23-October-2012 ..................... 73 Firmware Version 1.3.100 22-October-2012 ..................... 75 The following Features for Firmware 1.2.100 still apply................77 Firmware Version 1.2.100 10-September-2012 ..................
-
Page 5: Read Me First
4. Familiarize yourself with the equipment and test prior to shooting. 5. Before using the SSD’s it is IMPERATIVE TO FORMAT them in the Gemini 4:4:4. Formatting SSD media is a DESTRUCTIVE PROCESS; all existing data will be lost during format. -
Page 6: Overview
*AC Powered eSATA Transfer Station also available, see page 31. Request yours here: http://convergent-design.com/Products/Gemini444/GeminiTransfer.aspx IT IS IMPERATIVE TO NOTE: Only Convergent Design SSD’s will work in the Gemini 4:4:4. These SSD’s, available in 256GB and 512GB, must be purchased separately. Your Gemini 4:4:4 dealer is an ideal place to purchase these1.8” SSD’s. -
Page 7: Features
021313 FEATURES The Gemini 4:4:4 is a professional, high-definition video recorder that fits in the palm of your hand and is easily mountable on your camera. It is very light weight and small in size. Gemini 4:4:4 functions as a high-quality monitor, with a wide viewing angle, high brightness with great contrast, and no compromise video playback device. - Page 8 With the 3D Option, you are able to record two cameras simultaneously; Camera 1 to SDI A and Camera 2 to SDI B. Depending on your settings, you can see both channels for preview/playback, one separately, or Camera 1 on the Gemini and Camera 2 out to a monitor. *Cameras MUST be gen- locked.
- Page 9 021313 DUAL SSD The Gemini 4:4:4 is unique in that it supports two SSD’s for both recording and playback. To extend recording time, a recording can automatically span from one SSD to another. This is fully automatic. S-LOG and LOG-C SUPPORT Many features are built into the Gemini 4:4:4 for supporting Log footage: A menu option easily allows one to apply a built-in LUT (Lookup Table) to native S-Log footage.
-
Page 10: Gemini 4:4:4 Anatomy
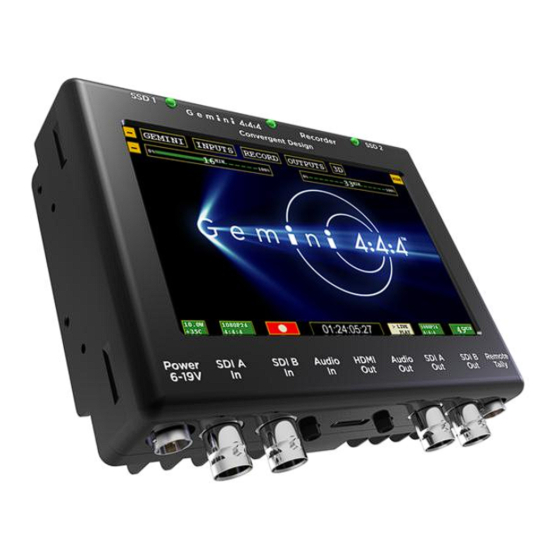
Gemini 4:4:4 User Manual 021313 GEMINI 4:4:4 ANATOMY SSD Drive 1 SSD Drive 2 HD Touch Screen Monitor Power SDI A SDI B Audio HDMI Audio SDI A SDI B Remote Tally kfjaslkdjflk sdlkfjaslkdjf lkdjflksdjf www.Gemini444.com P a g e... -
Page 11: Menu Structure
MENU STRUCTURE The Gemini 4:4:4 menu can be accessed through the buttons along the top of the screen. By tapping on a Main Menu heading, a Sub-Menu 1 navigation will appear. Likewise, by tapping a Sub- Menu 1 heading, a Sub-Item 2, and so on, may appear and subsequently provide you with an Option related to that. -
Page 12: Gemini
Gemini 4:4:4 User Manual 021313 GEMINI Sub-Menu 1 Sub-Menu 2 Sub-Menu 3 Option Description Additional Information The on screen menu will disappear after 15 seconds of idling. Touching the screen anywhere will bring the menu back. Auto-Hide The on-screen menu will always be displayed unless the hide button is touched. -
Page 13: Setup
1080p Note: Project Frame Rate cannont be set 3D DPX 4:2:2 or 4:4:4 up to 30p. See Release Notes at below; Frame Rate from Camera. end of this document for more details Records and plays Canon Cinema Raw .rmf files... -
Page 14: Record
The last three digits will auto-increment from (AAAAAAAA)(000) one recording to the next. If you are using more than one Gemini unit, it is recommended that at ARRIRAW REC BUTTON least the first two characters of this name be set TRIGGER different from one Gemini unit to the next. -
Page 15: Output
Option Description Additional Information When the Gemini is recording, the SDI and HDMI This red bar is not recorded in the Gemini. If you output will display a red bar on the bottom of the → → are using a separate recorder to record the screen to indicate an active record. -
Page 16: Enable/Disable Options
Gemini before proceeding. ) (**Note that the Live Preview on the Gemini of Vari-Frame data will not look as expected. The Gemini plays the last 1 second of captured Vari-Frame frames, so that the video and timecode will appear to repeat over a 1-second interval. -
Page 17: Menu Quick Keys
Gemini 4:4:4 User Manual 021313 MENU QUICK KEYS Menu Click to reveal main menu structure. Click << to collapse. Hide Click to remove all content/buttons from the screen. Tap the monitor anywhere to reveal SSD Safe Eject Updates the file system and exposes recorded clips. Recommended: record all clips before safely ejecting SSD’s for offloading data. -
Page 18: Mode Switch
Gemini 4:4:4 User Manual 021313 MODE TOGGLE & STATUS Across the bottom of your Gemini monitor you will find the Control Bar, including Mode Functions and related Indicators and Buttons. Scene & Take Status Line Caret Voltage / Internal Remaining... -
Page 19: Preparations
It must be registered. Otherwise the unit is disabled. 2. Obtain the Gemini 4:4:4 and all the necessary batteries, chargers well in advance of your shoot. Please be certain to plug the power cable into the power input, which is on the left side, the remote control connector is on the right side. - Page 20 22. Never put the Gemini 4:4:4 in a confined enclosure, it needs access to fresh air for cooling. 23. Never leave the Gemini 4:4:4 in hot sun without protection for an extended period of time. If it has been in a hot car, please allow time for it to cool.
-
Page 21: Power
3. Using an Anton Bauer or IDX Battery with a D-Tap connection. A D-Tap to 4-Pin Hirose Power Cable is included. 4. Using any 4-Pin Hirose Power cable as provided by Convergent Design for Gemini 4:4:4 or nanoFlash. 5. Using any suitable DC power source, 6 to 19 Volts DC, with a 4-Pin Hirose connector. -
Page 22: Registration
SETTING DATE & TIME The Gemini > Set > Time and Gemini > Set > Date menu items are used to set the internal clock of the Gemini 4:4:4, which keeps time even when there is no external power connected to the unit. -
Page 23: Setting Metadata
Gemini 4:4:4 User Manual 021313 SETTING METADATA When Gemini 4:4:4 is in Rec Mode, you can edit Metadata. Tap the ‘Metadata’ Menu Quick Key to reveal the following editable data: Reel, Scene, Take, Day, Camera, and Project. This information is stored until changed or power is removed. -
Page 24: Formatting Ssd Cards
Initializing SSD Drives If a SSD is removed from Gemini, Mac, or PC while still being accessed you may have to wait until the drive gets reinitialized in either the Gemini, Mac, or PC. This may take up to 5 minutes. -
Page 25: Ssd Status Indicators
If an SSD update is available, a dialog will appear to update your SSD(s) (upon insertion of the SSD). Please perform SSD updates at your earliest convenience. Ensure that SSD data is backed up and that the Gemini has a reliable power source, before updating SSD’s. -
Page 26: Recording
Gemini 4:4:4 User Manual 021313 RECORDING Recording Time / Media 1080p 1080p 1080p Media 23.97/24 1080p25 29.97/30 1080p48 1080p50 59.94/60 256GB SSD (x1) 256GB SSD (x2) 512GB SSD (x2) 1080p48 not supported in Firmware 1.1.2 Frame rates of 29.97/30p and above require two SSD’s (256 GB or 512 GB). -
Page 27: Recording Instructions
(10) Never remove a SSD while recording or playback. See SSD Status page 20. Gemini records video into DPX (.dpx) files. DPX is a file format that is specifically designed for uncompressed video. Each DPX file actually only stores one single frame of video. Therefore, each record will have a single folder that contains all of the DPX files. -
Page 28: Wav
SSD’s. Before editing, combine the two sets of files into a single folder to obtain the entire clip. Canon Raw Mode includes .wav audio as well. If audio is present on the SDI Input, Gemini records 2 channels of 24 bit audio as a WAV (.wav) file. www.Gemini444.com... -
Page 29: Playback
021313 PLAYBACK Now that you have successfully recorded to your Gemini 4:4:4, it’s time to harness its playback capabilities on its high-definition 800 x 480 monitor. (1) If the “>” is next to ‘PLAY’ on the Mode Toggle, you are ready to play back. If not, tap the Mode once to toggle to PLAY Mode. - Page 30 Gemini 4:4:4 User Manual 021313 PLAYLIST For additional options in playback, you may choose the ‘Playlist’ Menu Quick Key to display a list of clips, including metadata and other clip information. To reveal/hide clip info, simply tab the << button.
-
Page 31: Transfer
Gemini 4:4:4 User Manual 021313 TRANSFER Transfer Station Second Generation Universal Transfer Station Use only the Convergent Design Universal Transfer Station, in combination with a Seagate GoFlex Adapter (available in Thunderbolt, Firewire, or USB) for transferring data to a computer from a SSD. -
Page 32: Performance
If a SSD will not mount on a Mac or PC with the instructions provided above, insert the SSD into the Gemini to see if it is being detected. You may need to wait 5-10 Minutes for the SSD to be Reinitialized. - Page 33 Gemini 4:4:4 User Manual 021313 Suggested Minimum RAID Configuration Video Data Rate Suggested for Video Format Mbytes/Sec Real Time Playback/Edit ARRI/2K/1080p24 4:4:4 10-Bit DPX 186.6 1080p25 4:4:4 10-Bit 194.4 1080p30 4:4:4 10-Bit 233.3 P50 10-Bit P60 10-Bit **It’s recommended to not exceed 250 clips per card.
-
Page 34: File Support
File Support The Gemini 4:4:4 recorder accepts inputs from both HD-SDI 4:2:2 and 4:4:4 cameras. To record 4:4:4, you can use HD-SDI Dual Link 1.5G or Single Link 3G (up to 1080p30). 1080p50/60 requires Dual 3G. Note: All ARRIRAW 4:3, and 16:9 p48-60, require Dual 3G SDI. -
Page 35: File Structure
Gemini 4:4:4 User Manual 021313 File Structure }CLIPS{ CLIP001001 (Assuming that the RECORD|CLIP is set to (CLIP001) (001)) CLIP0001001.0000000.DPX CLIP0001001.0000001.DPX Etc. CLIP0001002 (Assuming that the RECORD|CLIP is set to (CLIP001) (002)) CLIP0001002.0000000.DPX CLIP0001002.0000001.DPX Etc. DPX, ARI, and RMF Frames May contain up to 60,000 Frames per Clip (Based on 512GB Drive) www.Gemini444.com... -
Page 36: Transfer Configurations
Versions 1.1.2, 1.2.110, and 1.3.105: SSD's used with the Gemini will report as entirely full (0 MB free) on a computer, as the Gemini reserves the entire SSD for video only, and prevents the computer from writing to this area. Thus the Gemini video area on the SSD is essentially read-only on a computer). - Page 37 SSD for updating the Gemini (see the User Manual for more details on updating the Gemini). Note: Macs require a PCI->Sata Expansion Card to be able to attach a SSD to the Mac via the Transfer Station.
- Page 38 Allow 10-20 seconds for Windows to recognize the SSD, after insertion. Gemini Clip Merger The Gemini 4:4:4, in certain modes, records even numbered files (frames of video) to one SSD and odd numbered files to the second SSD. This is done to achieve the very high data rate that some recording modes require.
-
Page 39: Software Applications
2 512 GB Note: For 1080p59.94 and 1080p60 DPX Recordings, instead of performing a normal “Copy” function in Steps 2 and 3, above, please use the “Gemini Transfer” tool to copy the data from the SSD to the destination folder. - Page 40 The free Convergent Design Transfer Utility must be used to unpack the data into normal DPX format. Notes - Gemini Clip Merge Utility: Our Gemini Clip Merger Utility can be used to combine Striped/Raided Records into Single Clips after the _SSD1/_SSD2 folders have been copied over to a common folder on a computer.
-
Page 41: Post Workflow
Gemini 4:4:4 User Manual 021313 POST WORKFLOW DPX Files (10-Bit) All DPX files are 10-bit RGB 4:4:4. See page 13 for more information related to 1080p59.94/60 in Rec709 and LOG. Adobe Software Imp/Exp File Type Function and General Notes Check Playback ... - Page 42 Gemini 4:4:4 User Manual 021313 Audition CS5.5 Edit Audio Imp/Exp Wav Audio Support Check Real-time Playback Native Support for DPX Apply LUT SpeedGrade Apply Color Correction Export to After Effects / Premier / Media Imp/Exp ...
- Page 43 Gemini 4:4:4 User Manual 021313 Quicktime Pro Export Native DPX import Plug In Imp/Exp Encode to Codec of choice DPX w/ Glue Tools AutoDesk Native Support for DPX Smoke Import Create Proxy Check Real Time Playback Flame ...
- Page 44 Apply LUT FurnaceCore Edit Export NLE / Final Production Create Proxy Sony Planned Support of Gemini DPX files Check Playback Apply Color Correction Import (near future) Vegas 12 Wav Audio Supported Apply LUT ...
- Page 45 This software merges clips (SSD1 & SSD2) for all Merger Raided formats. See table page 37-38. Export Combine Files/Takes DPX 1080p59.94/60 when recorded in Gemini are packed, thus the files may not look correct until unpacked, using this free transfer tool. www.Gemini444.com 44 | P a g e...
-
Page 46: Arriraw Files
Post. This allows for the most image flexibility. Depending on your workflow, ARRIRAW files are often exported ASA 4:4:4 RGB DPX or Tiff files (see the DPX Section above for compatible NLE’s.). The following are NLE’s supporting ARRIRAW workflow. - Page 47 Gemini 4:4:4 User Manual 021313 Check Real-time Playback Apply LUT Native Support for ARRIRAW (16:9 / 4:3) SpeedGrade Export to After Effects / Premier / Media Apply Color Correction Imp/Exp Create Proxy Encoder Great for DIT in the field ...
- Page 48 Gemini 4:4:4 User Manual 021313 Check playback Import Native Support for ARRIRAW (16:9 / 4:3 ) Clipster Edit Apply Look / LUTs Export Color Correction Final Production FILMLIGHT Check playback Import Native Support for ARRIRAW (16:9 / 4:3 ) Baselight ...
- Page 49 / Color Correctors. The Gemini 4:4:4 is capable of recording 12 Bit 4:4:4 files, and 12 Bit 4:2:2 files, from the Canon C500, which we need to be used with the Gemini Transfer program, to “unpack” the files to 16 Bit.
- Page 50 Gemini 4:4:4 User Manual 021313 Used to check a Single Frame DPX Check Playback Export JPG, etc. Apply LUT CS5.5 Create Proxy Export Final Production (Deliverable File) Bridge Native Support for DPX Batch Renaming Imp/Exp CS5.5...
- Page 51 Gemini 4:4:4 User Manual 021313 Quicktime Pro Export Native DPX import Plug In Imp/Exp Encode to Codec of choice DPX w/ Glue Tools AutoDesk Native Support for DPX Smoke Import Create Proxy Check Real Time Playback Flame ...
- Page 52 This software merges clips (SSD1 & SSD2) for all Merger Raided formats. See table page 37-38. Export Combine Files/Takes DPX 1080p59.94/60 when recorded in Gemini are packed, thus the files may not look correct until unpacked, using this free transfer tool. www.Gemini444.com 51 | P a g e...
-
Page 53: Xml Files / Metadata
021313 XML Files / Metadata The Gemini 4:4:4 records meta data information for every file/frame. Inside each clip directory there is a XML Metadata file, which can also be used when importing metadata in a NLE / Color Corrector. (This applies for DPX, ARRIRAW, and Canon 4K Cinema Raw). -
Page 54: Appendix
On the Right Side of the page, you will find “Current Firmware”. Make a note of the firmware version that you will be downloading. Format a SSD in the Gemini 4:4:4 (ensuring that no important clips are on the SSD first). Insert the formatted SSD card in the transfer station. - Page 55 (or the current firmware version number) 11. Navigate to this folder and file. (You may just click on “Open Folder”) 12. Double Click on this file. It will be something like “Gemini 1.0.105.zip” but with the current firmware number. 13. Click on Extract All Files.
- Page 56 Gemini 4:4:4 will not find the firmware update. 11. Ensure that you have adequate power to power the Gemini 4:4:4, either battery or AC Power. The firmware update takes approximately 5 minutes, but please ensure that you have at least 30 minutes of battery time remaining to ensure safety.
- Page 57 Gemini 4:4:4 User Manual 021313 20. If you wish to then reuse this SSD (normally the case, unless you have additional Gemini 4:4:4’s to update): a. Insert the SSD back into the Gemini 4:4:4 b. Click on Cancel (to avoid performing the Firmware Update again) c.
-
Page 58: Specifications
Environmental Ambient Temp: -10 to +40 ⁰C (Operating) / -20 to +70 ⁰C (Storage) Gemini 444 Recorder + SSD Transfer Station + HD-SDI cables + HDMI Cable + Hotshoe Gemini Production Kit with 1/4"x20 Ball Mount + Universal AC Power Supply + 4-Pin XLR Power Cable + D- Tap Power Cable;... -
Page 59: Gemini Mechanical Drawings
Gemini 4:4:4 User Manual 021313 Gemini Mechanical Drawings Useful for your mounting needs and designs, please find below mechanical drawings of the Gemini 4:4:4. Remote Connector Pinout POWER PINOUT REMOTE PINOUT (1) Power: +6.5 ~ +19V, (1) 232 - RX (2) Power: +6.5 ~ +19V... -
Page 60: Best Practices For Handling Ssd Media, Bnc Cables And Power
Additionally, insufficient SSD power can also lead to failures during the offload of video data from the SSD to a computer or loading new Gemini firmware updates onto the SSD. Anytime an SSD is connected to a PC/MAC, the operating system may perform file indexing operations, which can result in write operations to the SSD. - Page 61 Gemini and waiting upwards of 20 minutes for the drive to rebuild itself. After 20 minutes, power off the Gemini 4:4:4, wait 5 seconds, then power it on again. If the recovery was successful, then the SSD LED will turn green after about 10 seconds or so. We may also be able to recover the files.
- Page 62 Adapter, Model CAUSM2001. An ExpressCard 34 to USB 3.0 adapter may be required for full USB 3.0 compatibility. However, USB 2.0 works fine to copy Gemini firmware updates to the SSD. Firewire 800: Seagate GoFlex Model STAE102 This is the slowest interconnect (other than USB 2.0), but it’s a safe method...
- Page 63 Convergent Design offers a over-voltage/reverse-voltage protection module which mounts on the side of the Gemini and plugs into the power receptacle. This power module works by blocking the power to the Gemini 4:4:4 or nanoFlash if the voltage is over 19 Volts, or if the www.Gemini444.com...
- Page 64 • If the nanoFlash or Gemini 4:4:4 will not power up, check your cables for proper voltage and polarity. If you assume that the power protection module is defective, and connect your power cable directly to the Gemini 4:4:4 or the nanoFlash, and the power is bad, then you will damage the Gemini 4:4:4 or nanoFlash.
-
Page 65: Release Notes
SSD 1 needs to go through the Safe Eject procedure on the Gemini Recorder. So if this does occur, one just needs to insert the SSD or SSD’s into any Gemini 4:4:4 and then press the “SSD Safe Eject” icon. - Page 66 In this case, just perform the Recover SSD procedure. Please note that if one formats the SSD in a Mac and then the Mac writes files to the SSD, the Gemini 4:4:4 may not be able to recover all of the clips.
- Page 67 This is very desirable update provides substantial improvements in SSD reliability. Upon insertion of an SSD, the Gemini 4:4:4 will detect whether an update is necessary, and prompt the user to update the SSD. This will only need to be performed once for each SSD, and takes less than 1 minute.
- Page 68 021313 For System Priority = “2K” on the C500: RGB 4:4:4 1080P (1920x1080) 10-bit @ 23.98, 24, 25, 29.97, 50, 59.94 fps (29.97 and above requires two SSD's) (recorded as “.DPX” files) (1080p59.94 DPX recordings require Gemini Transfer utility to convert 10-bit “packed” to “un-packed”...
- Page 69 C500. With this option enabled, the Gemini 4:4:4 Clip names will not match the internal clip names, but will have a Date and Camera Serial Number as part of the Clip Name, which provides extra protection against one reusing the same Clip Name.
- Page 70 When switching the Canon C500 from 2K to 1080p, the Gemini Recorder may not properly detect the input change. In this case pull and re-insert the input cable for the Gemini to get an accurate reading of the input.
-
Page 71: Firmware Version
RGB 4:4:4 1080P 10-bit @ 50, 59.94 fps (requires 2 SSD's) (recorded as DPX files) RGB 4:4:4 1080P 12-bit @ 50, 59.94 fps (requires 2 recorders / 4 SSD's) (recorded as DPX files) RGB 4:4:4 2K (2048x1080) 10-bit @ 50 fps (requires 2 SSD's) (recorded as .DPX files) ... - Page 72 *** In most, but not all cases, currently unsupported formats from the C500 will cause a “Not Supported” message on the Gemini Recorder. Do not attempt to record any formats from the Canon C500 not currently supported by the Gemini Recorder (as specified in the above listings), the results will be unpredictable in such cases. Also, ensure the C500's output matches the Input Status of the Gemini Recorder.
- Page 73 Gemini 4:4:4 User Manual 021313 With ARRIRAW Recordings, fixed bug in which the .ari files from the Gemini Recorder would appear in DaVinci Resolve with a frame rate of 16801. Improved detection of missing 2 cable when in Dual-link with ARRIRAW input.
-
Page 74: Previous Firmware Releases
Camera Trigger (Record->Trigger), in which the clipname can be manually edited (in Record->Clip). When in Camera Trigger for any Canon Raw recordings, the Gemini Recorder will attempt to retrieve the base Clipname from the C500. The C500 must be simultaneously recording internally, in order for the Clipname to be passed to the recorder. - Page 75 Bug Fixes / Other Workarounds Fixed a bug recording from the ARRI ALEXA, in which the Gemini Recorder could get out of sync with respect to the Vari-Frame setting on the camera. The Gemini Recorder should now always correctly detect and follow the camera's Vari-Frame setting.
-
Page 76: Firmware Version 1.3.100 22-October-2012
Bug Fixes / Other Workarounds Fixed a bug recording from the ARRI ALEXA, in which the Gemini Recorder could get out of sync with respect to the Vari-Frame setting on the camera. The Gemini Recorder should now always correctly detect and follow the camera's Vari-Frame setting. - Page 77 RAIDed recordings. If the Gemini Recorder is in Canon Raw mode, and a standard 1080p video input is attached to the Recorder (instead of a Canon Raw input) , an inappropriate message such as “Set Raw” will sometimes appear.
-
Page 78: The Following Features For Firmware 1.2.100 Still Apply
IF YOU ARE UPDATING FROM FIRMWARE 1.0.54 TO THE NEW FIRMWARE, 1.2.100, PLEASE NOTE: Any SSD to be used for recording with the new firmware will first require a fresh formatting within the Gemini Recorder (with the new firmware installed). Additionally, clips recorded with previous firmware may not play out of Gemini with newer firmware. - Page 79 Note: If Camera Trigger or Timecode Trigger is used as the Record Trigger with 3D, the Trigger is based on Port A only; i.e., the Gemini will only start and stop recording based on the Trigger activity of the Camera connected to Input Port A.
- Page 80 Remote Record Trigger With this release the Remote Control Function of the Gemini 4:4:4 is now enabled. One can use a Remote Control Cable to Start/Stop the Gemini 4:4:4. Remote cables can be purchased from your dealer, or you can build your own.
- Page 81 Gemini 4:4:4 will automatically configure itself for proper operation, and preventing the possible loss of footage. Please allow video to be fed into the Gemini 4:4:4 for at least 10 seconds for the Gemini 4:4:4 do detect the change in the camera’s setting. ...
- Page 82 021313 To display these, just tap the SSD Info Icon on the upper left area of the Gemini 4:4:4 monitor. You may also tap the graphical display to bring up a Status Box with more specific information about each SSD.
- Page 83 Gemini 4:4:4 User Manual 021313 In certain high frame rates and modes, the Gemini 4:4:4 uses two SSD’s, recording even numbered frames to one SSD and odd numbered frames to the second SSD. This new, free utility program, for both Mac and PC’s, can be used to combine files from both SSD’s.
- Page 84 Bug Fixes Fixed a bug in which if the video source was lost during record, the Gemini Recorder would delay any action until the video source returned. The Gemini now, when the video source is lost, immediately ends the recording session with the Recorded Clip intact.
- Page 85 Gemini Transfer, available on our website on the Downloads page. All other DPX formats are recorded as un-packed on the Gemini, and are directly accepted by all DPX compatible software. Both packed and un-packed DPX data retain full quality.
- Page 86 Activated ARRIRAW feature can be disabled / enabled (see Disable ARRIRAW, page 10). ARRIRAW is available to all Gemini Users in Demo Mode. A gray bar appears across any recording. To activate ARRIRAW for Production Use: Purchase the ARRIRAW Upgrade from your local Dealer.
- Page 87 When using Timecode Trigger as the Record Trigger, repeated timescodes may be experienced on the final 2 or 3 frames of a given recording. The “Apply LUT” option only applies to 4:4:4 or RAW inputs. “Apply LUT” does not work in 1080p50/60 DPX or any 4:2:2 single source.
- Page 88 the “Project” value is placed in the “Project” field of the DPX header Most Metadata is displayed for each clip in the Play List (in “Play/Review” mode on the Gemini Recorder). This includes Scene, Take, Timecode, Date, Time, and Shooting Day.
- Page 89 Added Screen Flip function (Gemini->Set->LCD->Flip) to flip the Video and On-Screen Display by 180 degrees. This is to allow more flexibility of mounting the Gemini 4:4:4, as it can now be mounted upside down, while still viewing the image and menus in the upright position. This does not flip the recorded image.
-
Page 90: Canon 4K Cinema Raw Support
Gemini 4:4:4 User Manual 021313 Canon 4K Cinema Raw Support www.Gemini444.com 89 | P a g e... -
Page 91: Trouble Shooting & Support
Convergent Design community. http://www.dvinfo.net/forum/convergent-design-nanoflash/ (3) REFER TO DOCUMENTATION: Please read all of this User Manual, as well as our Gemini 4:4:4 FAQs which document basic usage and help answer common questions. (4) CONTACT US: If you still haven’t found a solution to your support needs we are always happy to help you 24/7! Support E-Mail: cd su p p o rt (at ) c on v er ge n t -d es ig n . -
Page 92: Limited Warranty
021313 Limited Warranty Convergent Design warrants Gemini 4:4:4, and all included accessories, against defects in material and workmanship for a period of 2 years (for registered units), 1 year (for non-registered units), and 3 months (for units used as rentals) from the original date of purchase. -
Page 93: Obtaining An Rma
Any loss or corruption of video or audio data recorded on the unit, or any loss or corruption of data which is in any way associated with the Gemini 4:4:4. Obtaining an RMA It is our policy that all material and repair returns, whether in warranty or not, are only accepted if an RMA (Return Merchandise Authorization) Number has been issued for the products being returned. - Page 94 Gemini 4:4:4 User Manual 021313 All products must be shipped prepaid to Convergent Design, or preferably through the dealer from which the unit was purchased (if outside the US). If you purchased the unit from a dealer outside of your normal trading zone, then you may be charged for return shipping to your location.
Need help?
Do you have a question about the 4:4:4 and is the answer not in the manual?
Questions and answers