Table of Contents
Advertisement
Quick Links
Advertisement
Table of Contents

Related Manuals for KGuard Security KG-SHA104


Summary of Contents for KGuard Security KG-SHA104
- Page 1 User Manual...
-
Page 2: Table Of Contents
User Manual CONTENTS Safety Instructions ……………………………..……………………………………….…………….1 Chapter 1. DVR Features ………………….………………………………………………………2 Chapter 2. Layout …………………….……………………………………………….……………..3 2.1. Front Panel …………………………….……………………………………….………………3 2.1.1. 4-CH Front Panel………………..………………………………………………..…….3 2.1.2. 8-CH Front Panel ………………..………………………………………… ………….4 2.2. Rear Panel ………………………………..………………………………………..…………..5 2.3. Remote Control……………………………...…………………………………….…………6 Chapter 3. DVR Installation ……………………………………………………………………….7 3.1. - Page 3 User Manual …………………………………………………...……………….19 5.2.4.5. PTZ Control 5.2.5. System Setup ……………………………………………………………………….…20 ………………………………………………………………….…20 5.2.5.1. Time Setup ……………………………………………………...…………….…21 5.2.5.2. Password …………………………………………………..……………… 21 5.2.5.2.1. Menu Lock ……………………………………………………………….… 22 5.2.5.3. Video Setup …………………………………………………...……………….…22 5.2.5.4. Language ………………………………………………………...……………….…22 5.2.5.5. Info ……………………………………………………………22 5.2.5.6. System Maintenance 5.2.6. Network Setup…………………………………………………….……………….… 23 ………………………………...……………………...
-
Page 4: Safety Instructions
Safety Instructions Use proper power source. Do not use this product with a power source that applies more than specified voltage (100-240V AC). Never insert anything metallic into the DVR case. Putting something into the DVR case can be a source of dangerous electric shock. Do not operate in wet &... -
Page 5: Chapter 1. Dvr Features
Chapter 1. DVR Features Real time monitoring Supports real time surveillance via Monitor Save Recordings DVR saves real-time recording image to HDD Backup Recordings Supports DVR backup via USB flash drive and hard drive. Playback Recordings Supports DVR single CH and multiple CH playback of recorded files Network operation Supports remote surveillance by multiple users simultaneously Alarm Setting... -
Page 6: Chapter 2. Layout
Chapter 2. Layoutt 2.1. Front Panel 2.1.1. 4-CH Front Panel 12 13 18 19 14 16 17 Item Key/Indicator Marks Functions Select Channel 1 to be full screen displayed Select Channel 2 to be full screen displayed Select Channel 3 to be full screen displayed Select Channel 4 to be full screen displayed QUAD Select quad display... -
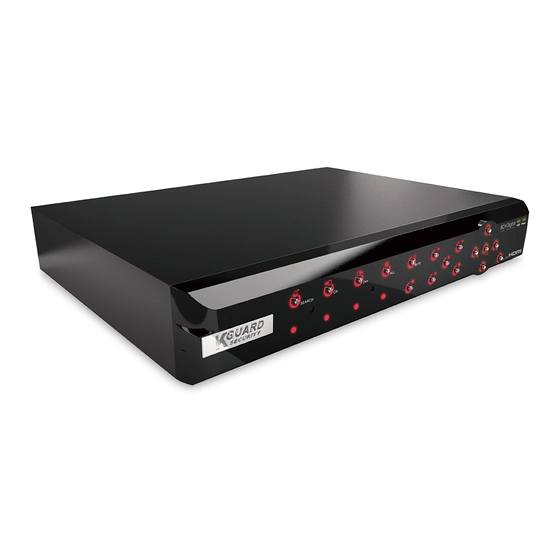
Page 7: 8-Ch Front Panel
2.1.2. 8-CH Front Panel 12 13 18 19 14 16 17 Item Key/Indicator Marks Functions SEARCH Enter system pop-up (short cut) menu bar Switch to previous channel Switch to next channel ALL CH Switch to 4/8 pictures display MUTE Audio mute key Start manual recording Move leftward / Rewind ... -
Page 8: Rear Panel
2.2. Rear Panel 4-CH Rear Panel 8-CH Rear Panel Item Physical port Connection method Video input Connect CH1-4/9 (BNC interface) Video output Connect monitor output (BNC interface) Audio input Connect 1 audio signal input (RCA interface) Audio output Connect 1 audio signal output (RCA interface) USB Port Connect USB mouse USB Port... -
Page 9: Remote Control
2.3. Remote Control Channel Select 1-8 ; Numeric key Numeric Key 9、0 Display all Channel Menu Enter/Exit Main Menu ▲ Up Key ▼ Down Key ◄ / Left / Right Key Select Key/ Edit Key Rewind key Play Key, Enter to recording search menu Forward Key ●... -
Page 10: Chapter 3. Dvr Installation
Chapter 3. DVR Installation 3.1. Hard Drive Installation Caution: Please do NOT install or uninstall hard drive while DVR is running! 1. Loosen the screws in the left and right sides. 2. Remove the cover 3. Connect data cord and power cable. -
Page 11: Camera And Monitor Connection
4. Install HDD on the bracket, fixed with screws firmly. 5. Check if the connectors are properly connected and there is no problem with wiring and close up cover, and fix it with screws. 3.2. Camera and Monitor Connection Connect camera cable to video input port of DVR, and from video output of DVR to Monitor via BNC connector or VGA port (refer to system figuration on Chapter 9.6). -
Page 12: Chapter 4. Dvr Boot Up
Chapter 4. DVR Boot Up 4.1. System Initialization After connecting the power adapter the system will boot-up and start initializing. 4.2. Main Interface After initialization, the system will display main interface. When there are video inputs, live images from the cameras will be displayed on screen. You can use mouse to double-click the live image of any channel for full screen display;... -
Page 13: Chapter 5. Dvr Menu
Chapter 5. DVR Menu 5.1. Main Menu Preview Camera Title Color setup Camera Privacy Setup Autoseq Setup Record Quality Record Solution (4CH) Record Audio Record Record Mode Record Schedule Record File Size Network DDNS Setup Main Menu Search Search Playback File List Backup HDD Management... -
Page 14: Main Menu
5.2. Main Menu Press SEL button on the front panel or click the right button of mouse to display pop-up menu. Select MAIN MENU to enter main OSD menu. Press ▲, ▼, ◄, keys on front panel to move the cursor, then press SEL key to enter selected item. -
Page 15: Privacy Zone Setup
5.2.1.2. Privacy Zone Setup Privacy zone function allows you to cover the private area, such as password input area on ATM machines. The covered areas will not be able to see in live view mode or in playback mode. You can select max. 4 privacy zones for each channel. -
Page 16: Record Setup
5.2.2. Record Setup Functions: CHANNEL: ON/OFF option decides to record or not. RESOLUTION: (4-CH only) decides the recording video resolution. About the definition of resolution, please refer to the specification chapter. QUALITY: select recording video quality, higher 4-CH quality will need more HDD space to save the video AUDIO REC.: DVR supports to record 1 channel audio signal. -
Page 17: Manual Recording
You are able to config 24 hours recording schedule for every channel or all channel from Sunday to Saturday. Steps: 1. Select Channel 2. Select a recording status among ALARM, GENERAL and NO RECORD 3. Move the cursor to the time point you want to set, click on the box in the schedule time line that you want to apply the selected record type to. -
Page 18: File List
Search All Recorded File: Press SEARCH button, system will search and show you the recorded status. RED color indicates ALARM recoding, GREEN color indicates continuous recording. You can click the time point to play back. For 4-CH DVR, system will play back all 4 channels at the same time. -
Page 19: Device Management
NOTE: Do not remove your USB device during making backup. Note: Backup files will be in H.264 format, you can play them with Netviewer program, or convert them to AVI format using the Netviewer program that comes with the DVR, so you can use any player that supports AVI format. -
Page 20: Hdd Format
5.2.4.1.1. HDD Format When a new HDD is installed into the DVR, the HDD status will show “NOT FORMATED”. You need to format the HDD otherwise the system cannot record. Warning: If you format a HDD which is being currently used, all data saved in the HDD will be lost! System will restart automatically after formatting the HDD. -
Page 21: Email Alarm Notification
Take GMAIL for example to demonstrate the email setting: 1. Set SSL to “On” via Gmail.com server, and set to “Off” via other mail server. 2. SMTP Port: indicates sender port of SMTP server. Generally the SMTP port value is 25, SMTP port of G-mail server is 465. -
Page 22: Motion Detection Setup
5.2.4.3. Motion Detection Setup STATUS: This option allows you enable motion detection on the channels. SENSITIVITY: This option allows you to set sensitivity level of motion detection from 1 to 4 with 4 being the most sensitive. MD AREA (motion detection area): Click this button of the corresponding channel to select the area you want to have motion detection. -
Page 23: System Setup
Open auto cruise function on PTZ setting menu if you want to setup cruise function, and set up cruise channel, cruise point, total quantity and stop time (by second) etc. Channel: select the channel with the PTZ camera TOTAL: set up presetting bit (angle) quantity. Please refer to your camera’s manual for detail CUR POINT: System has default starting (current) cruise point as 01. -
Page 24: Password
5.2.5.2. Password This option allows you set the device ID for the DVR and set the system password if you want to use one. Click APPLY button to save the settings. When you have enabled Password by setting the option to “ON”, you can setup a user password and administrator password respectively. -
Page 25: Video Setup
5.2.5.3. Video Setup VGA RESOLUTION: select the VGA video output solution to match your VGA monitor from 800x600, 1024x768, 1280x1024, 1440x900 and 1920x1200. VIDEO SYSTEM: Select the TV system from PAL and NTSC 5.2.5.4. Language Select system OSD language. System need to restart in order to complete the language switch after you APPLY the change. -
Page 26: Network Setup
5.2.6. Network Setup Your DVR supports to be remotely accessed via network, so that you can remotely control the DVR for monitoring, recording, playing back or making backup. Prior to the remote access, you need to set the network configuration at MAIN MENU ... -
Page 27: Internet Access Setup
5.2.6.2. Internet Access Setup Important Note: If you are using a DSL modem, the modem must be set to “bridge mode”. Note: Before the NETWORK configuration, it is strongly recommended that you perform the following tasks: 1. The DVR supports 3 common types of Internet Services: DHCP (Cable Modem), PPPoE (DSL Modem) and Static IP (Fiber Optics). -
Page 28: Ports
If your ISP uses STATIC IP network, select STATCI network TYPE. 1. Input the PORT (media port) 2. Input the WEB PORT (Must be different from media PORT) 3. Enter the IP Address that you have reserved at the beginning of this section into this field to be the unique address of your DVR in your local network 4. -
Page 29: Chapter 6. Network Access
Chapter 6. Network Access There are 3 methods to remote access the DVR via network: Internet Explorer Browser (IE), Netviewer client software & Mobile phones. 6.1. IE & Netviewer Access You can use Netviewer client software & Internet Explorer (IE) 6.0 or newer version to remote access the DVR. 6.1.1. -
Page 30: Connect To Dvr
Warning! It is strongly recommended to return all Internet Explorer Security to its default settings after the ActiveX Control has been installed. Enabling all ActiveX controls put your computer at risk of being attacked by computer virus. 6.1.2. Connect to DVR To connect to the DVR from a remote computer, you would then open an Internet Explorer browser window and enter the Internet IP of your router that you received by going to www.myipaddress.com. -
Page 31: Control Network Access
6.1.3 Control Network Access 6.1.3.1 Live 1. On / Off Live display [ ]: When the live display status is “On”, clicking the button to close live display. When the live display status is “Off”, clicking the button to open live display. 2. -
Page 32: Remote Backup
6.1.3.5. Remote Backup You can backup recorded video files from DVR to your PC using the Replay menu in the remote surveillance software. To backup files remotely: 1. Click REPLAY at the top of the main screen. 2. Select a date on the calendar and click RELOAD. 3. -
Page 33: Playback Local File With Netviewer
6.1.3.8. Playback Local File with Netviewer Run the Netviewer software, you will see the OFFLINE button displayed on the Login interface. Press this button to enter local file playback mode. Press the ADD button to add backup H.264 files or folder saved in your computer, you will see the files will be listed in the queue window, select a file then press PLAYFILE button to play. -
Page 34: Mobile Phones Access
6.2 Mobile Phones Access This function allows you to view 1 channel live image at the same time with your mobile phone. ® ® The DVR is currently compatible with mobile phones running Windows Mobile, Symbian ® ® Edition operating systems, iPhones and Blackberry on GPRS and/or 3G networks. - Page 35 3. Choose storage location and click “Install” to start the installation. 4. After installation finishes, click the icon named window mobile to run the program. This will display the program screen. 5. Click the “Setting” button to enter the Setting menu. User name: same as user name setup in DVR MOBILE setup Password: same as password setup in DVR MOBILE setup Server: DVR’s public IP address or DDNS domain name...
-
Page 36: Install & Operate Mobile Client In Symbian® Phones
® 6.2.1.2. Install & Operate Mobile Client in Symbian Phones 1. Install the webcam program that is included on the supplied CD by copying the “Symban_3.0.sisx” (Symbian 3.0 version) or “Symbian_5.0.sis” (Symbian 5.0 version) file to the mobile phone. You can do this by attaching the mobile phone to a computer and copying the file from the CD to the phone. - Page 37 6. Click “Continue” and wait for the program to install. 5. Once the installation is complete, go to the Applications folder and select the “Symbian_5.0” program, and click “Open” to display the settings menu. Default Access Point:Input the access point. System default for the access point is GPRS connection. Server Address: DVR’s public IP address or DDNS domain name Server Port:Same as the Server Port you set in the DVR under section 5.2.10.4.
-
Page 38: Install & Operate Mobile Client In Iphone
® 6.2.1.3. Install & Operate Mobile Client in iPhone Step 1: Download iTunes Visit Apple website http://www.apple.com/itunes/ to download & install the iTunes. Step 2: Download & install surveillance software “Aplayer” 2.1 Register iTunes Store 2.1.1 Run the installed iTunes, you might need to create an account to visit iTunes store firstly. Move to the menu “Store”, and click the option “Create Account”. - Page 39 2.1.3 Select & continue 2.1.4 Fill in your personal info & continue. Please note that the options of Payment Method are different from different regions, please select another payment method. Don’t worry, “Aplayer” is free software & you don’t need to pay for it.
- Page 40 Click the link included in the email message. It will connect to the iTunes store and turn to iTunes interface. Sign in your account. The register of your iTunes store account has been done.
- Page 41 2.2 Authorize Computer You need to authorize your computer with the registered ID. Move to the menu “Store”, and click the option “Authorize Computer”. Input your registered ID & password, then click Authorize button. 2.3 Download & install “Aplayer” into your iPhone 2.3.1 Click iTunes Store(1), then input “aplayer”...
- Page 42 2.3.2 Click the icon and it will turn to the download page. Click the “GET APP” button to download the file. You will find the downloaded file on the directory of Application 2.3.3 Connect your iPhone to the computer, you will find your Device displayed on the left sidebar. Select the DEVICES ID(1), and then click “Applications”...
- Page 43 The devices ID is different from different iPhones. After finishing the sync, you will find the Aplayer Icon on your iPhone Step 3: Setup & run “Aplayer” Main interface of Aplayer & function keys: . Direction keys of PTZ control Ⅰ...
-
Page 44: Chapter 7. Specifications
Chapter 7. Specifications Model KG-SHA104 ( 4CH ) KG-SHA108 ( 8CH ) Video Compression H.264 Video System NTSC / PAL Operation System Linux Video Input / BNC 4-channel / VGA 1-channel & BNC 8-channel / VGA 1-channel & BNC Output... -
Page 45: Chapter 8. System Connection Configuration
Chapter 8. System connection Configuration 4Channel DVR... - Page 46 8Channel DVR...
-
Page 47: Chapter 9.Appendix
Chapter 9. Appendix 9.1 Operation Function Table Type Title Description Page Time setting Setting system date, time and format and day-light saving time setting Language Select Setting system language Setting CH title and position; adjusting image color parameter value; setting CH display to CH Setting ON / Off and time display/recording time overlaying to On/Off. -
Page 48: Recording Alarm Setting
9.2. Recording Alarm setting Please refer the below matrix: “⊥” stand for “only alarm but no recording”; “AMR” stand for “alarm recording”; “NLR” stand for “normal recording”; and “NOR” stand for “ no recording”. Once alarm is triggered, alarm icon will occur, and when many alarms are triggered, alarm remarks will occur on the screen. Recording Mode Timing recording Recording alarm setting... -
Page 49: Email Server Check List (The Below Info Only O For Your Ref)
9.4. Email server check list (The below info only for your ref.) Email address (Web site) Sender server(25) Receiver server(110) @yahoo.com.tw smtp.mail.yahoo.com.tw pop.mail.yahoo.com.tw www.yahoo.com @yahoo.com smtp.mail.yahoo.com pop.mail.yahoo.com www.google.com @gmail.com smtp.gmail.com(465/587) pop.gmail.com(995) List 9-3 9.5. Usage Maintenance 1. Please make sure DVR keep away from heating source. 2. - Page 50 The material in this document is the intellectual property of our department . No part of this manual be reproduced, copied, translated, transmitted, or published in any form or by any means without our department prior written permission. Our products are under continual improvement and we reserve the right to make changes without noti ce.
Need help?
Do you have a question about the KG-SHA104 and is the answer not in the manual?
Questions and answers