
Related Manuals for KGuard Security KG-SH330


Summary of Contents for KGuard Security KG-SH330
- Page 1 KG-SH330/SH-530 User’s Manual Default account & Password for KG-SH330/530 User Account:「 「 「 「 aa」 」 」 」 Password:「 「 「 「 11」 」 」 」 (Version 1.0)
-
Page 2: Table Of Contents
KGUARD Standalone (KG-SH330&SH-530) User Manual Table of Contents Package Content......................4 Feature..........................5 Specification ........................5 Hardware Introduction....................7 SH330 Front view / Back view...............7 SH530 Front view / Back view...............9 Remote controller ..................11 HDD Installation.....................13 Text Input........................18 Main Screen ........................19 Menu..........................20 Login / Logout....................21 Status.......................22... - Page 3 KGUARD Standalone (KG-SH330&SH-530) User Manual 10.4 Search Archived Files ..................61 10.5 POS Search ....................62 10.6 Playback/Archive For Search By Time ............63 10.7 Playback/Archive For Search By Event............66 10.8 Playback/Archive For Smart Search ............67 10.9 Playback For Archived Files ...............67 10.10 Playback/Archive For POS Search ............68...
-
Page 4: Package Content
KGUARD Standalone (KG-SH330&SH-530) User Manual Package Content 1-1. KG-SH330 ---------------------------------- x1 1-2. Remote Controller ------------------------ 1-3. Y-Cable -------------------------------------- x1 1-4. Terminal Block ----------------------------- x2 1-5. RS232 Terminal Cover ------------------- x1 1-6. Power Adapter ----------------------------- x1 1-7. Power Cable -------------------------------- x1 1-8. -
Page 5: Feature
KGUARD Standalone (KG-SH330&SH530) User Manual Feature ※ Embedded system design, provide reliable system. ※ H.264 video compress with configurable quality. ※ Support Multiplex operation – Live, Record, Playback, Backup, Control, Remote access. ※ Preview Up to 30 (NTSC) / 25 (PAL) IPS per channel. - Page 6 KGUARD Standalone (KG-SH330&SH530) User Manual Audio Output RCA 2 CH Monitor Display Channel 1/4/7/9 1/4/7/9/10/13/16 Digital Zoom x 2, x4 Sequence Display Available Display Resolution NTSC:720(H)x 480(V) ; PAL : 720(H) x 576(V) Display Rate Up to 30 (NTSC) / 25 (PAL)
-
Page 7: Hardware Introduction
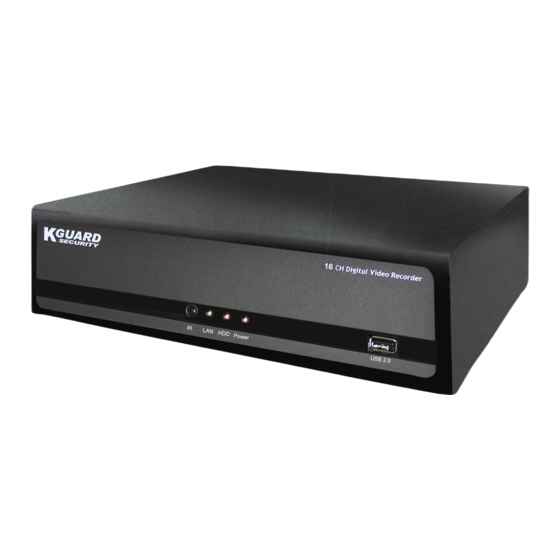
KGUARD Standalone (KG-SH330&SH530) User Manual Hardware Introduction SH330 Front view / Back view Name Description IR Indicator LED illuminates when IR is on. LAN Indicator LED illuminates when LAN cable is connected. HDD Indicator LED illuminates when HDD is properly installed. - Page 8 KGUARD Standalone (KG-SH330&SH530) User Manual Alarm Input Connector Connect to the alarm triggering devices. Alarm Output Connector Connect to the alarm triggering devices. LAN port This is the LAN connection port. NTSC / PAL switch Set the unit either as NTSC or PAL according to TV compatibility.
-
Page 9: Sh530 Front View / Back View
KGUARD Standalone (KG-SH330&SH530) User Manual SH530 Front view / Back view Name Description IR Indicator LED illuminates when IR is on. LAN Indicator LED illuminates when LAN cable is connected. HDD Indicator LED illuminates when HDD is properly installed. Power Indicator LED illuminates when power is turned on. - Page 10 KGUARD Standalone (KG-SH330&SH530) User Manual LAN port This is the LAN connection port. NTSC / PAL switch Set the unit either as NTSC or PAL according to TV compatibility. USB port This is the connection terminal for USB port device.
-
Page 11: Remote Controller
KGUARD Standalone (KG-SH330&SH530) User Manual Remote controller Name Description 1 REC Press to start the recording. 2 Mode Press to switch between live and playback mode. 3 SEQ Press to turn on the sequence mode. 4 CALL Click to bring up the call monitor. - Page 12 KGUARD Standalone (KG-SH330&SH530) User Manual to adjust the volume. Click to switch between different screen layouts. : Rewind feature. / II: Click to play or pause the playback. : Forward feature. : Click to copy an image to an external storage device. Click again to stop copying.
-
Page 13: Hdd Installation
KGUARD Standalone (KG-SH330&SH530) User Manual HDD Installation This system is specially designed to accommodate a maximum of 4 HDDs. Nevertheless, due to the space limitation, either the 4 HDD or the VGA card can be applied once at a time. - Page 14 KGUARD Standalone (KG-SH330&SH530) User Manual IDEs Figure 4 Step 4 : Then screw the IDE onto the HDD rack provided on top of the IDE cable as shown in the figure. VGA Card Note: Although this system can support up to a maximal of 2 SATA HDD & 2 IDE HDD, the 4 HDD is optional.
- Page 15 KGUARD Standalone (KG-SH330&SH530) User Manual Figure 5- SATA connection Figure 6- IDE connection Step 5 : Properly connect all the appropriate cables & power cables to their respective HDD as shown in figures 5 & 6 for both SATA & IDE.
- Page 16 KGUARD Standalone (KG-SH330&SH530) User Manual Figure 7 NOTE: The SATA & IDE cables must be carefully folded in the orientation as shown in the figure 7 before attaching the IDE to prevent disruption to other system components. Figure 8 Step 6 : Carefully assemble the cases & screw the it tightly to complete the HDD installation.
- Page 17 KGUARD Standalone (KG-SH330&SH530) User Manual Note 2: Each of the HDDs must be formatted before it can be used to record video/audio. Please refer to Section 7.7.6.1 HDD Format/Clear to format the HDDs. Note 3: Please refer to the following diagrams if IDE-to-SATA converter board...
-
Page 18: Text Input
KGUARD Standalone (KG-SH330&SH530) User Manual Text Input Press ▲▼◄► to highlight the text to be edited then press Enter to call up the alpha-numeric text pad. Name Description Press to enter the available number. Press to enter the available number and letter shown on the screen. -
Page 19: Main Screen
KGUARD Standalone (KG-SH330&SH530) User Manual Main Screen Name Description Video Screen Display live/playback video. Camera ID Shows ID number of the camera. Time / Date Shows the current recording time and date. Audio When audio is turned on, audio icon will be displayed on the screen. -
Page 20: Menu
KGUARD Standalone (KG-SH330&SH530) User Manual Menu Press to bring up a list of function setting menu. Name Description Login/Logout Press to login/logout of the system. Status Allow user to view the overall status of the system. Volume There are a maximum of 4 live audio inputs. User can choose to enable or disable the audio feature and adjust the audio volume. -
Page 21: Login / Logout
KGUARD Standalone (KG-SH330&SH530) User Manual Login / Logout In Menu display, press ▲▼ to change the highlighted option to Login / Logout, and then press ENTER to call up Login / Logout display as shown below. Click on the Login/Logout page to login the system and unlock the setting for changes. -
Page 22: Status
KGUARD Standalone (KG-SH330&SH530) User Manual 7.2 Status In Menu display, press ▲▼ to change the highlighted option to Status, and then press ENTER to call up Status display as shown below. This page will display the status of the system in terms of alarm and normal record size, camera status, hardware and software version. -
Page 23: Volume
KGUARD Standalone (KG-SH330&SH530) User Manual Note: The serial number can only be used once. Please contact the supplier for a new serial number. Hardware version This is the hardware version information. Software version This is the software version information. NOTE: If you forget Login Account and Password of SH330, please mail the data of... -
Page 24: Video Adjustment
KGUARD Standalone (KG-SH330&SH530) User Manual Mute to mute the selected audio channel. Press ENTER or check( ) / uncheck (-) this item. Volume Press to adjust the volume. Video Adjustment In Menu display, press ▲▼ to change the highlighted option to Video Adjustment, and then press ENTER to call up Video Adjustment display as shown below. -
Page 25: Vga Display
KGUARD Standalone (KG-SH330&SH530) User Manual 7.5 VGA Display In Menu display, press ▲▼ to change the highlighted option to VGA Display, and then press ENTER to call up VGA Display display as shown below. This section explains how to adjust the Resolution, Brightness, Contrast, Hue and Saturation of VGA display quality. -
Page 26: Backup Device
KGUARD Standalone (KG-SH330&SH530) User Manual 7.6 Backup Device In Menu display, press ▲▼ to change the highlighted option to Backup Device, and then press ENTER to call up Backup Device display as shown below. This window allows user to view the connection status of the backup device and to initiate data backup. -
Page 27: Backup Setting
KGUARD Standalone (KG-SH330&SH530) User Manual Click Backup to store the data files to an external storage device. Configuration Click Restore to restore the data files from the external device to the local system. MODE Eject the tray and disconnect. (for Internal DVD only) Load the tray and connect. -
Page 28: Setup
KGUARD Standalone (KG-SH330&SH530) User Manual return to Click to exit the backup setting, and previous display. Attention 1: To view the backup data playback, please access the IE interface of the system and press to locate the data file. Attention 2: Please refer to Appendix K –Standalone DVR Hardware Accessory... -
Page 29: Pre-Camera
KGUARD Standalone (KG-SH330&SH530) User Manual 7.7.1 Pre-Camera In Setup display, press ▲▼ to change the highlighted option to Pre-Camera, and then press ENTER to call up Pre-Camera display as shown below. This section shows how to change the recording Resolution, Setup the number of camera installed and assigning PTZ Speed Dome ID. -
Page 30: Camera
KGUARD Standalone (KG-SH330&SH530) User Manual checked. PTZ ID Press to assign each PTZ an ID. Group This column allows user to assign each camera into different surveillance groups. 7.7.2 Camera In Setup display, press ▲▼ to change the highlighted option to Camera, and then press ENTER to call up Camera Setup display as shown below. - Page 31 KGUARD Standalone (KG-SH330&SH530) User Manual Motion Detection whether the motion detection of this camera is enabled or not. Press ENTER or to check( ) or uncheck (-) this item. Motion This is the motion detection setting. (Settings..) (Press ENTER in Settings.. to call up Motion Setup display for the camera.
- Page 32 KGUARD Standalone (KG-SH330&SH530) User Manual ▲▼ Press these buttons to select the items. Press this button to escape from this screen, and return to previous display. Name Description Duration Press to adjust the length of warning period upon video loss trigger.
- Page 33 KGUARD Standalone (KG-SH330&SH530) User Manual 7.7.2.2 Motion Setting In Setup display, press ▲▼ to change the highlighted option to Motion Settings.. , and then press ENTER to call up Motion Setup display as shown below. ▲▼ Press these buttons to select the items.
-
Page 34: Alarm
KGUARD Standalone (KG-SH330&SH530) User Manual Email Press Enter or to check( ) or uncheck (-) this item. When checked, enable this feature will trigger text or figure files be sent to email when motion is detected. Press Enter or to check( ) or uncheck (-) this item. - Page 35 KGUARD Standalone (KG-SH330&SH530) User Manual specified alarm input. Duration Press to adjust the length of warning period when the alarm is triggered. Goto Preset User can set the monitor to display the defined preset camera image upon an event trigger.
-
Page 36: Seq Display Setup
KGUARD Standalone (KG-SH330&SH530) User Manual 7.7.4 SEQ Display Setup In Setup display, press ▲▼ to change the highlighted option to SEQ Display, and then press ENTER to call up Setup display as shown below. SEQ Display This section explains how to set up the surveillance sequence order for both main monitor and call monitor. -
Page 37: Scheduled Record
KGUARD Standalone (KG-SH330&SH530) User Manual 7.7.5 Scheduled Record In Setup display, press ▲▼ to change the highlighted option to Scheduled Record, and then press ENTER to call up Scheduled Record Setup display as shown below. This setting is for user to define and adjust the recording schedule. The system supports up to 16 different schedules with each T represents each schedule. -
Page 38: Hdd
KGUARD Standalone (KG-SH330&SH530) User Manual 7.7.6 HDD In Setup display, press ▲▼ to change the highlighted option to HDD, and then press ENTER to call up HDD Setup display as shown below. In the surveillance applications, alarm video/audio is much more important than normal video/audio. - Page 39 KGUARD Standalone (KG-SH330&SH530) User Manual HDD Full Action Press ENTER or to check( ) or uncheck (-) this item. This feature enables the system to take appropriate actions when the HDD capacity is short. Duration Press to adjust the length of warning period due to HDD capacity shortage.
- Page 40 KGUARD Standalone (KG-SH330&SH530) User Manual format and/or clear each HDD, and set the size for Alarm Record partition and Normal Record partition for each HDD. Please note that the HDD IDs for the internal HDDs in the DVR start from ID 1, lower for IDE and higher for SATA, and the HDDs in the farthest Hard Disk Box have the lowest HDD ID next to internal HDDs.
- Page 41 KGUARD Standalone (KG-SH330&SH530) User Manual The HDD Failure Action in Advanced HDD Setup allows the administrator to define how the system responds to the detected HDD failure, while the Privacy settings allow the administrator to set the DVR to record for Limited Period and the Retention Period of its HDD storage.
-
Page 42: Password
KGUARD Standalone (KG-SH330&SH530) User Manual 7.7.7 Password In Setup display, press ▲▼ to change the highlighted option to Password, and then press ENTER to call up Password Setup display as shown below. ▲▼◄► Press these buttons to select the items. -
Page 43: System Setup
KGUARD Standalone (KG-SH330&SH530) User Manual login name/password will be the default one each time the login dialog is shown, so the user doesn’t bother to enter the text to login the system. 7.7.8 System Setup In Setup display, press ▲▼ to change the highlighted option to System, and then press ENTER to call up System Setup display as shown below. -
Page 44: 422 / 485
KGUARD Standalone (KG-SH330&SH530) User Manual time according to the time zone selected. System Time Synchronization Click to synchronize the system time with the TSP server time. Time TSP Server Type in the TSP server address. Date Press to adjust the date. - Page 45 KGUARD Standalone (KG-SH330&SH530) User Manual Name Description Device Type Keyboard, GPS, POS, PTZ+Keyboard or N/A (Not Available). Press to select the appropriate device. Please note that PTZ can only be selected for either RS-232 or RS-422/485, but not both. Model Press to select the appropriate model for the device.
-
Page 46: Network
KGUARD Standalone (KG-SH330&SH530) User Manual NOTE 2 DVR/Camera ID – for PTZ/Keyboard => the device ID for this digital video/audio recorder, and it must not conflict with the other devices connected in the same control port.; for GPS/POS => the Camera ID to receive the GPS/POS data, “Multiple”... - Page 47 KGUARD Standalone (KG-SH330&SH530) User Manual Adv. Press Enter to access the advanced network setup. ( Advanced Network Setup) IP Address Press Enter to edit the IP address. Static IP Net Mask Press Enter to edit the net mask. Gateway Press Enter to edit the gateway IP.
- Page 48 KGUARD Standalone (KG-SH330&SH530) User Manual ▲▼◄► Press these buttons to select the items. Press this button to escape from this screen, and return to Setup Menu display. If the Save dialog is shown, press ENTER to exit and save, ESC to exit without saving.
- Page 49 KGUARD Standalone (KG-SH330&SH530) User Manual Name Description FTP Server Type in the FTP server address. (Please refer to section 5 for text/numeric entry) Username Type in the username. (Please refer to section 5 for text/numeric entry) Password Type in the password.
-
Page 50: Ptz Control
KGUARD Standalone (KG-SH330&SH530) User Manual Server (described below) is (to be) connected with the DVR. Please follow the Text Input method described in Section 5 to modify this item. PTZ Control RJ45 Color Code Description www.kguardsecurity.com... - Page 51 KGUARD Standalone (KG-SH330&SH530) User Manual Connection Step Step 1. Insert RJ-45 CABLE into K.G. Standalone DVR (KG-SH330/530) RS-485 PORT as square A. Adjust switch to RS-485 (2-line) as square B. Step 2. Connect DVR and PTZ Camera as below diagram.
- Page 52 KGUARD Standalone (KG-SH330&SH530) User Manual Step 3. Adjust the DIP SWITCH on the bottom of the Speed Dome PART User can select the control protocol / baud rate and address of the speed dome by adjusting DIP SWITCH on the bottom of the Speed Dome PART.
- Page 53 KGUARD Standalone (KG-SH330&SH530) User Manual Step 4. DVR Settings of PELCO-D Test PTZ Camera already connected sucessfully. Access to Setup operation of DVR standalone system then choose Pre-Camera Setup. Once PTZ Camera hardware is connectted successful then it will show the number of PTZ Camera that you connected.
- Page 54 KGUARD Standalone (KG-SH330&SH530) User Manual Press (on DVR remote controller) to set the Baud Rate to be 2400. (That’s the key point to let standalone DVR & Speed Dome communicate each other. ) Step 5. Press the PTZ button on DVR remote controller to confirm PTZ function .
-
Page 55: Software Upgrade
KGUARD Standalone (KG-SH330&SH530) User Manual Software Upgrade In Menu display, press ▲▼ to change the highlighted option to Software Upgrade, and then press ENTER to call up Software Upgrade display as shown below. User can upgrade the software from the upgrading files stored inside the external storage media such as DVD, SD card or USB flash drive. -
Page 56: Search & Playback
KGUARD Standalone (KG-SH330&SH530) User Manual 10 Search & Playback There are five ways to search the recorded video/audio for playback: (a) Search by time, (b) Search by event, (c) Smart search, (d) Search archived files, and (e) POS search. In split-window display, press SEARCH button to call up Search Menu display as shown. -
Page 57: Search By Time
KGUARD Standalone (KG-SH330&SH530) User Manual 10.1 Search By Time This section explains how user can search for specific data by defining the date and time as the search criteria. ▲▼◄► Press these buttons to select the items. Press this button to escape from this screen, and return to Menu display. -
Page 58: Search By Event / Log Display
KGUARD Standalone (KG-SH330&SH530) User Manual below) in the HDD to the connected backup device without playback. The Backup display (described in Section 10.6) will shown. Please note that this kind of backup is performed in the background, and the user can still do almost all the operations. -
Page 59: Smart Search
KGUARD Standalone (KG-SH330&SH530) User Manual playback it directly, or (3) press Copy Button ( ) to backup (copy) the selected recorded video/audio to the connected backup device without playback. The Backup display (described in Section 10.6) will shown. Please note that this kind of backup is performed in the background, and the user can still do almost all the operations. - Page 60 KGUARD Standalone (KG-SH330&SH530) User Manual ▲▼◄► Press these buttons to select the items. Press this button to escape from this screen, and return to Menu display. Name Description Target Camera Click to select the data source camera as the search criteria.
-
Page 61: Search Archived Files
KGUARD Standalone (KG-SH330&SH530) User Manual 10.4 Search Archived Files This section explains how user can search for archived files stored in the external device. ▲▼◄► Press these buttons to select the items. Press this button to escape from this screen, and return to Menu display. -
Page 62: Pos Search
KGUARD Standalone (KG-SH330&SH530) User Manual 10.5 POS Search This section explains how user can retrieve and view data recorded from the POS device. ▲▼◄► Press these buttons to select the items. Press this button to escape from this screen, and return to Menu display. -
Page 63: Playback/Archive For Search By Time
KGUARD Standalone (KG-SH330&SH530) User Manual performed in the background, and the user can still do almost all the operations. Please also note that the playback (or backup) can walk across all the matched files. Please refer to Section 10.8 Playback For Smart Search for the detailed operations for smart search playback. - Page 64 KGUARD Standalone (KG-SH330&SH530) User Manual ENTER Press this button to display the GPS/POS data if there’s GPS/POS data accompanied with the playback camera. Please select the Type (GPS or POS), Position, Background, Rows, and number of Characters on the screen, and then press ENTER to display the GPS/POS data, or ESC to cancel.
- Page 65 KGUARD Standalone (KG-SH330&SH530) User Manual Note: For internal DVD, please open the front door in order not to block the tray from ejecting, esp. while it’s in backup process. Blocking the tray from ejecting may damage the DVD writer. Stop ( ) Press this button to stop copying and return to the previous display.
-
Page 66: Playback/Archive For Search By Event
KGUARD Standalone (KG-SH330&SH530) User Manual Except the playback buttons, the user can still do all the other operations in split-window display as if there is no playback. Please refer to 4.3 Remote controller for the operations of the other buttons. -
Page 67: Playback/Archive For Smart Search
KGUARD Standalone (KG-SH330&SH530) User Manual 10.8 Playback/Archive For Smart Search In Smart Search display, press ENTER to enter Smart Search Playback display of the / II selected matched file, or press Play Buttons ( ) to playback it directly. Please note that the playback can walk across all the (up to 500 per record partition) matched files. -
Page 68: Playback/Archive For Pos Search
11 Remote Access 11.1 Remote Access via Internet Explorer (IE) Step1. Type in the IP address of the KG-SH330 standalone DVR in the IE address bar to access the system remotely. Step2. When the IE prompts to install ActiveX control, click to allow installation. - Page 69 KGUARD Standalone (KG-SH330&SH530) User Manual Step3. When an installation dialog box pops up, click to install IE Plugin.cab. NOTE: Step 2 & Step 3 only apply to first time user. Step4. Type in the login name, password, control port and data port information to access the system.
-
Page 70: Main Screen
KGUARD Standalone (KG-SH330&SH530) User Manual 11.1.1 Main Screen Name Description Camera ID Displays the ID of the camera. Video Screen This is to display both live and playback video. Date/Time This is to show the actual recording time and date of the video. - Page 71 KGUARD Standalone (KG-SH330&SH530) User Manual This feature enables user to search for POS recorded POS Search: data according to the specified date and time. Click to upgrade the system. Software Upgrade: GPS Configuration enables user to customize the GPS Configuration: GPS setting.
-
Page 72: Search & Playback
KGUARD Standalone (KG-SH330&SH530) User Manual 11.1.2 Search & Playback 11.1.2.1 Search By Time This feature enables user to search for a video data playback according to specific date, time and event type search criteria. Name Description Event Type Check the type of video as the search criteria. - Page 73 KGUARD Standalone (KG-SH330&SH530) User Manual 11.1.2.2 Search By Event This feature enables user to search for a video data playback according to the device, event type and camera source. Name Description Event List Window The window lists out all the events searched according to the criteria set.
-
Page 74: Ptz Control
KGUARD Standalone (KG-SH330&SH530) User Manual 11.1.3 PTZ Control Name Description PTZ control Click to control the pan / tilt / zoom of the PTZ speed dome. Focus Click to adjust the focus of the camera. Iris Click to adjust the camera iris. -
Page 75: Server Configuration
KGUARD Standalone (KG-SH330&SH530) User Manual 11.1.4 Server Configuration This is for user to add new DVR, edit existing DVR and to delete DVR as well as configure the property of each DVR. Setup configuration of the specific DVR can be modified and uploaded to the respective DVR remotely. - Page 76 KGUARD Standalone (KG-SH330&SH530) User Manual 11.1.4.2 Modify Server Press to modify the server information. STEP1: Delete all the information that is to be modified. STEP2: Then enter new information into their respective columns. STEP3: Then click OK to save changes.
- Page 77 KGUARD Standalone (KG-SH330&SH530) User Manual 11.1.4.4 Configure Server Property Press to enter the server configuration page. 11.1.4.4.1 Pre-camera Name Description Best REC Select to adjust the recording resolution. Resolution Watermark Click to watermark the video. Max ID Click to set the maximum number of camera available on a specific DVR.
- Page 78 KGUARD Standalone (KG-SH330&SH530) User Manual internet. Open Click to apply the previously saved setting to the current configuration. Save Press to save the setting to a specified location. 11.1.4.4.2 Camera Name Description Title Assign a title to each camera for easy identification.
- Page 79 KGUARD Standalone (KG-SH330&SH530) User Manual Normal Record IPS Allow the adjustment of normal recording rate. 11.1.4.4.3 Motion Name Description Camera ID Select the camera as a motion trigger. Duration Set the notification duration during motion detection. Goto Preset Set which camera preset location to be displayed upon a motion Pre-record Set the pre-recording time.
- Page 80 KGUARD Standalone (KG-SH330&SH530) User Manual 11.1.4.4.4 Video Loss Name Description Camera ID Select the camera as a video loss trigger. Duration Set the notification duration during video loss. Pre-record Set the pre-recording time. Alarm Output Select the alarm output notification during video loss.
- Page 81 KGUARD Standalone (KG-SH330&SH530) User Manual 11.1.4.4.5 Alarm Name Description Normal State Choose to turn on/off the alarm condition during normal state. Focus Camera Choose the focus camera upon an alarm trigger. Duration Set the alarm duration once it is triggered.
- Page 82 KGUARD Standalone (KG-SH330&SH530) User Manual 11.1.4.4.6 SEQ Display This configuration allows user to setup the order of the surveillance sequence of each DVR. Name Description Sequence Page Device Type Select the appropriate monitor for the surveillance Setting sequence. Window Type Select the number of display channel for each surveillance page.
- Page 83 KGUARD Standalone (KG-SH330&SH530) User Manual 11.1.4.4.7 Schedule Name Description T(x) This represents the number of schedule segment. ※ ※ ※ ※ User can set up to a maximum of 16 different schedule segments. The beginning of the new schedule segment represents the end of the previous schedule segment.
- Page 84 KGUARD Standalone (KG-SH330&SH530) User Manual 11.1.4.4.8 HDD Name Description Alarm Record Auto Overwrite Select this will enable the overwritten of old data when the disk capacity is achieved. HDD Full Action Select this will enable full usage of HDD capacity.
- Page 85 KGUARD Standalone (KG-SH330&SH530) User Manual 11.1.4.4.9 Password This configuration allows administrator to assign login name and password to other users. Name Description User Information Administrator can create user accounts for other users by assigning login name, password and user level.
- Page 86 KGUARD Standalone (KG-SH330&SH530) User Manual 11.1.4.4.10 System Name Description Time zone Select the suitable time zone from the drop down menu. System time User can manually set the time of the system or set the system to synchronize its time with a specific standard time server.
- Page 87 KGUARD Standalone (KG-SH330&SH530) User Manual 11.1.4.4.11 RS232/422/485 Name Description RS-232 Select the appropriate device that uses the RS-232 signal, device model, camera ID, baud rate, data bit, stop bit and parity from the drop down menus. RS-422/485 Select the appropriate device that uses the RS-422/485 signal, device model, camera ID, baud rate, data bit, stop bit and parity from the drop down menus.
- Page 88 KGUARD Standalone (KG-SH330&SH530) User Manual 11.1.4.4.12 Network Name Description Net Type Choose the appropriate net type to configure. There are 3 types of net: Static IP, PPPoE and DHCP Static IP Type in the correct IP address, net mask, gateway and DNS.
- Page 89 KGUARD Standalone (KG-SH330&SH530) User Manual 11.1.4.4.13 Email Name Description SMTP Type in the server URL, username and password. Mail From Enter the email address of the sender. Mail To Enter the email address of the recipient. Attachment User can select the type of image to be attached to the mail.
- Page 90 KGUARD Standalone (KG-SH330&SH530) User Manual 11.1.4.4.14 Name Description File Transfer Protocol Fill in the FTP server address, username and password. User may also choose to assign a prefix for each file to enable easy differentiation. Download This function enables user to download the original configuration from the host system should any accidental modification occur.
-
Page 91: Pos Search
KGUARD Standalone (KG-SH330&SH530) User Manual 11.1.5 POS Search This feature is designed to allow IE client to be able to search for POS data file of a specific device within a specific range of time period. User can also create a backup for POS data and play data file. -
Page 92: Gps Configuration
KGUARD Standalone (KG-SH330&SH530) User Manual 11.1.6 GPS Configuration This feature is designed to allow user to be able to configure the GPS setting via IE. Name Description Device Select the DVR that is connected with GPS. Display Show GPS Click to enable the display of GPS. -
Page 93: Pos Configuration
KGUARD Standalone (KG-SH330&SH530) User Manual 11.1.7 POS Configuration This feature is designed to allow user to be able to configure the POS setting via IE. Name Description Device Select the DVR that is connected with POS. Show POS Click to display the POS window on the screen. -
Page 94: Remote Access Via Pda
This is an example using Nokia N73 Step 1 : Connect to internet by clicking on Web. Step 2 : Type in the IP address of the KG-SH330 system(refer to 7.7.10 Network) to access the connection page. http://(IP address of the KG-SH330)/wap.htm ex. - Page 95 KGUARD Standalone (KG-SH330&SH530) User Manual Step 5 : Click on the camera number to view image of the camera. Finish your setting then click OK to view image of the camera. Figure 1 Key Descreption Display format: Display Channel 1/2/3/4 or 4 channel at a time.
-
Page 96: Ie Remote Access Via Vista
KGUARD Standalone (KG-SH330&SH530) User Manual Step 1 Step 2 Step 3 Step 4 Step 5 11.3 IE Remote Access via Vista Open IE browser. Click on “Tools” and go to “Internet Options”. Step1. www.kguardsecurity.com... - Page 97 KGUARD Standalone (KG-SH330&SH530) User Manual Step2. (a) Click on “Security” tab (b) Click on “Trusted sites”. (c) Click on “Sites” Step3. Enter the IP address of Standalone DVR. And untick the option on “Require server verification (https:) for all sites in this zone”. Then click on “Add”.
- Page 98 KGUARD Standalone (KG-SH330&SH530) User Manual The IP address is now save in Trusted sites. Click on “Close”. Step4. Enter Standalone IP address in IE browser. Step5. Click on “Install ActiveX Control” option. www.kguardsecurity.com...
- Page 99 KGUARD Standalone (KG-SH330&SH530) User Manual Step6. Click on “Install”. Step7. Click on “Yes”. Step8. Click on “Install”. www.kguardsecurity.com...
- Page 100 KGUARD Standalone (KG-SH330&SH530) User Manual Step9. Enter “User name” and password. Then click on “OK”. Step10. Now you should see the Standalone DVR remote viewing with IE browser. www.kguardsecurity.com...
-
Page 101: Cms2000
To increase its diversified capability, the system is fully compatible with almost all of Kguard security solution series including DVS, standalone DVRs and DVR cards. CMS2000 is designed for its IP based versatility and its integrability with DVR and DVS to enhance its security integrity. -
Page 102: Pos Connection
KGUARD Standalone (KG-SH330&SH530) User Manual 13 POS Connection The Standalone DVR (S130/SH130/SH330/SH530) support P.O.S. machine connection and support only general protocol of EPSON printer. 13.1 Connection Step & Diagram Connection Diagram: You could connect to printer directly or using terminal Block for without printer application. - Page 103 KGUARD Standalone (KG-SH330&SH530) User Manual For P.O.S. Setting as below: Device Type : POS Model : Epson General Baud Rate : 9600 Data Bit Stop Bit Parity : None Name Description Device Type Press to select the appropriate device. Model Press to select the appropriate model for the device.
- Page 104 KGUARD Standalone (KG-SH330&SH530) User Manual 13.2.1.2 Display Model Click ''Esc'' (thrice)on the remote controller to access Main Screen as below. Step A. P.O.S. Display Setting Click Set/Enter on the Remote Controller to call up the GPS/POS setting. Name Description Type Click to select either GPS or P.O.S.
- Page 105 KGUARD Standalone (KG-SH330&SH530) User Manual Characters Click to set the width of the P.O.S. display window. NOTE: This feature is only available for P.O.S. display Enter Click to save and exit the setting. Click to exit without saving the configuration.
-
Page 106: Rs232/422/485 Setting Via Remote
KGUARD Standalone (KG-SH330&SH530) User Manual 13.2.2 RS232/422/485 Setting via Remote 13.2.2.1 RS232/422/485 Setting of Remote Access Step A. Type in the IP address of Standalone DVR in the IE address bar. Type in the login name, password, control port and data port information (as Figure A-1) to access the system(as Figure A-2). - Page 107 KGUARD Standalone (KG-SH330&SH530) User Manual Step B. Click ‘’Server Configuration’’ to access operation as below. Then Press to enter the server configuration page. Step C. RS232/422/485 Setting First, please finish RS-232 For P.O.S. Setting as below: Device Type : POS...
- Page 108 KGUARD Standalone (KG-SH330&SH530) User Manual Name Description RS-232 Select the appropriate device that uses the RS-232 signal, device model, camera ID, baud rate, data bit, stop bit and parity from the drop down menus. www.kguardsecurity.com...
- Page 109 KGUARD Standalone (KG-SH330&SH530) User Manual 13.2.2.2 Display Model P.O.S. Configuration This feature is designed to allow user to be able to configure the P.O.S. setting via www.kguardsecurity.com...
- Page 110 KGUARD Standalone (KG-SH330&SH530) User Manual Name Description Device Select the DVR that is connected with P.O.S.. Show P.O.S. Click to display the POS window on the screen. POP-up Window Click to display the POS information on a separate window. Signal Type Click to select the signal that applies.
-
Page 111: Appendix A - Pos Connection Diagram
KGUARD Standalone (KG-SH330&SH530) User Manual Appendix A – POS Connection Diagram KG-SH330/530 is designed to support the integration of POS system. POS Connection WITH SH330/530 are the same. This picture illustrates the connection diagram of the POS system with the standalone DVR system (KG-SH330). - Page 112 KGUARD Standalone (KG-SH330&SH530) User Manual Appendix C - GPS/POS Display Setting Click Set/Enter to call up the GPS/POS setting. Name Description Type Click to select either GPS or POS as the display type. Position Click to adjust the position of the GPS/POS display window.
-
Page 113: Appendix D - Detection Setting
KGUARD Standalone (KG-SH330&SH530) User Manual Appendix D – Detection Setting Press Menu > Setup > Camera > Motion Setting > Detection Settings Name Description Click to resize the motion detection area. 【 】 Enter Press to set/reset the changes made. -
Page 114: Appendix E -Time Zone
KGUARD Standalone (KG-SH330&SH530) User Manual Appendix E –Time Zone Time Zone Offset Start Samoa GMT – 11:00 Hawaii GMT – 10:00 Alaska GMT – 09:00 ˇ Mar, 2nd Sun, 2:00 Nov, 1st Sun, 2:00 Pacific Time (US & Canada) GMT – 08:00 ˇ... - Page 115 KGUARD Standalone (KG-SH330&SH530) User Manual Tehran GMT + 03:30 ˇ Mar, 4th Tue, 2:00 Sep, 4th Thu, 2:00 Abu Dhabi, Muscat GMT + 04:00 Baku, Tbilisi, Yerevan GMT + 04:00 ˇ Mar, last Sun, 2:00 Oct, last Sun, 3:00 Kabul...
-
Page 116: Appendix F - Recording Table Reference (Ntsc)
KGUARD Standalone (KG-SH330&SH530) User Manual Appendix F – Recording Table Reference (NTSC) NTSC Recording Time (in Hour) - For Reference Only System Storage (GB): 200 Average Recording Rate (IPS) Resolution Quality Picture Size (KB)* 120 60 720x480 27.7 (Full D1) 24.5... -
Page 117: Appendix G - Recording Table Reference (Pal)
KGUARD Standalone (KG-SH330&SH530) User Manual Appendix G – Recording Table Reference (PAL) PAL Recording Time (in Hour) - For Reference Only System Storage (GB): 200 Average Recording Rate (IPS) Resolution Quality Picture Size (KB)* 100 50 12.5 720x576 36.0 (Full D1) 32.0... -
Page 118: Appendix H - Rs422 / 485 Port
KGUARD Standalone (KG-SH330&SH530) User Manual Appendix H – RS422 / 485 Port This port allows the connection of keyboard controller or VT-100 terminal via their appropriate cables. Please refer to the following diagram for pin definition & cross reference with section 7.7.9 (RS-232/422/485 setting) for setup purpose. -
Page 119: Appendix I - Main Aux & Call Aux Monitor Connection Diagram
KGUARD Standalone (KG-SH330&SH530) User Manual Appendix I – MAIN AUX & CALL AUX MONITOR CONNECTION DIAGRAM MAIN-AUX: Used to daisy chain to TV monitor. This has the same output function as Main Out but can be switched off via RS485 keyboard control. -
Page 120: Appendix J - Dvr 1- 8 Ir Sensor Setup & Remote Controller Trouble Shooting
KGUARD Standalone (KG-SH330&SH530) User Manual Appendix J – DVR 1- 8 IR Sensor Setup & Remote Controller Trouble Shooting DVR 1- 8 IR Sensor Setup If you are using only one KG SH-330/530. Press “DVR1” button on Remote Controller. For two or more KG SH-330/530. You can define “DVR1”, “DVR2”… “DVR8” by change switch setting at front panel of KG SH-330. - Page 121 KGUARD Standalone (KG-SH330&SH530) User Manual Step 2: Manually assign a specific ID for each DVR by turning the switch (the framed area) from number 1-8. Arrow on knob define the “DVR1”, “DVR2” and so. For two KG SH-330 you can set first Standalone DVR as 1 on arrow and another will be 2. So when you want to control first Standalone DVR just press “DVR1”...
-
Page 122: Appendix K - Standalone Dvr Hardware Accessory Support List
KGUARD Standalone (KG-SH330&SH530) User Manual Q: If the DVR 1- 8 IR Sensor Setup and solution A. (Remote Controller Trouble Shooting) doesn’t work. A: The IR Remote Controller may be out of order. Please contact your local dealer or supplier for new IR Remote Controller. -
Page 123: Appendix L - Standalone Dvr Firmware Update
KGUARD Standalone (KG-SH330&SH530) User Manual HP’s dvd9404e External 18X Super Multi DVD Writer Series LG / GE20LU10 DVD Disc Support Some DVD Discs Tested – Only single-side, single-layer disc is supported Infomedia’s DVD+R 16X Mitsubishi’s DVD+RW 1-4X Philips’s DVD+RW 1-4X Ritek’s DVD-R 8X... - Page 124 KGUARD Standalone (KG-SH330&SH530) User Manual DVR Video Server Configuration In the DVR Video Server the user has to enable the “Web Server settings” and to specify a port for the video streaming via IE. In the sample the port is set as “8080”...
-
Page 125: Appendix M - Ide To Sata Converter Board Installation Guide
KGUARD Standalone (KG-SH330&SH530) User Manual Please note that user must first input the username and password in order to enter the system. Network configuration(Stream Video by Remote Client Software) User can also install the Remote Client Software and use the Remote Client Software to access the Video Server from remote sites. - Page 126 KGUARD Standalone (KG-SH330&SH530) User Manual ↑Connect SATA HDD and STI Board. SATA HDD SATA TO IDE BOARD ↑Finish Figure. Step 2. Connect “IDE DATA CABLE” and SATA HDD. Jumper setting on the STI board A. Jumper ON (Default setting) Device 1, Slave Mode...
- Page 127 KGUARD Standalone (KG-SH330&SH530) User Manual B. Jumper OFF Device 0, Master Mode Connected to IDE PCI SLOT of Standalone DVR Slave HDD Master HDD ↑IDE DATA CABLE ONE SATA HDD First, STI board jumper set to Master Mode (Jumper OFF).
- Page 128 KGUARD Standalone (KG-SH330&SH530) User Manual Master HDD ↑Master HDD REAR PANEL TWO SATA HDD First, one of STI board Jumper set to Slave Mode (Jumper ON) and the other set to Master Mode (Jumper OFF) separately. Then connect IDE DATA CABLE and SATA HDD.
- Page 129 KGUARD Standalone (KG-SH330&SH530) User Manual Step 3. Connect One or Two HDD and Standalone DVR. Connect H.D.D. and “Standalone Main Board”. Connect H.D.D. and “Standalone Power Board”. ← ← ← ← IDE DATA CABLE ← ← ← ← IDE POWER CABLE...
- Page 130 KGUARD Standalone (KG-SH330&SH530) User Manual Slave HDD Master HDD *Finish the STI Board hardware installation. Step 4. Login Standalone DVR system to do the H.D.D. Settings. Login DVR System step: ‘’Menu’’ (click on the remote controller) → ‘’Login’’ → ‘’Setup’’ operation → ‘’HDD Setup’’...
- Page 131 KGUARD Standalone (KG-SH330&SH530) User Manual ↑Detect the two HDD have formatted as the red square of figure below. www.kguardsecurity.com KG P/N: 82620-00200-21000...
Need help?
Do you have a question about the KG-SH330 and is the answer not in the manual?
Questions and answers