
Related Manuals for Condair ABS3


Summary of Contents for Condair ABS3
- Page 1 Humidifier InstallatIon and operatIng InstructIons...
-
Page 3: Table Of Contents
Dimensions 4.3.1 Overview water installation Declaration of conformity 4.3.2 Notes on water installation Electric installation 4.4.1 Wiring diagram Condair ABS3 4.4.2 Notes on electric installation 4.4.3 Dismounting and mounting the electric connection box 4.4.4 Notes regarding the cabling 4.4.5 Configuration 4.4.5.1 Setting the flushing cycles... -
Page 4: Introduction
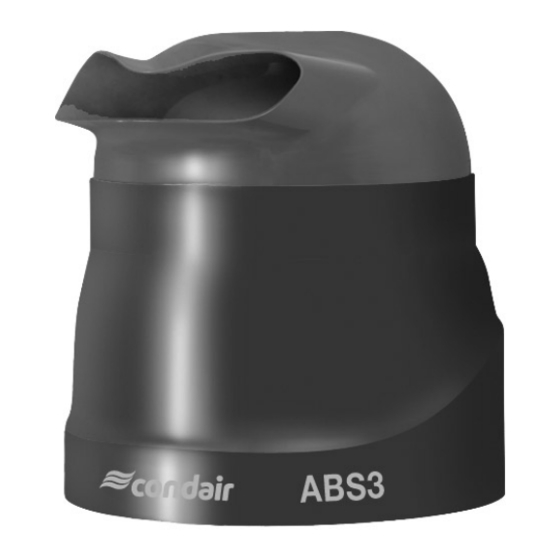
The subject of these installation and operating instructions is the adiabatic atomiser humidifier Condair ABS3. The various accessories are only described insofar as this is necessary for proper operation of the equipment. Further information on accessories can be obtained in the respective instructions. - Page 5 If the equipment changes hands, the documentation must be passed on to the new operator. If the documentation gets mislaid, please contact your Condair supplier. Language versions These installation and operating instructions are available in various languages. Please contact your Condair supplier for information.
-
Page 6: For Your Safety
General Every person working with the Condair ABS3 must have read and understood the installation and operating instructions before carrying out any work. Knowing and understanding the contents of the installation and operating instructions is a basic requirement for protecting the personnel against any kind of danger, to prevent faulty operation, and to operate the unit safely and correctly. - Page 7 ABS3 and may can affect the air passing through the humidifier. Prevention: the Condair ABS3 must be cleaned in the prescribed intervals according to the infor- mation given in chapter 6 “Maintenance". The cleaning works must be carried out correctly and the air filter must be replaced after their prescribed lifetime has elapsed. Behaviour in case of danger...
-
Page 8: Product Overview
Principle of operation Condair ABS3 operates according to the atom i zation principle. The water is drawn in through cone (4) from the water reservoir (3) and is hurled from the atomiser disk (5) against the atomiser collar (8), thereby producing aerosols (fog). The level in the water res- ervoir is monitored and controlled with the float switch (10). -
Page 9: Identification Of The Unit
-2 °C. The anti-freeze kit consist of a heating element connected to the con- trol board. The Condair ABS3 is prepared for the installation of the anti-freeze kit. The control of the heating element is established via the temperature sensor built into the unit. -
Page 10: Standard Delivery
If possible, always transport the unit with the help of another person. Packaging Keep the original packaging of the Condair ABS3 for later use. In case you wish to dispose of the packaging, observe the local regulations on waste disposal. Never dispose of the packaging to the environment. -
Page 11: Mounting And Installation Work
General notes All statements relating to the positioning and installation of the ABS3 as well as to the water and electrical installation must be followed and complied with. Observe and comply with all local regulations dealing with water and electrical installations. -
Page 12: Mounting The Unit
Notes on unit location In order to ensure the correct function of the humidifier and the accessibility for maintenance, please observe the following locating instructions: – The Condair A BS3 humidifiers are designed for wall mouting or ceiling mounting (hanging instal- lation). Make sure that the structure (wall, pillar, ceiling, etc.) on which the unit is to be mounted has sufficient carrying capacity and can accommodate the fastening elements. -
Page 13: Wall Mounting
4.2.2 Wall mounting To fix the humidifier to the wall, use the wall bracket, screws and dowels provided. The wall bracket can be used as template for the fixing holes. Mounting the wall bracket 1. Mark the fixing holes on the wall using the wall bracket as template. Make sure the wall bracket is aligned exactly horizontal before marking the holes. 2. Drill the four fixing holes (ø8 mm, 45mm deep). 3. Clean the holes and insert the dowels. 4. Fix the wall bracket with four screws to the wall (position of the bracket as shown in the figure above). Before tightening the screws align the wall bracket exactly horizontal. Mounting the unit 1. ... -
Page 14: Ceiling Mounting (Hanging Installation)
4.2.3 Ceiling mounting (hanging installation) Ceiling mounting is done with the angle brackets supplied as standard. The three chains for hanging up the unit must be provided by the customer. The chains must be fixed at the ceiling exactly perpendicularly above the three angle brackets fixed to the unit. The fixing points and the chains must have a sufficient load-bearing capacity, in order to carry the weight of the unit (see chapter 9.1 “Technical data”). Use chains made of steel (preferably corrosion-resistant steel). The dimension of the chain links must meet to the specifications in the adjacent figure. -
Page 15: Water Installation
Water installation 4.3.1 Overview water installation A Water supply pipe (included in the delivery, L: 1.5 m, G 3/4") B Stop valve (by client) C Water filter (accessory Z261, installation recommended, by client) D Drain pipe (included in the delivery, L: 1.5 m) with constant downward slope >10° E Open drain funnel with siphon (by client) Connector water supply G 3/4" Connector water drain ø10 mm Water supply pipe Drain pipe ø12/10 mm... -
Page 16: Notes On Water Installation
– Notes on water quality: – For the water supply of the Condair ABS3, use exclusively untreated drinking water or fully demineralised water. – The use of additives such as corrosion inhibitors, disinfectants, etc. is not allowed, since these additives may endanger health and affect proper operation. -
Page 17: Electric Installation
Electric installation 4.4.1 Wiring diagram Condair ABS3 24 VDC / 60 mA 1.1 l/h 6.5 l/h N L1 GND IN LEVEL internal external – + P / PI ON-OFF ON-OFF 115 V / 50/60Hz 230 V / 50/60Hz A1 Continuous humidity controller 0...10 V On/Off humidistat A3 ... -
Page 18: Notes On Electric Installation
The electric installation must be carried out according to the wiring diagram in chapter 4.4.1 and the applicable local regulations. All information given in the wiring diagram must be followed and observed. The electrical installation of the Condair ABS3 includes: Installation Power supply 230V/50-60Hz or 115V/50-60Hz Connection of power supply to terminals L1 and N according to the wiring diagram. The service switch (disconnects all 2 wires with a minimum contact clearance of 3 mm) and the fuses (2.5 A, slow acting) are mandatory. -
Page 19: Dismounting And Mounting The Electric Connection Box
4.4.3 Dismounting and mounting the electric connection box Dismounting the electric connection box 1. Undo the three screws at the air filter assembly and remove the air filter assembly. 2. Push fixing clip “C” sidewards and carefully pull connection box out of the unit. 3. Undo the four screws of the connection box and remove the cover. Now you can connect the cables on the control board or configure the control. CAUTION! The electronic components inside the electric connection box are very sensitive to electro- static discharge. -
Page 20: Notes Regarding The Cabling
4.4.4 Notes regarding the cabling Pass the power supply cable through the cable gland “1a” into the unit and through the cable gland “1b” into the electric connection box and connect it to the control board according to the wiring dia- gram. -
Page 21: Configuration
4.4.5 Configuration For the configuration the electric connection box in the unit must be dismounted and opened. For this purpose please observe the notes in chapter 4.4.3. 4.4.5.1 Setting the flushing cycles The flushing cycles are set via the DIP switches SW1 on the control board: During operation a flushing cycle The 6 hours flushing cycle during is performed every 6 hours. operation is deactivated (e.g. for the operation with fully deminer- alised water). After 72 hours without humidity 72 hours flushing deactivated. -
Page 22: Operation
• the electric installation for any damage. If the inspection reveals any irregularities (e.g. leakage, irregular running) or any damaged compo- nents take the Condair ABS3 out of operation as described in chapter 5.3. Then, let the damage or malfunction be resolved by a qualified specialist or a service technician of your Condair supplier. Note: During operation individual drops are carried along by the air flow and thrown against the hood. This causes an audible noise, which is completely normal. -
Page 23: Taking The Unit Out Of Operation
2. Turn off the service switch in the mains supply line, then secure the service switch against inad- vertent switching on. 3. Close the stop valve of the water supply line. Note: If the Condair ABS3 is not used for prolonged period of time, cover the unit with a plastic hood. -
Page 24: Maintenance
Safety DANGER! Before maintenance is initiated, the Condair ABS3 must be tak en out of operation in accord- ance with instructions in chapter 5.3 and protected against unintentional switching on. WARNING! If the Condair ABS3 is insufficiently maintained ill-making germs can increase in the water reservoir by the time and get into the ambient air. -
Page 25: Maintenance Work
Maintenance work Component Work to be carried out Air filter 1. Undo the three screws and remove the air filter assembly downwards. 2. Clean filter mat on both sides with a vacuum cleaner. 3. Place the cleaned filter mat between the two filter grids, then insert the filter assembly from downside into the unit and fix it with the three screws. Note: If the filter mat is heavily contaminated, replace the filter mat (EU3/C3). Drain siphon 1. Undo the three screws and remove the air filter assembly downwards. 2. Remove pipe “B” from the connector. 3. Undo the two screws “C”, then remove the connection piece “A”... -
Page 26: Troubleshooting
Safety In order to eliminate faults, the Condair ABS3 must be set out of operation as described in chapter 5.3, disconnect the unit from the mains and secure the unit against inadvertent power-up. Malfunction list Important! Most operational malfunctions are not caused by faulty equipment but rather by improper installation. -
Page 27: Taking Out Of Service/Disposal
Taking out of service/Disposal Taking out of service If the Condair ABS3 must be replaced or if the humidification system is not needed any more, pro- ceed as follows: 1. Take the unit out of operation as described in chapter 5.3. 2. Have the unit (and all other system components, if necessary) unmounted by a qualified service technician. Disposal/Recycling In conformance with the European Directive 2002/96 EC on Waste Electrical and Elec- tronic Equipment (WEEE) this device may not be disposed of in domestic waste. -
Page 28: Product Specifications
Product specifications Technical data Humidification capacity 1.1 ... 6.5 l/h Unit voltage 230V / 50/60Hz or 115V / 50/60Hz Power consumption 0.23 kW (0.3 kW with optional anti-freeze kit) Air circulation 280 m /h (77.8 l/s) Content water reservoir 0.055 l Unit weight 17.6 kg Connector water supply R 3/4" outside thread Connector water drain ø 10 mm Admissible pressure water supply 1...10 bar (0.1...1.0 MPa) -
Page 29: Declaration Of Conformity
Produkt the product responsabilité, que le produit Condair ABS3 auf das sich diese Erklärung bezieht, to which this declaration relates is in auquel se réfère cette déclaration est mit den folgenden Normen oder... - Page 30 Notes...
- Page 31 © condair ltd., printed in switzerland technical modifications reserved...
- Page 32 40002-2 Manufacturer: condair ltd. Member of the Walter Meier group talstrasse 35-37, 8808 pfäffikon, switzerland ph. +41 55 416 61 11, Fax +41 55 416 62 62 info@condair.com, www.condair.com...
Need help?
Do you have a question about the ABS3 and is the answer not in the manual?
Questions and answers