
Related Manuals for Condair EL


Summary of Contents for Condair EL
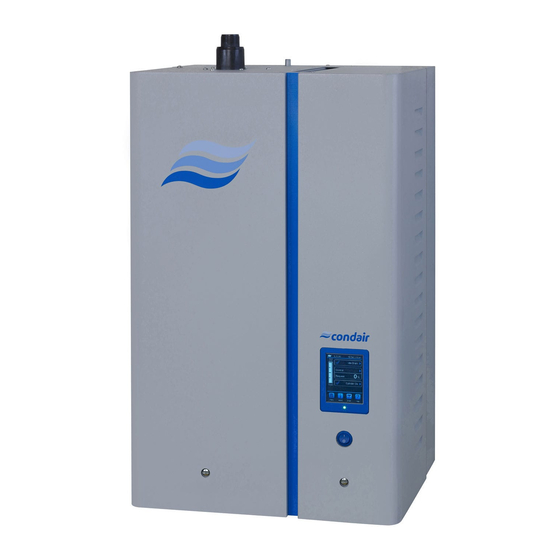
- Page 1 PLANNING- AND INSTALLATION MANUAL Steam humidifier Condair EL Humidification and Evaporative Cooling...
- Page 2 Condair Group AG, except to the extent required for installation or maintenance of recipient's equipment. Liability Notice Condair Group AG does not accept any liability due to incorrect installation or operation of the equipment or due to the use of parts/components/equipment that are not authorised by Condair Group AG.
-
Page 3: Table Of Contents
For your safety Product Overview Calculating the maximum required steam capacity Models overview 3.2.1 Single units Small ("S"), EL 5...15 and Medium ("M"), EL 20...45 3.2.2 Single units Large ("L"), EL 50...90 3.2.3 Double units (2 x "M"), EL 35...90 3.2.4... - Page 4 Wiring diagram Condair EL 50...90 - Single units "L" 5.7.4 Wiring diagram Condair EL 35...90 - Double units 2 x "M" 5.7.5 Wiring diagram EL 70...180 - Linkup systems 3 x "M" or 4 x "M" 5.7.6 Installation work external connections 5.7.7...
-
Page 5: Introduction
Further information on options and accessories can be obtained in their respective instructions. This installation manual is restricted to the installation of the Condair EL steam humidifier and is meant for well trained personnel being sufficiently qualified for their respective work. This installation manual is supplemented by various separate items of documentation (operation manual, spare parts list, etc.), which are included in the delivery. - Page 6 If the documentation gets misplaced, please contact your Condair representative. Language versions This installation manual is available in other languages. Please contact your Condair representative for information. Introduction...
-
Page 7: For Your Safety
For your safety General Every person, who is in charge of the installation work on the Condair EL must have read and understood this installation manual and the Condair EL operation manual before carrying out any work. Knowing and understanding the contents of the installation manual and the operation manual is a basic requirement for protecting personnel against any kind of danger, to prevent faulty operation, and to operate the unit safely and correctly. - Page 8 Preventing unsafe operation All persons working with the Condair EL are obliged to report any alterations to the unit that may affect safety to the owner without delay and to secure the Condair EL against accidental power-up. Prohibited modifications to the unit No modifications must be undertaken on the Condair EL without the express written consent of Condair.
-
Page 9: Product Overview
Product Overview Calculating the maximum required steam capacity The maximum required steam capacity must be calculated based on one of the following formulas: V • p • (x oder • (x 1000 1000 • ε maximum steam demand in kg/h volume of supply air portion per hour in m /h (for indirect room humidification) or room volume to be humidified per hour in m /h (for direct room humidification) -
Page 10: Models Overview
Models overview Condair EL steam humidifiers are available as single units with different housing sizes (S, M and L), as double units (2 x "M") and as Linkup systems (3 x "M" or 4 x "M") with different heating voltages and steam capacities ranging from 5 kg/h up to a maximum of 180 kg/h. -
Page 11: Single Units Large ("L"), El 50
3.2.2 Single units Large ("L"), EL 50...90 200V/1~ 230V/1~ 240V/1~ 200V/3~ 230V/3~ 400V/3~ 415V/3~ 440V/3~ 460V/3~ 480V/3~ 500V/3~ 600V/3~ Housing Condair size kg/h kg/h kg/h kg/h kg/h kg/h kg/h kg/h kg/h kg/h kg/h kg/h ...50... –– –– –– –– ––... -
Page 12: Double Units (2 X "M"), El 35
3.2.3 Double units (2 x "M"), EL 35...90 200V/1~ 230V/1~ 240V/1~ 200V/3~ 230V/3~ 400V/3~ 415V/3~ 440V/3~ 460V/3~ 480V/3~ 500V/3~ 600V/3~ Housing Condair size kg/h kg/h kg/h kg/h kg/h kg/h kg/h kg/h kg/h kg/h kg/h kg/h ...35... –– –– –– 2*17.5 2*17.5 ––... -
Page 13: Linkup Systems (3 X "M"), El 70
3.2.4 Linkup systems (3 x "M"), EL 70...135 200V/1~ 230V/1~ 240V/1~ 200V/3~ 230V/3~ 400V/3~ 415V/3~ 440V/3~ 460V/3~ 480V/3~ 500V/3~ 600V/3~ Housing Condair size kg/h kg/h kg/h kg/h kg/h kg/h kg/h kg/h kg/h kg/h kg/h kg/h ...70... –– –– –– ––... -
Page 14: Linkup Systems (4 X "M"), El 105
3.2.5 Linkup systems (4 x "M"), EL 105...180 200V/1~ 230V/1~ 240V/1~ 200V/3~ 230V/3~ 400V/3~ 415V/3~ 440V/3~ 460V/3~ 480V/3~ 500V/3~ 600V/3~ Housing Condair size kg/h kg/h kg/h kg/h kg/h kg/h kg/h kg/h kg/h kg/h kg/h kg/h ...105... –– –– –– ––... -
Page 15: Product Designation
Heating voltage Type: Condair EL 400V3 Serial: XXXXXXX 07.15 Voltage: 400V 3~ / 50...60Hz El. Power: 30.0 kW / 43.3 A Maximum steam capacity Steam capacity: 40.0 kg/h Steam humidifier Water press.: 100..1000 kPa (1..10 bar) Main Unit / Module A... - Page 16 Key model designation Example: Condair EL 50 L 400V/3~ Product designation Unit model: Housing size: L: large housing Heating voltage: 230V/1~/50...60Hz: 230V/1~ 200V/3~/50...60Hz: 200V/3~ 230V/3~/50...60Hz: 230V/3~ 400V/3~/50...60Hz: 400V/3~ 415V/3~/50...60Hz: 415V/3~ 440V/3~/50...60Hz: 440V/3~ 460V/3~/50...60Hz: 460V/3~ 480V/3~/50...60Hz: 480V/3~ 500V/3~/50...60Hz: 500V/3~ 600V/3~/50...60Hz: 600V/3~...
-
Page 17: Options
LonWorks board 1x LW 1x LW 1x LW 1x LW 1x LW 1x LW Supplementary board to connect the Condair EL to a building management system via LonWorks. Drain water cooling 1x DWC 1x DWC 1x DWC 2x DWC 3x DWC... -
Page 18: Option Details
For water conductivity from 125 to 1250 µS/cm Exchangeable steam cylinder 1xA363 1xA464 1xA674 1xA664 2xA664 2xA674 Cleanable steam cylinder 1xD363 1xD464 1xD674 1xD664 2xD664 2xD674 If you have questions regarding the steam cylinders please contact your Condair representative. Product Overview... -
Page 19: Accessories
3x BP 4x BP Blower pack for direct room humidification. The blower pack can be mounted either directly onto the Condair EL or separated from the unit to the wall (see details in chapter 3.5.1.3). Support for steam distribution pipe... -
Page 20: Accessory Details
3.5.1 Accessory details 3.5.1.1 DV41-..., DV61-... and DV81-... steam distribution pipes The steam distribution pipes are selected on the basis of the duct width "B" (for horizontal installation) or the duct height "H" (for vertical installation) and the capacity of the steam humidifier. Important! Always select the longest possible steam distribution pipe (opti mum humidification distance). Steam distribution pipes made of CrNi steel Duct width (B)/ Max. -
Page 21: 3.5.1.2 Optisorp Steam Distribution System
3.5.1.2 OptiSorp steam distribution system The OptiSorp steam distribution system is used in ventilation ducts with a short humidification distance (for the calculation of the humidification distance refer to chapter 5.4.2). When ordering an OptiSorp system the duct dimension must be specified. Please consult the data in the following table: OptiSorp OptiSorp OptiSorp... -
Page 22: 3.5.1.3 Blower Pack
3.5.1.3 Blower pack The blower packs – in combination with the steam humidifiers Condair EL – are used for direct room humidification. The blower packs are mounted directly on the humidifier or separately above the humidifier to the wall. Note: further information on the blower pack can be found in the separate manual supplied with the blower pack. -
Page 23: Receiving And Storage
Check packing slip to ensure all parts has been delivered. All material shortages are to be reported to your Condair supplier within 48 hours after receipt of the goods. Condair Group AG assumes no responsibility for any material shortages beyond this period. -
Page 24: Storage And Transportation
Storage and Transportation Storing Until installation store the Condair EL in its original packaging in a protected area meeting the following requirements: – Room temperature: 5 ... 40 °C – Room humidity: 10 ... 75 %rh Transportation For optimum protection always transport the unit and components in their original packaging and use appropriate lifting/transporting devices. -
Page 25: Mounting And Installation Work
DANGER! Danger of electric shock! The Condair EL is mains powered. Live parts may be exposed when the unit is open. Touching live parts may cause severe injury or danger to life. Prevention: The Condair EL must be connected to the mains only after all mounting and installation work has been completed, all installations have been checked for correct workmanship and the unit is closed and properly locked. -
Page 26: Installation Overviews
Installation overviews Typical installation for duct humidification Humidity sensor or humidity controller u c t i b s t r Return duct n y o . 3 m t o a m i n o w n High limit humidistat n k n a n c (external safety chain) i s u d i s t... - Page 27 Typical installation for room humidification Blower Pack (mounted separated from the steam humidifier) Steam line – As short as possible (max. length 4 m) – Adequate upslope/downslope min.15 % (8.5°) – No restrictions – Condensate trap at the lowest point – Hose or fixed pipe (with same inner diameter as steam outlet) Condsensate line DS80...
-
Page 28: Mounting The Unit
Mounting the unit 5.3.1 Notes on locating the unit e.g. EL 60 2x "M" * recommended.: 250 mm d u l d u l . 5 0 m i n e.g. EL 105 3x "M" . 5 0 m i n... - Page 29 The steam humidifier Condair EL must only be installed in rooms with a floor drain. CAUTION! If for some reason the Condair EL must be installed in a location without floor drain, it is manda- tory to provide a leakage monitoring device to safely interrupt the water supply in case of leakage.
-
Page 30: Mounting The Humidifier
5.3.2 Mounting the humidifier Overview wall mounting single units Small ("S") and Medium ("M") Dimension Housing size EL 5...15 ("S") EL 20...45 ("M") "a" in mm 193.5 193.5 "b" in mm 304.8 406.4 "c" in mm 57.6 61.8 Weights Housing size EL 5...15 ("S") EL 20...45 ("M") - Page 31 Overview wall mounting single units Large ("L") Dimension Housing size EL 50...90 ("L") "a" in mm 243.5 "b" in mm 406.4 "c" in mm 117.2 Weights Housing size EL 50...90 ("L") Netweight in kg 57.3 Operating weight in kg 105.0 Fig.
-
Page 32: Inspecting The Installed Unit
Procedure 1. Mark the attachment points "A" for the wall support at the desired position with the help of a spirit level. Then, drill holes diameter: 10 mm, depth: 50 mm. 2. Insert the supplied plastic plugs, and fix the wall support to the wall with the screws and washers supplied. -
Page 33: Steam Installation
Steam installation 5.4.1 Overview steam installation for duct humidification u c t i b s t r n y o . 3 m t o a m i n o w n n k n a n c i s u d i s t i f B t i o n o r p... - Page 34 Blower Pack (mounted separated from the steam humidifier) Steam line – As short as possible (max. length 4 m) – Adequate upslope/downslope min.15 % (8.5°) – No restrictions – Condensate trap at the lowest point Condsensate line – Hose or fixed pipe (with same inner diameter as –...
-
Page 35: Positioning Of The Steam Distributor
5.4.2 Positioning of the steam distributor The location of the steam distributor should be determined at the time of dimensioning the air condition- ing system. Please note the following instructions to ensure proper humidification of the duct air. Calculating the absorption distance The steam, emitting from the steam distributor, requires a certain distance to be absorbed by the air so that it is no longer visible as steam. - Page 36 Note: If the absorption distance has to be reduced for technical reasons, the amount of steam per unit must be divided between several steam distribution pipes or the steam distribution system OptiSorp must be used. If this is the case, contact your Condair representative. Minimum distances to be observed...
- Page 37 before diffuser before humidity limit controller / sensor before/after filter/heater " ) ( 1 . 1 . 5 2,5 x B before aerosol filter before/after fan, zone exit " ) ( 1 . Mounting and installation work...
- Page 38 Installation notes The steam distribution pipes are designed for either horizontal installation (on the duct wall) or, with ac- cessories, for vertical installation (in the duct floor). The outlet orifices should always point upwards and at right angles to the airflow. If possible, the steam distribution pipes should be installed on the pressure side of the duct (max. duct pressure 1500 Pa).
- Page 39 1 / 4 1 / 4 gm i 1 / 4 gm i 1 / 4 2 / 5 2 / 5 1 / 5 1 / 5 1 / 5 1 / 5 1 / 5 1 / 5 H min.= 600 mm H min.= 500 mm H min.= 400 mm...
-
Page 40: Installing The Steam Distributors
– Steam distribution pipes must not be mounted to round ducts. If you have questions relating to the dimensioning of ventilation ducts in combination with steam humidi- fiers Condair EL, contact your Condair representative. 5.4.3 Installing the steam distributors Detailed information on the installation of steam distribution pipes DV41-.., DV61-.. and DV81-... as well as the OptiSorp steam distribution system can be found in the separate mounting instructions for these products. -
Page 41: Positioning And Mounting Of The Blower Packs (Accessory Bp)
If you have questions concerning the direct room humidification, please contact your Condair representative. Further information is provided in the separate installation and operating instructions for the correspond- ing blower pack. -
Page 42: Installing The Steam And Condensate Lines
Installing the steam and condensate lines Installations notes – Use original steam and condensate hose from your Condair representative or solid steam pipes from copper or stainless steel (min. DIN 1.4301) exclusively. Steam and condensate lines from other material may cause undesired operational malfunctions. - Page 43 Installation examples Accessory: VS-DV... Ømin. 200 mm Ømin. 200 mm Fig. 15: Steam distributor mounted more than 500 mm above the top edge of the humidifier Mounting and installation work...
- Page 44 Ensure adequate cooling according to local codes Obstacle Ensure adequate cooling according to local codes Install condensate drain (full size T) at the lowest point Fig. 16: Steam distributor mounted less than 500 mm above the top edge of the humidifier Mounting and installation work...
- Page 45 Steam line must be insolated over the entire length! Ømin. 200 mm Fig. 17: Steam line with solid piping and insulation Mounting and installation work...
-
Page 46: Common Steam And Condensate Line Errors
5.4.6 Common steam and condensate line errors Wrong Correct Steam line not led at least 11.81" (300 mm) perpendicularly Lead steam line at least 11.81" (300 mm) perpendicularly upwards before first bend (forming of condensate). upwards before first bend. Minimum bend radius of steam hose/solid steam line not The minimum bend radius of 11.81"... -
Page 47: Inspecting The Steam Installation
5.4.7 Inspecting the steam installation Use the following check list to ensure that the steam installation was performed correctly: – Steam distributor Steam distributors (steam distribution pipe or OptiSorp steam distribution system) correctly positioned and secured (screws tightened)? Are the outlet orifices at right angles to the air flow for horizontal installation, or at 45 degree angle for vertical installation? –... -
Page 48: Water Installation
Water installation 5.5.1 Overview water installation Water drain connector ø30 mm Water supply connector G 3/4" Water supply pipe (supplied by others) Drain hose (supplied) – internal diameter ø30 mm Filter valve (accessory) or – Drain hose must be led to the left Shut-off valve and filter 5µm –... - Page 49 Water drain connector ø30 mm Water supply connector G 3/4" Drain hose (supplied) Water supply pipe – internal diameter ø30 mm (supplied by others) – Drain hose must be led to the left – constant downslope (min 15 %/8.5°) to collector pipe –...
-
Page 50: Notes On Water Installation
The use of additives such as corrosion inhibitors, disinfectants, etc. is not allowed, since these additives may endanger health and affect proper operation. – If the Condair EL is to be operated with softened or partly softened water, please contact your Condair supplier. –... -
Page 51: Inspecting The Water Installation
5.5.3 Inspecting the water installation Check the following topics: – Water supply Has filter valve (accessory "Z261") or shut-off valve and 5 µm water filter respectively been installed in supply line to each unit module? Has acceptable water pressure (without drain water cooling: 1 – 10 bar, with drain water cooling: 2 –... -
Page 52: Notes On Humidity Control Systems/Humidity Control
Notes on humidity control systems/humidity control 5.6.1 System 1 – Room humidity control System 1 is suited for direct room humidification and air conditioning systems with mainly recir- culated air. The humidity sensor or humidistat respectively is preferably located in the room itself or in the exhaust air duct. -
Page 53: System 3 - Supply Air Humidity Control With Continuous Output Limit Ation
5.6.3 System 3 – Supply air humidity control with continuous output limit ation Supply air humidity control (humidity sensor installed in supply air duct) should be used only where room humidity control is impracticable for technical reasons. Such systems always require a PI-controller. -
Page 54: Admissible Control Signals
5.6.5 Admissible control signals Control with external controller Control with internal PI controller Control signals Humidity sensor signals 0...5 VDC 0...5 VDC 1...5 VDC 1...5 VDC 0...10 VDC (Potentiometer 140 Ω ... 10 kΩ) 0...10 VDC (Potentiometer 140 Ω ... 10 kΩ) 2...10 VDC 2...10 VDC 0...20 VDC... -
Page 55: Electrical Installation
DANGER! Danger of electric shock The Condair EL is mains powered. Live parts may be exposed when the unit is open. Touching live parts may cause severe injury or danger to life. Prevention: The Condair EL unit must be connected to the mains only after all mounting and instal- lation work has been completed, all installations have been checked for correct workmanship and the covers are closed and fastened properly. -
Page 56: Wiring Diagram Condair El 5
Jumper wire, if no monitoring devices are connected to SC1 and SC2 Jumper for activating the termination resistor for Modbus or BACnet MSTP network (Jumper must be connected, if the Condair EL is the first or the last unit in the network) Jumper for activating Modbus or BACnet MSTP communication via RS485 interface (J6). -
Page 57: Wiring Diagram Condair El 50
Jumper for activating the termination resistor for Modbus or BACnet MSTP network (Jumper must be connected, if the Condair EL is the first or the last unit in the network) Jumper for activating Modbus or BACnet MSTP communication via RS485 interface (J6). If jumper is not in place no communication will take place through the RS485 interface. -
Page 58: Wiring Diagram Condair El 35
Jumper for activating the termination resistor for Modbus or BACnet MSTP network (Jumper must be connected, if the Condair EL is the first or the last unit in the network) Jumper for activating Modbus or BACnet MSTP communication via RS485 interface (J6). If jumper is not in place no communication will take place through the RS485 interface. -
Page 59: Wiring Diagram El 70
4 5 6 7 8 9 10 230 V/1~/50..60 Hz 200-600 V/3~/50..60 Hz 200-600 V/3~/50..60 Hz Option TR (3Ph) Option CVI (3Ph+N) Fig. 28: Wiring diagram EL 70...180 - Linkup systems 3 x "M" or 4 x "M" Mounting and installation work... - Page 60 Jumper for activating the termination resistor for Modbus or BACnet MSTP network (Jumper must be connected, if the Condair EL is the first or the last unit in the network) Jumper for activating Modbus or BACnet MSTP communication via RS485 interface (J6).
-
Page 61: Installation Work External Connections
5.7.6 Installation work external connections Connecting the external safety chain The potential-free contacts of external moni t or ing de- MAIN SUPPLY vices (e.g. ventilation interlock B1, airflow monitor B2, safety high limit humidistat B3, etc.) are connected in series (external safety chain "K2") to the terminals "SC1" and "SC2"... - Page 62 Ohmic humidity controller (passive) The signal cable of an ohmic humidity controller (140Ω...10kΩ) is to be connected according to the wir- ing diagram to the terminals "V+", "IN" and GND" on CONT. SIGN. the driver board in the control compartment. The connecting cable must be led through a cable gland or grommet into the control compartment.
- Page 63 – "Steam" (Terminal 7 and 8): Control compartment This relay closes as soon as the Condair EL hu- midifies. – "Unit on" (Terminal 9 and 10): This relay closes as soon as the voltage supply to the Control compartment of the Condair EL is switched on.
- Page 64 The maximum contact loading is 250V/8A. Connecting the control voltage Note: if the Condair EL is equipped with option "CVI" or "TR", a separate control voltage supply is not required. The control voltage supply (L1, N, PE) is to be connected...
- Page 65 Connecting the heating voltage supply The heating voltage supply (L1, L2, L3 and PE or L1, N and PE) is to be connected in accordance with the wiring diagram to the corresponding terminals of terminal strip "X0" in the control compartment. The supply wiring is to be fed into the unit via the cable guide with clamp L1 L2 L3 on the bottom of the unit.
- Page 66 Connecting the heating voltage supply via option TR (for 3 phase single voltage system) The heating voltage supply (L1, L2, L3 and PE) is to be connected in accordance with the wiring diagram to the corresponding terminals of the option TR.
- Page 67 Connecting the heating voltage supply via Option CVI (for 3 phase/neutral single voltage system) The heating voltage supply (L1, L2, L3, N and PE) is to be connected in accordance with the wiring diagram to the corresponding terminals of the option CVI.
-
Page 68: Inspecting The Electrical Installation
5.7.7 Inspecting the electrical installation Check the following points: Do the supply voltages for heating and control voltage comply with the relevant voltages stated on the specification label? Are the voltage supplies (heating and control voltage) correctly fused? Are the service switches "Q.." installed in the supply lines for to the heating and control voltage? Are all components correctly connected according to the wiring diagram? Are all connecting cables fastened? Are the connecting cables free of tension (passed through cable glands?) -
Page 69: Product Specification
Product specification Performance data / Fuses "F3" heating voltage supply 200 V/1~/50...60Hz 230 V/1~/50...60Hz 240 V/1~/50...60Hz 200 V/3~/50...60Hz 230 V/3~/50...60Hz 400 V/3~/50...60Hz EL 5 19.0 16.3 16.3 10.9 3x 16 3x16 3x10 EL 8 30.0 10.0 26.1 26.1 17.3 3x 25 15.0... - Page 70 415V/3~/50...60 Hz 440V/3~/50...60 Hz 460V/3~/50...60 Hz 480V/3~/50...60 Hz 500V/3~/50...60 Hz 600V/3~/50...60 Hz EL 5 3x10 EL 8 3x10 3x10 3x10 3x10 3x10 3x10 EL 10 10.4 3x16 3x16 3x16 3x16 3x10 3x10 EL 15 11.3 15.7 3x20 14.8 3x20 14.1 3 x 20 13.5...
-
Page 71: Operating Data
Operating data Control steam output – active 0…5 VDC, 1…5 VDC, 0…10 VDC, 2…10 VDC, 0…20 VDC, 0…16 VDC, 3.2…16 VDC, 0…20 mADC, 4…20 mADC – passive all potentiometric humidity sensors from 140 Ω…10 kΩ – On/Off control <2.5 VDC --> Off; ≥2.5 VDC…20 VDC --> On Duct air pressure -0.8 kPa to 1.5 kPa;... -
Page 72: Appendix
Unit dimensions Condair EL 5 - 15, unit size "S" 2x ø8 (“A”) 173.5 71.5 ø22 80.5 304.5 57.5 57.5 G 3/4" ø31 211.5 Fig. 29: Unit dimensions Condair EL 5 - 15, unit size "S" (dimensions in mm) Appendix... -
Page 73: Unit Dimensions Condair El 20 - 45 And 35 - 180, Unit Size "M
Unit dimensions Condair EL 20 - 45 and 35 - 180, unit size "M" 181.8 2x ø8 (“A”) 163.5 ø30 (A4../D4..) ø45 (A6../D6..) 88.5 406.5 61.75 406.5 61.75 G 3/4" ø31 321.5 Fig. 30: Unit dimensions Condair EL 20 - 45 and 35 - 180, unit size "M" (dimensions in mm) Appendix... -
Page 74: Unit Dimensions Condair El 50 - 90, Unit Size "L
Unit dimensions Condair EL 50 - 90, unit size "L" 4x ø8 (“A”) 163.5 61.8 535.5 2x ø45 406.5 406.5 1000 2x G 3/4" 2x ø31 321.5 Fig. 31: Unit dimensions Condair EL 50 - 90, unit size "L" (dimensions in mm) Appendix... -
Page 75: Ec Declaration Of Conformity
EC Declaration of conformity Appendix... -
Page 76: H,X Diagram
101325 Pa/ Meereshöhe © 1501 • Condair GmbH • www.condair.de Appendix... - Page 77 Notes...
- Page 78 Notes...
- Page 80 01.2016 Condair CZ / Omyly a technické změny SK / Omyly a technické zmeny Flair, a.s. Jihlavská 512/52 140 00 Praha 4 - Michle tel.: +420 241 774 105, fax: +420 241 774 106 info@flair.cz; www.flair.cz Flair, a.s. Flair, a.s., organizační složka Slovensko Stará...
Need help?
Do you have a question about the EL and is the answer not in the manual?
Questions and answers