Table of Contents
Advertisement
Advertisement
Table of Contents

Related Manuals for Condair EL2


Summary of Contents for Condair EL2
- Page 1 Humidifiers InstallatIon and operatIng InstructIons...
-
Page 3: Table Of Contents
Water installation 5.5.1 Overview water installation 5.5.2 Notes on water installation 5.5.3 Inspecting the water installation Electric installation 5.6.1 Wiring diagram Condair EL2 5.6.2 Notes on electric installation 5.6.3 Unit configuration 5.6.4 Inserting the EL2 Card 5.6.5 Inspecting the electrical installation... -
Page 4: Introduction
Notes on the installation and operating instructions Limitation The subject of these installation and operating instructions is the steam humidifier Condair EL2. The various accessories (e.g. steam distributor, steam distribution system, etc.) are only described insofar as this is necessary for proper operation of the equipment. Further information on accessories can be obtained in the respective instructions. These installation and operating instructions are restricted to the installation, commissioning, operation, servicing and trouble shooting of the steam humidifier Condair EL2 and is meant for well trained personnel being sufficiently qualified for their respective work. - Page 5 Safekeeping Please safeguard these installation and operating instructions in a safe place, where it can be im- mediately accessed. If the equipment changes hands, the documentation should be passed on to the new operator. If the documentation gets mislaid, please contact your Condair supplier. Language versions The present installation and operating instructions are available in various languages. Please contact your Condair supplier for information. Copyright protection The present installation and operating instructions are protected under the Copyright Act. Passing-on and reproduction of the manual (or part thereof) as well as exploitation and communication of the contents are prohibited without written permission by the manufacturer. Violation of copyright terms...
-
Page 6: For Your Safety
For your safety General Every person working with the Condair EL2 must have read and understood the present installation and operating instructions before carrying out any work. Knowing and understanding the contents of the installation and operating instructions is a basic requirement for protecting the personnel against any kind of danger, to prevent faulty operation, and to operate the unit safely and correctly. All ideograms, signs and markings applied to the unit must be observed and kept in readable state. - Page 7 One may get in touch with live parts when the unit is open. Touching live parts may cause severe injury or danger to life. Prevention: Before carrying out any work set the Condair EL2 out of operation as described in chapter 6.3 (switch off the unit, disconnect it from the mains and stop the water supply) and secure the unit against inadvertent power-up.
-
Page 8: Product Overview
Product Overview Models overview Steam air humidifiers Condair EL2 are available with different heating voltages and steam capaci- ties ranging from 5 kg/h up to a max. of 45 kg/h. Heating voltage ** Max. steam capacity Model Unit size in kg/h Condair EL2 Unit small Unit large 400V3 (400V/3~/50...60Hz) -
Page 9: Identification Of The Unit
The identification of the unit is found on the type plate (for the location of the type plate see unit overview): Type designation Serial number (7 digits) Month/Year Condair AG, CH-8808 Pfäffikon Heating voltage Type: EL2 45 Ser.Nr.: XXXXXXX 02.10 Heating Voltage: 400V / 3~ / 50...60Hz... -
Page 10: Steam Humidifier Construction
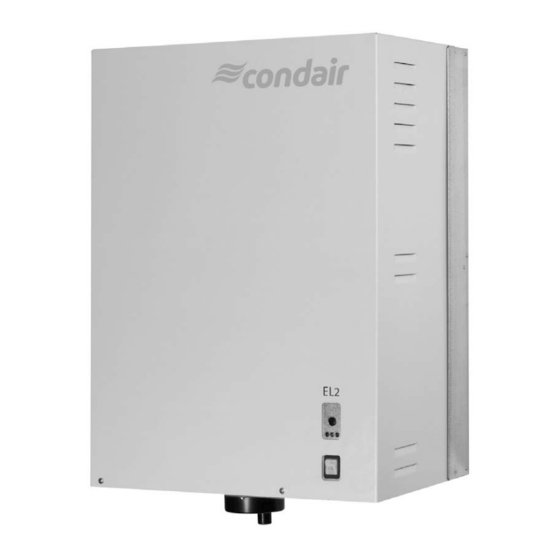
1 Housing (small, large) Water supply hose Cable openings, top side 14 Overflow hose Main contactor Inlet valve Power board 16 water supply connector (not visible) Control board with EL2 Card 17 Drain connector (not visible) 6 Remote operating and fault 18 Drain valve indication board (option) Steam cylinder Cable openings, bottom side Electrode plug 8 Drain/info key... -
Page 11: Functional Description
Functional description The steam humidifier Condair EL2 is a pressureless steam generator that utilizes an electrode heating. The steam humidifier Condair EL2 is designed for air humidification via a steam distributor (steam distribution pipe, fan unit or steam distribution system OptiSorp). Steam generation Any time steam is requested, the electrodes are supplied with voltage via main contactor. Simultane- ously, the inlet valve opens and water enters the steam cylinder from the bottom via water cup and supply line. As soon as the electrodes come in contact with the water, current begins to flow between the electrodes, eventually heating and evaporating the water. The more the electrode surface is exposed to water, the higher is the current consumption and thus the steam capacity. -
Page 12: Humidification System Overview
Control voltage supply Water drain connector Heating voltage supply Water supply connector Cable openings Water connection hose G 3/4"- G 3/8" 13 Steam hose (accessory “DS..”/“Z10”) (included in the delivery) 14 Condensate hose (accessory “KS10”) 6 Filter valve (accessory “Z261”) Steam distribution pipe 7 Manometer (installation recommended) (accessory “41-..”/“61-..”/“81-..”) 8 Funnel with siphon (building side) Fan unit (accessory “FAN3 EL2...”) -
Page 13: Options
Options 3.6.1 Options overview Condair EL2... 230V1 400V3 23/32/45 230V3 23/32 D... Cleanable steam cylinder D3.. D4.. D6.. Cleanable steam cylinder as an alternative to the disposable steam cylinder built in as standard (see also chapter 3.6.2). Remote operating and fault indication PCB with relay contacts for the connection of remote displays for “Operation”, “Steam”, “Fault”... -
Page 14: Option Details
3.6.2 Option details Steam cylinder The steam humidifier is available with two different types of steam cylin d ers: – Exchangeable steam cylinder type A... (standard version) – Cleanable steam cylinder type D... (option) The following tables present an overview of the steam cylinders used in the different models. Condair EL2...400V3 32/45 For water conductivity from 125 to 1250 µS/cm Exchangeable steam cylinder A363 A464 A674 A664 Cleanable steam cylinder... -
Page 15: Accessories
1x 41-... 1x 61-... 1x 81-... (details see chapter 3.7.2) Steam distribution system OptiSorp ––– System 1 (details see chapter 3.7.2) Fan unit FAN3 EL2 M FAN3 EL2 L (details see chapter 3.7.2) Steam hose / meter 1x DS22 1x DS60 1x DS80 Condensate hose / meter 1x KS10 Accessories for humidity control Condair EL2... -
Page 16: Accessory Details
Steam distribution pipe 41-.../61-.../81-... The steam distribution pipes are selected on the basis of the duct width (for horizontal installation) or the duct height (for vertical installation) and the capacity of the steam humidifier. Important! Always select the longest possible steam distribution pipe (opti m um humidification dis- tance). Steam distribution pipes for Length (L) steam Duct width (B) Condair EL2 distribution pipe Type 41-.. Type 61-.. Type 81-.. in mm in mm 41-200 210...400... -
Page 17: Standard Delivery
Standard delivery The standard delivery includes: – Steam humidifier Condair EL2 with water connection hose G 3/4" - G 3/8" equipped with the op- tions ordered according to chapter 3.6, fixing set and installation and operating instructions (this document), packaged in cardboard box – Unit small (WxHxD): 445 mm x 755 mm x 360 mm, shipping weight: 26 kg – Unit large (WxHxD): 560 mm x 820 mm x 435 mm, shipping weight: 31 kg... -
Page 18: Notes For The Planning Engineer
Carrier-Diagram for moist air respectively. Important notes: – The required maximum steam capacity depends on the specific application and the installation. The calculated steam capacity based on the above formulas, the h,x diagram and the condition of the air to be humidified does not consider any steam loss (e.g. due to condensation in the steam hoses and the steam distributors), any heat loss of the unit as well as any absorption or release of humidity of materials located in the room being humidi fi ed. In addition, the calculated steam capacity does not consider any losses caused by the draining rate depending on the water quality as well as any losses occur if the steam humidifier is operated on a mains circuit with a ground fault circuit interrupter. The total amount of losses depends on the entire system and must be taken into consideration when calculating the required steam capacity. If you have any questions regarding the calculation of the steam capacity please contact your Condair supplier. – For systems where the max. required steam capacity varies extensively (e.g. for test facilities or for systems with variable air volume flow, etc.), please contact your Condair supplier. -
Page 19: Selecting The Unit
4.1.2 Selecting the unit Condair EL2 45 400V3 Model Unit size Heating voltage ** Max. steam capacity Condair EL2 .. in kg/h Unit small Unit large 400V3 (400V/3~/50...60Hz) 230V3 (230V/3~/50...60Hz) 230V1 (230V/1~/50...60Hz) ** Other heating voltages on request Selecting the options an accessories... -
Page 20: Selecting The Control System
Selecting the control system The various control systems – System 1: Room humidity control System 1 is suited for direct room humidification and air conditioning systems with mainly recirculated air. The humidity sensor or humidistat respectively is preferably located in the room itself or in the exhaust air duct. Condair EL2 humidity sensor ventilation interlock B2 airflow monitor B3 safety humidistat humidistat External continuous controller (e.g. PI controller) input signal from A1 –... - Page 21 – supply air humidity control — System 3 Direct room humidification System 1 — Please contact your Condair supplier, if your application meets the following conditions: – Humidification of small rooms up to 200 m – Air conditioning systems with a high number of air exchanges – Systems with variable air volume flow – Test facilities with extreme control accuracy requirements – Rooms with a high variation in max. steam capacity – Systems with temperature fluctuations...
-
Page 22: Mounting And Installation Work
Mounting and installation work Important notes for mounting and installation work Qualification of personnel All mounting and installation work must be carried out only by well qualified personnel authorised by the owner. It is the owner’s responsibility to verify proper qualification of the personnel. General note Strictly observe and comply with all information given in the present installation and operating instruc- tions regarding the location of the unit and the installation of water, steam and electricity. Observe and comply with all local regulations dealing with water, steam and electrical installa- tions. -
Page 23: Installation Overview
Installation overview Steam installation, see chapter 5.4 FAN3 EL2 M 41-... FAN3 EL2 L 61-... 81-... 230V/1~/50Hz min. 5 % – KS10 Pmax 1500 Pa min. 20 % Pmin -800 Pa – 41-... KS10 61-... 81-... min. 20 % DS22 min. -
Page 24: Mounting The Unit
5.3.1 Notes on locating the unit . 4 0 m i n . 2 5 m i n 60...70 °C 1 ... 40 °C max. 75 %rh IP20 Condair EL2 ... 230V1 Condair EL2 ... 230V3 23/32 Condair EL2 ... 400V3 23/32/45 Dimensions Housing (XxYxZ) in mm 377x279x612 492x351x670 Weights Net weight in kg... - Page 25 – The Condair EL2 is protected according to IP20. Make sure the units are installed in a drip-proof location and the admissible ambient conditions are complied with. – The steam humidifier Condair EL2 may only be installed in rooms with a floor drain. CAUTION! If for some reason the Condair EL2 must be installed in a location without floor drain, it is mandatory to provide a leakage monitoring device to safely interrupt the water supply in case of leakage. – When fixing the Condair EL2 use only the fixing materials supplied with the unit. If fixing with the materials supplied is not possible in your particular case, select a method of fixing that is of similar stability.
-
Page 26: Mounting The Humidifier
5.3.2 Mounting the humidifier Dimension Housing size small large 189 mm 246 mm 61 mm 52 mm 490 mm 547 mm 120 mm 180 mm 120 mm 180 mm Procedure 1. Mark the attachment point “A” on the wall. 2. Drill hole for attachment point “A” (diameter: 8 mm, depth: 40 mm). 3. Insert the supplied plastic plug, and tighten the screw until the distance between the wall and the screw head is 4 mm. -
Page 27: Inspecting The Installed Unit
5.3.3 Inspecting the installed unit Check the following points: Is the unit installed in the correct place (see chapter 5.3.1)? Is the supporting surface stable enough? Is the unit correctly aligned, vertically and horizontally? Is the unit properly secured (see chapter 5.3.2)? Has the front panel of the unit been relocated and correctly fixed with the two screws? -
Page 28: Steam Installation
Steam installation 5.4.1 Overview steam installation FAN3 EL2 M 41-... FAN3 EL2 L 61-... 81-... min. 5 % – Pmax 1500 Pa min. 20 % Pmin -800 Pa KS10 – 41-... KS10 61-... 81-... min. 20 % DS22 min. 5 % –... -
Page 29: Positioning And Mounting Of The Steam Distribution Pipes
For duct widths <600 mm the humidification distance for the OptiSorp system increases by ap- prox. 50% ϕ1 in %rh: Relative supply air humidity prior to humidification at the lowest supply air temperature ϕ2 in %rh: Relative supply air humidity after the steam distribution pipe at maximum capacity Example given: ϕ1= 30 %rh, ϕ2= 70 %rh humidification distance B 1,4 m (0.36 m for steam distribution system OptiSorp) Note: If the humidification distance has to be reduced for technical reasons, the amount of steam per basic unit must be divided between two steam distribution pipes or the steam distribution system OptiSorp must be used. If this is the case, contact your Condair supplier. - Page 30 Minimum distances to be observed To prevent the water vapour, that is emitting from the steam distribution pipe, from condensing on downstream system components, a minimum distance to the steam distribution pipe must be observed (depends on the humidification distance “B ”). before/after constriction after expansion before bend before branch before diffuser before control sensor before/after filter/register before/after fan, zone exit 1.5 x B 5 cm 2,5 x B before aerosol filter...
-
Page 31: Installing The Steam Distributors
– To facilitate the installation of the steam distribution pipes and for control purposes, a sufficiently sized control opening should be planned. – Within the range of the humidification distance, the ventilation duct should be waterproofed. – Air ducts passing through cold rooms should be insulated to prevent the humidified air from con- densing along the duct wall. – Poor airflow conditions within the air duct (e.g. caused by obstacles, tight bends, etc.) can lead to condensation of the humidified air. – Steam distribution pipes must not be mounted to round ducts. If you have questions relating to the dimensioning of ventilation ducts in combination with steam humidifiers Condair EL2, contact your Condair supplier. 5.4.3 Installing the steam distributors Detailed information on the installation of steam distribution pipes 41-.., 61-.../81-... and OptiSorp steam distribution system can be found in the separate mounting instructions for this products. -
Page 32: Positioning And Mounting Of The Fan Unit
5.4.4 Positioning and mounting of the fan unit The fan unit is mounted on the wall separately above the unit. To allow the steam coming from the fan unit to spread out evenly, without condensing on obstacles (ceilings, joists, pillars, etc.), the following minimum dimensions must be observed when selecting the location for the fan unit. FAN3 EL2 M FAN3 EL2 L max. 8 kg/h 15 kg/h 32 kg/h 45 kg/h A min. 3.0 m 6.0 m 8.0 m 10.0 m B min. -
Page 33: Installing The Steam Hose
300 mm. Important! Allowance must be made for a pressure loss of 10 mm water column (approx. 100 Pa) per meter steam hose. Note: If your particular installation exceeds the maximum steam hose length of 4 m contact your Condair representative. In any case, steam hoses longer than 4 m must be insulated in their entire length. – Reductions in the cross section such as kinks should be avoided throughout the entire length of... -
Page 34: Installing The Condensate Hose
– Important! Allowance must be made for a pressure loss of 10 mm water column (approx. 100 Pa) per meter length or per 90° bend. 5.4.6 Installing the condensate hose Important! Use original Condair condensate hose exclusively. Other types of hoses can cause operational malfunctions. The hose layout depends on the position of the steam distribution pipe: – Steam distribution pipe is mounted more than 300 mm above the top edge of the humidifier: Condensate hose is led down to the humidifier with a minimum slope of 20 %, in the form of a siphon (min. -
Page 35: Inspecting The Steam Installation
– Steam distribution pipe is mounted less than 300 mm above the top edge of the humidifier: Condensate hose is led down with a minimum slope of 20 %, in the form of a siphon (min. hose bend diameter Ø200 mm), directly into a discharge funnel. min. 20 % min. 20 % Note: If your unit feeds a number of steam distribution pipes, the individual condensate hoses are to be led into the discharge funnel. Important! Before putting the unit into operation, the siphon of the condensate hose must be filled with water. 5.4.7 Inspecting the steam installation Use the following check list to ascertain that the steam installation was performed correctly: –... -
Page 36: Water Installation
Water installation 5.5.1 Overview water installation ø 22 mm G 3/4" ø14/7 mm G 3/8" ø22 mm G 3/4" G 1/2" min. 10 % DS22 – min. 10 % Z261 125...1250 µS/cm – 1...10 bar 1...40 °C ≥ 40 mm... -
Page 37: Notes On Water Installation
– Admissible mains pressure 1.0 to 10.0 bar (hammer-free system) For mains pressures >10 bar, the connection must be made via a pressure reducing valve (ad- justed to 1.0 bar). For mains pressures <1.0 bar please contact your Condair supplier. – Notes on water quality: – For the water supply of the Condair EL2, use exclusively untreated drinking water. – The use of additives such as corrosion inhibitors, disinfectants, etc. is not allowed, since these additives may endanger health and affect proper operation. – If the Condair EL2 shall be operated with softened or partly softened water, please contact your Condair supplier. -
Page 38: Inspecting The Water Installation
5.5.3 Inspecting the water installation Check the following topics: – Water supply Has filter valve (accessory “Z261”) or shut-off valve and 5 µm water filter respectively been installed in supply line? Have admissible water pressure (1 – 10 bar) and admissible temperature (1 – 40 °C) been observed? Does the supply capacity match the humidifier and is the minimum inside diameter of the sup- ply pipe maintained throughout the entire length? Are all components and pipes properly secured and are all threaded connections securely tightened? Is the water system properly sealed? Does the water supply installation meet the requirements of the local regulations for water installations? – Water drain Is the minimum inside diameter of the drain pipe of 40 mm maintained throughout the entire length? Has drain pipe been installed with a downslope of at least 10 %? Has the heat resistance of the material used been verified to be at least 100 °C? Is the drain hose properly secured (hose clamps at unit connection tightened)? Does the water drain installation meet the requirements of the local regulations for water installations? -
Page 39: Electric Installation
Electric installation 5.6.1 Wiring diagram Condair EL2 Control board Power board Heating Driver board EL2 Card CURRENT SENSOR L1 L2 L3 LEV.SENSOR Drain Factor Cylinder L1 L2 L3 Power Limit Settings CPU BOARD Manual Drain Low Conduct. (6.3 AT) Standby Drain Force Drain... -
Page 40: Notes On Electric Installation
Heating voltage supply Up CAUTION! Before connecting, ensure that the mains voltage corresponds with the heating voltage for the unit (see type plate). The Condair EL2 is to be connected to the mains supply in accordance with the wiring diagram, via a service switch “Q2” (disconnecting device with a minimum contact opening of 3 mm is an es- sential requirement) and an fuse group “F2” (essential requirement, fuses are to be as detailed in the following table). The supply wiring is to be fed into the unit via a tension-relieving device (cable gland) and connected to the terminals of the main contactor “K1”. - Page 41 Control voltage supply Uc CAUTION! – Before connecting, ensure that the mains voltage corresponds with the control voltage of the unit (230 V/1 50…60 Hz). – The humidifier must only be connected to a mains supply with a protective conductor. The connection to the control voltage Uc is made in accordance with the wiring diagram, to the ter- minal “X3”...
-
Page 42: Unit Configuration
– External continuous humidity controller 0-10V (A1) An external humidity continuous controller is to be connected to the contacts “IN” (+) and “GND” (–) of the terminal block “X1”. – 24 VDC On/Off humidistat (passive) An 24 VDC On/Off humidistat is to be connected to the contacts “V+” and “IN” of the terminal block “X1”. Note: for the 24 VDC On/Off control a jumper must be set on “JP1”. – 230V On/Off control (active) The signal line of a 230V On/Off control is to be connected to the contact “VD” of the terminal block “X2” via external fuse “F4” (max. 10 A, slow-acting). Connecting the fan unit FAN3 EL2 Refer to the separate documentation of the fan unit. 5.6.3 Unit configuration All setting components for the unit configration are located on the control board: – Rotary switch “Cylinder”: cylinder type – Potentiometer “Drain Factor”: drain factor – Potentiometer “Power Limit”: power limitation – DIP switch “Settings”:... - Page 43 General settings (“Settings”) With the DIP switches “Settings” you can set different unit parameters. The unit parameters are preset in the factory and may only be modified by the client after consulting the Condair representative. Switch Factory setting Description ON: low water conductivity <125 µS/cm OFF: normal water conductivity ≥125 µS/cm ON: standby draining (72 hours) activated OFF: standby draining (72 hours) deactivated ON: forced draining (72 hours) activated OFF: forced draining (72 hours) deactivated ON: cleanable steam cylinder OFF: replaceable steam cylinder ON: the heating voltage is interrupted during draining of the steam cylinder OFF: the heating voltage is interrupted during draining and refilling of the steam cylinder ON: Offset control signal activated (2-10V) OFF: Offset control signal deactivated (0-10V)
-
Page 44: Inserting The El2 Card
EL2 Card. Before you start the electrical installation, check whether the EL2 Card is installed. If it is not, check whether the type designation on the EL2 Card supplied corresponds with the type designation on the data plate inside the unit. If the designations match, place the EL2 Card in the card holder on control print . Then cover the data plate above the type plate inside the unit with the data plate supplied (self-adhesive). -
Page 45: 6 Operation
Operation Function of the display and operating elements Drain/Info key – press key shortly: Opens and closes the drain valve (manual draining). Note: the drain valve is automatically closed after 10 minutes. – press key for a extended period of time (>3 sec.): activating the info mode red LED “Error” – in normal operating mode – The LED lights in case of a malfunction of the unit. Further operation is no longer possible, the heating voltage is inter- rupted. -
Page 46: Commissioning
– the yellow LED lights permanently, the steam cylinder maintenance is due (see chapter 7) or the maintenance indication has not been reset (see chapter 7.6). – the red LED lights permanently, a fatal malfunction has occurred (see chapter 8). After the system test the unit is in normal operation mode. As soon as the humidity controller or the humidistat requires humidity, power is switched on for heating. The inlet valve opens (slight delay) and the steam cylinder fills with water. As soon as the submerged electrodes heat the water up the green LED lights up and after a few minutes (approx. 5–10 minutes, depending on the conductivity of the water) steam is produced. Note: If the Condair EL2 is operated with water of low conductivity it may happen that the maximum steam capacity is not reached in the first few hours of operation. This is normal. As soon as the conductivity has reached a sufficient level (due to the vaporisation process) the humidifier will reach the maximum steam capacity. -
Page 47: 6.3 Notes On Operation
Notes on operation 6.3.1 Function of the LED's in info mode The info mode is activated by pressing the drain/info key for an extended period of time (> 3 seconds). After activating the info mode: – first, the green LED flashes. The number of flashes indicates the current steam output in % of the maximum steam capacity. Green LED flashing ... Steam output in % Note: if no steam production is in progress when the info mode is activated the green LED lights for 3 seconds, then it turns off again. – then, if a malfunction is present (warning or error) the red and the yellow LED flash successively. The number of flashes of the red LED indicates the left digit of the error code while the number of flashes of the yellow LED indicates the right digit of the error code. Note: If the red LED lights when the info mode is activated the malfunction indicated is an error (E..) otherwise a warning (W..). This indication procedure is repeated until the info mode is exited automatically after 5 minutes or the info mode is exited by pressing the drain/Info key again. Examples: Indication in normal green LED lights operating mode red LED lights green LED flashes .. –– ––... -
Page 48: Inspections During Operation
Inspections during operation During operation the Condair EL2 and the humidification system have to be inspected weekly. On this occasion check the following: • the water and steam installation for any leakage. • the steam humidifier and the other system components for correct fixing and any damage. • the electric installation for any damage. If the inspection reveals any irregularities (e.g. leakage, error indication) or any damaged compo- nents take the Condair EL2 out of operation as described in chapter 6.5. Then, contact your Condair representative. Carrying out manual draining Proceed as follows to drain the unit manually: 1. Briefly press the drain/info key. The heating voltage is interrupted and the drain valve opens. The yellow LED flashes. Note: the drain valve closes after 10 minutes automatically 2. To stop the drain cycle briefly press the drain/info key again. -
Page 49: Maintenance
Safety Some maintenance work requires removal of the unit cover. Please note the following: DANGER! Danger of electric hazard! You may get in touch with live parts when the unit is open. Touching live parts may cause severe injury or even lethal violation. Prevention: Before carrying out any maintenance work set the Condair EL2 out of operation as described in chapter 6.5 (switch off the unit, disconnect it from the mains and stop the water sup- ply) and secure the unit against inadvertent power-up. CAUTION! The electronic components inside the humidifier are very sensitive to electrostatic discharge. Prevention: Before carrying out any maintenance work to the electrical or electronic equipment of the humidifier, appropriate measures must be taken to protect the respective components against damage caused by electrostatic discharge (ESD protection). -
Page 50: Maintenance List
Maintenance list To maintain operational safety the Condair EL2 steam humidifier must be maintained at regular in- tervals. This is differentiated between the first maintenance after approx. 500 operating hours (I), steam cylinder maintenance after the yellow LED lights (II) and annual maintenance (III). Below you will find a summary of the work to be carried out for each of the three maintenance stages. -
Page 51: Removing And Installing Parts For Maintenance
Removing and installing parts for maintenance 7.3.1 Removal and installation of the steam cylinder 1. Use a screwdriver to undo the two screws fixing the front panel to the unit, then remove the front panel. 2. Release the hose clamp on the steam hose using a screwdriver, then detach the steam hose from the steam outlet connection of the steam cylinder. 3. Remove all plugs from the electrodes and from the level sensor. 4. Loosen the screw of the steam cylinder fixing device by a few turns, then push the fixing device upwards until it comes loose and remove it. - Page 52 5. Carefully lift steam cylinder away from the cylinder receptacle, then remove it to the front. CAUTION! Put steam cylinder down carefully to avoid damage to the lower connection piece! Installation of the steam cylinder follows the reverse sequence. Observe the following: – Before installing the steam cylinder in the unit, check the O-ring of the cylinder receptacle for damage and replace if necessary. – Moisten the O-ring of the cylinder receptacle with water (do not use grease or oil), then insert steam cylinder into the receptacle and push it down to the stop. – Attach the electrode plugs and the level sensor plug to the respective electrode and sensor con- nections according to the following table.
- Page 53 – Fasten steam hose on the connector of the steam cylinder with hose clamps. CAUTION! – A leaky steam hose can cause damage due to moisture inside the unit. – The outlet connector of the steam cylinder is made of plastic. Do not overtighten the hose clamp on the steam connector of the steam cylinder.
-
Page 54: Disassembly And Assembly Of The Cleanable Steam Cylinder Type D
7.3.2 Disassembly and assembly of the cleanable steam cylinder type D... 1. Fasten electrode snap fastenings and push electrodes approx. 2 cm downwards into the steam cylinder. 2. Release clamp clips of the cylinder cover and raise cover. 3. Remove carefully electrodes by lifting upwards. 4. Remove O-rings from the electrodes. Note: Intact O-rings can be reused. The assembly of the cleanable steam cylinder follows the reverse sequence. Observe the follow ing: – Before assembling the steam cylinder, check the O-ring in the steam cylinder cover and the O-rings on the electrodes for damage, and replace if necessary. Make sure to relocate O-rings correctly. -
Page 55: Removal And Installation Of The Water Cup And The Water Hoses
7.3.3 Removal and installation of the water cup and the water hoses For removing the water cup and the water hoses the steam cylinder must be removed first (see chapter 7.3.1). 1. Release hose clamps using pliers, then disconnect all hoses from the corresponding connectors and remove the hoses. Note: The hoses connected to the water cup may also be removed together with the water cup (see illustration) and then disconnected from the connectors of the water cup outside the unit. 2. Carefully pull fixing clip of the water cup to the front, then push water cup down from the holding device and remove it to the front. The installation of the water cup and the water hoses follows the reverse sequence. Before fixing the water hoses to the connector using the hose clamps, align the hoses in a way that they are not twisted. -
Page 56: Removal And Installation Of The Drain Valve
7.3.4 Removal and installation of the drain valve For removing the drain valve the steam cylinder must be removed first (see chapter 7.3.1). 1. Detach electric cables (polarity of the cables must not be observed). 2. Release hose clamp and remove the hose from the connector. 3. Loosen the two screws with Phillips screwdriver, then remove the drain valve. 4. Disassemble the drain valve. The assembly and the installation of the drain valve follows the reverse sequence. Before assem- bling the valve, check O-ring for damage and replace if necessary. -
Page 57: 17 7.3.5 Removal And Installation Of The Inlet Valve
7.3.5 Removal and installation of the inlet valve For removing the inlet valve the steam cylinder must be removed first (see chapter 7.3.1). 1. Detach electric cables (polarity of the cables must not be observed). 2. Release hose clamp and remove the hose from the connector. 3. Unlock union nut of the water pipe and remove water pipe. 4. Loosen the two screws with Phillips screwdriver, then remove inlet valve. The installation of the inlet valve follows the reverse sequence. The union nut of the water pipe must be tightened by hand only. -
Page 58: Notes On Cleaning The Unit Components
Notes on cleaning the unit components Unit component What to clean and how to clean Steam cylinder cover • Knock off or brush away any limescale as much as pos- Steam cylinder body sible (do not use a wire brush). Cylinder strainer If the parts are heavily calcified, place them in an 8% formic acid solution (observe safety notes in chap- ter 7.5), until the limescale comes off. • Finally wash parts in a lukewarm soap solution and rinse well with tap water. Heating electrodes • Immerse the heating electrodes (up to 2 cm below the snap fastening) in a container with 8-percent formic acid... - Page 59 Unit component What to clean and how to clean Drain valve • Use a brush to remove any limscale from the valve housing, the bores and the valve seat on the valve stem valve housing (do not use a wire brush). • Wash the valve housing and the valve stem with a luke- warm soap solution, rinse the parts well with tap water and let them dry.
-
Page 60: Notes On Cleaning Agents
Notes on cleaning agents Only use cleaning agents stated in the table above. The use of disinfectants is only permitted if they do not leave any toxic residues. In any case the parts must be thoroughly rinsed with water after cleaning. WARNING! Formic acid is indeed harmless to the skin, but it attacks the mucous membranes. Therefore prevent your eyes and respiratory tracts from getting in touch with the acid and its vapours (wear goggles and work in a well ventilated room or outside). CAUTION! Do not use any solvents, aromatized or halogenized hydrocarbons or other aggressive substances as they may cause damage to the components of the unit. It is mandatory to observe and comply with the information and instructions regarding cleaning agents. Observe in particular: all information relating to the protection of personnel, environmental protection and restrictions regarding usage. Resetting the maintenance indication After completing maintenance work, the maintenance indication (yellow LED lights) must be reset as follows: • Press drain key with the unit switched off and hold down. -
Page 61: 18 8 Fault Elimination
Fault elimination Important! Most operational malfunctions are not caused by faulty equipment but rather by improper installation or disregarding of planning guidelines. Therefore, a complete fault diagnosis always in- volves a thorough examination of the entire system. Often, the steam hose connection has not been properly executed, or the fault lies with the humidity control system. Fault indication In case of malfunction during operation, the unit control checks whether there is a temporary prob- lem or whether it can resolve the problem by taking necessary measures. Such malfunctions are not indicated in the normal operation mode. However an appropriate error code with the status “Warning” is generated. Note: If the cause of the malfunction disappears of its own accord or if the controls can repair the malfunction, the alarm will automatically reset. If the control, after several attempts, fails to solve the problem (number of attempts depends on the type of malfunction) or if the problem obstructs further operation, the heating voltage is interrupted via the main contactor. The red LED lights in normal operation mode and an appropriate error code with the status “Error”... -
Page 62: Malfunction Lists
Cause Remedy Code Malfunction Code Malfunction EL2 Card missing No EL2 Card installed on the Install EL2 Card or start test run. control board. ––– ––– EL2 Card is empty No data stored on the EL2 Card. Install new EL2 Card. - Page 63 Warning Error Cause Remedy Code Malfunction Code Malfunction No electrode current No electrode current Phase failure heating voltage. Inspect/turn on service switch of for more than 20 for more than 4 the mains supply line. Inspect the minutes hours fuses of the mains supply, replace if necessary. Water supply obstructed/shut-off Inspect water supply (filter, water valve closed/water pressure too piping, etc.), check/open shut-off...
-
Page 64: 22 8.3 Notes On Fault Elimination
For the elimination of faults set the steam humidifier out of operation as described in chapter 6.5, separate the unit from the mains and secure it against inadvertent power-up. The elimination of faults must be carried out by qualified and well trained professionals only. Malfunctions relating to the electrical installation (e.g. replacement of fuses) must be repaired by authorized personnel or by your Condair representative’s service technician only. Repair work and the replacement of faulty components must be carried out by your Condair repre- sentative’s service technician only! Resetting the error indication (red LED lights) To reset the error indication: Disconnect the steam air humidifier from the mains. Wait approx. 5 seconds, then reconnect... -
Page 65: 23 9 Taking Out Of Service/Disposal
Taking out of service/Disposal Taking out of service If the Condair EL2 must be replaced or if the humidification system is not needed any more, proceed as follows: 1. Take the unit out of operation as described in chapter 6.5. 2. Have the unit (and all other system components, if necessary) unmounted by a qualified service technician. Disposal/Recycling Dismantled components must be disposed of and/or recycled according to the local regulations. In case of doubt please contact your Condair supplier. -
Page 66: Product Specifications
Overpressure set Remote operating and fault indication Terminals heating voltage M-THV L-THV Accessories Steam distribution pipe 41-... 61-... 81-... Steam distribution system OptiSorp System 1 Fan unit FAN3 EL2 M FAN3 EL2 L Steam hose / meter DS22 DS60 DS80 Condensate hose / meter KS10... -
Page 67: Unit Dimensions
10.2 Unit dimensions Condair EL2 5/8/15 (dimensions in mm) 120 120 ø22... - Page 68 Condair EL2 23/32/32/45 (Dimensions in mm) ø22...
- Page 69 Notes...
- Page 70 Notes...
- Page 71 © condair ltd., printed in switzerland technical modifications reserved...
- Page 72 consultIng, sales and servIce: reg.no. 40002-2 Humidair CC Tel: +27 (0)11 7811577 Fax: +27 (0)11 8862005 info@humidair.co.za www.humidair.co.za...
Need help?
Do you have a question about the EL2 and is the answer not in the manual?
Questions and answers