Table of Contents
Advertisement
Quick Links
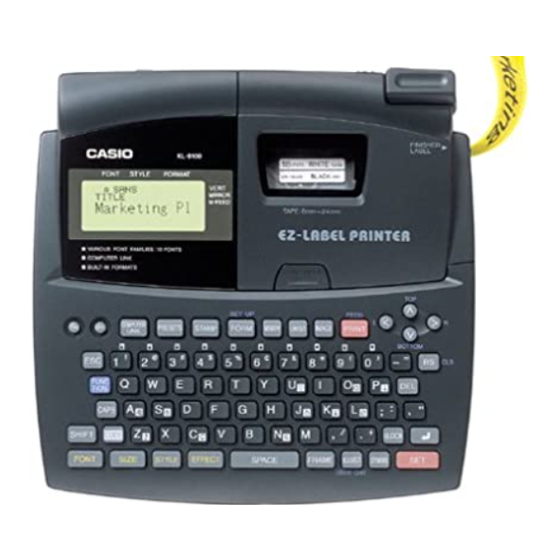
KL-8100
User's Guide
Guía del usuario
Instruktionshäfte
E S Sw
GUIDELINES LAID DOWN BY FCC RULES FOR USE OF THE UNIT IN THE U.S.A. (not applicable to other areas).
This equipment has been tested and found to comply with the limits for a Class B digital device, pursuant to Part 15 of the FCC Rules.
These limits are designed to provide reasonable protection against harmful interference in a residential installation. This equipment
generates, uses and can radiate radio frequency energy and, if not installed and used in accordance with the instructions, may cause
harmful interference to radio communications. However, there is no guarantee that interference will not occur in a particular installation.
If this equipment does cause harmful interference to radio or television reception, which can be determined by turning the equipment off
and on, the user is encouraged to try to correct the interference by one or more of the following measures:
• Reorient or relocate the receiving antenna.
• Increase the separation between the equipment and receiver.
• Connect the equipment into an outlet on a circuit different from that to which the receiver is connected.
• Consult the dealer or an experienced radio/TV technician for help.
Changes or modifications not expressly approved by the party responsible for compliance could void the user's authority to operate the
equipment.
Proper connectors must be used for connection to host computer and/or peripherals in order to meet FCC emission limits.
Cable specified for PC ...... Windows
Windows
is a registered trademark of Microsoft Corporation.
®
Model Number:
Trade Name:
Responsible party:
Address:
Telephone number: 973-361-5400
This device complies with Part 15 of the FCC Rules, Operation is subject to the following two conditions: (1) This device may not
cause harmful interference, and (2) this device must accept any interference received, including interference that may cause
undesired operation.
Note of the following safety precautions before using the label printer for the first time. Keep these safety precautions and operating instructions on hand for future
reference.
About safety precaution symbols
Svenska
FCC WARNING
compatible PC to EZ-LABEL PRINTER'
®
Declaration of Conformity
KL-8100
CASIO COMPUTER CO.,LTD.
CASIO, INC.
570 MT.PLEASANT AVENUE, DOVER, NEW JERSEY 07801
CASIO COMPUTER CO., LTD.
6-2, Hon-machi 1-chome
Shibuya-ku, Tokyo 151-8543, Japan
Important Safety Precautions
NOTICE
Advertisement
Table of Contents

Related Manuals for Casio KL-8100


Summary of Contents for Casio KL-8100
-
Page 1: Declaration Of Conformity
This device complies with Part 15 of the FCC Rules, Operation is subject to the following two conditions: (1) This device may not cause harmful interference, and (2) this device must accept any interference received, including interference that may cause undesired operation. CASIO COMPUTER CO., LTD. 6-2, Hon-machi 1-chome Shibuya-ku, Tokyo 151-8543, Japan Important Safety Precautions Note of the following safety precautions before using the label printer for the first time. - Page 2 The following symbols are used in this manual and on the product itself to alert you and others to the risk of personal and material injury. Warning This symbol indicates an item that can result in death or serious personal injury if ignored. Caution This symbol indicates an item that can result in serious personal injury or material damage if ignored.
- Page 3 • Never mix batteries of different types. • Never leave dead batteries in KL-8100. • Remove the batteries if you do not plan to use KL-8100 for a long time. • Use only the battery type specified for this label printer in this manual.
-
Page 4: Quick Reference
Introduction Congratulations on your selection of this product. This label printer makes it possible for you to print adhesive labels for a wide variety of applications, such as: name tags, cassette tape labels, floppy disks, binders, and other applications. You can produce attractive, original labels thanks to such features as: •... -
Page 5: Important Precautions
Note the following important precautions when using an AC adaptor to power your label printer. • Use only specified CASIO AD-A12070 AC adaptor, and make sure the adaptor has the same voltage rating as the household current in your area. Using a wrong adaptor can damage your label printer. - Page 6 Important! Batteries can burst or leak and damage your unit if you use them the wrong way. Note the following important points. • Be sure that the plus (+) and minus (–) sides of each battery are facing correctly. • Never mix batteries of different types •...
- Page 7 • If there is a cartridge already in the label printer, remove it by grasping the cartridge on both sides with your thumb and forefinger, and lift straight up. 3. Remove the stopper from a new tape cartridge and check to see that the tape is ready to use. 4.
- Page 8 About the SET UP menu The SET UP menu lets you change various basic settings quickly and easily. To display the SET UP menu, press FUNC and then FORM. Use u and i to move the highlighting to the item you want to select and then press SET. Press ESC to clear the SET UP menu without selecting anything. The following sections explain how to use most of the SET UP menu items.
- Page 9 Important! • You can produce a demo print when the text input display is clear, immediately after turning power on only. Even if you input text and then delete it, pressing PRINT will not produce a demo print. • If you experience problems with printing, check your tape cartridge and power supply, and try again. Part 3 Inputting Characters and Symbols This part of the manual tells you how to input characters.
- Page 10 Manual feed indicator This indicator appears when you are using manual feed instead of auto feed. Auto feed is in effect when this indicator is not on the display. Important! After you finish printing when using manual feed, be sure to always press FUNC and then PRINT (FEED) to feed the tape before cutting it. If you don’t you will cut off part of the printed text.
- Page 11 See page E-25 for a complete list of symbols, dingbats, and characters that are available from each menu. Inputting Illustrations Your label printer gives you a choice of 50 illustrations that you can use in your labels. To input illustrations 1.
- Page 12 1. Press FUNC and then ILLUST (USER CHR). 2. Use u and i to move the highlighting to ”DELETE” and then press SET. 3. Use t and y to select the user character you want and then press SET. 4. Press SET to delete the selected character or ESC to abort without deleting anything. Part 4 Deleting and Inserting Characters This section describes everything you need to know about deleting and editing characters you have already input.
-
Page 13: Table Of Contents
Overwrite Result: ABCDXXXHI Insert Result: ABCDXXXEFGHI To switch between overwrite and insert 1. Press FUNC and then FORM (SET UP) to display the SET UP menu. 2. Use u and i to highlight ”INPUT” and then press SET. 3. Use u and i to highlight the setting you want (”INSERT” or ”OVERWRITE”) and then press SET. •... - Page 14 Text Effects........E-12 Fonts E-12 To change the default font setting .......E-12 To change the font for displayed text....E-12 To change the font for all the text ......E-12 To change the font for blocks of text....E-12 To change the font for lines of text ......E-12 To change the font for specific characters...E-12 To find out current font settings ......E-12 Character Styles...
- Page 15 To store a stamp label E-23 To recall a stamp label from memory E-23 To delete a stamp label from memory E-23 Part 12 Memory..........E-23 To store data E-23 Recalling Text From Memory E-23 To recall memory text using sequential search ...E-23 To recall memory text using character search ..E-24 To delete memory text .........E-24 Part 13 Data Communication.......
- Page 16 ∑ Continued use of the unit when smoke or a strange odor is coming from it creates the danger of electrical shock. Immediately turn power off and unplug the power cord from the wall outlet. Request servicing from your original dealer.
- Page 17 Never mix batteries of different types. ∑ Never leave dead batteries in KL-8100. ∑ Remove the batteries if you do not plan to use KL-8100 for a long time. ∑ Use only the battery type specified for this label printer in this manual.
- Page 18 ∑ Contact a nearby dealer whenever you require servicing. ∑ Note that the manufacturer shall not be held liable for any loss or claims by third parties which may arise out of the use of this product. ∑ Note that the manufacturer shall not be held liable for any damages incurred as a result of data loss caused by malfunctions, repairs, or interruption of power supply.
-
Page 19: Label Printer Menus
Note the following important precautions when using an AC adaptor to power your label printer. ∑ Use only specified CASIO AD-A12070 AC adaptor, and make sure the adaptor has the same voltage rating as the household current in your area. Using a wrong adaptor can damage your label printer. -
Page 20: Loading/Replacing Batteries
∑ Be sure to grasp the plug of the AC adaptor cord when disconnecting it. Never pull on the cord. Loading/Replacing Batteries A handy low battery power indicator lets you know when battery power is getting too low for proper operation. The message LOW BATTERY or REPLACE BATTERIES appears on the display if battery power is low when you perform any of the following operations. -
Page 21: Resetting The Memory
RECALL” appears on the display. Pressing SET when this message is on the display recalls the text that was on the screen when you last turned off power. ∑ Pressing any key besides SET, FUNC, SHIFT or CODE clears the text from memory. -
Page 22: Removing The Tape Cartridge
Use a pencil or some other thin object to take up slack in the ink ribbon as shown in the illustration. Note that the tape does not move at this time. ∑ If the ink ribbon is slack when you load it into the label printer, it can break or cause some other problem. -
Page 23: Unit Of Measurement
The label printer is equipped with sound capabilities that signal when power is turned on and when an illegal operation is attempted. Normally, sound are turned on whenever you turn power on, but you can use the following procedure to turn the sound on and off. To turn sound on and off On the SET UP menu, highlight ”SOUND”... -
Page 24: Display Symbols And Indicators
Important! You can input up to 255 characters per label. Further input becomes impossible after you input the 255th character. Display Symbols and Indicators Before getting into actual input, you should first become acquainted with the symbols and indicators used on the label printer display. CAPS on/off indicator ”A”... -
Page 25: Basic Alpha-Numeric Input
This mark separates two blocks on the screen. Return symbol () The return symbol indicates a newline operation. Character style indicators These indicators point to the character effect that is assigned to the character where the cursor is currently located. You can select between normal, bold, outline, shadow, and raised. -
Page 26: Greek Characters, And Russian Characters
n CAPS off Example: To input á CODE 1 (´) A Inputting Symbols, Dingbats, Special Numbers, Greek Characters, and Russian Characters The SYMBOL menu provides you with a choice of symbols, dingbats, and special number formats, in addition to Greek and Russian letters. To use the SYMBOL menu With the cursor at the location where you want to input a symbol, dingbat, number, or character, press the... -
Page 27: User Characters
See page E-25 for a complete list of illustrations that are available. User Characters You can create up to four user characters and store them in memory. You can create a character from scratch, or you can use an existing character or symbol as a basis for creating a new character. -
Page 28: To Recall A User Character
Use the user character drawing techniques described to edit the character you want, and then press SET. Continue from step 7 under ”To create a user character using an existing character”. To recall a user character With the cursor located in the input screen where you want to input the user character, press FUNC and then ILLUST (USER CHR). -
Page 29: To Clear A Portion Of Text
Press SET. Press SET to clear all of the text on the display or ESC to abort without clearing anything. To clear a portion of text Press FUNC and then BS (CLS). Use u and i to highlight ”PART” (if it isn’t already highlighted). Press SET. -
Page 30: Part 5 Character Attributes And
Part 5 Character Attributes and Text Effects The operations in this part of the manual explain how to change fonts and character styles. These characteristics are called ”character attributes”. It also tells you how to assign such text effects as underlining, shading, and box printing to text. Important! •... -
Page 31: To Find Out Current Font Settings
To find out current font settings Use the t and y cursor keys to move the cursor around the display. The font indicator shows the current font setting for the character where the cursor is located. Character Styles There are five character styles: normal, bold, outline, shadow, and raised. The following sections describe how to change the character style for displayed text, and how you can find out what the character style setting is for text on the display. -
Page 32: To Change The Text Effects For Blocks Of Text
2. Use u and i to highlight the effect you want and then press SET. • What you should do next depends on the range you want to use. To change the text effects for blocks of text 1. After performing the two steps under ”To assign text effects”, use u and i to highlight ”BLOCK” and then press SET. •... -
Page 33: Small Typeface
Small Typeface • The normal size for the small typeface is 1 ∞ 1 (16 ∞ 16 dots; 2mm ∞ 2mm). 8 ∞ 16 dots matrix is used to form alpha-numeric characters and symbols. • Character size can be changed by specifying a vertical factor (1, 2, 3, 4) and a horizontal factor (1, 2, 3, 4, 5, 6, 7, 8). •... -
Page 34: To Specify Character Sizes For Lines Of Text Using Preset Formats
24mm and 18mm tape, 2 lines of text 1 ∞ 1/1 ∞ 1 1 ∞ 1/2 ∞ 2 2 ∞ 2/1 ∞ 1 2 ∞ 2/2 ∞ 2 1 ∞ 1/3 ∞ 3 3 ∞ 3/1 ∞ 1 24mm and 18mm tape, 3 lines of text 1 ∞... -
Page 35: Fundamentals Of Label Layout
Fundamentals of Label Layout Before we actually begin our discussion about how to layout a tape, we should first define a few terms. Note the following. Blocks A block is text that is enclosed between two block marks (). Note that the first (far left) block does not require a block mark at the beginning, and the last (far right) block does not require a block mark at the end. - Page 36 2. Use u and i to move the highlighting to ”BLOCK FORM” and then press SET. 3. Specify whether you want your specifications to apply to one block or all blocks and then press SET. • If you specify one block, the specifications you make will be applied to the block where the cursor was located when you pressed FORM. •...
-
Page 37: To Display The All Form Menu
All Text Operations The procedures in this section control the following parameters for all of the text on the display. • Mirror printing (mirror, normal) • Proportional character spacing (on, off) • Smoothing (on, off) • Block space (none, narrow, wide) •... -
Page 38: Part 8 Printing
MANUAL This setting provides side spaces of only 1mm of the printed text. If you perform two consecutive print operations (without manually feeding between prints), the last character of the first print operation is followed by the first character of the second print operation, with no space provided between them. It is a good way to save tape when you print a series of tapes. -
Page 39: To Show The Image Display
To show the image display 1. After laying out the label you plan to print, press IMAGE. • The image on the display scrolls from right to left. 2. To stop the image from scrolling and freeze the current contents on the display, press SET. 3. -
Page 40: Layout
LAYOUT The preset layouts provide a total of 74 label templates that you can use to create attractive labels quickly and easily. Each template is made up of ”elements” whose contents you can use as they are or change to something else. You can even store completed labels in memory for instant recall when you need them. •... -
Page 41: To Delete A Preset Layout Label From Memory
• To print the label without making any changes, perform the procedure starting from step 6 under ”To use a preset layout to create a label and print it”. To delete a preset layout label from memory 1. While the LAYOUT menu is on the display, use u and i to move the highlighting to ”DELETE” and then press SET. 2. -
Page 42: To Print A Bar Code
7. Use u and i to move the highlighting to ”PRINT” and then press SET to execute it. 8. Use u and i to move the highlighting to ”EXIT” and then press SET. 9. Press SET to end the operation. ITF, CODE39, CODABAR The following applies to ITF, CODE39 and CODABAR bar codes. -
Page 43: To Store A Numbering Format
• You can also specify the font, character style, and text effects if you want. 6. Specify the print direction (page E-17) and either mirror or normal printing (page E-17). • Use u and i to move the highlighting between items, and t and y to change each setting. 7. -
Page 44: To Store A Stamp Label
6. Input the text you want to include in each block, and then press SET to advance to the next block. • To leave a block blank, press SET without inputting anything. • When you press SET after inputting the text for the last block, the following menu appears. 7. -
Page 45: Cleaning The Printer Head And Roller
• What you do next depends on whether or not you want to delete existing text on the display or combine the recalled text with existing text. 1. Use u and i to move the highlighting to ”NEW”. 2. Press SET to delete any text that was previously on the input screen and replace it with the recalled text. COMBINE 1. -
Page 46: Initializing The Label Printer
Character Spacing Narrow Narrow Block Length Auto Auto Mirror Printing Normal Normal Proportional Spacing Smoothing Block Spacing Narrow Narrow Auto Feed Long Long Tape Length Auto Auto Block Alignment ****(Left) ****(Left) Default Font Retained Sans-Serif Insert/Overwrite Retained Insert Contrast (32 levels) Retained Level 17 Item... -
Page 47: Enlarged Label Measurements
DINGBAT NUMBER GREEK, RUSSIAN Frames ALL TEXT *When 6mm tape is loaded EACH CHARACTER Fonts ENLARGED Label Measurements... -
Page 48: Bar Code Specifications
Phrases BARGAIN DO NOT BEND DUPLICATE FRAGILE NO SMOKING SALE SECRET SPECIMEN Bar Code Specifications *1 The check digit is automatically calculated in accordance with input data. For EAN-13, EAN-8, UPC-A, and ITF, the check digit is appended at the end of the printed digits. - Page 49 • Text Input • Tape Cutting • Using Labels • Data Communication...
-
Page 50: Error Messages
Be sure to have the battery replaced by the date noted on the sticker on the back of the label printer. Have the battery replaced by the retailer where you purchased the label printer or by an authorized CASIO service provider. Note that you will be charged for battery replacement.
Need help?
Do you have a question about the KL-8100 and is the answer not in the manual?
Questions and answers