
Subscribe to Our Youtube Channel
Related Manuals for Datavideo TLM 170


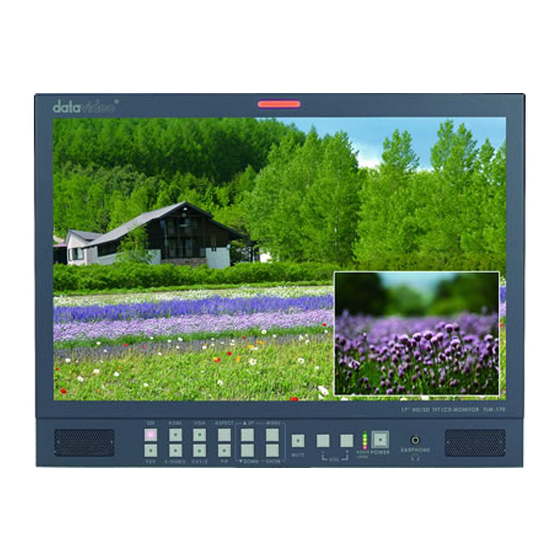
Summary of Contents for Datavideo TLM 170
- Page 1 TLM 170 / D / M / MD 17” Widescreen LCD TFT Monitor Instruction Manual www.datavideotek.com Rev 280408...
-
Page 2: Table Of Contents
Table of contents Warnings and Precautions 2 Warranty 3 Disposal3 Packing List 4 Introduction 4 Features 4 Operation 5 Front Panel 5 Rear Panel6 Menu Options 7 Colour Processor 8 PIP Menu 9 Special Feature Menu 12 System Info. Menu 13 Fitting Stand (TLM170 / TLM170D only) 14 Fitting Rack Ears (TLM170 / TLM170D only) 15 Rack Mounting (TLM170M / TLM170MD only) 16 Specification 17 Service and Support 18... -
Page 3: Warnings And Precautions 2
Warnings and Precautions 1. Read all of these warnings and save them for later reference. 2. Follow all warnings and instructions marked on this unit. 3. Unplug this unit from the wall outlet before cleaning. Do not use liquid or aerosol cleaners. Use a damp cloth for cleaning. 4. Do not use this unit in or near water. 5. Do not place this unit on an unstable cart, stand, or table. The unit may fall, causing serious damage. 6. Slots and openings on the cabinet top, back, and bottom are provided for ventilation. To ensure safe and reliable operation of this unit, and to protect it from overheating, do not block or cover these openings. Do not place this unit on a bed, sofa, rug, or similar surface, as the ventilation openings on the bottom of the cabinet will be blocked. This unit should never be placed near or over a heat register or radiator. This unit should not be placed in a builtin installation unless proper ventilation is provided. 7. This product should only be operated from the type of power source indicated on the marking label of the AC adapter. If you are not sure of the type of power available, consult your Datavideo dealer or your local power company. 8. Do not allow anything to rest on the power cord. Do not locate this unit where the power cord will be walked on, rolled over, or otherwise stressed. 9. If an extension cord must be used with this unit, make sure that the total of the ampere ratings on the products plugged into the extension cord do not exceed the extension cord’s rating. 10. Make sure that the total amperes of all the units that are plugged into a single wall outlet do not exceed 15 amperes. 11. Never push objects of any kind into this unit through the cabinet ventilation slots, as they may touch dangerous voltage points or short out parts that could result in risk of fire or electric shock. Never spill liquid of any kind onto or into this unit. 12. Except as specifically explained elsewhere in this manual, do not attempt to service this product yourself. Opening or removing covers that are marked “Do Not Remove” may expose you to dangerous voltage points or other risks, and will void your warranty. Refer all service issues to ... -
Page 4: Warranty 3
Warranty Datavideo warrants that the equipment it manufactures shall be free from defects in material and workmanship for a period of 12 months from the date of product purchased. If equipment fails due to such defects, Datavideo will, at its option, repair or provide a replacement for the defective part or product. Equipment that fails after the warranty period, has been operated or installed in a manner other than that specified by Datavideo, or has been subjected to abuse or modification, will be repaired for time and material charges at the Buyer’s expense. This warranty does not affect your statutory rights within the Country of purchase. Disposal For EU Customers only WEEE Marking. This symbol on the product indicates that it will not be treated as household waste. It must be handed over to the applicable takeback scheme for the recycling of electrical and electronic equipment. For more detailed information about the recycling of this product, please contact your local Datavideo office. -
Page 5: Packing List 4
Wrench 8mm / 10mm 1 1 Stand (LA1002) 1 1 Rack Ear (Right) 1 1 Rack Ear (Left) 1 1 Screw M3 x 6mm 10 10 Screw M4 x 6mm 8 8 Velcro Cable Tie 36cm 2 2 Crosshead Screwdriver Bit 7.5cm 1 1 Introduction The Datavideo TLM170 is a 17” High Resolution (1440 x 90) TFT Widescreen Monitor. It features multiple input options, overscan, selectable safe area frame and Picture in Picture. Features 17” High Resolution TFT Widescreen Monitor 1440 x 900 Underscan + Overscan Switchable Safe Area Frame 70% / 80% / 90% Multiple Inputs HDMI / VGA / Component (YUV) / SVideo (Y/C) / Composite x 2 / HD/SD SDI (D models only) PIP Mode Bicolour Tally Light Switchable Aspect Ratio 16:10 / 16:9 / 4:3 Robust Metal Construction NTSC / PAL Compatible 12v Operation... -
Page 6: Operation 5
Operation Front Panel BiColour Tally Light Can be used to indicate Live (RED) or Cued (AMBER) source. Source Select Buttons Select the type of input you are using SDI (TLM170D / TLM170MD only), HDMI, VGA, YUV, SVideo, CV 1 & 2 The active input will be indicated by a red LED on the Source Button Aspect Ratio Button Sets the Aspect Ratio to 16:10 / 16:9 / 4:3 16:10 16:9 ... - Page 7 PIP Button Activates Picture in Picture Mode See PIP Menu for more details. Red LED will light when PIP mode is active. Menu Navigation Buttons Display and navigate the set up menus See Menu Options for more details Down Button also switches the Safe Area Mask On / Off UP Button also switches the 4:3 Mask On / Off (only available in 16:9 and 16:10 modes) Mute Button Mutes the audio from the internal speakers or headphone socket. Volume Control & Audio Meter Adjusts the speaker / headphone volume up / down. Standby Button Switches the TLM170 screen On from standby / Off to standby N.B. main Power On/Off switch is located on the rear of the TLM170. Headphone Socket 3.5mm headphone socket; internal speaker circuit will automatically mute when headphones are connected.
-
Page 8: Rear Panel6
Rear Panel VESA 100 x 100 Mounting Holes For fitting a universal VESA style wall mounting bracket. Also used for attaching the stand (LA1002) to the monitor. Stand is supplied with TLM170 & TLM170D models. 3.5mm Tally Light Input Tally light information can be supplied to the TLM170 from the Datavideo RMC 140, TB5 or TB10 via this socket. Component Video Input BNC connectors for Component (YUV (Y/RY/BY)) Video. SVideo Input Input for SVideo (Y/C). Composite Video Inputs 1 & 2 BNC connectors for Composite Video. Analog Audio Inputs Mono Audio Inputs to correspond to the Analog Video Inputs (Component / SVideo / Composite 1 & 2) Speaker Output Connections Speaker Output connections Max 5v p p (2w) DC In Socket 2.1mm In Line Power Socket with screw lock, for connecting the power supply or suitable 12v 5A feed. On / Off Switch Main on / off switch, switches the TLM170 on and off. The Standby button on the front panel will switch the TLM170 from Standby Mode to On. VGA Input Sub D 15 Pin connection for VGA Input Max Res. 1920 x 1080. HDMI Input Video and Audio input from HDMI SDI Input & Loop Through BNC Input for HD / SD SDI with a Loop Through Output (D Models only) -
Page 9: Menu Options 7
Menu Options The TLM170 is set up via on screen menus. To display the on screen menu press the MENU button. The menus are navigated using the Up / Down buttons. There are four menus Colour Processor PIP Feature Setting Special Feature Setting System Information... -
Page 10: Colour Processor 8
Colour Processor The first menu to be displayed is the Colour Processor Menu. To access the Colour Processor Menu press enter, the Brightness setting will be highlighted. To adjust the Brightness press Enter again. An adjustment bar will appear at the bottom of the screen. Use the Up / Down buttons to change the setting and then press Enter to store the new value and return to the main menu. To select a different setting (Contrast, Saturation, Sharpness) use the Up / Down buttons. Follow the same procedure to set the other values. -
Page 11: Pip Menu 9
PIP Menu The PIP Feature Setting Menu allows you to adjust the appearance of the picture in picture. The position, size, main source and sub source can be set in the menus. To access the menu press enter so that PIP Mode is highlighted To access the options for the selected setting press enter again, so that the option column is highlighted In this case Large PIP. - Page 12 Use the Up / Down buttons to navigate the available options. You can choose: PIP Mode Large PIP Small PIP PIP Position BottomRight TopLeft TopRight Bottom Left PIP Main Source CVBS 1 CVBS 2 SVIDEO COMP. Component HDMI SDI PIP Sub Source CVBS 1 CVBS 2 SVIDEO COMP. Component HDMI SDI N.B. The PIP feature can only be one analogue source and one digital source. i.e. If the main source is analogue then the sub source must be digital, and vice versa. Examples: Main Source = CVBS 1 Sub Source = SDI / HDMI only Main Source = HDMI Sub Source = CVBS1 / 2 SVIDEO COMP. VGA only...
-
Page 13: Special Feature Menu
Special Feature Menu The Special Feature Menu has settings for the safe area frame, the scan mode and the speaker settings. The menu is accessed in the same way as the other menus, press the ENTER button and then use the UP / DOWN buttons to highlight the setting you want to alter. In this case Frame Ratio Once the setting is highlighted press the ENTER button again to highlight the options, and then use the UP / DOWN buttons to select the required value, and press ENTER once more to accept the new value. -
Page 14: System Info. Menu
In the Special Feature Menu you can choose: Frame Ratio This will display a “Safe Area” Off / 70% / 80% / 90% frame on the screen 70% 80% 90% Once you have set the Frame Ratio you can exit the menu. To display the Safe Area frame press the DOWN Button Mask Type This sets the 4:3 Mask option. Overlay / Transparent Overlay Mode Transparent Mode Once you have set the Mask Type you can exit the menu. To display the 4:3 Mask press the UP Button N.B. Only works in 16:9 and 16:10 modes Scan Mode Overscan / Underscan Internal Speaker Mute Control On / Off External Speaker Mute Control On / Off System Info. Menu The System Info. Menu displays the Firmware Version of the monitor, and offers a Factory Reset option, which will return all the settings of the monitor to the factory defaults. To reset the monitor press the ENTER button, so that Factory Reset is highlighted, and then press ENTER again to highlight the options column. Use the UP / Down button to select YES from the options and then press ENTER to reset the monitor. After a few seconds the monitor will be reset. -
Page 15: Fitting Stand (Tlm170 / Tlm170D Only)
Fitting the stand to the TLM170 / TLM 170D The TLM170 / TLM170D is supplied with a desktop stand (LA1002). Please refer to the LA1002 User Guide for adjustments to the stand, prior to fitting it to the monitor. To attach the stand to the monitor, align the stand with the VESA 100 mounting holes on the rear of the monitor, and use the four supplied screws to secure it. -
Page 16: Fitting Rack Ears (Tlm170 / Tlm170D Only)
Fitting the 19” Rack Ears to the TLM170 / TLM170D In addition to the desktop stand the TLM170 / TLM170D is supplied with 19” Rack Ears, these allow the monitor to be rack mounted (19” 6U). Use the supplied screws to attach the left and right rack ears. You will there are four screws either side, as illustrated above, plus additional screws at the base of each rack ear, as illustrated below. -
Page 17: Rack Mounting (Tlm170M / Tlm170Md Only)
Fitting the TLM170M / MD to a 19” Rack The TLM170 M / TLM170 MD is designed to rack mount. When folded away it is 1U high, please bear in mind that when opened for operation the monitor is 6U high, so leave adequate room for this. The monitor is ready fitted with sliding rack rails, these have a length adjustment at the rear to suit the distance between the front and rear rack rails of your cabinet. To adjust the length loosen the four adjustment nuts as illustrated below, and pull the side rails back as far as is required. Then retighten the nuts. Mount the monitor in your rack with the rear panel facing upwards. Ensure the rack mounting screws are secured both front and rear. Once mounted unscrew the two locking screws on either side of the front panel, and pull the monitor forward using the handle. Once the monitor is fully forward simply hinge it up into a vertical position. To fold away, pull the top of the monitor forward, so that it hinges down to a horizontal position, then push it back into the rack until you are able to screw in the locking screws. N.B. When folding the monitor away be careful not to trap your fingers or scrape your knuckles on the rack cabinet. -
Page 18: Specification
Response Time 8ms (B to W) Contrast 700:1 Brightness 500 cd/m2 Video Formats Video Inputs SD Video NTSC / PAL HD Video 720/50P / 720/59P 1080/50i / 1080/59i Video Outputs HD/SDSDI Loop Through Output (TLM170D / MD models only) Audio Inputs Unbalanced mono audio inputs for CVBS1 / CVBS2 / SVIDEO / Component HDMI Audio Input Audio Outputs Terminal Connection for speaker outputs (2 Watt) Maximum output for speaker in FP is 2 Watts Headphone Socket 3.5mm Stereo Jack Video Adjustments Brightness 0 ~ 100 Contrast 0 ~ 100 Colour 0 ~ 100 Tint (NTSC) 0 ~ 100 Sharpness 0 ~ 24 Working Temperature 0° to 50° C / 32° to 122° F Power Requirements DC In 12V 5.5A via 2.1mm InLine DC Jack Socket (Lockable) Weight 4.3Kg Copyright Datavideo 2008. Specifications are subject to change without notice. -
Page 19: Service And Support
Service and Support It is our goal to make your products ownership a satisfying experience. Our supporting staff is available to assist you in setting up and operating your system. Please refer to our web site www.datavideotek.com for answers to common questions, support requests or contact your local office below. Datavideo Corporation (USA) 12300U East Washington Blvd., Whittier, CA 90606 USA Tel: +1 562 696 2324 contactus@datavideo.us www.datavideo.us Datavideo Technologies Europe BV Floridadreef 106, 3565 AM Utrecht, The Netherlands Tel: +31 30 261 9656 info@datavideo.nl www.datavideo.info Datavideo UK Limited Unit 2 Waterside Business Park, Hadfield, Glossop, Derbyshire SK13 1BE UK Tel: +44 1457 851000 sales@datavideo.co.uk www.datavideo.info Datavideo Technologies Co., Ltd. 10F, 176 JianYi Rd, Chung Ho City, Taipei Hsien, Taiwan 235 Tel: +886 2 8227 2888 service@datavideo.com.tw www.datavideo.com.tw Datavideo Technologies China Co. 2FD, 2 Lane 777, West Guangzhong Rd, Zhabei District, Shanghai, China Tel: +86 21 5603 6599 service@datavideo.cn www.datavideo.cn Datavideo Technologies (S) PTE Ltd. No. 100, Lorong 23 Geylang, #0103 D’Centennial Bldg, Singapore 388398 Tel: +65 6749 6866 info@datavideo.sg www.datavideo.info Datavideo Hong Kong Limited G/F., 26 Cross Lane, Wanchai, HK Tel: +852 2833 1981 info@datavideohk.com www.datavideohk.com...
Need help?
Do you have a question about the TLM 170 and is the answer not in the manual?
Questions and answers