Table of Contents
Advertisement
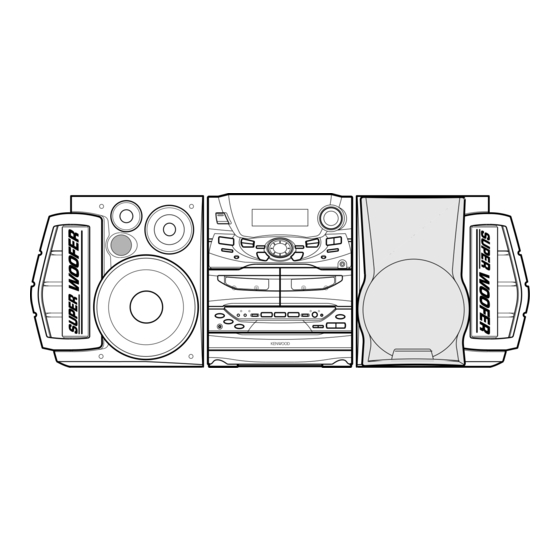
COMPONENT SYSTEM/COMPACT HI-FI SYSTEM
XD-951
XD-A900
XD-A700
INSTRUCTION MANUAL
KENWOOD CORPORATION
This instruction manual is used to describe multiple models listed above.
Model availability and features (functions) may differ depending on the country and sales
area.
COMPACT
DIGITAL AUDIO
B60-3907-00 01 MA
99/12 11 10 9 8 7 6 5 4 3 2 1 98/12 11 10 9 8 7 6 5 4
(E2,Q,M,X,Y,K,P)
MC
ˆ
Advertisement
Table of Contents

Related Manuals for Kenwood XD-951


Summary of Contents for Kenwood XD-951
-
Page 1: Instruction Manual
COMPONENT SYSTEM/COMPACT HI-FI SYSTEM XD-951 XD-A900 XD-A700 INSTRUCTION MANUAL KENWOOD CORPORATION This instruction manual is used to describe multiple models listed above. Model availability and features (functions) may differ depending on the country and sales area. COMPACT DIGITAL AUDIO B60-3907-00 01 MA... -
Page 2: Before Applying Power
Class 1. It means that the unit is utilizing laser beams that are of a weaker class. There is no danger of hazardous radiation outside the unit. XD-951/A900/A700 (En) CLASS 1... -
Page 3: Table Of Contents
Before applying power ... 2 Safety precautions ... 2 Special features ... 4 Handling of discs and tapes ... 5 System connection (XD-951/XD-A900) ... 6 Connection of the System Accessories ... 6 System connection (XD-A700) ... 8 Connection of the System Accessories ... 8 Connection of the surround speakers ... -
Page 4: Special Features
Special features DOLBY Pro Logic Surround Built in sub woofer (XD-951/XD-A900 only) 3D Wide FL display Easy to operate, new multi control jog dial 3-Disc carousel CD player Demonstration When the power supply is restored after a power failure or the power cord is unplugged and plugged in again during use, this unit auto- matically starts the demonstration function (display only). -
Page 5: Handling Of Discs And Tapes
In such a case, insert a pencil into the reel hole and wind the reel hub to remove the slack. 2. Endless tapes Do not use an endless tape, as this could damage the mechanism of the unit. Before applying power XD-951/A900/A700 (En) -
Page 6: System Connection (Xd-951/Xd-A900)
System connection (XD-951/XD-A900) Connection of the System Accessories This is the connection method for system and accessories. Please look carefully at the illustration and connect cor- rectly in the order of the numbers. AM loop antenna The supplied antenna is for indoor use. Place it as far as... - Page 7 Stick the supplied front speaker cushions to the bottom of the front speakers to sta- bilize the speakers and prevent them from slipping. Speaker cushion System connection (XD-951/XD-A900) XD-951/A900/A700 (En) Notes Notes 1. In case an associated system compo- nent is connected, also read the instruc- tion manual of the component.
-
Page 8: System Connection (Xd-A700)
CENTER SPEAKER MIN. MAX. (6-16 ) SURROUND SPEAKERS (12-16 ) DIGITAL OPTICAL – – Black – XD-951/A900/A700 (En) „ SUPER WOOFER PRE OUT Power cord To wall AC outlet FRONT SPEAKERS (6-16 ) Speaker cord CENTER – SPEAKER (6-16 ) - Page 9 Speaker cushion System connection (XD-A700) XD-951/A900/A700 (En) BASS REFLEX SPEAKER SYSTEM Notes Notes 1. In case an associated system compo- nent is connected, also read the instruc- tion manual of the component.
-
Page 10: Connection Of The Surround Speakers
3. Mount each speaker by hooking up the hole of the speaker rear panel on the screw attached to the wall. 4. Check that the speakers are firmly mounted. System connection (XD-951/XD-A900/XD-A700) Surround speaker system (supplied) Center speaker Surround speaker –... -
Page 11: Connection Of Options (Optional Parts)
1. All of the optical-fiber cables sold in audio stores cannot always be used. If the cable you purchased cannot be connected to this unit, please consult your dealer or KENWOOD distributor. 2. Insert the optical-fiber cable straight into the connector until it clicks. -
Page 12: Controls And Indicators
DISC SKIP º MINI HiFi COMPONENT SYSTEM MULTI CONTROL LISTEN MODE VOL. REV.MODE DOLBY NR DISC & SRS ( VOLUME CONTROL DOWN SRS 3D ENTER PHONES PUSH OPEN REC/ PLAY REC/ARM ¡ ¢ XD-951/A900/A700 (En) ¢ ∞ § ¶ ⁄ ¤... - Page 13 ¡ ⁄ OPEN/CLOSE (0) key The disc tray is opened and closed. ¡ ¤ CD operation keys Play/pause (6) key Stop (7) key Skip (4 ¢) keys Controls and indicators XD-951/A900/A700 (En) & ⁄ey ¤ §¶ ™£ ™ ª⁄ )¡...
-
Page 14: Display
CD player, cassette deck, etc. It also shows the approxi- mate sound level during volume control. ! Guideline Blinks during the setting of an item using the jog dial. Controls and indicators XD-951/A900/A700 (En) O.T.T. PROG. SLEEP &... -
Page 15: Remote Control Unit
During CD playback, press to skip CD tracks. ™ INPUT key £ MUTE key This is used to mute the sound temporarily. ¢ VOLUME keys ¡ ¡ ™ ™ § ¡£§ & Controls and indicators XD-951/A900/A700 (En) & POWER) key › fl ‚ ‡ ° § ¡... -
Page 16: Operation Of Remote Control Unit
SPACE freq. FM : 100 kHz AM : 10 kHz FM : 50 kHz AM : 9 kHz 3 Establish the selection. XD-951/A900/A700 (En) 3 Close the cover. 30˚ 30˚ ON/STANDBY 0 / A M 1 0 0 / A M... - Page 17 Each press switches the reception mode alternately. 1 POLAR system 2 PILOT TONE system 3 Establish the selection. XD-951/A900/A700 (En) With the remote control unit, pressing the MENU key makes it possible to select the same items as those available on the main unit using the MENU (up#/down@) keys.
-
Page 18: Let's Put Out Some Sound
1 TUNER (Radio) 2 CD ™ 3 TAPE 4 AUX (External input) 3. Volume adjustment XD-951/A900/A700 (En) Listening through headphones Insert the headphone plug into the PHONES jack. ÷ The sounds from all speakers are cut off. ÷ The display part becomes dark when the power is switched OFF. - Page 19 ÷ This function is not available when the AUX input is selected. When the TUNER input is selected, it is available only when the volume is set to 0. Let's put out some sound XD-951/A900/A700 (En) SRS LEVEL MULTI CONTROL (Only when SRS 3D is ON) S.W.
-
Page 20: Playback Of Cd
- 2 3 7 2 3 4 5 - 3 6 1 5 Let's put out some sound XD-951/A900/A700 (En) Skipping tracks To stop Playback The label must be on top. Disc played first when the 6 key is pressed. -
Page 21: Skipping Tracks
To skip forward ÷ Playback starts from the position where the key is released. To pause playback ÷ Each press pauses and plays the CD alternately. To stop playback Let's put out some sound XD-951/A900/A700 (En) Forward search TUNING Remote control unit... -
Page 22: Playback Of Tape
÷ When playing back a recording using the equalizer or SRS 3D effect, switch the equalizer or SRS 3D effect. Let's put out some sound XD-951/A900/A700 (En) If you load a tape in a cassette deck (deck B) while the power is off, simply pressing the tape play key turns power auto-... - Page 23 A. Please play back tapes recorded with equalizer etc. without applying any effect. Note Note Let's put out some sound XD-951/A900/A700 (En) (Noise Reduction) Lit when “DOLBY NR” is ON. B 0 0 0 0 Transport direction indicators...
-
Page 24: Relay Play
Let's put out some sound XD-951/A900/A700 (En) Relay play When tapes are set in the decks A and B and the reverse mode is set to “[” (play of both sides), play of the second deck will be started automatically after play of the first deck has been com- pleted. -
Page 25: Searching For The Desired Music Program (Dpss)
÷ Tapes recorded by cross-fade recording (in which the beginning of next program is overlapped on the end of previous program). (DPSS) : Press once. : Press once. : Press 4 times. Let's put out some sound XD-951/A900/A700 (En) To play the next program : Press once. To play the 4th program after the current program : Press 4 times. -
Page 26: Receiving Broadcast Station
Every time the key is pressed, the preset stations are switched over as follows. Press ¢ for the order of 1=2=3 ... 38=39=40=1... Press 4 for the order of 40=39=38 ... 3=2=1=40... Let's put out some sound XD-951/A900/A700 (En) Collective presetting of stations... -
Page 27: Collective Presetting Of Stations
(In the manual mode, stereo broadcasts are re- ceived in monaural.) ÷ Normally, use the AUTO (Auto tuning) mode. Let's put out some sound XD-951/A900/A700 (En) M E M O (manual preset) M 8 9 O 0 Each press alternates the mode. -
Page 28: Let's Record
÷ Wind the tape to the position where recording is to be started. 3. Set the recording condition. 1 Select the reverse mode. 2 Select the DOLBY NR mode. XD-951/A900/A700 (En) ÷ Differentiation between normal (TYPE ) and high (TYPE ) tape is set automatically. -
Page 29: Start Recording
2 Start recording. ÷ Recording stops automatically when the tape side(s) to be recorded have been fully recorded. Let's record XD-951/A900/A700 (En) (Noise Reduction) Lit when “DOLBY NR” is ON. The input source component to be recorded should be displayed. - Page 30 3 Put the cassette deck in Record-pause mode. (Press the REC/ARM key twice.) 4 Start playing the CD. (Synchro recording starts) ÷ Recording stops when the stop key of the CD player is pressed. Let's record XD-951/A900/A700 (En) ª...
-
Page 31: Copying Tape (Tape Dubbing)
ENTER ÷ Dubbing can also be stopped by pressing the stop (7) key. Note that the non-recorded space is not created in this case. Let's record XD-951/A900/A700 (En) Load tapes in the decks. Recording tape D U B B I... -
Page 32: Playback Of Cd
÷ Up to 32 tracks can be programmed. When “FULL” is displayed, no more tracks can be programmed. ENTER XD-951/A900/A700 (En) | Scrolled display (SELECT DISC) C T D I s D I s C... - Page 33 ÷ If the key is pressed during playback, normal playback in order of tracks resumes from the current track. Playback of CD XD-951/A900/A700 (En) D 2 T 0 2 D 3 T O 4 D - T - -...
-
Page 34: Repeated Playback
4 ALL REPEAT DISC SKIP To stop repeated playback Press the REPEAT key twice to select “REPEAT OFF”. Playback of CD XD-951/A900/A700 (En) 0 0 0 | Scrolled display (DISC REPEAT) R E P E A 0 0 0 | Scrolled display (ALL REPEAT) - Page 35 Press the key repeatedly to switch the display. 1 PGM REPEAT 2 REPEAT OFF To stop repeated playback Press the REPEAT key twice to select “REPEAT OFF”. To quit the program mode Playback of CD XD-951/A900/A700 (En) A C K R E P E A T ‹...
-
Page 36: Listening To An Unexpected Title Sequence (Random Playback)
÷ When the TIME key of the remote control unit is pressed during playback, the time display appears but it soon returns to the original display. To cancel random playback REPEAT XD-951/A900/A700 (En) (random playback) 0 0 0 Random play of all discs | Scrolled display... -
Page 37: Radio Data System) (For Only U.k., Europe And Russia)
If no PS data was sent, R.D.S EON NEWS INFO. STEREO 2 Frequency Display : The frequency of the current station is displayed. STEREO XD-951/A900/A700 (En) M 1 0 2 5 0 ¶ “NO PS” is displayed. M 1 0 2 5 0... -
Page 38: Searching For A Desired Program Type (Pty Search)
If no PTY data is available, or if the station is not an RDS station, “NONE” is displayed. Program type table A 4 ¢ keys P.CALL DOWN ¢ XD-951/A900/A700 (En) (PTY search) Program Type Name Display Pop Music POP M Rock Music ROCK M *M.O.R. - Page 39 ÷ If a program of the desired type is found, that program is received and the program type name display changes temporarily to the frequency dis- play, and then to the station name display. XD-951/A900/A700 (En) STEREO Program type name display.
-
Page 40: To Be Able To Listen To The Desired Information At Any Time (Eon)
EON data. Please select a different station. ÷ If you want TA programs, select the stations with which the “TP” indicator lights. XD-951/A900/A700 (En) Lights when “INFO.” is selected M 1 0 2 5 0 STEREO... - Page 41 If the TP indicator already lights with the current station, you can listen to the traffic announcement program through the station without making reservation with the EON function. R.D.S. XD-951/A900/A700 (En)
-
Page 42: Convenient Cd Recording
Edit recording of CD is possible by the simple operation of en- tering the recording length of the tape. Recording the programmed titles (CD PGM RECORD) Program the desired tracks from up to 3 CD discs in the desired order and record the programmed playback onto tape. XD-951/A900/A700 (En) -
Page 43: Recording Only Desired Titles (Cd One Track Record)
ENTER To end recording in the middle ÷ Both the cassette deck and CD player stop. Convenient CD recording XD-951/A900/A700 (En) Lights 0 1 2 In case the key is pressed with track No.3 0 1 2... -
Page 44: Recording Of An Entire Cd (Cd Record)
“Recording” and start recording of side B with the interrupted track. ENTER To end recording in the middle ÷ Both the cassette deck and CD player stop. Convenient CD recording XD-951/A900/A700 (En) CD RECORD CD EDIT CD PGM RECORD TAPE DUBBING... -
Page 45: Giving Preference To The Tape Length Over The Title Sequence (Cd Edit)
÷ Press the stop (7) key to stop recording in the middle. ÷ If you commit an error in the time entry, restart the procedure from step Convenient CD recording XD-951/A900/A700 (En) D I T Automatic editing of tape sides A and B... -
Page 46: Recording The Programmed Titles (Cd Pgm Record)
(Only when the selected input is TAPE and tapes are present in both decks A and B) To end recording in the middle ENTER Convenient CD recording XD-951/A900/A700 (En) G M R E C | Scrolled display (CD PGM RECORD) -
Page 47: Effective Sound Adjustment
MAX. The level is increased. ÷ Sound is not output at the MIN. position. XD-951/A900/A700 (En) B A L A N C Indicates the center y - - R Indicates the balance setting... -
Page 48: Listening With The Desired Sound (Equalizer Function)
DISPLAY 3 ENTER ÷ When DISPLAY AUTO is selected, the display mode is switched in sequence from 1 to 3 every time a track changes during CD playback. Effective Sound Adjustment XD-951/A900/A700 (En) feating the EX.BASS and SRS 3D cir- cuits. -
Page 49: Creation And Memorizing Of An Equalizer Pattern
SOURCE DIRECT MULTI CONTROL To increase the level ÷ Each frequency band can be adjusted in the range between -8 and +8. ENTER Effective Sound Adjustment XD-951/A900/A700 (En) A L E Q 1 L E V E L L + 8... -
Page 50: Enjoying Sound Field Effects
÷ Please set as desired according to the titles being played back etc. To cancel SRS 3D The level increases. ENTER Effective Sound Adjustment XD-951/A900/A700 (En) | Scrolled display (SRS 3D ON) 3 D O N L E V E L L + 5 Level display... -
Page 51: Dolby Pro Logic Surround Adjustment
÷ To abort setting in the middle, press the LISTEN MODE key again. ÷ When the setting completes, all of the set contents are displayed by scrolling. Effective Sound Adjustment XD-951/A900/A700 (En) | Scrolled display (SELECT MODE) C T M O D | Scrolled display (DOLBY PRO LOGIC) Y P R O speaker. -
Page 52: Dolby Pro Logic Surround Playback
÷ After several seconds, return is made to the original display. To cancel DOLBY PRO LOGIC surround play To increase VOLUME Effective Sound Adjustment XD-951/A900/A700 (En) In PHANTOM mode: TEST L (Left) TEST R (Right) TEST S (Surround) | Scrolled display (DOLBY PRO LOGIC) -
Page 53: Dolby 3 Stereo Adjustment And Play
÷ The center level value is memorized as a common setting with DOLBY PRO LOGIC surround. To cancel DOLBY 3 STEREO play Press the STEREO key of the remote control unit. Effective Sound Adjustment XD-951/A900/A700 (En) | Scrolled display (DOLBY 3 STEREO) The center mode display scrolls. speaker. large-sized speaker. -
Page 54: Dsp (Digital Signal Processor) Playback
STEREO DISCO HALL LIVE ENTER RETURN ... Returns to 3 of 1. To cancel DSP play Effective Sound Adjustment XD-951/A900/A700 (En) | Scrolled display (SELECT MODE) C T M O D Selected mode is displayed. Selected mode is displayed. STEREO... -
Page 55: Enjoying Karaoke (Except For Some Areas)
÷ Set the MIC VOL. control knob to the fully counterclockwise position microphone when the microphone is not used. volume ÷ The microphone audio cannot be reproduced while the DPSS function of the cassette deck is in use. Effective Sound Adjustment XD-951/A900/A700 (En) ∞... -
Page 56: Clock Adjustment
AC outlet and plugged again. In such a case, adjust the clock again. Adjust the clock before setting the timer. XD-951/A900/A700 (En) C L O C K A M 1 2 O 0 A M 8 0 0... -
Page 57: Timer Operation
ENTER If you are in the middle of time setting, press the TIMER key. If the O.T.T. operation has already been started, turn the unit off. XD-951/A900/A700 (En) P T I M E SLEEP A M 7 O 0 O.T.T. -
Page 58: Timer Programming
“minute” using the same procedure. CONTROL The time is advanced. Adjust the clock before setting the timer. Timer operation XD-951/A900/A700 (En) ÷ Playing the auxiliary input ÷ For recording source Make prepara- Make timer setting of... - Page 59 TIME SET O.T.T. PROG. ON/OFF PROG.1 PROG.2 AUTO POWER SAVE Adjust the clock before setting the timer. Timer operation XD-951/A900/A700 (En) A M 8 O 0 For timer recording 1 Select the mode. Select “TIMER REC”. MULTI CONTROL TIMER PLAY...
- Page 60 ENTER ÷ Also prepare the disc or tape and adjust the listening volume. Adjust the clock before setting the timer. Timer operation XD-951/A900/A700 (En) | Scrolled display (PROG. ON/OFF) O N / O | Scrolled display (PROG. ON/OFF) O N / O...
-
Page 61: Important Items
When your unit needs to be repaired, bring the entire set (Speakers excluded) to your dealer. XD-951/A900/A700 (En) Demagnetizing the head When the recording / playback head is magnetized, the sound quality will deteriorate. In such a case, demagnetize the head using a commercially avail- able demagnetizer (head eraser). -
Page 62: In Case Of Difficulty
÷ The frequency of the station to be received is not tuned. ÷ Car ignition noise. ÷ Influence of an electric appliance. ÷ A TV set is installed near the system. XD-951/A900/A700 (En) ENTER Remedy ÷ Replace with new batteries. ÷ Operate the unit inside the remote control- lable range. - Page 63 Dolby NR OFF. ÷ The capstans or pinch rollers are dirty. ÷ The tape is wound irregularly. In case of difficulty XD-951/A900/A700 (En) ÷ Preset stations with tunable frequencies. ÷ Preset stations again. ÷ This is not malfunction. Press the MODE/ DEMO key to cancel the demontration.
- Page 64 MERCIALLY AVAILABLE TAPES OR DISC SHOULD CONTACT THE MECHANICAL COPYRIGHT PROTECTION SOCIETY LIMITED OR THE PERFORMING RIGHTS SOCIETY LIMITED. In case of difficulty XD-951/A900/A700 (En) ÷ Use a cassette with an unbroken recording protect tab or block the hole. ÷ Close the holder completely.
-
Page 65: Specifications
(U.S.A. and Canada) ... 530 kHz ~ 1,700 kHz LW tuner section (For the United Kingdom and Russia) Tuning frequency range ... 153 kHz ~ 279 kHz 1. KENWOOD follows a policy of continuous advancements in development. For this reason specifications may be changed without notice. Notes Notes 2. - Page 66 (U.S.A. and Canada) ... 530 kHz ~ 1,700 kHz LW tuner section (For the United Kingdom and Russia) Tuning frequency range ... 153 kHz ~ 279 kHz 1. KENWOOD follows a policy of continuous advancements in development. For this reason specifications may be changed without notice. Notes Notes 2.
- Page 67 Dimensions ... W: 260 mm (10-1/4”) Weight (net) ... 1.9 kg (4.2 lb) (1 piece) H: 330 mm (13”) D: 315 mm (12-3/8”) H: 100 mm (3-15/16”) D: 110 mm (4-5/16”) H: 135 mm (5-5/16”) D: 180 mm (7-1/16”) Specifications (XD-A700) XD-951/A900/A700 (En)
-
Page 68: For Your Records
This instruction manual is used to describe multiple models listed below. Model availability and features (functions) may differ depending on the country and sales area. SUPER S.W. WOOFER LEVEL PRE OUT XD-951 XD-A900 XD-A700 DIGITAL MIC 1,2 / VOL. YES (Except for Europe, U.K.